Reanimating Ubuntu Servers on Hetzner or Some Helpful Commands
- Tutorial

This small post-cheat sheet is intended for those who suddenly, during an unsuccessful experiment or update, stopped pinging the server, fell off,
sshand more. Simply put, it is about restoring the server after updates, hacks, and the like. According to my feelings, the latter is much less common. Mentioned hetzner are only fleeting in nature, due to the fact that often have to use its services.
Resue, mount partitions, chroot
So, to begin with, we have no access to the system, after, for example, another reboot. Therefore, we have two options left - to reinstall the system or restore it. In the case of VPS, the hezner simply rolls the new system and, of course, that nothing remains on the disk. Therefore, we certainly choose recovery.
Who cares, to reinstall from rescue, use the command:
installimage
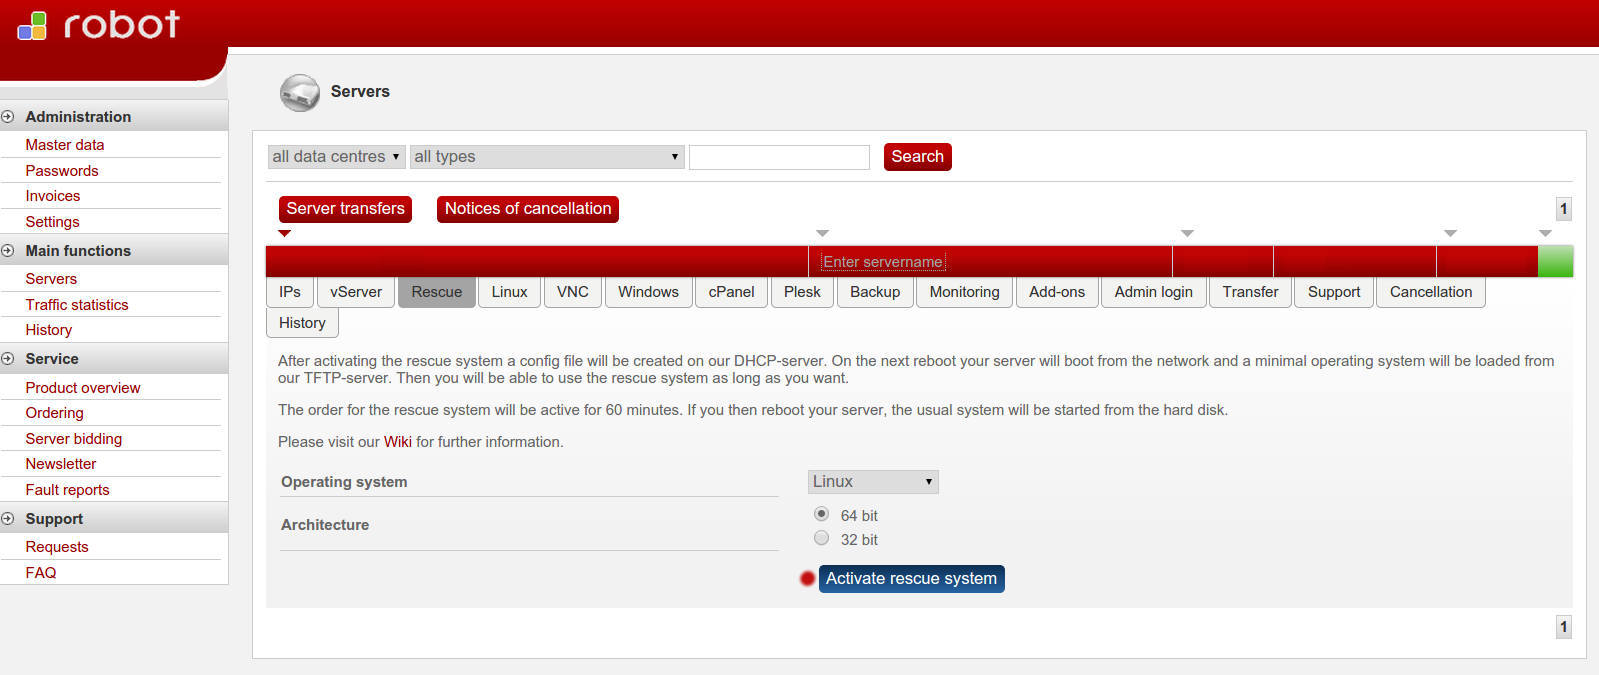
After that, hetzner will show the generated password. We reboot the server from the admin panel and connect, it is better through the IP address
ssh, the ssh root@55.22.33.44login is, of course, root.
After logging in, we are greeted with an invitation of this kind. The
root@rescuechrootcolor will change to blue. root@rescueThe first thing we do is look at the name of our drives:
ls /dev/[hsv]d[a-z]*[0-9]*
 # самый распространенный пример вывода: /dev/sda /dev/sda1 /dev/sda2 /dev/sda3
Then mount the disk with our system:
mount /dev/sda3 /mnt
We do not touch / boot and other partitions yet. After being mounted, we need to make the contents visible
/dev /sys /procotherwise, if we were left without a kernel, then it will not be delivered.mount --bind /dev /mnt/dev/; mount --bind /proc /mnt/proc/; mount --bind /sys /mnt/sys/
in
debiana comfortable command, replacing this line in ubuntuit was not detected.chroot-prepare /mnt
Thereafter:
chroot /mnt;
Now you can mount everything else:
/bootmount -a
At this stage, we have, in principle, a more recently controlled system that is less under our control.
Diagnostics
More often than not, you have to deal with upgrade or installation problems. Here, of course, it’s difficult to detail something - you can only advise, if the distribution is updated, do it through screen
For example:
screen -S upgrade
apt-get update
apt-get dist-upgrade
do-release-upgrade
The reason for one of the most common problems is a banal lack of disk space
df -h
Sometimes it happens that there is a place and there are no free nodes. Then this will also lead to a failure of the update and further problems.
df -i
Security
If there is a suspicion that we have been hacked or broken, then the first thing to do is look at who is now on the server:
who
See who entered what commands:
last
Look at the story
history
Of course, these are all half measures, but nonetheless.
Next you need:
- Check
/root/.sshthat there are no left certificates. - See in
/etc/passwdorder thatrootno one else has the authority. nmapso that there are no suspicious open ports, and if there are, then we make sure that no one suspicious is listening to them.- We change the password just in case
rootusingpasswd. - The benefits of studying logs
/var/logcan be invaluable. - Checking the system for rootkits
Update and installation:
apt-get install rkhunter
rkhunter --update
Rootkit Search:
rkhunter -c -sk
Warnin-gov he is likely to find a lot, especially in
/binand /usr/binthere is still an alternative:
Installation
chkrootkit:apt-get install chkrootkit
Rootkit Search:
chkrootkit
Recovery
Consider the worst case scenario, when the folder is
/bootgenerally empty and the grub is not installed on the system, there is no kernel and most of the packages are broken.System Restore
Clean package archive
apt-get clean
We remove not deleted dependencies from already deleted packages
apt-get autoremove
We put
grub2:apt-get install grub2
We write grub in
MBRgrub-install /dev/sda
Install or reinstall the normal kernel.
apt-get install linux-image-x.x.x-xx-generic --reinstall
Updating the grub menu
update-grub
We execute the commands designed to resolve dependency conflicts:
apt-get install -f
dpkg --configure -a
Reinstall all packages:
apt-get install --reinstall `dpkg --get-selections | grep -v deinstall | awk '{print $1}'`
If you know what the problem was, then just reinstall the desired package:
apt-get install {имя_пакета} --reinstall
At the end, you can run again:
apt-get install -f
dpkg --configure -a
Conclusion
Preliminarily leaving
chrootc using Ctrl+Dor exitdo:reboot
We look what happened. If the problem remains, then everything is new and look what we have missed, paying as much attention as possible
/var/log. All recipes offered are not a panacea. Perhaps someone else solved such problems differently, but these recipes often helped me.
Useful links:
wiki Hetzner Rescue System
ubuntu wiki recovery grub
screen