Multiseat for Windows Jobs
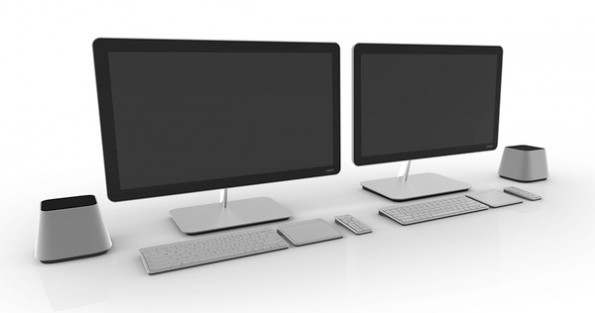
I want to tell you about an unusual way to create a multi-user workstation, which is based on VMPlayer.
This solution was developed for commercial operation, and as a message to the solution of this problem, it was stated that the current characteristics of the purchased equipment exceed the needs of users and the software they use. Of course, this applies mainly to typical office plankton and many peripheral posts. It will also be useful for solving problems for those for whom the management, for its fully justified reasons, has refused or is likely to refuse a request to update the workstation. It is sad, but it happens ...
In order for the solution to become worthy of application, it was presented with the following requirements:
- As an operating system for end users, Windows should remain.
- The cost of a system unit for two employees, ideally, should be comparable to the cost of one typical of those purchased at that time.
- User work should not slow down noticeably or be uncomfortable due to the fact that one computer is used.
Well, actually, the business requirements are clear, so it's time to move on to a solution ...
Technical part
The development was carried out on a workstation with currently modest parameters - AMD Athlon 64 X2, GeForce GT 440, DDR II 4Gb, HDD 320GB, and although the result was quite acceptable, to meet the above requirements, when choosing a technical component, the following recommendations should be taken into account:
- A processor with two cores - each VM is allocated one, and of course, support for modern virtualization technologies is desirable, then you can expect performance close to the "iron" workstation.
- RAM is not a particularly expensive component, so it’s better, without regret, to calculate 3Gb for each workplace, plus 1 Gb for the host system. But in certain situations, it is quite possible to get by at 1.5 Gb for each location.
- The hard disk on which the virtual machine will be located, it is desirable that it be separate for each workstation, this will give independence to I / O operations and virtual machines will interfere with each other less. This requirement can be omitted if the goal of cost savings is a higher priority.
- The motherboard , preferably, should already have two video outputs, this eliminates the need to purchase a separate video card. But, if you have a desire to use your video card and / or there are no video outputs on the motherboard, then you can use, of course, external.
There are some more remarks concerning peripherals, namely monitors, keyboards and mice, and although at first glance they are somewhat strange, their implementation will not be difficult and costly, which is important for fulfilling the solution requirements.
- Monitors . When choosing monitors, please note that motherboards with DVI and VGA video outputs do not support DVI-> VGA adapters. Therefore, you need to make sure that the available monitors and video outputs match each other.
- Keyboards and mice . This is more likely not a comment, but a more restriction on the choice of these HID devices. Firstly, all devices must be USB. Secondly, the VID: PID of one keyboard must not match the VID: PID of another. The same condition applies to the mouse. Simply put, keyboard models should be different and mouse models should also be different. This limitation is connected with the fact that VID and PID are used to distribute devices between virtual machines, and the possibility of connecting the same models has not been studied, since fulfilling this condition is not difficult.
For example, I’ll give the configuration that we took as the standard for our dualseats: Intel Core i3, MB (DVI + VGA, Audio, GLan), HDD 500Gb x 2 .
So, the technical part is explained and justified. Now I will pass to a software stuffing and the principle of work.
Training
Well, let's get started. To create dualseat, we need to prepare several basic components.
Platform
The first step to creating a platform for dualseat is installing Ubuntu Server 12.04 x64. After a fairly trivial installation of the system, we deliver packages that will ensure the functioning of the remaining components, and at the same time some useful utilities:
apt-get install ...
apt-get install unclutter xinput libxcursor1 mc openssh-server binutils gcc x11-xserver-utils x11vnc xinetd alsa-base alsa-utils vim nodm fluxbox tofrodos ntfsprogsAfter installation, we configure the system so that its launch is transparent to the user, and the graphic design of the host system itself is not striking, and even better, that it is completely absent.
Let's start with the nodm configuration, which is just designed to automatically start the X session, right at boot time:
/ etc / default / nodm
Now configure the window manager to organize an empty workspace. To do this, set the following parameters in the fluxbox settings:/ etc / default / nodm
NODM_ENABLED=true
NODM_USER=vm
NODM_XINIT=/usr/bin/xinit
NODM_XSESSION=/etc/X11/Xsession
NODM_X_OPTIONS='vt7 -nolisten tcp'
NODM_MIN_SESSION_TIME=60/home/vm/.fluxbox/init
The operating system has been prepared, and as Lelik would say from the movie “Diamond Hand” - “Chef, you are ready, the system is loaded without noise and dust.” /home/vm/.fluxbox/init
session.screen0.toolbar.visible: false
session.screen0.workspaces: 1Next, download the latest version of VMPlayer from the official VMWare website. Installation is quite simple, but may require the installation of a patch immediately after installation if vmplayer does not start. But in order to achieve maximum responsiveness of virtual machines, we carry out
small tuning system and hypervisor
/ etc / vmware / config
/etc/sysctl.conf
/ etc / fstab
The size value depends on the amount of installed RAM, and cannot be less than the sum allocated to both virtual machines plus 1 Gb. This will be due to the tuning carried out below.
mainMem.useNamedFile="FALSE"
tmpDirectory="/run/shm"
prefvmx.useRecommendedLockedMemSize="TRUE"
prefvmx.minVmMemPct="100"
/etc/sysctl.conf
vm.swappiness=0
vm.overcommit_memory=1
vm.dirty_background_ratio=5
vm.dirty_ratio=10
vm.dirty_expire_centisecs=1000
dev.rtc.max-user-freq=1024
/ etc / fstab
The size value depends on the amount of installed RAM, and cannot be less than the sum allocated to both virtual machines plus 1 Gb. This will be due to the tuning carried out below.
tmpfs /run/shm tmpfs size=8GSystem environment
Now you need to prepare the system environment: create a user and a couple of folders.
- vm is the user who will log in nodm, and from which virtual machines will be launched.
- / home / vm / user01 and / home / vm / user02 are folders for user virtual machines. If the system is prepared with two hard drives, the second hard drive should be mounted in one of these folders.
Virtual workstations
Creating virtual machines and installing systems will be left to you, I think this process is familiar to most readers. But there will still be a few recommendations, as the goal is the comfortable work of users.
- Virtual disks must be SCSI, no matter what the system will be, and in no case should you choose an IDE, since you will get a very inefficient virtual disk subsystem.
- Unused equipment (Printer, Floppy disk, Serial port, etc.) should be removed from the virtual machine configuration.
- VMWare Tools is a prerequisite for the effective operation of the guest system.
Some important conventions for the scripts below:
- The names of both vmx files are expected to be workstation.vmx.
- The virtual machine names must be user00 and user01 respectively.
After the virtual workstations are prepared and located in their places, we will carry out their tuning, again squeezing the maximum performance.
/home/vm/user00/workstation.vmx and /home/vm/user01/workstation.vmx
/home/vm/user00/workstation.vmx and /home/vm/user01/workstation.vmx
mem.ShareScanTotal=0
mem.ShareScanVM=0
mem.ShareScanThreshold=8192  # Значение зависит от количества установленной оперативной памяти
sched.mem.maxmemctl=0
sched.mem.pshare.enable = "FALSE"
mainMem.useNamedFile = "FALSE"
MemTrimRate = "0"
MemAllowAutoScaleDown = "FALSE"
All components are prepared and optimized, it remains to put everything together and add a couple of strokes.
System Startup Configuration
To start dualseat, we use the
/home/vm/.fluxbox/startupcontents of which, sequentially and commenting, I quote further (pay attention to the configuration of monitors)./home/vm/.fluxbox/startup
/home/vm/.fluxbox/startup Turn
off all system attempts to “put out” the screen:
По умолчанию, система с двумя мониторами запускается в режиме clone, это когда мы видим одну и ту же картинку на обоих мониторах. Для настройки корректного отображения будем использовать утилиту
Чтобы получить доступные разрешения для каждого монитора, используется команда
Настройка обоих мониторов происходит в момент запуска fluxbox, для этого используются следующие строки (порядок строк важен), значения в которых, у вас конечно должны быть свои:
Системный курсор нам не нужен, а сам по себе он остается всегда видимым, поэтому «тушим» его таким образом
Теперь запуск графической оболочки и сразу после нее запуск самих виртуальных машин
off all system attempts to “put out” the screen:
xset -dpms
xset s off
setterm -blank 0
setterm -powerdown 0
По умолчанию, система с двумя мониторами запускается в режиме clone, это когда мы видим одну и ту же картинку на обоих мониторах. Для настройки корректного отображения будем использовать утилиту
xrandr (вместо конфигурации в xorg.conf). Чтобы получить доступные разрешения для каждого монитора, используется команда
xrandr -q. Нужно обратить внимание на то, что DVI выход системой показывается как HDMI. Настройка обоих мониторов происходит в момент запуска fluxbox, для этого используются следующие строки (порядок строк важен), значения в которых, у вас конечно должны быть свои:
# Устанавливаем разрешение монитора подключенного к VGA
xrandr --output VGA1 --mode 1280x1024
# Устанавливаем разрешение монитора подключенного к HDMI
xrandr --output HDMI1 --mode 1920x1080
# Располагаем HDMI пространство слева от VGA
xrandr --output HDMI1 --left-of VGA1
# Делаем HDMI монитор основным (с которого будет начинаться нумерация)
xrandr --output HDMI1 --primary
Системный курсор нам не нужен, а сам по себе он остается всегда видимым, поэтому «тушим» его таким образом
unclutter -idle 1 -root &Теперь запуск графической оболочки и сразу после нее запуск самих виртуальных машин
exec fluxbox &
fbpid=$!
sleep 1
{
 /home/vm/user00/start &  # Скрипт запуска VM00
 /home/vm/user01/start &  # Скрипт запуска VM01
} &
wait$fbpid
The following are scripts for starting the virtual machines themselves, where they first check if the target machine is already running. The launch itself, next, is accompanied by a script
check_shutdownthat will be executed immediately after turning off the VM. It is needed to check for the need to turn off the computer when turning off both jobs.Scripts for starting virtual machines
/home/vm/user00/start
/home/vm/user01/start
/home/vm/check_shutdown
Для выполнения команды
if ps ax | grep -v grep | grep -P "vmplayer.*user00" > /dev/null
thenexitelse
    /usr/bin/vmplayer -X /home/vm/user00/workstation.vmx && /home/vm/check_shutdown &
fi
/home/vm/user01/start
if ps ax | grep -v grep | grep -P "vmplayer.*user01" > /dev/null
thenexitelse
    /usr/bin/vmplayer -X /home/vm/user01/workstation.vmx && /home/vm/check_shutdown &
fi
/home/vm/check_shutdown
if ps ax | grep -v grep | grep vmplayer > /dev/null thenexit 0
else
  sudo shutdown -h now
fi
Для выполнения команды
sudo shutdown без ввода пароля, нужно добавить в файл /etc/sudoers строку:vm ALL=NOPASSWD: /sbin/shutdownInsulation
Now we begin to isolate resources between jobs.
Monitors
To start virtual machines, each on its own monitor, we use the capabilities of the fluxbox window manager, where the file
/home/vm/.fluxbox/appscontains the rules for the location of virtual machines at the time of launch./home/vm/.fluxbox/apps
/home/vm/.fluxbox/apps
# для VMPlayer user00
[app] (title=.*user00.*)
    # Монитор 2
    [Head] {2}
    # Убираем оформление
    [Deco] {NONE}
    # Запустить минимизированным
    [Minimized] {yes}
[end]
# для VMPlayer user00
[app] (title=.*user01.*)
    # Монитор 1
    [Head] {1}
    # Убираем оформление
    [Deco] {NONE}
    # Запустить минимизированным
    [Minimized] {yes}
[end]
# Other applications
[app] (title=.*)
	[Jump] {no}
#	[Workspace] {1}
	[Position] (CENTER) {0 0}
	[Layer] {12}
[end]
Please note that VMPlayer starts minimized, this is done so that the user does not see the start of the VMPlayer shell. But in order for this effect to work to the end, you need to remember in the VMPlayer settings to check the option “Enter full screen mode after powering on” or, as an equivalent, to
workstation.vmxset the parameter gui.viewModeAtPowerOn = "fullscreen". If you have an NVidia or Radeon video card and you have installed the drivers, then you can fully use the 3D accelerator function of the accelerator to the virtual video device by checking the “Accelerate 3D graphics” option . The
workstation.vmxparameter is responsible for this mks.enable3d = "TRUE".Keyboards and mice
To distribute these HID devices, VMPlayer is able to capture USB equipment for exclusive use. Before distributing the devices, we find out their VID and PID using the utility
lsusb. After all identifiers of devices are found out, we prescribe the following parameters in each workstation.vmx./home/vm/user00/workstation.vmx and /home/vm/user01/workstation.vmx
/home/vm/user00/workstation.vmx и /home/vm/user01/workstation.vmx
# Общие установки
vmmouse.present = "FALSE"
usb.generic.allowHID = "TRUE"
svga.noHWCursor = "TRUE"# Для клавиатуры c VID=0458 и PID=010e
usb.quirks.device0 = "0x0458:0x010e allow"
usb.autoConnect.device0 = "0x0458:0x010e"# Для мыши c VID=0566 и PID=3107
usb.quirks.device1 = "0x0566:0x3107 allow"
usb.autoConnect.device1 = "0x0566:0x3107"
USB
All USB devices can be divided into two categories: permanently connected and connected during operation.
There are no problems with permanently connected, they are registered in the corresponding workstation.vmx, by analogy and using the same parameter
usb.autoConnect.deviceNand utility lsusbthat were used when connecting the mouse and keyboard. There are two options for connecting USB devices during operation. The first option is when all USB devices are thrown on only one machine. To do this, in the workstation.vmx file of this machine, set the parameter
usb.generic.autoconnect=TRUE, and in the other, respectively usb.generic.autoconnect = "FALSE".The second option, which allows you to distribute USB devices while connecting by users themselves, is to use USB over IP technology. Although this method may be somewhat costly, but it solves the problem. The problem is solved as follows: the server part is installed on the host, which shares USB devices, and the client is installed on the guest system. Unfortunately, the opensource usb / ip project turned out to be crude and an acceptable result could not be achieved. For urgent needs, you can use commercial products, for example, we used this one : USB Redirector for Linux (this part is free) and USB Redirector Client (this one costs money).
Finishing touch
To complete the solution, the following scenarios should work:
- When you turn on the system unit, virtual machines start automatically.
- Each of the workstations can be turned on and off, even if the neighboring workplace is working.
- When you turn off all jobs, the system unit should turn off.
Point 1 and 3 are implemented using the scripts located above. Point two is partially implemented. When you turn off one of the virtual machines, the second will remain working. But how to turn the machine off again? The question is solved very elegantly: for this we hang up the Power button (this is the one on the system unit) to start the virtual machines. To do this, we
/home/vm/.fluxbox/keyswrite several lines in the file :/home/vm/.fluxbox/keys
/home/vm/.fluxbox/keys
124 :Exec /home/vm/user00/start & /home/vm/user01/start
133 :Exec /home/vm/user00/start & /home/vm/user01/start
After this configuration, the user will turn on his car as usual for himself.
Result
I tried to present the solution in its entirety, but I omitted some details so as not to clutter up an already overgrown article, I hope they do not interfere with assembling my dualseat, and if you really have such a desire, I am ready to answer all the questions that arose during the assembly process.
Despite the fact that many of the settings and techniques are already ready to use, finding them was not a trivial task, so I hope that the article will also be useful for those who find the solution unacceptable for their unconditionally justified reasons.
How does it work for us?
The solution really works. The dualseat build is actually minimized. After installing the system, the script installs additional packages, vmplayer and copies all the mentioned configs and scripts. Virtual machines are simply replicated using the "golden template". In the end, a little tweaking is required: set the correct resolutions for monitors, connect stationary devices and configure work with USB.
The responsiveness of the system is more than acceptable for most of our employees. Of course, we do not make general use, but we closed many questions on the organization and updating of jobs for which this solution is the best.
Thank you all for your attention, I hope it turned out interesting.