Kubernetes tips & tricks: speeding up large database bootstrap
With this article we open a series of publications with practical instructions on how to make life easier for yourself (exploitation) and developers in various situations that happen literally every day. All of them are collected from real experience in solving problems from clients and have improved over time, but still do not pretend to be ideal - consider them rather as ideas and preparations.
I will start with the "trick" of preparing large database dumps like MySQL and PostgreSQL for their quick deployment for various needs - first of all, at the developer sites. The context of the operations described below is our typical environment, which includes the working Kubernetes cluster and the use of GitLab (and dapp ) for CI / CD. Go!
The main pain in Kubernetes when using the feature branch is large databases when developers want to test / demonstrate their changes on a full (or almost complete) database from production. For example:
Note : Usually, we back up the database using MySQL using Percona innobackupex, which allows you to save all databases and users ... in short, everything that may be required. It is this example that is discussed further in the article, although in general it makes absolutely no difference how exactly you make backups.
So, let's say we have a database backup. What to do next?
First of all, we will create in Kubernetes Deployment , which will consist of two init-containers (i.e., such special containers that run before the pods with the application and allow pre-configuration) and one pod.
But where to place it? We have a large database (1 TB) and we want to raise ten of its copies - we need a server with a large disk (10+ TB). We will order it separately for this task and mark the node with this server with a special label
With the help
... and take a look at the contents of this site.
We will call the first init-container
The description of this container in Deployment is as follows:
The script used in the container
After downloading the backup, the second init-container is started
It is in this init-container that we do all the necessary conversions to the database, preparing it for the selected application: we clear the tables for which this is permissible, we change access within the database, etc. Then we turn off the MySQL server and simply archive the entire
Description of the second init container in Deployment :
The script used in it
The final chord is the launch of the main flow, which occurs after the execution of the init containers. In the pod we have a simple nginx, and through a
Configuration:
Additional Notes:
When the MySQL database rolls out in the developer’s test environment, it has a button in GitLab that launches the Redundant Deployment 's with MySQL with the strategy
The selected approach allows us to wait until the new dump is downloaded, unzipped and launched, and only after that the old one will be deleted from MySQL. Thus, while we are preparing a new dump, we are quietly working with the old base.
The init container of this Deployment uses the following command:
Those. we download the compressed dump of the database, which was prepared in step 1, unzip it to
It turns out that we always have Deployment , which rolls out every night and does the following:
For the example we have considered, creating a dump from a real replica takes about 6 hours, preparing a “base image” takes 7 hours, and updating the database in the developer’s environment takes 2 hours. Since the first two actions are performed “in the background” and invisible to developers, in fact they can deploy a prod version of the database (with a size of 1 TB) in the same 2 hours .
Questions, criticism and corrections to the proposed scheme and its components are welcome in the comments!
PS Of course, we understand that in the case of VMware and some other tools, it would be possible to manage to create a snapshot of the virtual machine and launch a new virutalki from snapshot (which is even faster), but this option does not include preparation of the base, taking into account time ... Not to mention the fact that not everyone has the ability or desire to use commercial products.
Other K8s series tips & tricks:
Read also in our blog:
I will start with the "trick" of preparing large database dumps like MySQL and PostgreSQL for their quick deployment for various needs - first of all, at the developer sites. The context of the operations described below is our typical environment, which includes the working Kubernetes cluster and the use of GitLab (and dapp ) for CI / CD. Go!
The main pain in Kubernetes when using the feature branch is large databases when developers want to test / demonstrate their changes on a full (or almost complete) database from production. For example:
- There is an application with a database in MySQL for 1 TB and 10 developers who are developing their own features.
- Developers want individual test circuits and a couple more specific circuits for tests and / or demonstrations.
- In addition, there is a need to restore the nightly dump of the production-base in your test loop in a reasonable time - to reproduce the problem with the client or bug.
- Finally, there is an opportunity to lighten the size of the base by at least 150 GB - not so much, but still saving space. Those. we still need to somehow prepare the dump.
Note : Usually, we back up the database using MySQL using Percona innobackupex, which allows you to save all databases and users ... in short, everything that may be required. It is this example that is discussed further in the article, although in general it makes absolutely no difference how exactly you make backups.
So, let's say we have a database backup. What to do next?
Step 1: Preparing a new database from dump
First of all, we will create in Kubernetes Deployment , which will consist of two init-containers (i.e., such special containers that run before the pods with the application and allow pre-configuration) and one pod.
But where to place it? We have a large database (1 TB) and we want to raise ten of its copies - we need a server with a large disk (10+ TB). We will order it separately for this task and mark the node with this server with a special label
dedicated: non-prod-db . At the same time, we use the same-name taint , who will say Kubernetes, that only applications that are resistant (have tolerations ) to it can roll to this node , that is, translating into the language Kubernetes,dedicated Equal non-prod-db. With the help
nodeSelectorand tolerationsselect the desired node (located on the server with a large disk): nodeSelector:
dedicated: non-prod-db
tolerations:
- key: "dedicated"
operator: "Equal"
value: "non-prod-db"
effect: "NoExecute"... and take a look at the contents of this site.
Init containers: get-bindump
We will call the first init-container
get-bindump. It is mounted emptyDir(c /var/lib/mysql), where the database dump will be received from the backup server. For this, the container has everything you need: SSH keys, backup server addresses. This stage in our case takes about 2 hours. The description of this container in Deployment is as follows:
- name: get-bindump
image: db-dumps
imagePullPolicy: Always
command: [ "/bin/sh", "-c", "/get_bindump.sh" ]
resources:
limits:
memory: "5000Mi"
cpu: "1"
requests:
memory: "5000Mi"
cpu: "1"
volumeMounts:
- name: dump
mountPath: /dump
- name: mysqlbindir
mountPath: /var/lib/mysql
- name: id-rsa
mountPath: /root/.sshThe script used in the container
get_bindump.sh:#!/bin/bash
date
if [ -f /dump/version.txt ]; thenecho"Dump file already exists."exit 0
fi
rm -rf /var/lib/mysql/*
borg extract --stdout user@your.server.net:somedb-mysql::${lastdump} stdin | xbstream -x -C /var/lib/mysql/
echo$lastdump > /dump/version.txtInit containers: prepare-bindump
After downloading the backup, the second init-container is started
prepare-bindump. It executes innobackupex --apply-log(since the files are already available in /var/lib/mysql- thanks to emptyDirfrom get-bindump) and the MySQL server starts. It is in this init-container that we do all the necessary conversions to the database, preparing it for the selected application: we clear the tables for which this is permissible, we change access within the database, etc. Then we turn off the MySQL server and simply archive the entire
/var/lib/mysqltar.gz file. As a result, the dump fits into a file of 100 GB in size, which is already an order of magnitude smaller than the original 1 TB. This stage takes about 5 hours. Description of the second init container in Deployment :
- name: prepare-bindump
image: db-dumps
imagePullPolicy: Always
command: [ "/bin/sh", "-c", "/prepare_bindump.sh" ]
resources:
limits:
memory: "5000Mi"
cpu: "1"
requests:
memory: "5000Mi"
cpu: "1"
volumeMounts:
- name: dump
mountPath: /dump
- name: mysqlbindir
mountPath: /var/lib/mysql
- name: debian-cnf
mountPath: /etc/mysql/debian.cnf
subPath: debian.cnfThe script used in it
prepare_bindump.shlooks like this:#!/bin/bash
date
if [ -f /dump/healthz ]; thenecho"Dump file already exists."exit 0
fi
innobackupex --apply-log /var/lib/mysql/
chown -R mysql:mysql /var/lib/mysql
chown -R mysql:mysql /var/log/mysql
echo"`date`: Starting mysql"
/usr/sbin/mysqld --character-set-server=utf8 --collation-server=utf8_general_ci --innodb-data-file-path=ibdata1:200M:autoextend --user=root --skip-grant-tables &
sleep 200
echo"`date`: Creating mysql root user"echo"update mysql.user set Password=PASSWORD('password') WHERE user='root';" | mysql -uroot -h 127.0.0.1
echo"delete from mysql.user where USER like '';" | mysql -uroot -h 127.0.0.1
echo"delete from mysql.user where user = 'root' and host NOT IN ('127.0.0.1', 'localhost');" | mysql -uroot -h 127.0.0.1
echo"FLUSH PRIVILEGES;" | mysql -uroot -h 127.0.0.1
echo"truncate somedb.somedb_table_one;" | mysql -uroot -h 127.0.0.1 -ppassword somedb
/usr/bin/mysqladmin shutdown -uroot -ppassword
cd /var/lib/mysql/
tar -czf /dump/mysql_bindump.tar.gz ./*
touch /dump/healthz
rm -rf /var/lib/mysql/*Under
The final chord is the launch of the main flow, which occurs after the execution of the init containers. In the pod we have a simple nginx, and through a
emtpyDircompressed and trimmed dump of 100 GB is enclosed. The function of this nginx is to give this dump. Configuration:
- name: nginx
image: nginx:alpine
resources:
requests:
memory: "1500Mi"
cpu: "400m"
lifecycle:
preStop:
exec:
command: ["/usr/sbin/nginx", "-s", "quit"]
livenessProbe:
httpGet:
path: /healthz
port: 80
scheme: HTTP
timeoutSeconds: 7
failureThreshold: 5
volumeMounts:
- name: dump
mountPath: /usr/share/nginx/html
- name: nginx-config
mountPath: /etc/nginx/nginx.conf
subPath: nginx.conf
readOnly: false
volumes:
- name: dump
emptyDir: {}
- name: mysqlbindir
emptyDir: {}This is what the entire Deployment looks like with its initContainers ...
---
apiVersion: apps/v1beta1
kind: Deployment
metadata:
name: db-dumps
spec:
strategy:
rollingUpdate:
maxUnavailable: 0
revisionHistoryLimit: 2
template:
metadata:
labels:
app: db-dumps
spec:
imagePullSecrets:
- name: regsecret
      nodeSelector:
        dedicated: non-prod-db
      tolerations:
      - key: "dedicated"
        operator: "Equal"
        value: "non-prod-db"
        effect: "NoExecute"
initContainers:
      - name: get-bindump
        image: db-dumps
        imagePullPolicy: Always
        command: [ "/bin/sh", "-c", "/get_bindump.sh" ]
        resources:
          limits:
            memory: "5000Mi"
            cpu: "1"
          requests:
            memory: "5000Mi"
            cpu: "1"
        volumeMounts:
        - name: dump
          mountPath: /dump
        - name: mysqlbindir
          mountPath: /var/lib/mysql
        - name: id-rsa
          mountPath: /root/.ssh
- name: prepare-bindump
image: db-dumps
imagePullPolicy: Always
command: [ "/bin/sh", "-c", "/prepare_bindump.sh" ]
resources:
limits:
memory: "5000Mi"
cpu: "1"
requests:
memory: "5000Mi"
cpu: "1"
volumeMounts:
- name: dump
mountPath: /dump
- name: mysqlbindir
mountPath: /var/lib/mysql
- name: log
mountPath: /var/log/mysql
- name: debian-cnf
mountPath: /etc/mysql/debian.cnf
subPath: debian.cnf
containers:
      - name: nginx
        image: nginx:alpine
        resources:
          requests:
            memory: "1500Mi"
            cpu: "400m"
        lifecycle:
          preStop:
            exec:
              command: ["/usr/sbin/nginx", "-s", "quit"]
        livenessProbe:
          httpGet:
            path: /healthz
            port: 80
            scheme: HTTP
          timeoutSeconds: 7
          failureThreshold: 5
        volumeMounts:
        - name: dump
          mountPath: /usr/share/nginx/html
        - name: nginx-config
          mountPath: /etc/nginx/nginx.conf
          subPath: nginx.conf
          readOnly: false
      volumes:
      - name: dump
        emptyDir: {}
      - name: mysqlbindir
        emptyDir: {}
- name: log
emptyDir: {}
- name: id-rsa
secret:
defaultMode: 0600
secretName: somedb-id-rsa
- name: nginx-config
configMap:
name: somedb-nginx-config
- name: debian-cnf
configMap:
name: somedb-debian-cnf
---
apiVersion: v1
kind: Service
metadata:
name: somedb-db-dump
spec:
clusterIP: None
selector:
app: db-dumps
ports:
- name: http
port: 80Additional Notes:
- In our case, we prepare a new dump every night using the scheduled job in GitLab. Those. every night we automatically roll out this Deployment , which pulls up a fresh dump and prepares it for distribution to all developers' test environments.
- Why do we wrap volume also in init containers
/dump(and there is a check for existence in the script/dump/version.txt)? This is done in case the server is restarted, on which it runs under. The containers will be restarted and without this check, the dump will be re-downloaded. If we have already prepared a dump once, then on the next start (in case of server reboot), the flag file/dump/version.txtwill report this. - What kind of image
db-dumps? We collect it with dapps and itDappfilelooks like this:dimg: "db-dumps" from: "ubuntu:16.04" docker: ENV: TERM: xterm ansible: beforeInstall: - name: "Install percona repositories" apt: deb: https://repo.percona.com/apt/percona-release_0.1-4.xenial_all.deb - name: "Add repository for borgbackup" apt_repository: repo="ppa:costamagnagianfranco/borgbackup" codename="xenial" update_cache=yes - name: "Add repository for mysql 5.6" apt_repository: repo: deb http://archive.ubuntu.com/ubuntu trusty universe state: present update_cache: yes - name: "Install packages" apt: name: "{{`{{ item }}`}}" state: present with_items: - openssh-client - mysql-server-5.6 - mysql-client-5.6 - borgbackup - percona-xtrabackup-24 setup: - name: "Add get_bindump.sh" copy: content: | {{ .Files.Get ".dappfiles/get_bindump.sh" | indent 8 }} dest: /get_bindump.sh mode: 0755 - name: "Add prepare_bindump.sh" copy: content: | {{ .Files.Get ".dappfiles/prepare_bindump.sh" | indent 8 }} dest: /prepare_bindump.sh mode: 0755
Step 2: Run the database in the developer's environment
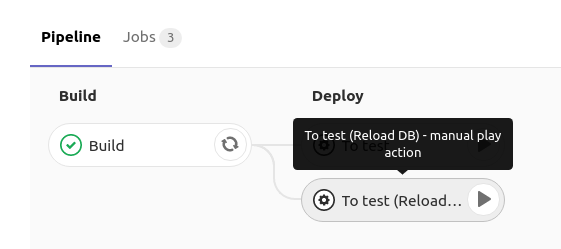
When the MySQL database rolls out in the developer’s test environment, it has a button in GitLab that launches the Redundant Deployment 's with MySQL with the strategy
RollingUpdate.maxUnavailable: 0:How is this implemented?
В GitLab при нажатии на reload db деплоится Deployment с такой спецификацией:
Т.е. мы говорим Kubernetes, чтобы он обновлял Deployment (создавал новый под) и при этом следил за тем, чтобы как минимум один под был живой. Так как при создании нового пода у него есть init-контейнеры, пока они работают, новый под не переходит в статус Running, а значит — старый под продолжает работать. И только в момент, как сам под с MySQL запустился (и отработала readiness probe), трафик переключается на него, а старый под (со старой базой) удаляется.
Подробности об этой схеме можно почерпнуть из следующих материалов:
spec:
  strategy:
    rollingUpdate:
      maxUnavailable: 0
Т.е. мы говорим Kubernetes, чтобы он обновлял Deployment (создавал новый под) и при этом следил за тем, чтобы как минимум один под был живой. Так как при создании нового пода у него есть init-контейнеры, пока они работают, новый под не переходит в статус Running, а значит — старый под продолжает работать. И только в момент, как сам под с MySQL запустился (и отработала readiness probe), трафик переключается на него, а старый под (со старой базой) удаляется.
Подробности об этой схеме можно почерпнуть из следующих материалов:
- Performing a Rolling Update(документация Kubernetes);
- Rolling Updates with Kubernetes Deployments(Ta-Ching Chen);
- Kubernetes deployment strategies(Container Solutions).
The selected approach allows us to wait until the new dump is downloaded, unzipped and launched, and only after that the old one will be deleted from MySQL. Thus, while we are preparing a new dump, we are quietly working with the old base.
The init container of this Deployment uses the following command:
curl "$DUMP_URL" | tar -C /var/lib/mysql/ -xvzThose. we download the compressed dump of the database, which was prepared in step 1, unzip it to
/var/lib/mysql, and then start under Deployment ', in which MySQL is started with the data already prepared. All this takes about 2 hours.And Deployment looks like this ...
apiVersion: apps/v1beta1
kind: Deployment
metadata:
  name: mysql
spec:
  strategy:
    rollingUpdate:
      maxUnavailable: 0
  template:
    metadata:
      labels:
        service: mysql
    spec:
      imagePullSecrets:
      - name: regsecret
      nodeSelector:
        dedicated: non-prod-db
      tolerations:
      - key: "dedicated"
        operator: "Equal"
        value: "non-prod-db"
        effect: "NoExecute"
      initContainers:
      - name: getdump
        image: mysql-with-getdump
        command: ["/usr/local/bin/getdump.sh"]
        resources:
          limits:
            memory: "6000Mi"
            cpu: "1.5"
          requests:
            memory: "6000Mi"
            cpu: "1.5"
        volumeMounts:
        - mountPath: /var/lib/mysql
          name: datadir
        - mountPath: /etc/mysql/debian.cnf
          name: debian-cnf
          subPath: debian.cnf
        env:
        - name: DUMP_URL
          value: "http://somedb-db-dump.infra-db.svc.cluster.local/mysql_bindump.tar.gz"
      containers:
      - name: mysql
        image: mysql:5.6
        resources:
          limits:
            memory: "1024Mi"
            cpu: "1"
          requests:
            memory: "1024Mi"
            cpu: "1"
        lifecycle:
          preStop:
            exec:
              command: ["/etc/init.d/mysql", "stop"]
        ports:
        - containerPort: 3306
          name: mysql
          protocol: TCP
        volumeMounts:
        - mountPath: /var/lib/mysql
          name: datadir
        - mountPath: /etc/mysql/debian.cnf
          name: debian-cnf
          subPath: debian.cnf
        env:
        - name: MYSQL_ROOT_PASSWORD
          value: "password"
      volumes:
      - name: datadir
        emptyDir: {}
      - name: debian-cnf
        configMap:
          name: somedb-debian-cnf
---
apiVersion: v1
kind: Service
metadata:
  name: mysql
spec:
  clusterIP: None
  selector:
    service: mysql
  ports:
  - name: mysql
    port: 3306
    protocol: TCP
---
apiVersion: v1
kind: ConfigMap
metadata:
  name: somedb-debian-cnf
data:
  debian.cnf: |
    [client]
    host     = localhost
    user     = debian-sys-maint
    password = password
    socket   = /var/run/mysqld/mysqld.sock
    [mysql_upgrade]
    host     = localhost
    user     = debian-sys-maint
    password = password
    socket   = /var/run/mysqld/mysqld.sock
Results
It turns out that we always have Deployment , which rolls out every night and does the following:
- gets a fresh database dump;
- somehow it prepares to work correctly in a test environment (for example, trancheytit some tables, replaces real user data, gets the necessary users, etc.);
- provides each developer the opportunity to click on a button in CI to roll out such a prepared base into his namespace in Deployment - thanks to the Service available in it, the database will be available at the address
mysql(for example, this can be the name of the service in the namespace).
For the example we have considered, creating a dump from a real replica takes about 6 hours, preparing a “base image” takes 7 hours, and updating the database in the developer’s environment takes 2 hours. Since the first two actions are performed “in the background” and invisible to developers, in fact they can deploy a prod version of the database (with a size of 1 TB) in the same 2 hours .
Questions, criticism and corrections to the proposed scheme and its components are welcome in the comments!
PS Of course, we understand that in the case of VMware and some other tools, it would be possible to manage to create a snapshot of the virtual machine and launch a new virutalki from snapshot (which is even faster), but this option does not include preparation of the base, taking into account time ... Not to mention the fact that not everyone has the ability or desire to use commercial products.
Pps
Other K8s series tips & tricks:
- " Personalized error pages in NGINX Ingress ";
- " Transfer of resources working in a cluster under the management of Helm 2 ";
- " On the allocation of sites and the load on the web application ";
- " Access to dev-sites ".
Read also in our blog:
- “ Build and heat applications in Kubernetes using dapp and GitLab CI ”;
- " Practice with dapp. Part 1: Build simple applications ";
- " Practice with dapp. Part 2. Deploying Docker images in Kubernetes with the help of Helm ”;
- “ Orchestration of the CockroachDB DBMS at Kubernetes ”;
- " Our experience with Kubernetes in small projects " (video of the report, which includes an introduction to the technical device Kubernetes);
- “ Useful utilities when working with Kubernetes ”.