Compact folding do-it-yourself laptop workstation
In this article, I want to tell you about one of the options for creating a workplace at home, when you want a convenient place, and there is no free space for the table (or do not want to occupy it).
How can I do this in just a couple of hours of time and reasonable costs, and I want to tell and show on my own example.
This option will be primarily interesting to people working at home (in whole or in part) and not having a normal workplace or wanting to increase the free space in the room by replacing the bulky old workplace with such a compact one.
If you do not want to read how I spread the text in my thoughts - go directly to section “2. Purchase"
It all started with the last redecoration in the room. Then it was decided to abandon the large (huge) desk with drawers. “I don’t really need it,” I thought then, and my repair went under the “down with the furniture, give space” division. Of the flat horizontal surfaces there was only a coffee table (actually for magazines, coffee, any little thing). The computer migrated under the TV as a media station, and its place was taken for me by a small 13.3 "ultrabook. Visually, the room became 2 times more free space and I was happy until the need to work at home began to arise. After a couple of days, it became clear that working in the shrimp position on the couch at the coffee table does not bring any joy, and after an hour or two brings back pain and "eyes in a bunch."
Because one of the main conditions for me was the preservation of free space - I was considering the option of a small table within 60x100cm and a height of about 70-80 cm.
I had at my disposal a small space against the wall

There were generally two options - either stupidly buy such a table and put it on to the wall, or hang the table directly on the wall, getting some advantages (which I will talk about at the end). Suddenly, the idea came that the hinged table can be made not only bolted to the wall but also removable / folding. On this I stopped, having decided to rush to the nearest Ikea / Ob.
The idea was to buy a countertop in ikey, and then at OBI purchase various fasteners and put together the construction yourself. But it turned out that Ikea already has a table ready for me ready for a reasonable 2500 rubles. Realizing that my dream is closer than I thought - I bought it (by the way, therefore, in the heading “do it yourself” is in quotation marks - my hands were involved at least, but the article moved from the category “wow, so I could do that” to “hmm, and so I can, I’ll go do it ”)

The table has dimensions 50x90 cm. Out of 50 cm - 12 cm there is a fixed shelf and another 38 cm - the folding tabletop itself. In disassembled form, an identical surface of 50 cm is obtained without a noticeable gap. The table is made of thick chipboard and covered with a film on top of a dark wood (black and brown classic Ikea colors). Folding up and down the table takes about two seconds and is not an inconvenience.
On the IKEA Russian site, this table is www.ikea.com/ru/ru/catalog/products/20217522/#/80217524
For assembly, in addition to the table itself, you need: a good screwdriver (in my case a screwdriver), a puncher, 6 dowels + screws for attaching to the wall (according to the Ikea tradition, it does not attach them to furniture)
Like the rest of the Ikea furniture, the table does not stand out in fantastic quality, but is made quite tolerable, all holes are prepared smoothly and the design is both simple and reliable.
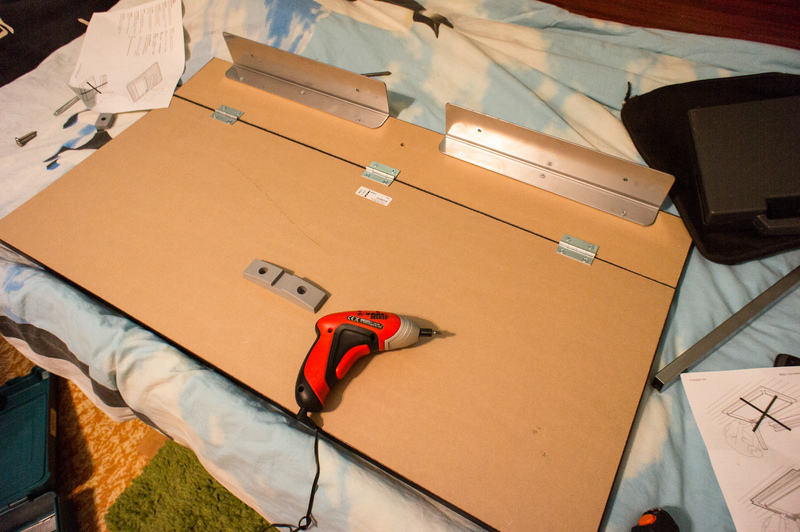
First, corners are screwed to a smaller part (shelf) for attaching to the wall.

We must pay tribute to the designers - all the metal parts are made of very thick metal - about 2-3mm.
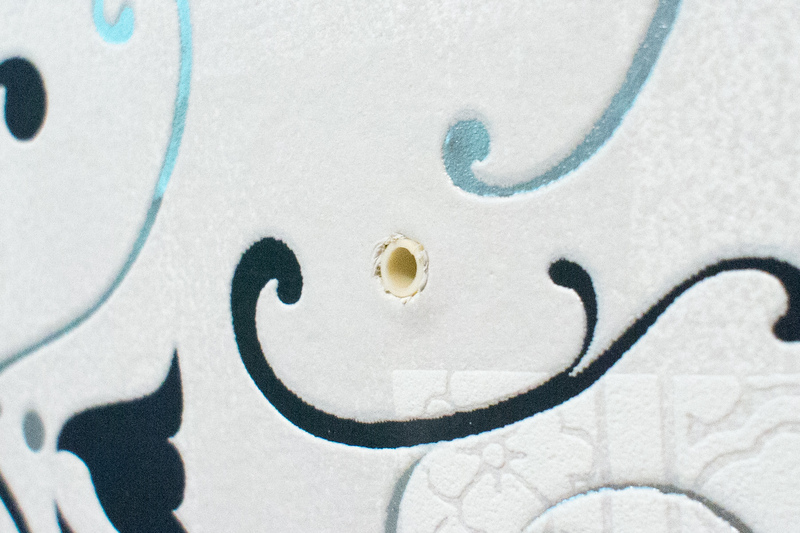
Holes in the wall are marked (here you need to think carefully about the height of the structure)
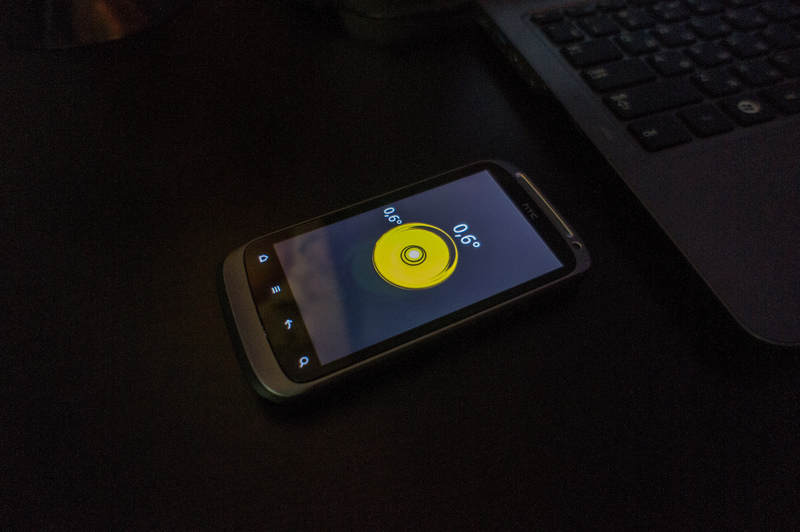
As a level, in the absence of the present, I used the program for android
I took reasonably large dowels and screws, because the table itself weighs under 10kg + laptop and other junk + hands on it when working. Moreover, you don’t need to be an engineer to understand that relying on the edge of the table we create a non-load load on fixing it to the wall.
Then the hinges and the main countertop are attached.
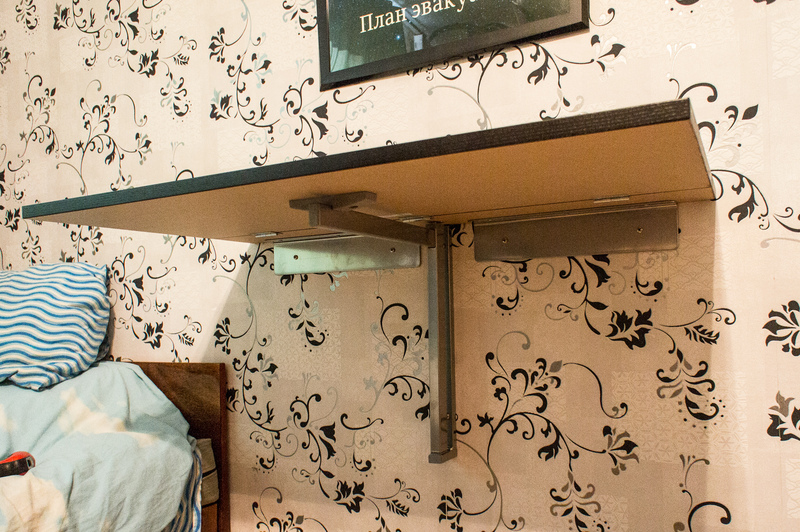
And all this is hung on the wall, twisted qualitatively. Then the central leg is hung. Done!
The supporting leg is made very reasonably - the thick metal of square section does not allow it to bend even a millimeter, while the L-shaped design does not interfere with the legs.
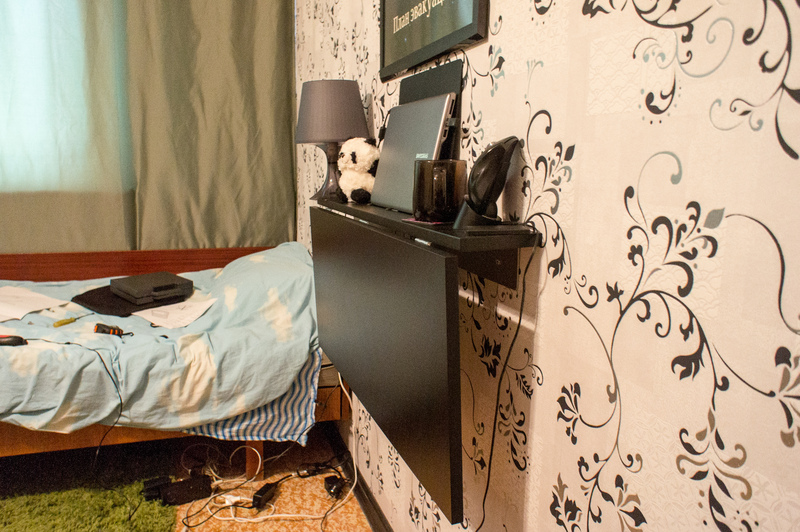
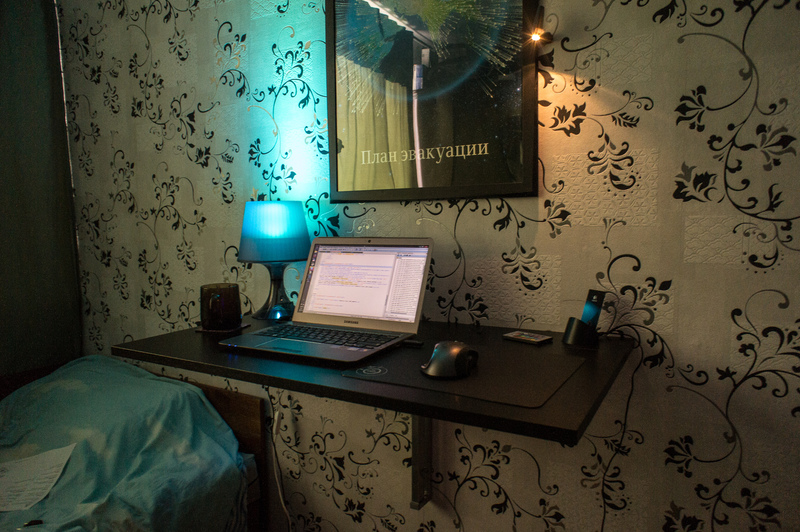
The folded table has a convenient shelf on which all my “working” things are placed. The ultrabook is kept from rolling down by small silicone “pimples” glued to the table.
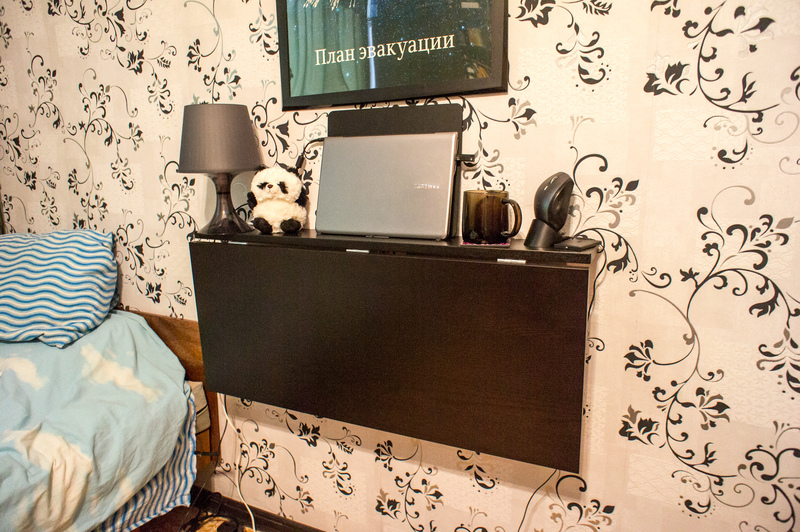
The shelf freely holds a lamp, a cup, a carpet for the mouse, the mouse itself, charging for it, the ultrabook itself, and even the panda.
When it is complicated, the space in the room practically does not suffer!
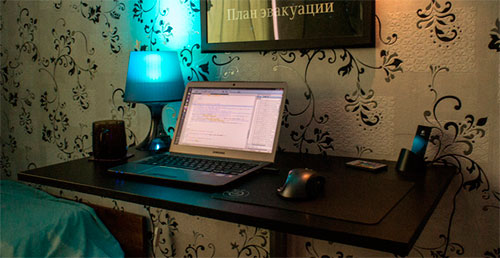
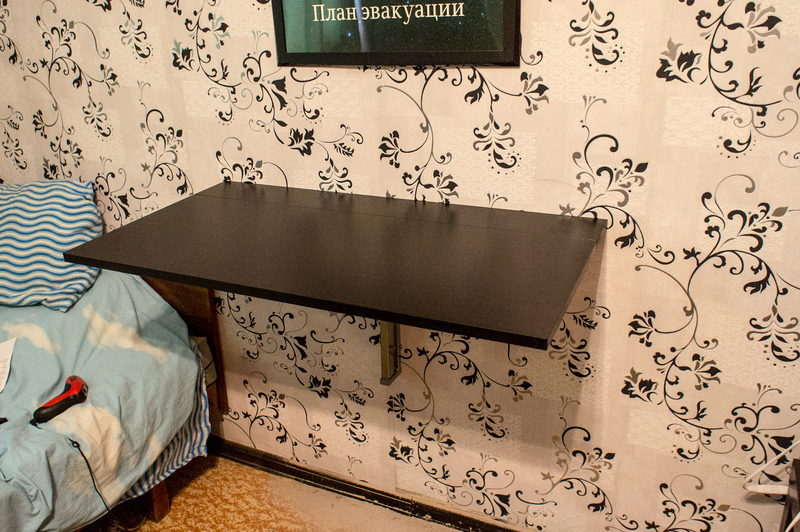
When unfolded, the table turns into a full-fledged laptop workstation in the
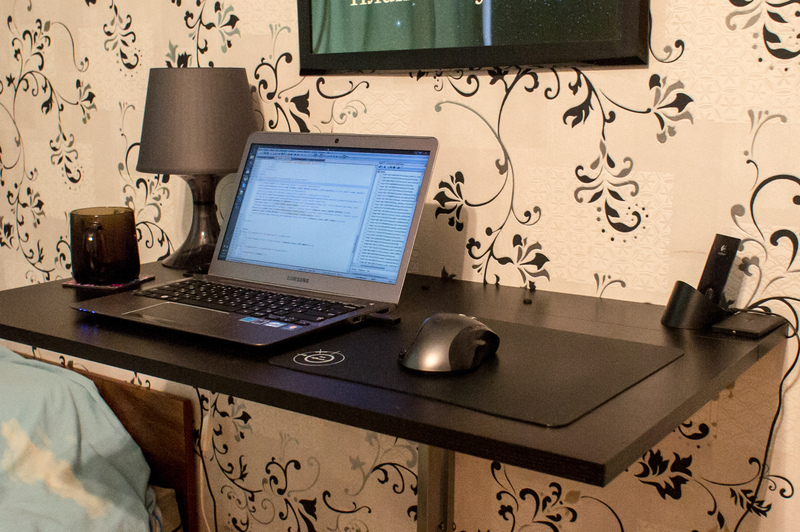
evening

Compared with the classic workplace, I can distinguish the following differences:
Pluses of my option:
+ Less takes up space (when folded, almost not at all)
+ When folded, it almost disappears. A classic table needs to be dismantled for this, so you just can’t hide it.
= Relatively inexpensive (a similar floor table can even cost more due to the presence of legs or about the same amount)
+ Very stable (I don’t know how it will be next, but now it’s a monolithic structure on all corners and in all planes that is difficult to swing even You can’t achieve this from an ordinary table of similar sizes)
+ It can be of any height (as it hangs, it will be)
And cons
- Do not move (except for re-hanging with a punch. But even in this case we are limited by walls)
- Limited in depth (if you like to stretch your legs - this is not your option, there is a wall. Normally, it allows you to sit freely - depth 50cm is sufficient with my height ~ 185cm). I would even say that this is a bit of a plus - he teaches you to sit correctly and not to spread oneself on the chair.
- You can sit at the table only on one side (you can tightly on the sides, but this is an option for 10 minutes)
That's probably all. I solved my problem without violating the space of the room and getting a comfortable workplace.
The article was written in a new workplace - conveniently and comfortably, without the thought of “hurry to finish and dump”.

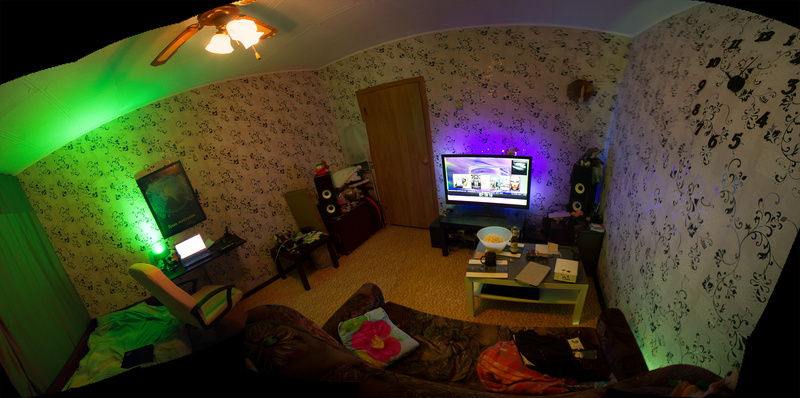
UPD: by “numerous requests” (for the whole one) a quick panorama of the room. Sorry srach etc.
Click more
How can I do this in just a couple of hours of time and reasonable costs, and I want to tell and show on my own example.
This option will be primarily interesting to people working at home (in whole or in part) and not having a normal workplace or wanting to increase the free space in the room by replacing the bulky old workplace with such a compact one.
If you do not want to read how I spread the text in my thoughts - go directly to section “2. Purchase"
0. Lyrical digression
It all started with the last redecoration in the room. Then it was decided to abandon the large (huge) desk with drawers. “I don’t really need it,” I thought then, and my repair went under the “down with the furniture, give space” division. Of the flat horizontal surfaces there was only a coffee table (actually for magazines, coffee, any little thing). The computer migrated under the TV as a media station, and its place was taken for me by a small 13.3 "ultrabook. Visually, the room became 2 times more free space and I was happy until the need to work at home began to arise. After a couple of days, it became clear that working in the shrimp position on the couch at the coffee table does not bring any joy, and after an hour or two brings back pain and "eyes in a bunch."
1. Options
Because one of the main conditions for me was the preservation of free space - I was considering the option of a small table within 60x100cm and a height of about 70-80 cm.
I had at my disposal a small space against the wall
There were generally two options - either stupidly buy such a table and put it on to the wall, or hang the table directly on the wall, getting some advantages (which I will talk about at the end). Suddenly, the idea came that the hinged table can be made not only bolted to the wall but also removable / folding. On this I stopped, having decided to rush to the nearest Ikea / Ob.
2. Purchase
The idea was to buy a countertop in ikey, and then at OBI purchase various fasteners and put together the construction yourself. But it turned out that Ikea already has a table ready for me ready for a reasonable 2500 rubles. Realizing that my dream is closer than I thought - I bought it (by the way, therefore, in the heading “do it yourself” is in quotation marks - my hands were involved at least, but the article moved from the category “wow, so I could do that” to “hmm, and so I can, I’ll go do it ”)
The table has dimensions 50x90 cm. Out of 50 cm - 12 cm there is a fixed shelf and another 38 cm - the folding tabletop itself. In disassembled form, an identical surface of 50 cm is obtained without a noticeable gap. The table is made of thick chipboard and covered with a film on top of a dark wood (black and brown classic Ikea colors). Folding up and down the table takes about two seconds and is not an inconvenience.
On the IKEA Russian site, this table is www.ikea.com/ru/ru/catalog/products/20217522/#/80217524
3. Assembly and installation
For assembly, in addition to the table itself, you need: a good screwdriver (in my case a screwdriver), a puncher, 6 dowels + screws for attaching to the wall (according to the Ikea tradition, it does not attach them to furniture)
Like the rest of the Ikea furniture, the table does not stand out in fantastic quality, but is made quite tolerable, all holes are prepared smoothly and the design is both simple and reliable.
First, corners are screwed to a smaller part (shelf) for attaching to the wall.
We must pay tribute to the designers - all the metal parts are made of very thick metal - about 2-3mm.
Holes in the wall are marked (here you need to think carefully about the height of the structure)
As a level, in the absence of the present, I used the program for android
I took reasonably large dowels and screws, because the table itself weighs under 10kg + laptop and other junk + hands on it when working. Moreover, you don’t need to be an engineer to understand that relying on the edge of the table we create a non-load load on fixing it to the wall.
Then the hinges and the main countertop are attached.
And all this is hung on the wall, twisted qualitatively. Then the central leg is hung. Done!
The supporting leg is made very reasonably - the thick metal of square section does not allow it to bend even a millimeter, while the L-shaped design does not interfere with the legs.
4. Result
The folded table has a convenient shelf on which all my “working” things are placed. The ultrabook is kept from rolling down by small silicone “pimples” glued to the table.
The shelf freely holds a lamp, a cup, a carpet for the mouse, the mouse itself, charging for it, the ultrabook itself, and even the panda.
When it is complicated, the space in the room practically does not suffer!
When unfolded, the table turns into a full-fledged laptop workstation in the
evening
5. Pros and Cons
Compared with the classic workplace, I can distinguish the following differences:
Pluses of my option:
+ Less takes up space (when folded, almost not at all)
+ When folded, it almost disappears. A classic table needs to be dismantled for this, so you just can’t hide it.
= Relatively inexpensive (a similar floor table can even cost more due to the presence of legs or about the same amount)
+ Very stable (I don’t know how it will be next, but now it’s a monolithic structure on all corners and in all planes that is difficult to swing even You can’t achieve this from an ordinary table of similar sizes)
+ It can be of any height (as it hangs, it will be)
And cons
- Do not move (except for re-hanging with a punch. But even in this case we are limited by walls)
- Limited in depth (if you like to stretch your legs - this is not your option, there is a wall. Normally, it allows you to sit freely - depth 50cm is sufficient with my height ~ 185cm). I would even say that this is a bit of a plus - he teaches you to sit correctly and not to spread oneself on the chair.
- You can sit at the table only on one side (you can tightly on the sides, but this is an option for 10 minutes)
That's probably all. I solved my problem without violating the space of the room and getting a comfortable workplace.
The article was written in a new workplace - conveniently and comfortably, without the thought of “hurry to finish and dump”.
UPD: by “numerous requests” (for the whole one) a quick panorama of the room. Sorry srach etc.
Click more
