July 31, 2012 at 17:55
Capturing webcam images through QCamera
Hi, Habr!
In this article I will talk about working with a webcam from Qt5 under Windows (but the example should also work under Linux and Mac OS X with the gstreamer plugin installed).
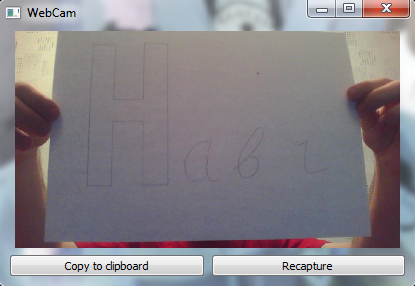
If you are interested in how to make such an application and overcome the problems that arise at the same time, then I ask for cat.
Once I wanted to add support for a webcam to my screenshot (which, in principle, is not quite a screenshot). Since I used Qt4 at that time, I began to look for ready-made solutions for this version, but then EuroElessar told me that in Qt5 there is a QCamera class that just suited my tasks.
It was decided to switch to Qt5, which was still in alpha state (and now only pre-beta).
The first problems began at the compilation stage. Due to the crooked scripts / guides, qtwebkit didn’t want to compile, because of which I lost one evening, but then the whole framework was compiled as a debug and release version.
More interesting.
After going into the examples for QtMultimedia and finding the camera directory there, I decided to launch and see how it works.
Then a second problem awaited me:

Obviously, some kind of plugin is missing. To find it, I climbed into QtMultimedia \ src \ plugins . There, my gaze first fell on gstreamer, but pretty quickly I realized that it could not be compiled under Windows.
Then I found an unfinished directshow there.
After compiling this plugin and putting it in QtBase \ plugins \ mediaservice , I successfully ran an example from QtMultimedia, which showed a list of cameras and even tried to display the image, but it turned out badly and striped:
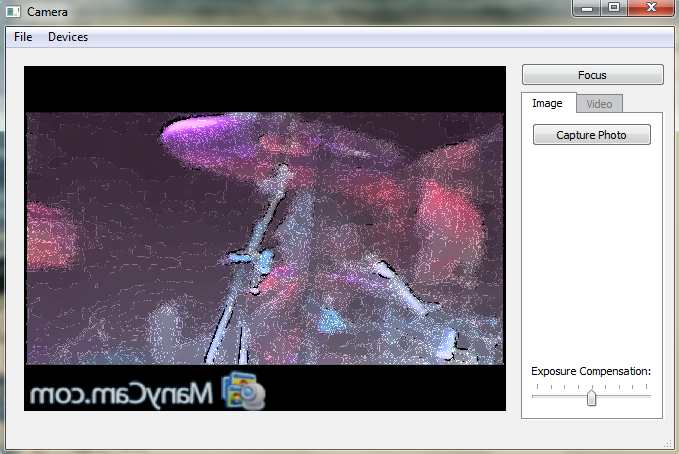
Spitting on it, I began to write my code, hoping that I will not have this problem. And it really wasn’t there, but it was different: the image resolution was always 320x240. After a little bit of the directshow code of the plugin, I decided to go to sleep to figure it out tomorrow. The next day again did not bring any results with directshow, but I completely finished the code in my application. Therefore, there was only one thing left - to finish off this directshow.
The next day I found a solution that, as is usually the case in such situations, turned out to be quite simple and obvious. In the code, the updateProperties () function was not called anywhere , which received information about the supported permissions, and the sizes 320x240 were hardcoded in the class constructor itself. Having corrected this function and adding its call, I began to receive the image of the maximum possible resolution.
Now we pass directly to the code.
Since the example is small and serves only for demonstration, I described all the slots in the constructor.
To get started, let's sketch two small forms in the designer.
webcam.ui - in fact, the main window:
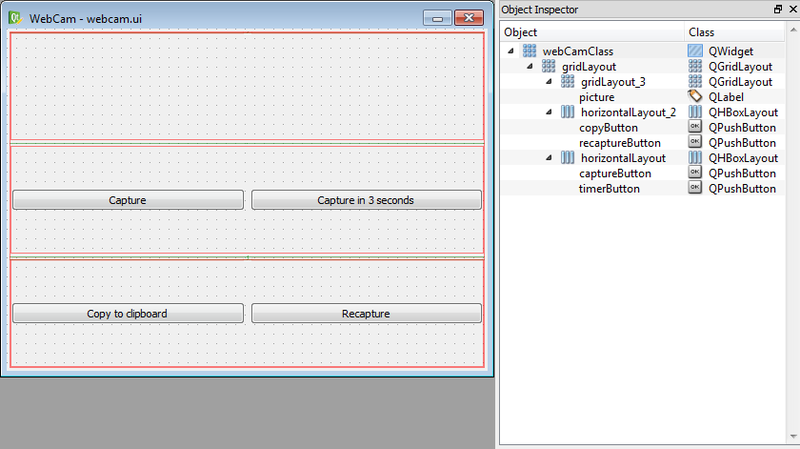
webcamselect.ui - is used to select a webcam, if several are installed:

Here I just give the header file code, because there is nothing to comment on.
As you can see from webcam.h, we have a static member in the class called m_defaultDevice, which we will define before the constructor:
In the constructor itself, by the function QCamera :: availableDevices () we get a list of cameras, and then check whether our m_defaultDevice is in this list. Depending on this, we will have two further ways:
1) If the device is on the list, then simply skip this step.
2) If it was not there, then you need to display a dialog with a choice:

However, if there are no webcams, you just need to exit with an error, and if there is only one, then select it.
But if there are several webcams, then in a cycle we will create buttons for each webcam and show a dialog:
It is very convenient here to use the new signal-slot syntax , so as not to smear the code throughout the class, which I did.
After selecting the user, the program will either exit (he clicked the cross) or in m_defaultDevice will be the id of our device.
When creating these objects, no problems should arise, so we just pass the camera id to the QCamera constructor and connect it to the error and status change slots:
QCameraViewfinder is such an object that allows you to display the image from the webcam directly to the widget (do we want the user not to photograph himself blindly?).
We create, set the minimum size (otherwise our widget cannot be reduced) and connect to the camera object:
(The QCamera :: CaptureStillImage parameter is required for capturing images.)
Create a new label that will be drawn on top of the image and count down, and a template variable for it:
and put it on the viewfinder:
Next, we declare a timer that will start when the countdown and its slot:
As you can see from the code, if there is still time, then simply reduce it by a second, and if it is over, we take pictures, turn off the timer and hide the counter.
Since the code for all of them is quite simple, I will not give it here, but I will say a few words about QClipboard:
In the current version of Qt, it works quite strange: it may not write the image to the buffer (it rarely happens), or, while it gets out of there, spoil it. I hope this will be fixed for the release.
We turn on the camera and create a QCameraImageCapture object that should support writing to the buffer ( QCameraImageCapture :: CaptureToBuffer ), but it writes to the file anyway.
The imageSaved () slot almost duplicates imageCaptured () , so in the article I will describe only it.
Open the file in which the camera placed the image, and read the image from it, which we then mirror and put in m_pixmap, and then, expanding or compressing it in size, into a QLabel picture. We delete the file so as not to litter.
The capture function, like all other functions, is not more complex and consists of 3 significant lines:
First, focus and lock the camera. Locking must be done so that another application does not begin to change the settings that we configured to take a picture.
Secondly, we take a snapshot to the file passed as a parameter.
Thirdly, unlock the camera.
The rest of the functions are not of interest and, I think, there is no point in commenting on them.
Despite the fact that Qt5 is still in a state of not even beta, things like a webcam can already be used, though with some reservations and problems to be solved.
Application sources can be taken here .
I hope this article helps someone.
(Since this is my first article, please inform me in PM about all typos and design errors.)
In this article I will talk about working with a webcam from Qt5 under Windows (but the example should also work under Linux and Mac OS X with the gstreamer plugin installed).
If you are interested in how to make such an application and overcome the problems that arise at the same time, then I ask for cat.
Background
Once I wanted to add support for a webcam to my screenshot (which, in principle, is not quite a screenshot). Since I used Qt4 at that time, I began to look for ready-made solutions for this version, but then EuroElessar told me that in Qt5 there is a QCamera class that just suited my tasks.
It was decided to switch to Qt5, which was still in alpha state (and now only pre-beta).
First problems
The first problems began at the compilation stage. Due to the crooked scripts / guides, qtwebkit didn’t want to compile, because of which I lost one evening, but then the whole framework was compiled as a debug and release version.
More interesting.
After going into the examples for QtMultimedia and finding the camera directory there, I decided to launch and see how it works.
Then a second problem awaited me:
Obviously, some kind of plugin is missing. To find it, I climbed into QtMultimedia \ src \ plugins . There, my gaze first fell on gstreamer, but pretty quickly I realized that it could not be compiled under Windows.
Then I found an unfinished directshow there.
Direct show
After compiling this plugin and putting it in QtBase \ plugins \ mediaservice , I successfully ran an example from QtMultimedia, which showed a list of cameras and even tried to display the image, but it turned out badly and striped:
Spitting on it, I began to write my code, hoping that I will not have this problem. And it really wasn’t there, but it was different: the image resolution was always 320x240. After a little bit of the directshow code of the plugin, I decided to go to sleep to figure it out tomorrow. The next day again did not bring any results with directshow, but I completely finished the code in my application. Therefore, there was only one thing left - to finish off this directshow.
The next day I found a solution that, as is usually the case in such situations, turned out to be quite simple and obvious. In the code, the updateProperties () function was not called anywhere , which received information about the supported permissions, and the sizes 320x240 were hardcoded in the class constructor itself. Having corrected this function and adding its call, I began to receive the image of the maximum possible resolution.
Correction
1) Open the file QtMultimedia \ src \ plugins \ directshow \ camera \ dscamerasession.cpp .
2) In the function DSCameraSession :: setDevice (...) at the very end, add updateProperties (); .
3) The updateProperties ( ) function is replaced with this:
2) In the function DSCameraSession :: setDevice (...) at the very end, add updateProperties (); .
3) The updateProperties ( ) function is replaced with this:
void DSCameraSession::updateProperties()
{
    HRESULT hr;
    AM_MEDIA_TYPE *pmt = NULL;
    VIDEOINFOHEADER *pvi = NULL;
    VIDEO_STREAM_CONFIG_CAPS scc;
    IAMStreamConfig* pConfig = 0;
    hr = pBuild->FindInterface(&PIN_CATEGORY_CAPTURE, &MEDIATYPE_Video,pCap,
                               IID_IAMStreamConfig, (void**)&pConfig);
    if (FAILED(hr)) {
        qWarning()<<"failed to get config on capture device";
        return;
    }
    int iCount;
    int iSize;
    hr = pConfig->GetNumberOfCapabilities(&iCount, &iSize);
    if (FAILED(hr)) {
        qWarning()<<"failed to get capabilities";
        return;
    }
    QList sizes;
    QVideoFrame::PixelFormat f = QVideoFrame::Format_Invalid;
    types.clear();
    resolutions.clear();
    for (int iIndex = 0; iIndex < iCount; iIndex++) {
        hr = pConfig->GetStreamCaps(iIndex, &pmt, reinterpret_cast(&scc));
        if (hr == S_OK) {
            pvi = (VIDEOINFOHEADER*)pmt->pbFormat;
            if ((pmt->majortype == MEDIATYPE_Video) &&
                    (pmt->formattype == FORMAT_VideoInfo)) {
                // Add types
                if (pmt->subtype == MEDIASUBTYPE_RGB24) {
                    if (!types.contains(QVideoFrame::Format_RGB24)) {
                        types.append(QVideoFrame::Format_RGB24);
                        f = QVideoFrame::Format_RGB24;
                    }
                } else if (pmt->subtype == MEDIASUBTYPE_RGB32) {
                    if (!types.contains(QVideoFrame::Format_RGB32)) {
                        types.append(QVideoFrame::Format_RGB32);
                        f = QVideoFrame::Format_RGB32;
                    }
                } else if (pmt->subtype == MEDIASUBTYPE_YUY2) {
                    if (!types.contains(QVideoFrame::Format_YUYV)) {
                        types.append(QVideoFrame::Format_YUYV);
                        f = QVideoFrame::Format_YUYV;
                    }
                } else if (pmt->subtype == MEDIASUBTYPE_MJPG) {
                } else if (pmt->subtype == MEDIASUBTYPE_I420) {
                    if (!types.contains(QVideoFrame::Format_YUV420P)) {
                        types.append(QVideoFrame::Format_YUV420P);
                        f = QVideoFrame::Format_YUV420P;
                    }
                } else if (pmt->subtype == MEDIASUBTYPE_RGB555) {
                    if (!types.contains(QVideoFrame::Format_RGB555)) {
                        types.append(QVideoFrame::Format_RGB555);
                        f = QVideoFrame::Format_RGB555;
                    }
                } else if (pmt->subtype == MEDIASUBTYPE_YVU9) {
                } else if (pmt->subtype == MEDIASUBTYPE_UYVY) {
                    if (!types.contains(QVideoFrame::Format_UYVY)) {
                        types.append(QVideoFrame::Format_UYVY);
                        f = QVideoFrame::Format_UYVY;
                    }
                } else {
                    qWarning() << "UNKNOWN FORMAT: " << pmt->subtype.Data1;
                }
                // Add resolutions
                QSize res(pvi->bmiHeader.biWidth, pvi->bmiHeader.biHeight);
                if (!resolutions.contains(f)) {
                    sizes.clear();
                    resolutions.insert(f,sizes);
                }
                resolutions[f].append(res);
                if ( m_windowSize.width() < res.width() && m_windowSize.height() < res.height() )
		    m_windowSize = res;
            }
        }
    }
    pConfig->Release();
    pixelF = QVideoFrame::Format_RGB24;
    actualFormat = QVideoSurfaceFormat(m_windowSize,pixelF);
}
Now we pass directly to the code.
Working with a webcam in Qt5
Since the example is small and serves only for demonstration, I described all the slots in the constructor.
We draw molds
To get started, let's sketch two small forms in the designer.
webcam.ui - in fact, the main window:
webcamselect.ui - is used to select a webcam, if several are installed:
Header file
Here I just give the header file code, because there is nothing to comment on.
webcam.h
#ifndef WEBCAM_H
#define WEBCAM_H
#include
#include
#include
#include
#include "ui_webcam.h"
#include "ui_webcamselect.h"
class webCam : public QWidget
{
	Q_OBJECT
public:
	webCam();
	~webCam();
	bool nativeEvent( QByteArray ba, void *message, long *result );
public slots:
	void cameraError( QCamera::Error value );
	void cameraStateChanged( QCamera::State state );
	void capture( bool checked = false );
protected:
	void mouseMoveEvent( QMouseEvent* event );
	void mousePressEvent( QMouseEvent* event );
	void paintEvent( QPaintEvent *event );
	void resizeEvent( QResizeEvent *event );
private:
	Ui::webCamClass ui;
	Ui::webCamSelectClass select_ui;
	QPoint m_drag_pos;
	static QByteArray m_defaultDevice;
	QDialog *m_selectDialog;
	QPointer< QCamera > m_camera;
	QPointer< QCameraImageCapture > m_imageCapture;
	QPixmap m_pixmap;
	QTimer *m_timer;
	int m_timerPaintState;
};
Camera selection
As you can see from webcam.h, we have a static member in the class called m_defaultDevice, which we will define before the constructor:
QByteArray webCam::m_defaultDevice = QByteArray();In the constructor itself, by the function QCamera :: availableDevices () we get a list of cameras, and then check whether our m_defaultDevice is in this list. Depending on this, we will have two further ways:
1) If the device is on the list, then simply skip this step.
2) If it was not there, then you need to display a dialog with a choice:
However, if there are no webcams, you just need to exit with an error, and if there is only one, then select it.
But if there are several webcams, then in a cycle we will create buttons for each webcam and show a dialog:
foreach( QByteArray webCam, cams )
{
	auto commandLinkButton = new QCommandLinkButton( QCamera::deviceDescription( webCam ) );
	commandLinkButton->setProperty( "webCam", webCam );
	connect( commandLinkButton, &QCommandLinkButton::clicked, [=]( bool )
		{
			m_defaultDevice = commandLinkButton->property( "webCam" ).toByteArray();
			m_selectDialog->accept();
		}
	);
	select_ui.verticalLayout->addWidget( commandLinkButton );
}
if ( m_selectDialog->exec() == QDialog::Rejected )
{
	deleteLater();
	return;
}
It is very convenient here to use the new signal-slot syntax , so as not to smear the code throughout the class, which I did.
After selecting the user, the program will either exit (he clicked the cross) or in m_defaultDevice will be the id of our device.
Create QCamera and QCameraViewfinder Objects
When creating these objects, no problems should arise, so we just pass the camera id to the QCamera constructor and connect it to the error and status change slots:
m_camera = new QCamera( m_defaultDevice );
connect( m_camera, SIGNAL( error( QCamera::Error ) ), this, SLOT( cameraError( QCamera::Error ) ) );
connect( m_camera, SIGNAL( stateChanged( QCamera::State ) ), this, SLOT ( cameraStateChanged( QCamera::State ) ) );
QCameraViewfinder is such an object that allows you to display the image from the webcam directly to the widget (do we want the user not to photograph himself blindly?).
We create, set the minimum size (otherwise our widget cannot be reduced) and connect to the camera object:
auto viewfinder = new QCameraViewfinder;
viewfinder->setMinimumSize( 50, 50 );
m_camera->setViewfinder( viewfinder );
m_camera->setCaptureMode( QCamera::CaptureStillImage );
(The QCamera :: CaptureStillImage parameter is required for capturing images.)
Setting UI and timer buttons
Create a new label that will be drawn on top of the image and count down, and a template variable for it:
auto timerLabel = new QLabel;
QString timerLabelTpl = "%1
";and put it on the viewfinder:
ui.gridLayout_3->addWidget( viewfinder, 0, 0 );
ui.gridLayout_3->addWidget( timerLabel, 0, 0 );
Next, we declare a timer that will start when the countdown and its slot:
m_timerPaintState = 0;
m_timer = new QTimer( this );
m_timer->setInterval( 1000 );
connect( m_timer, &QTimer::timeout, [=]()
	{
		m_timerPaintState--;
		if ( m_timerPaintState )
		{
			timerLabel->setText( timerLabelTpl.arg( QString::number( m_timerPaintState ) ) );
		}
		else
		{
			m_timer->stop();
			timerLabel->hide();
			capture();
		}
	}
);
As you can see from the code, if there is still time, then simply reduce it by a second, and if it is over, we take pictures, turn off the timer and hide the counter.
Control Button Slots
Since the code for all of them is quite simple, I will not give it here, but I will say a few words about QClipboard:
connect( ui.copyButton, &QPushButton::clicked, [=]( bool )
	{
		QApplication::clipboard()->setImage( m_pixmap.toImage() );
	}
);
In the current version of Qt, it works quite strange: it may not write the image to the buffer (it rarely happens), or, while it gets out of there, spoil it. I hope this will be fixed for the release.
Image capture
m_camera->start();
m_imageCapture = new QCameraImageCapture( m_camera );
//m_imageCapture->setCaptureDestination( QCameraImageCapture::CaptureToBuffer );
m_imageCapture->setCaptureDestination( QCameraImageCapture::CaptureToFile );
We turn on the camera and create a QCameraImageCapture object that should support writing to the buffer ( QCameraImageCapture :: CaptureToBuffer ), but it writes to the file anyway.
The imageSaved () slot almost duplicates imageCaptured () , so in the article I will describe only it.
connect( m_imageCapture, &QCameraImageCapture::imageSaved, [=]( int id, const QString &fileName )
	{
		QFile imageFile( fileName );
		if ( imageFile.exists() )
		{
			m_pixmap = QPixmap::fromImage( QImage( fileName ).mirrored( true, false ) );
			ui.picture->setPixmap( m_pixmap.scaled( ui.picture->width(), ui.picture->height(), Qt::KeepAspectRatio ) );
			imageFile.remove();
		}
		else
		{
			QMessageBox::critical( this, "Error", "Image file are not found!" );
			deleteLater();
			return;
		}
	}
);
Open the file in which the camera placed the image, and read the image from it, which we then mirror and put in m_pixmap, and then, expanding or compressing it in size, into a QLabel picture. We delete the file so as not to litter.
Capture function
The capture function, like all other functions, is not more complex and consists of 3 significant lines:
void webCam::capture( bool )
{
	m_camera->searchAndLock();
	m_imageCapture->capture( QCoreApplication::applicationDirPath() + "/image.jpg" );
	m_camera->unlock();
	ui.captureButton->setEnabled( true );
	ui.timerButton->setEnabled( true );
}
First, focus and lock the camera. Locking must be done so that another application does not begin to change the settings that we configured to take a picture.
Secondly, we take a snapshot to the file passed as a parameter.
Thirdly, unlock the camera.
The rest of the functions are not of interest and, I think, there is no point in commenting on them.
Conclusion
Despite the fact that Qt5 is still in a state of not even beta, things like a webcam can already be used, though with some reservations and problems to be solved.
Application sources can be taken here .
I hope this article helps someone.
(Since this is my first article, please inform me in PM about all typos and design errors.)