Unity 3D. Create a 3D menu
- From the sandbox
- Tutorial
Introduction
Habra already has a couple of tutorials on the topic of the cross-platform 3D engine "Unity 3D", but still has no lessons on the 3D menu.
I was prompted by this post by Unity3d script basics and Unity3D for beginners - Tutorial 1 .
Also, a couple of people scolded the author on the topic "We live in the wrong century", so here is a pinch of knowledge.
By doing this tutorial, I assumed that you were already familiar with the basics of JS and the Unity 3D interface.
I will work with the Windows version of Unity 3D. Owners of other operating systems I think will understand.
Cooking
1) Have a basic idea on the topic of the menu, so to speak mental preparation.
2) The models you need. You can find it here (Google Sketchup). The format we need is collada.
3) Have a font for the text of the menu. You can take standard Windows fonts.
First steps
I came up with a sketch on Western themes.
Let's start with the preparation of the scene.
Be the first to create a terrain and select the size / height / texture quality (Terrain-> Set Resolution / Flatten Heightmap).
Next, select a texture and make the scene’s main landscape.
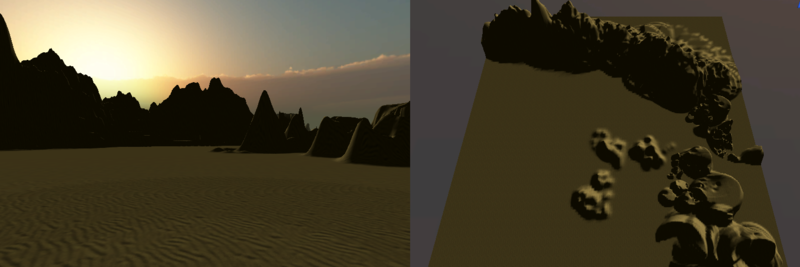
After putting the camera under the desired viewing angle, add the light (Derectional light) and the shadow of it.
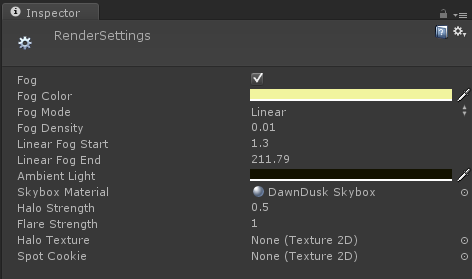
Add fog and sky (skybox), all this can be found in Edit-> Render Settings.
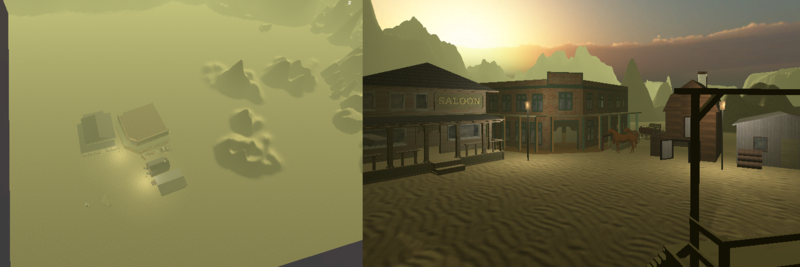
Models
To begin, unzip the downloaded archive, and transfer all the textures from images to the Materials folder of your project (just select and drag it onto the folder in the unity window).
Next, import the * .dae model into Unity (Assets-> Import New Asset), and add it to the scene, also resize to your liking.
IMPORTANT! If you do it out of order, you will get a non-textured model.
Menu Basics
The menu can be made using models or 3D text, or you can from all at once.
I will talk about the text version, because it will be more familiar.
To create 3D text with your own font, you need to add it to the project (Assets-> Import New Asset).
After, having selected it, go to (GameObjects-> Create Other-> 3D Text).
You will create soapy text. To improve quality, change the Font Size, and then adjust the size.

Next we will make it functional. To do this, copy the following code to JS'e and apply “3D text” to all objects.
function OnMouseDown () { //1
	if(name=="Play Game") { Application.LoadLevel("Test Scene"); } //2
	if(name=="Options") { }
	if(name=="Quit") { Application.Quit(); } //3
}
function OnMouseOver () { //1
	animation.Play(); //4
}
1) Events during mouse manipulation.
2) Loads a scene called Test Scene if you specify it when compiling the project (you can also specify a serial number).
3) Exit the application if it is not compiled under the web, or does not start in the editor.
4) The method of animating the menu, if you want one (Too dreary, so I won’t tell. You can see it in my finished project).
* name - the name of the object on which the script lies.
Menu navigation
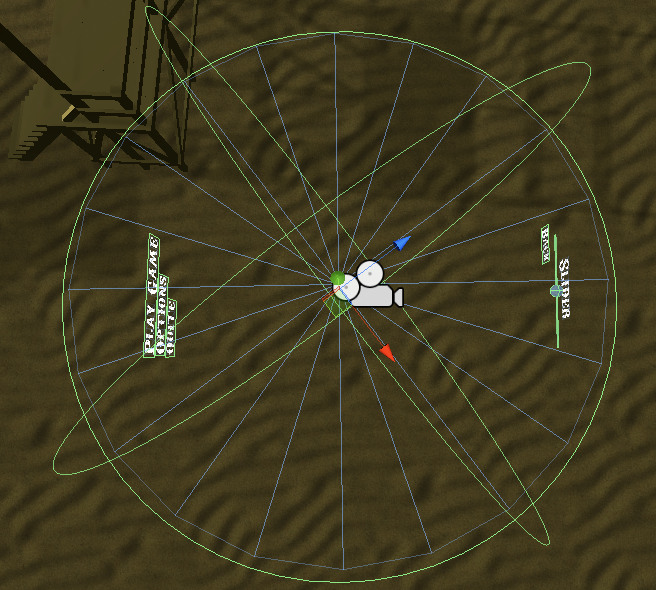
Create a cylinder, and rename it to Menu. Make it transparent by applying any partially transparent material (you can like on the screen).

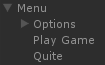
We embed all our 3D text objects in the Menu object (Hierarchy window).
Also, on the other side of the cylinder, create two 3D texts, and move them hierarchy in the Menu. This will be a sub menu item.
Update the script.
var menuRotation : GameObject; //1
function OnMouseDown () {
	if(name=="Play Game") { Application.LoadLevel("Test Scene"); }
	if(name=="Options" || name=="Back" ) { menuRotation.transform.Rotate(0, 180, 0); } //2
	if(name=="Quit") { Application.Quit(); }
}
function OnMouseOver () {
	animation.Play();
}
1) Create a variable containing the object.
2) When you click on an object called Options, the command will rotate the menuRotation object 180 *.
Move the cylinder to the Menu Rotation field of the Options button.
Now you have an almost ready menu. It remains only to create a slider.
Sliders
Sliders are the most dreary part of the lesson. Get ready for suffering and shamanism.
* I would be glad if someone posted their version of the slider, because mine is actually a shaman.
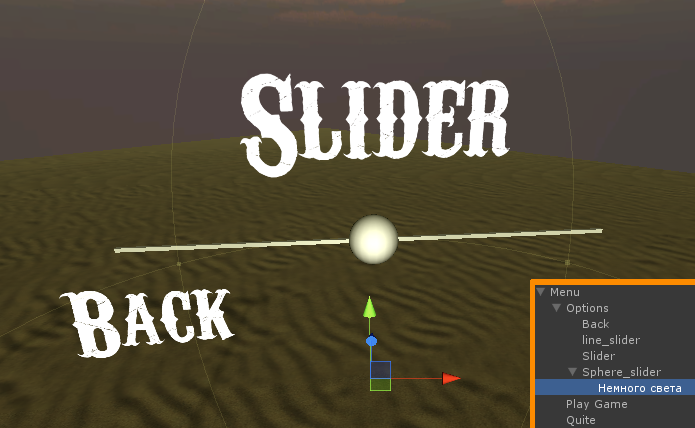
Create a noticeable Cube and stretch it to a thread. Create with the Sphere and place it in the center of the Cube.
All this is located opposite the main menu, namely the Options submenu.
* For convenience, I renamed them to line_slider and sphere_slider.
Create a new JS script, and attach it to Sphere (sphere_slider).
function OnMouseDrag () { //1
    var translation : float = Input.GetAxis ("Mouse X"); //2
    transform.Translate(translation, 0, 0); //3
    print(transform.position.x.ToString()); //4
}
1) The event will be activated when you click (on Sphere / sphere_slider) and move the mouse.
2) Will create a translation variable in which X coordinates of the mouse are transferred.
3) Moves Sphere / sphere_slider behind the mouse.
ATTENTION. The coordinate along which the ball will move is different for everyone (it is easiest to turn it with the X / red arrow along the path)
4) The transform.position.x line will give us the coordinate at which the object is currently located.
ATTENTION. The coordinate is still different (transform.position.x || y || z; or rotation Sphere / sphere_slider).
According to the conclusion to the console, we determine the minimum and maximum that the future slider will move to.
As soon as you notice the necessary coordinates, update the old script.
function OnMouseDrag () {
    var translation : float = Input.GetAxis ("Mouse X") * 0.18; //1
	if (transform.position.x < min || transform.position.x > max) { //2
		if (transform.position.x < min) { transform.Translate(0.1, 0, 0); } //3
		if (transform.position.x > max) { transform.Translate(-0.1, 0, 0); } //3
	} else {
		transform.Translate(translation, 0, 0);
	}
}
1) Still we catch the X coordinate, but with a coefficient that lowers \ increases the speed of the ball.
ATTENTION! Also unique to each user.
2) The maximum and minimum movement of the slider along the axes.
3) When going beyond the limits, the coordinate decreases slightly (to avoid the slider getting stuck in place).
* change min and max to the previously obtained limits.
Here the slider is almost ready. It remains only to teach him to return the value.
var bullet : float = 0; //1
function OnMouseDrag () {
    var translation : float = Input.GetAxis ("Mouse X") * 0.18;
	if (transform.position.x < min || transform.position.x > max) { //2
		if (transform.position.x < min) { transform.Translate(0.1, 0, 0); } //3
		if (transform.position.x > max) { transform.Translate(-0.1, 0, 0); } //3
	} else {
		transform.Translate(translation, 0, 0);
	}
	bullet = (transform.position.x - min)*250;//2
}
1) Create a variable bullet.
2) Writes the values of the slider in the variable bullet.
That's all. Now you have a more or less functioning Unity 3D menu.
What I got is tyk .
Thank you for the lesson.