Improving the quality and convenience in the manufacture of circuit boards
 The time spent on manufacturing boards for a particular development or project is often influenced not only by straightness of the hands, but also by the tools that you have to use, and, often, with high-quality equipment, an extraordinary number of nerve cells are also saved. About my transition to a new level of convenience in two stages of manufacturing, namely, etching of boards and drilling, as well as small disadvantages that have surfaced will be described later.
 To begin with, what was originally available:
- etching takes place in an unsurpassed bowl from instant noodles by the simplest method, the same immersion, which almost ruined the double-sided board due to the difference in the circulation of copper coke, etching, on average, takes from 25 minutes to an hour with a tail and a bunch of nerves, the maximum size boards - 100x90 mm.

- holes are drilled using a DP 25 engine with a button attached to a resin tape and charging from SE-rik. Drilling an average scarf with 190 holes takes about 15 minutes, which is about 4-5 seconds per hole. Plus, skewing during drilling is possible, leading to mismatch of layers, etc.
Dvizhechek is similar to this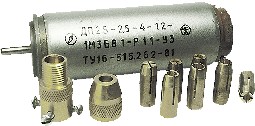
The next steps were pushed by a spoiled double-sided board, which was first etched due to the fact that I parked the etching of the second side in the park, and then finished it off by overlooking the angle along the second axis during drilling and, of course, missed the second layer by dimes.
Maximizing the micro drill:
The movement began with the purchase of an etching container, and a container for bulk solids from a nearby supermarket fell under the distribution:
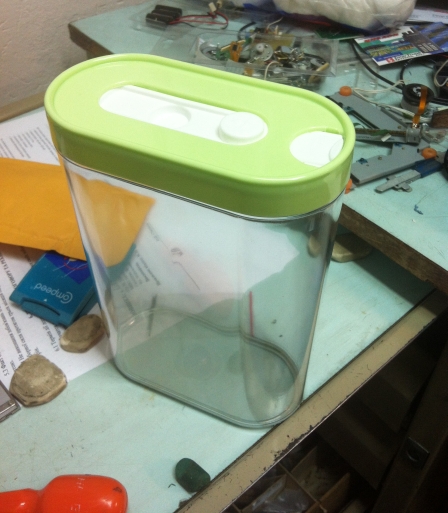
Issue price - 27 hryvnias or 104 rubles.
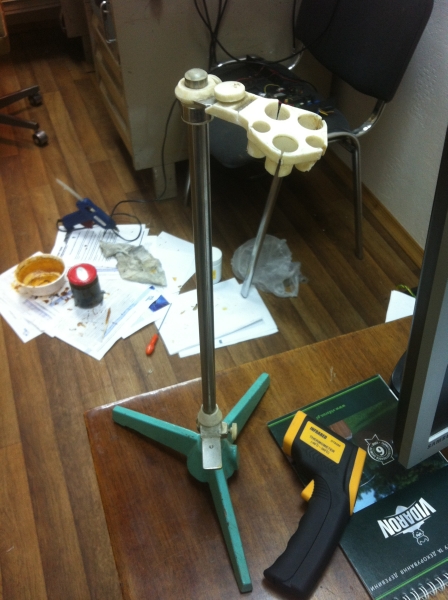
A bed for a hand drill was also bought at a hardware store (there were no free suitable mechanisms, but the price seemed reasonable). The price of the issue is 172 UAH. or 662 rub.
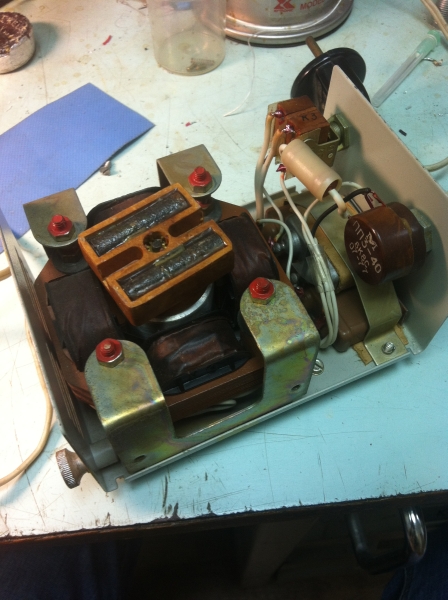
To power the microdrills, I determined the old AT-BP and soldered a simple PWM to control the speed according to one of hundreds of circuits. PWM pinned onto the PSU cover, which abruptly acquired the title of Radiator.

When assembling, an interesting barrel came out, when the output polevik is hooked on the housing by the screen, the PWM slate rides. The problem is solved by gluing the transistor through a flexible textolite and thermal grease.
Then it remains to bring together the diameter of my engine and the seat in the machine for an “adult” drill. The issue was resolved “in Brazilian style”, the nearly dead roll of wide tape was cut along, perpendicular to the axis, then a segment was cut. The motor is carefully wrapped in a couple of layers with resin duct tape to give adhesion and wrapped with tape from a scotch tape roll according to the principle "where the tape does not hold, welding should not be done." The power button is installed on the rack of the laboratory table, the speed controller is displayed on the PSU cover.
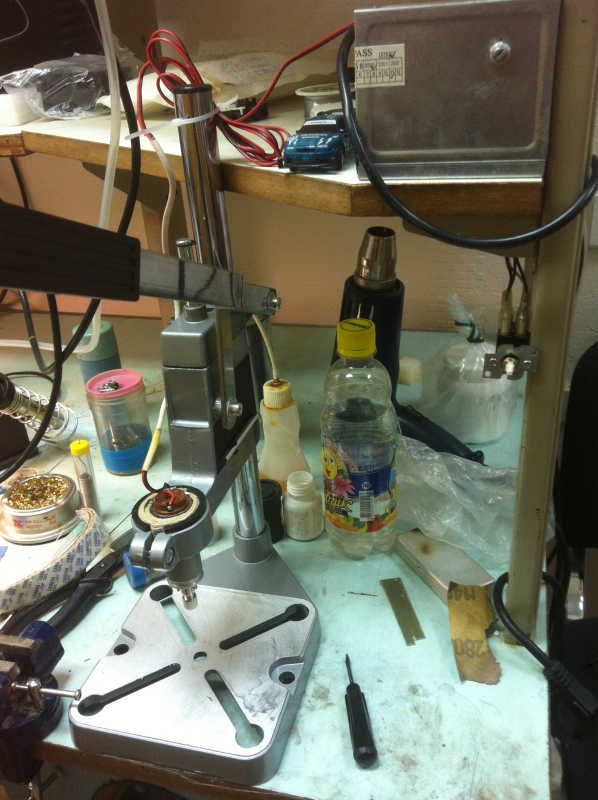
For backlighting, I stuck the remains of a flashlight onto the engine:
It works perfectly, one minus - the return spring is very powerful, designed for a weight of 1-2 kg, you need to lean on the drive lever with all the weight. Solution - I lowered the initial height to one and a half cm, it works by pressing with my fingertips.
Officially, work on the drilling machine is currently completed.
Shake or mix. Magnetic stirrer.
The next step was to improve the etching process boards. Looking at my colleagues in the workshop - a thermal laboratory, I spied a solution. I have long wanted to make a magnetic stirrer. A broken tripod for test tubes and a burnt-out laboratory tile were taken as the basis.
A four-phase motor with native fasteners, three kondeichi and an alternator for adjusting the rotation speed are screwed into the tile. All parts are taken from decommissioned laboratory equipment. The drive is made of a strange leg from some object, which, apparently, was warming itself up (otherwise there is such plastic on it) and two magnets from the door alarm, everything is flooded with a compound, there is nothing for it to twitch.
For clarity, I checked everything with water, because in the solution you can not see any zgi.
The first video using a cap from a counter and a magnet with ears for fastening (5 UAH or 19 rubles), a cap to reduce circulation, as it turned out - in spite of this, from the scum particles you can see that everything is circulating beautifully.
The second roller without a "clip", the magnet perfectly keeps alignment to the center. But the circulation is much higher.
Instead of broken test tube holders, I adapted the Plexiglas plate to a movable mount and built hooks that are convenient to manipulate the board in solution. In order to look at the state of the board during etching, you can turn the mixer (the stand itself, roughly speaking) 180 degrees, and lower the capacity down, it turned out to be quite convenient.

Here it is worth noting errors identified during the etching process. Unknowingly, I turned the rpm to the maximum (about 200 rpm by eye), which led to insane baiting and oppressed the lower half of the board. I note that the solution is not used for the first time and the concentration of the solution is lower than recommended on the bank. In 3 minutes, the entire unmasked layer was eaten to a mark of about 7 cm from the bottom of the container. At this moment, I briefly turned my eyes to the "owl" mode and dropped the speed to a minimum, because I did not think about the need to turn the board over in advance, after another 6-7 minutes the rest of the board came up.
Thus, we can conclude that the afterburner can be started for boards whose top point does not fit beyond the 8 cm mark, otherwise the grass will be uneven, in all other cases I would not exceed half the maximum rotation speed.
Result:
I was satisfied with the payment, due to the fast etching process, I did not manage to swim a piece of the road, which was not sealed during LUT, because I correct unprinted places with a marker for disks, which is washed out during prolonged etching.
The container for bulk solids also pleased that it can be closed with a convenient lid and sent for storage, it looks an order of magnitude better than a liter jar with a polyethylene lid.
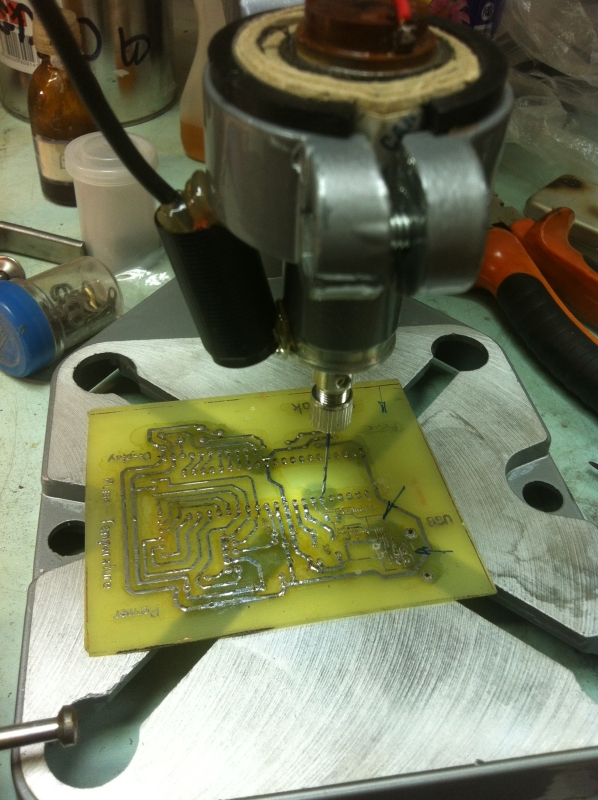
Next came the turn of drilling. I didn’t notice how I drilled the whole board, in 15-20 minutes I went through a drill and tinned the whole board. According to rough estimates, it takes about 2-3 seconds for one hole, the thought process “where to drill further” takes longer.
Product:

All the holes coincided, the holes are perpendicular, the board is ready in about an hour, taking into account the rearrangement of equipment and drinking tea, the nerves are intact, the mood is good.
To summarize:
- total financial costs = 200-250 UAH or 770-960 rubles
- total time spent on equipment preparation = 6 hours
- the drill stand is a little tight, but with a decrease in height everything is fine
- it is necessary to be careful with the speed of the mixer due to the possible unevenness of the reaction
- job satisfaction is priceless
And finally, I want to remind you, do not forget about safety precautions - use a respirator or ventilate the room, I was carried away by the process and sat like Koschey over the gold and at the exit a little bugging - burned my throat with fumes of the solution.