IPad Battery Replacement
After long using and “raping” from all sides of my iPad2, I decided to change the battery, because I started to hold it for a little more than an hour! Faced with the problem that ordering an original battery through a service center is not so simple and it will take 2 months or more to wait. I found instructions on a bourgeois website, ordered an battery on eBay , 22 days passed and began to conjure.
In order to disassemble the iPad tablet you will need:
- a special hairdryer to soften the plastic and weaken the action of the glue.
- A plastic tool for separating the front panel (sold in spare parts stores for phones).
- Plastic picks, for the convenience of separating the panel (you can use everything that is at hand and has similar qualities).
- Special small screwdrivers (can be ordered on the Internet, or use sets for mobile phones).
Getting Started:
At the initial stage, you will need to separate the front panel of the device; for this, use the hairdryer to heat the area to the right (the home button from the bottom) of the home button for convenient separation. Be careful when directing a stream of hot air, the button may be damaged if it is very hot.
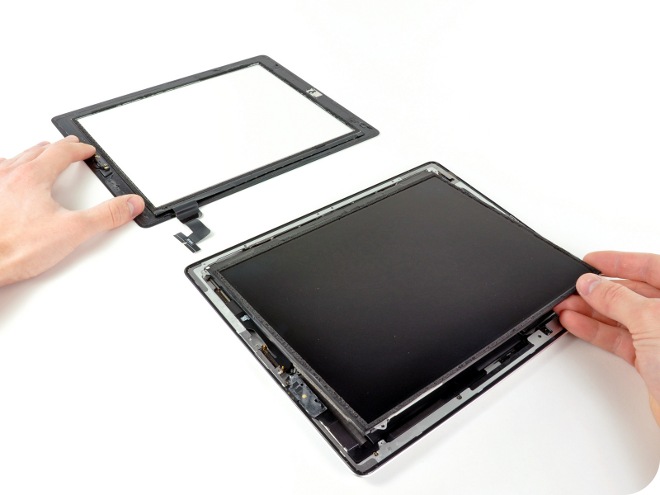
Next, it is necessary, using mediators, to separate the front panel, for more details on how to do this, see the photos.


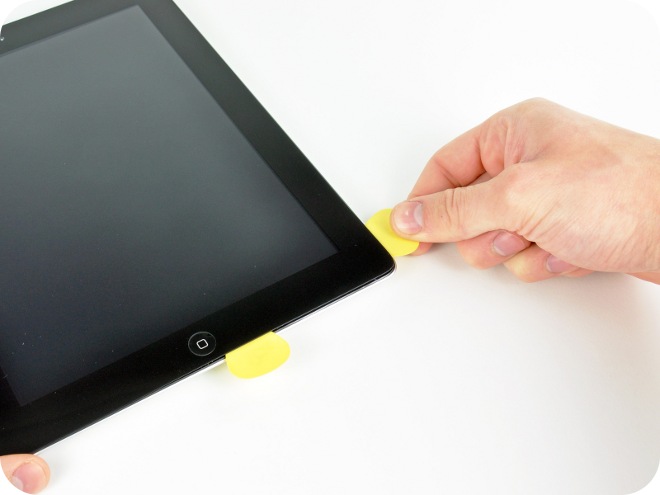

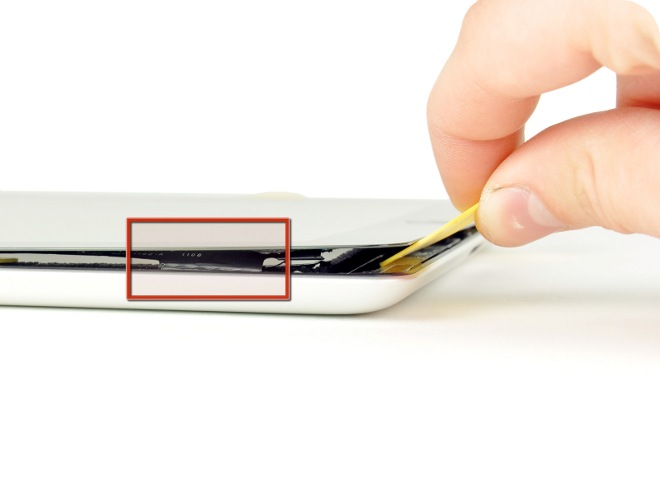
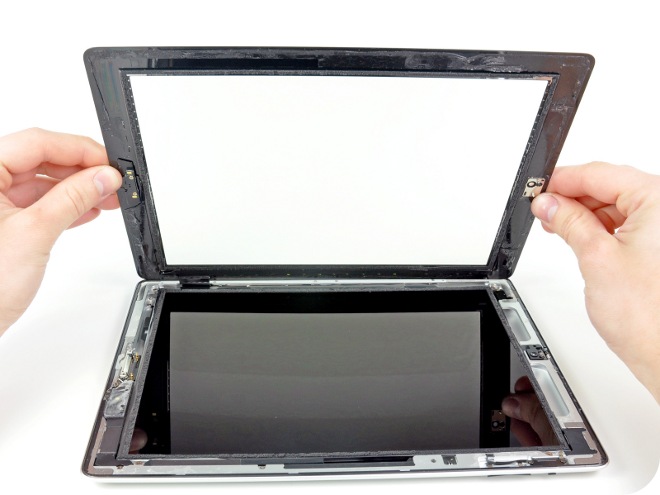
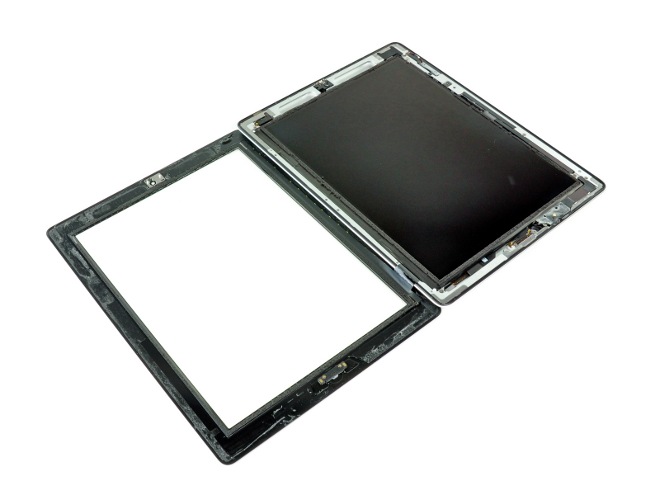
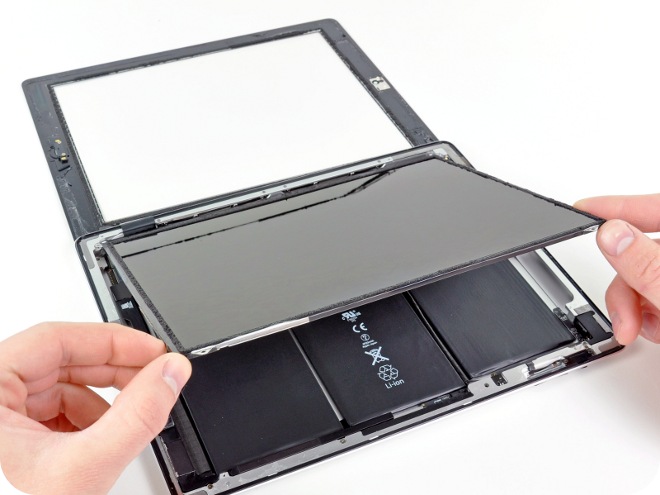
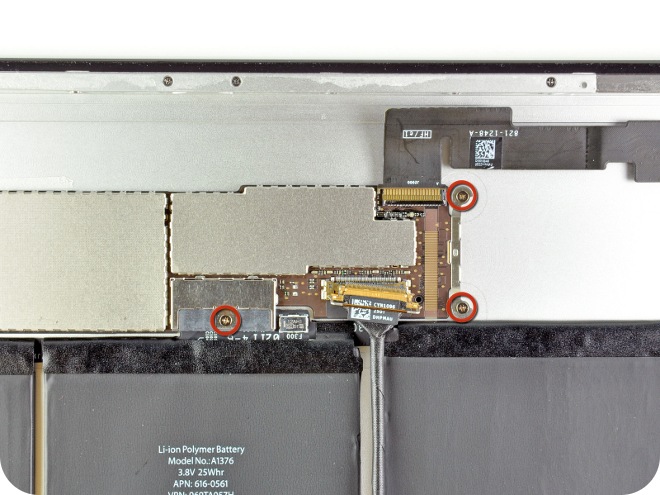
After separating the front panel, you need to unscrew the 4 screws that secure the screen of the device. For this, you will need a small Phillips screwdriver, it is better if it is with a magnetic tip. Also, it is better to think in advance where you will put the cogs so as not to lose them, otherwise everything happens.
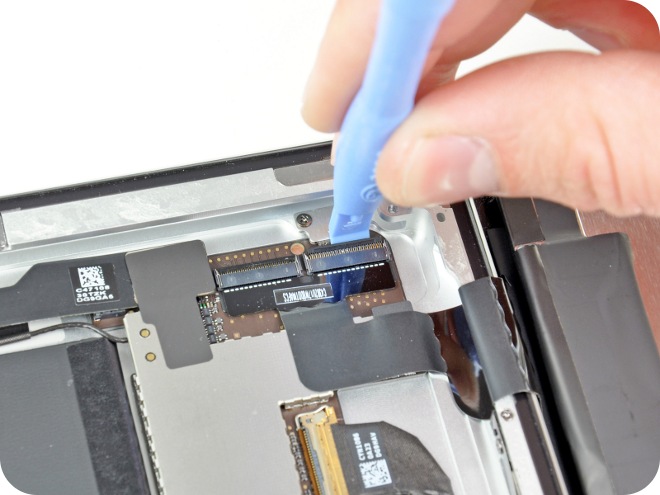
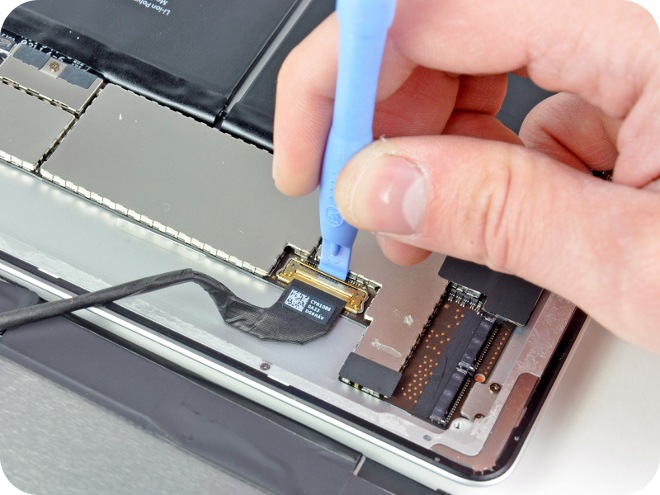
Next, we again use a plastic tool to separate the cables of the screen, touch-screen and all the others. Again, we look at the photos to understand which cables need to be disconnected.



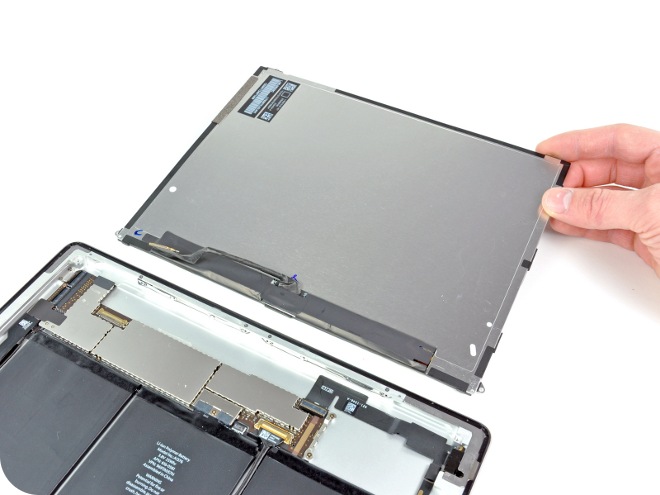
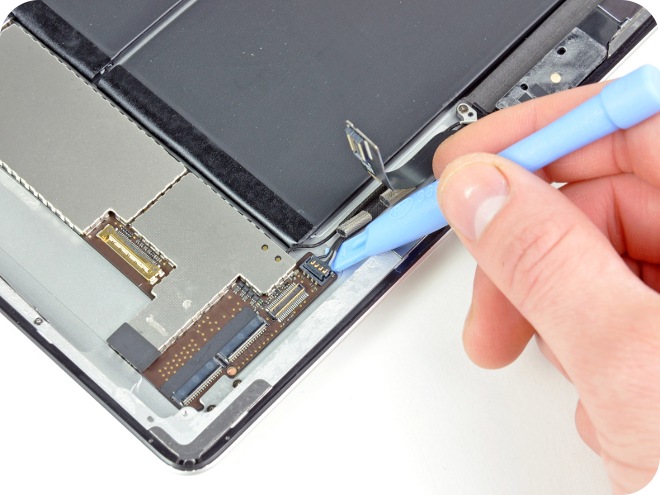
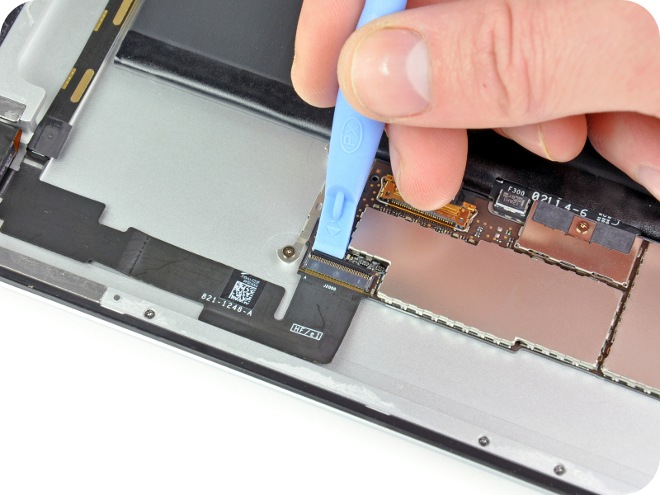
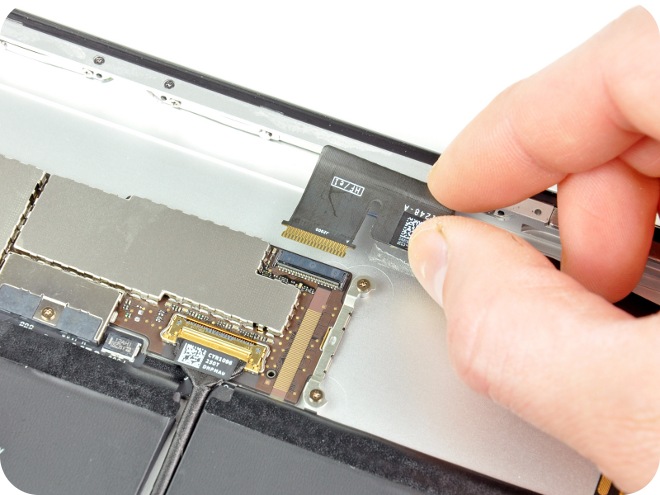

Further on the photo, in red, the bolts that need to be unscrewed are shown, we look carefully

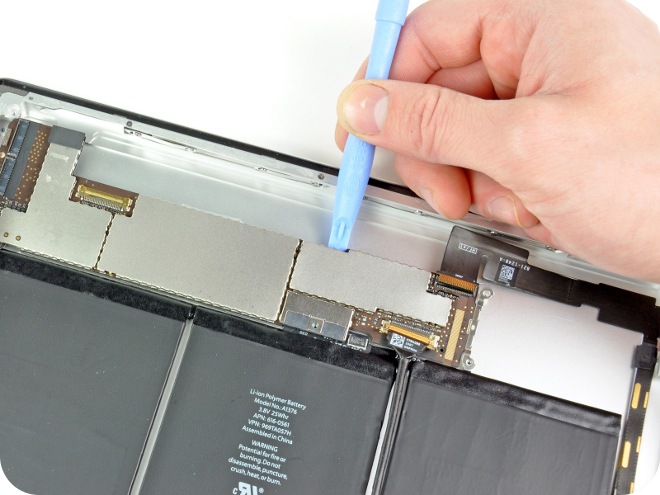


In order to remove the battery, it is better to heat the tablet from behind with a hairdryer.

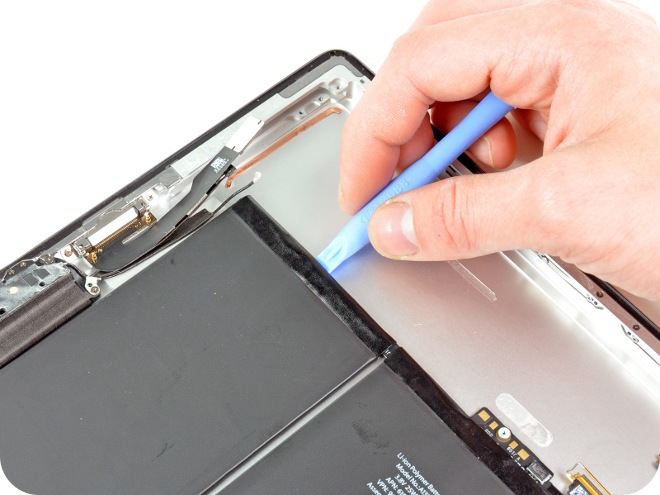

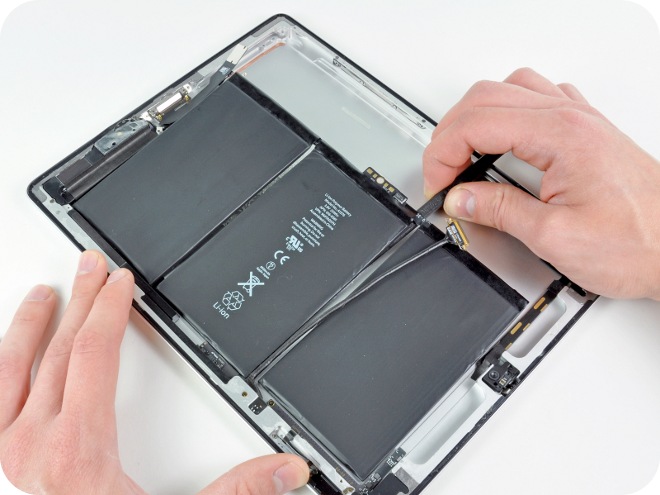
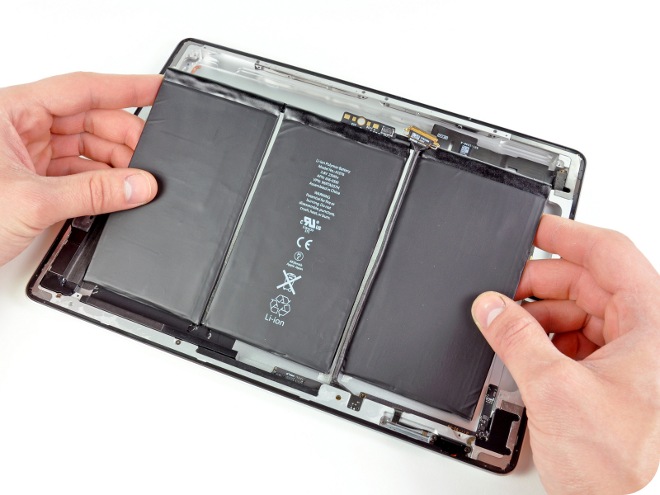
The tablet is assembled in the reverse order. For bonding, re-warm the tablet at the edges. If you accidentally perepalili glue, it is worth using a special double-sided tape, you can buy it in a radio parts store.
In order to disassemble the iPad tablet you will need:
- a special hairdryer to soften the plastic and weaken the action of the glue.
- A plastic tool for separating the front panel (sold in spare parts stores for phones).
- Plastic picks, for the convenience of separating the panel (you can use everything that is at hand and has similar qualities).
- Special small screwdrivers (can be ordered on the Internet, or use sets for mobile phones).
Getting Started:
At the initial stage, you will need to separate the front panel of the device; for this, use the hairdryer to heat the area to the right (the home button from the bottom) of the home button for convenient separation. Be careful when directing a stream of hot air, the button may be damaged if it is very hot.
Next, it is necessary, using mediators, to separate the front panel, for more details on how to do this, see the photos.


After separating the front panel, you need to unscrew the 4 screws that secure the screen of the device. For this, you will need a small Phillips screwdriver, it is better if it is with a magnetic tip. Also, it is better to think in advance where you will put the cogs so as not to lose them, otherwise everything happens.
Next, we again use a plastic tool to separate the cables of the screen, touch-screen and all the others. Again, we look at the photos to understand which cables need to be disconnected.


Further on the photo, in red, the bolts that need to be unscrewed are shown, we look carefully


In order to remove the battery, it is better to heat the tablet from behind with a hairdryer.


The tablet is assembled in the reverse order. For bonding, re-warm the tablet at the edges. If you accidentally perepalili glue, it is worth using a special double-sided tape, you can buy it in a radio parts store.
