September 22, 2011 at 11:06
Archos 101 and 3G modem
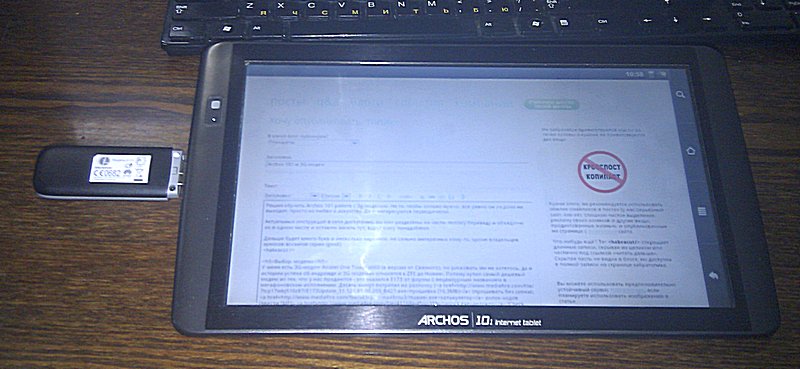
I decided to train Archos 101 to work with a 3g modem. Not that you really need it, anyway, he does not leave the house, just out of a love of art. Yes, and are interested periodically.
Up-to-date instructions on the network are enough, but they are divided into parts, so I will translate and combine them in one place and leave them hanging here, if anyone needs them.
Then there will be many letters and a few pictures that are of little interest to anyone except the owners of the arkos of the eighth series (gen8). In theory, the instruction (in terms of flashing) should be applicable to any tablets of this series - Archos 28IT, 32IT, 43IT, 70IT, 101IT. Although calling my Archos 28IT tablet my hand does not rise.
At the expense of working with a modem - only 101 has a full-fledged USB port with 500mah.
I have an Alcatel One Touch x060 3G modem (in the version from Svyaznoy), but they didn’t want to risk it, and the success stories about android and 3G modems belong to ZTE and Huawei. Therefore, I bought the cheapest modem that we sell - it turned out to be E173 from a company with an obscene name in a megaphone version. I spent ten minutes on unlocking ( firmware (16.3MB) (flashing without a SIM card), unlock code calculator (enter IMEI), unlocker (Check Lock, enter the code from the calculator, Unlock)), after which the modem normally picked up the MTS SIM card (even with megaphone software).
Initially, Archos does not know how to work with modems, there is no necessary kernel module. You can either slip the module itself, or put an alternative firmware - UrukDroid . The firmware is easier to install and from it there are more useful things, not only support for modems, but also samba, cifs and an ssh server, which makes life a bit easier in the future (using a tablet as a photo frame will make it easier to upload photos).
You can install firmware either in the internal memory of the tablet, or on an SD card. I first tried on SD (8gb, Class4), but performance and stability were unsatisfactory. Therefore, I rearranged it in the internal memory (and then I describe just that).
The flashing starts with the installation of the Special developer edition firmware. We are losing the Arkos guarantee, but we get the opportunity to play with the device as we want.
Download firmware (65 megabytes) . Turn off the tablet, turn it on while holding Vol- until the service menu appears, select Update Firmware. We connect the tablet to the computer, drop the firmware on it, press the power button - disconnects from the computer. We connect the charger - installation of SDE will begin.
After installing the SDE, you can proceed to UrukDroid.
From here we download the archive (147MB) with firmware and a new kernel.
Inside there are three initramfs.cpio.gz, zImage and UrukDroid-install.tgz
files. Flash initramfs.cpio.gz and zImage through the SDE boot menu:
1) Turn on the tablet, holding Vol-, until we see “Archos AXXXX - Boot Menu”,
2) Go to “Recovery System” -> “Developer Edition Menu” -> “Flash Kernel and Initramfs”, connect the tablet to the computer and copy zImage and initramfs.cpio.gz
3) Turn off the tablet (preferably through the "safe removal"), a short press on the power button - and the kernel will be flashed.
4) At the end, press the power again, the reboot will begin.
The kernel is installed.
Then we boot into the SDE - turn on the tablet, holding the volume button, see the Boot Menu, go to the "Developer edition". Select the item "UrukDroid 1.5 Installation framework".
There are two installation methods to choose from, Simple and Advanced. The first option is installed without additional questions on the memory card, if one is stuck (or swears that there is no memory card). For the first attempt, I recommend trying it.
Advanced - you can select the installation location - SD / internal memory, select the partition sizes (I left the default ones).
Regardless of the choice of installation type, the steps do not differ further: we connect the tablet to the computer, copy UrukDroid-install.tgz, turn off the tablet, press the power button.
Later, during the installation process, you will be prompted to copy / data - not recommended.
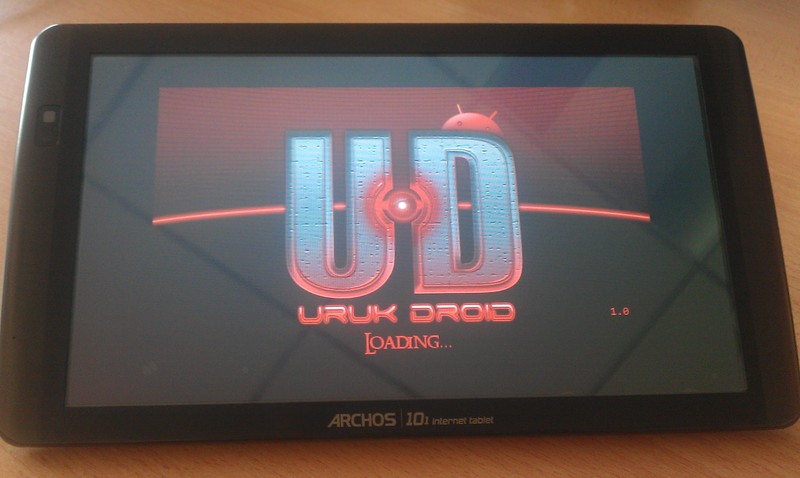
After the reboot, you will see the UrukDroid'a boot screen. If the native OS starts to load, then it will be necessary to go back to the Boot menu and select Developer Edition.
Installation will continue, progress information will be displayed at the bottom of the screen. After a few minutes, the tablet will reboot and the tablet setup wizard will start.
That's it, flashing is over.
In some cases, the setup wizard throws an error message and offers to close - you need to restart the tablet. True, this did not help me when installing on SD, messages continued to appear. I had to cancel the setting. But this was not the only problem, the speed of work was low, frequent freezes. Therefore, he refused the firmware on the SD card.
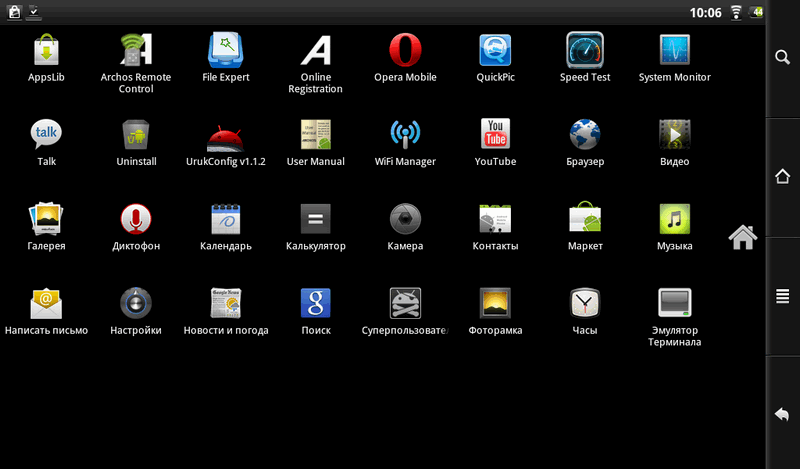
There are no noticeable external differences from the stock firmware, a couple of programs have been added (Opera Mobile, WiFi Manager, QuickPic), the UrukConfig configuration utility - and that’s all. The market was reinstalled through AppsLib (ArcTools).
Configuring the modem is to copy the initialization scripts and run them. It is made in the terminal.
1. Install a terminal emulator or run sshd via urukconfig. I did the second method, it is more convenient to type on a normal keyboard and copy commands from the instructions. If connected to wifi, then the IP of the tablet will be written next to the sshd power button, root user, UrukDroid password.

2. It is believed that this step is not necessary in versions of UrukDroid'a starting with 0.7, but in 1.5 I needed it, it did not work without it.
Download 3Gsupport-0.4.zip , unzip and copy 3Gsupport-0.4.tar.gz to your tablet.
Make a backup of the original files Unzip 3Gsupport-0.4.tar.gz to the root of the device.
3.Run the terminal emulator or connect to the tablet via ssh.
Connect the modem.
Wait a few seconds (5-10), then run /system/xbin/3Gmodem_detect.sh The
script will start and write something like !!! RESET !!! 4 . Disconnect the modem, do not connect anything to USB and go to Settings-> Wireless networks-> Cellphone tethering. If a settings profile is specified, delete it - Archos cannot work with more than one profile. Create a new profile, enter the APN, name and password (for MTS - internet.mts.ru, mts, mts) If the third and fourth steps were done correctly, you can check the Internet connection:
If the result looks something like this, then everything is done correctly: If not, then here you can see the possible problems and their solutions. I will not list everything. Personally, after CONNEST I had some kind of garbage falling out, but this did not affect the performance.
Connect the modem, then 'Settings-> Wireless networks-> Cellphone Tethering-> Tether'.
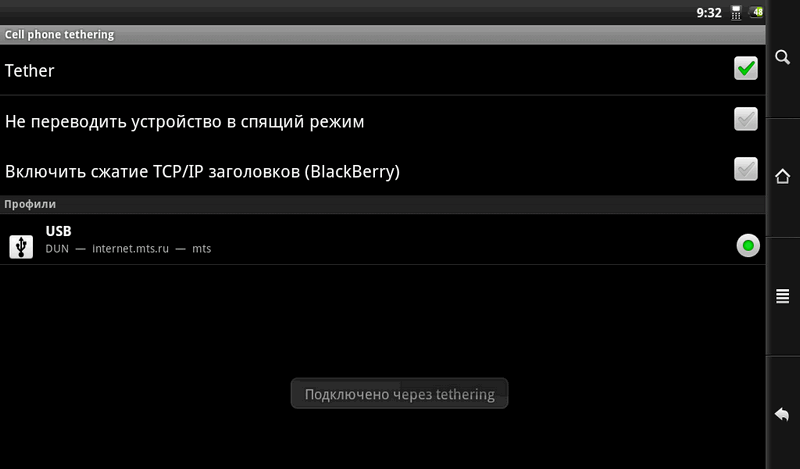
There are no particular difficulties, except for a small joke - my first attempt to connect does not work stably, writes “I can’t”. From the second, it normally connects.
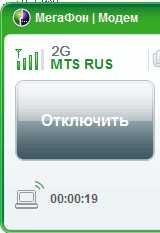
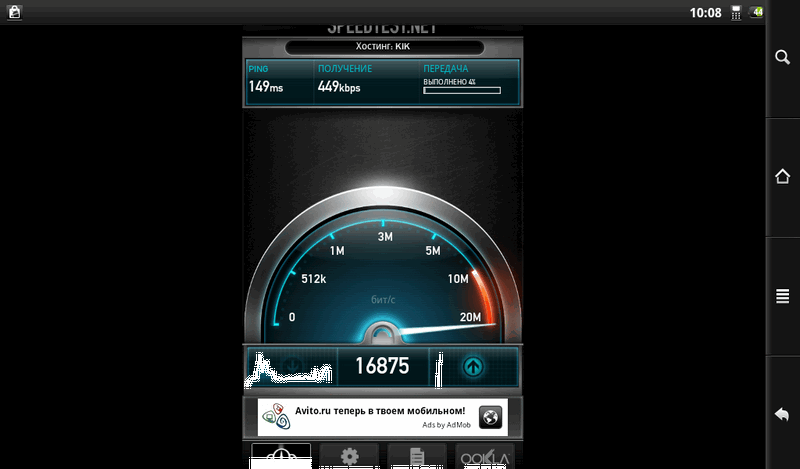
Speed - it depends on the operator and coverage area, with 3g it’s sad in our area, occasionally blows in a fair wind for a short while, mostly EDGE. In the picture - the download managed to be tested with 3G, and the switch to EDGE happened on the download and the roof of the test fell off.
Related links:
code.google.com/p/urukdroid/wiki/Installation - installing UrukDroid
forum.xda-developers.com/showthread.php?t=895599 - UrukDroid on the forum xda-developers.com
forum.xda-developers. com / showthread.php? t = 940470 - modem setup
Up-to-date instructions on the network are enough, but they are divided into parts, so I will translate and combine them in one place and leave them hanging here, if anyone needs them.
Then there will be many letters and a few pictures that are of little interest to anyone except the owners of the arkos of the eighth series (gen8). In theory, the instruction (in terms of flashing) should be applicable to any tablets of this series - Archos 28IT, 32IT, 43IT, 70IT, 101IT. Although calling my Archos 28IT tablet my hand does not rise.
At the expense of working with a modem - only 101 has a full-fledged USB port with 500mah.
Modem selection
I have an Alcatel One Touch x060 3G modem (in the version from Svyaznoy), but they didn’t want to risk it, and the success stories about android and 3G modems belong to ZTE and Huawei. Therefore, I bought the cheapest modem that we sell - it turned out to be E173 from a company with an obscene name in a megaphone version. I spent ten minutes on unlocking ( firmware (16.3MB) (flashing without a SIM card), unlock code calculator (enter IMEI), unlocker (Check Lock, enter the code from the calculator, Unlock)), after which the modem normally picked up the MTS SIM card (even with megaphone software).
Tablet firmware
Initially, Archos does not know how to work with modems, there is no necessary kernel module. You can either slip the module itself, or put an alternative firmware - UrukDroid . The firmware is easier to install and from it there are more useful things, not only support for modems, but also samba, cifs and an ssh server, which makes life a bit easier in the future (using a tablet as a photo frame will make it easier to upload photos).
You can install firmware either in the internal memory of the tablet, or on an SD card. I first tried on SD (8gb, Class4), but performance and stability were unsatisfactory. Therefore, I rearranged it in the internal memory (and then I describe just that).
The flashing starts with the installation of the Special developer edition firmware. We are losing the Arkos guarantee, but we get the opportunity to play with the device as we want.
Download firmware (65 megabytes) . Turn off the tablet, turn it on while holding Vol- until the service menu appears, select Update Firmware. We connect the tablet to the computer, drop the firmware on it, press the power button - disconnects from the computer. We connect the charger - installation of SDE will begin.
After installing the SDE, you can proceed to UrukDroid.
From here we download the archive (147MB) with firmware and a new kernel.
Inside there are three initramfs.cpio.gz, zImage and UrukDroid-install.tgz
files. Flash initramfs.cpio.gz and zImage through the SDE boot menu:
1) Turn on the tablet, holding Vol-, until we see “Archos AXXXX - Boot Menu”,
2) Go to “Recovery System” -> “Developer Edition Menu” -> “Flash Kernel and Initramfs”, connect the tablet to the computer and copy zImage and initramfs.cpio.gz
3) Turn off the tablet (preferably through the "safe removal"), a short press on the power button - and the kernel will be flashed.
4) At the end, press the power again, the reboot will begin.
The kernel is installed.
Then we boot into the SDE - turn on the tablet, holding the volume button, see the Boot Menu, go to the "Developer edition". Select the item "UrukDroid 1.5 Installation framework".
There are two installation methods to choose from, Simple and Advanced. The first option is installed without additional questions on the memory card, if one is stuck (or swears that there is no memory card). For the first attempt, I recommend trying it.
Advanced - you can select the installation location - SD / internal memory, select the partition sizes (I left the default ones).
Regardless of the choice of installation type, the steps do not differ further: we connect the tablet to the computer, copy UrukDroid-install.tgz, turn off the tablet, press the power button.
Later, during the installation process, you will be prompted to copy / data - not recommended.
After the reboot, you will see the UrukDroid'a boot screen. If the native OS starts to load, then it will be necessary to go back to the Boot menu and select Developer Edition.
Installation will continue, progress information will be displayed at the bottom of the screen. After a few minutes, the tablet will reboot and the tablet setup wizard will start.
That's it, flashing is over.
In some cases, the setup wizard throws an error message and offers to close - you need to restart the tablet. True, this did not help me when installing on SD, messages continued to appear. I had to cancel the setting. But this was not the only problem, the speed of work was low, frequent freezes. Therefore, he refused the firmware on the SD card.
There are no noticeable external differences from the stock firmware, a couple of programs have been added (Opera Mobile, WiFi Manager, QuickPic), the UrukConfig configuration utility - and that’s all. The market was reinstalled through AppsLib (ArcTools).
Modem Setup
Configuring the modem is to copy the initialization scripts and run them. It is made in the terminal.
1. Install a terminal emulator or run sshd via urukconfig. I did the second method, it is more convenient to type on a normal keyboard and copy commands from the instructions. If connected to wifi, then the IP of the tablet will be written next to the sshd power button, root user, UrukDroid password.
2. It is believed that this step is not necessary in versions of UrukDroid'a starting with 0.7, but in 1.5 I needed it, it did not work without it.
Download 3Gsupport-0.4.zip , unzip and copy 3Gsupport-0.4.tar.gz to your tablet.
Make a backup of the original files Unzip 3Gsupport-0.4.tar.gz to the root of the device.
# su

# cp /system/bin/tether_start_usb.sh /system/bin/tether_start_usb.sh.ORIGINAL

# cp /system/bin/tether_stop.sh /system/bin/tether_stop.sh.ORIGINAL
# su
# cp /sdcard/3Gsupport-0.4.tar.gz /
# cd /
# tar -zvxf 3Gsupport-0.4.tar.gz3.Run the terminal emulator or connect to the tablet via ssh.
Connect the modem.
Wait a few seconds (5-10), then run /system/xbin/3Gmodem_detect.sh The
script will start and write something like !!! RESET !!! 4 . Disconnect the modem, do not connect anything to USB and go to Settings-> Wireless networks-> Cellphone tethering. If a settings profile is specified, delete it - Archos cannot work with more than one profile. Create a new profile, enter the APN, name and password (for MTS - internet.mts.ru, mts, mts) If the third and fourth steps were done correctly, you can check the Internet connection:
# /system/xbin/3Gmodem_detect.sh

Supported USB device found !!!! VendorID: 12d1 - ProductID: 1446

New VendorID: 12d1

New ProductID not detected in usb-modeswitch config file. Try to detect it later !

Switching device to usbserial mode !


Looking for target devices ...

 No devices in target mode or class found

Looking for default devices ...

 Found devices in default mode, class or configuration (1)

Accessing device 004 on bus 002 ...

Getting the current device configuration ...

 OK, got current device configuration (1)

Using endpoints 0x01 (out) and 0x81 (in)

Using endpoints 0x01 (out) and 0x81 (in)

Inquiring device details; driver will be detached ...

Looking for active driver ...

 OK, driver found ("usb-storage")

 OK, driver "usb-storage" detached


SCSI inquiry data (for identification)

-------------------------

 Vendor String: HUAWEI

 Model String: Mass Storage

Revision String: 2.31

-------------------------


USB description data (for identification)

-------------------------

Manufacturer: HUAWEI Technology

 Product: HUAWEI Mobile

 Serial No.: not provided

-------------------------

Setting up communication with interface 0 ...

Using endpoint 0x01 for message sending ...

Trying to send message 1 to endpoint 0x01 ...

 OK, message successfully sent

Resetting response endpoint 0x81

 Error resetting endpoint: -110

Resetting message endpoint 0x01

 Error resetting endpoint: -19

 Device is gone, skipping any further commands


Checking for mode switch (max. 20 times, once per second) ...

 Searching for target devices ...

 Searching for target devices ...


Found target device, now opening

 Found correct target device


Mode switch succeeded. Bye.


Detected ProductID of a switched device: 140c

USB device VendorID: 12d1 ProdID: 140c. Probing serial mode

usbserial.ko module registered and /dev/ttyUSB{X} device nodes created sucessfully.

Writing default configuration to '/data/local.prop' file .....Done.
- Plug in the modem.
- Wait a few seconds.
- Run the terminal emulator or connect to the tablet via ssh.
- Run the su command
- Run '/system/xbin/3Gmodem_init.sh'
- Run '/ system / bin / pppd / dev / ttyUSB0 460800 debug mtu 1280 mru 1280 name mts password mts call tether' (well, or instead of “mts” the name and password of your provider)
If the result looks something like this, then everything is done correctly: If not, then here you can see the possible problems and their solutions. I will not list everything. Personally, after CONNEST I had some kind of garbage falling out, but this did not affect the performance.
ATZ

OK

AT+CGDCONT=1,"IP","internet.mts.ru"

OK

ATD*99#

CONNECT
Using
Connect the modem, then 'Settings-> Wireless networks-> Cellphone Tethering-> Tether'.
There are no particular difficulties, except for a small joke - my first attempt to connect does not work stably, writes “I can’t”. From the second, it normally connects.
Speed - it depends on the operator and coverage area, with 3g it’s sad in our area, occasionally blows in a fair wind for a short while, mostly EDGE. In the picture - the download managed to be tested with 3G, and the switch to EDGE happened on the download and the roof of the test fell off.
Related links:
code.google.com/p/urukdroid/wiki/Installation - installing UrukDroid
forum.xda-developers.com/showthread.php?t=895599 - UrukDroid on the forum xda-developers.com
forum.xda-developers. com / showthread.php? t = 940470 - modem setup