Introducing Netbeans Platform
Netbeans Platform is a Swing-based framework that can be used to create large desktop applications. The Netbeans IDE of the same name was created just on the basis of the Netbeans Platform. It contains many APIs for easier work with windows, actions, files, etc.
In essence, the Netbeans Platform is an analogue of the Eclipse RCP (Rich Client Platform), only based on Swing, not SWT. I’m not going to find out which is better. There is an opinion that the Netbeans Platform is easier to learn, less “buggy” and, since it is based on Swing, supports more platforms and the application created on it looks the same everywhere. However, some things are missing in it.
Each individual opportunity in the application on Netbeans Platform can be represented by a separate module, which, in turn, is comparable to a plug-in. The Netbeans module is a group of Java classes that provides the application with specific functionality.
Unfortunately, there is very little material in Russian. More precisely, I did not find anything. You should add the netbeans.org/features/platform/all-docs.html page to your bookmarks, there is almost everything that you might need.
To get started, you should download the Netbeans IDE with support for the Netbeans Platform. We follow this link: netbeans.org/downloads/index.html and download any version where there is a daw opposite the "NetBeans Platform SDK".
As an introduction, we’ll create an application that somehow transforms the entered text.
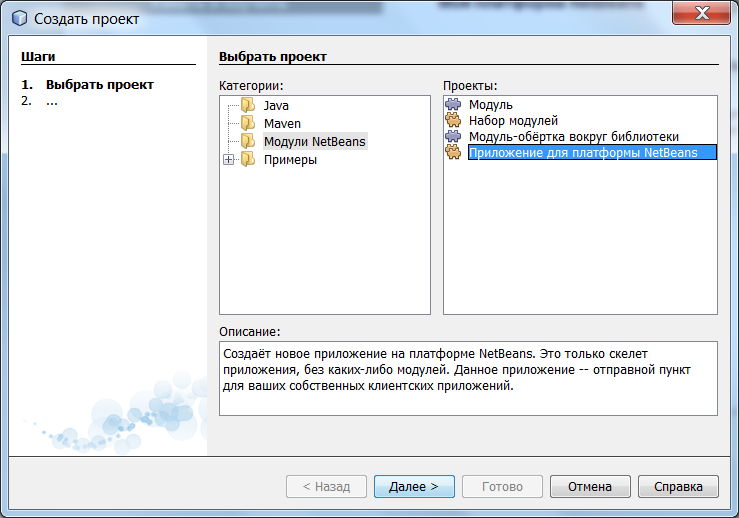
We launch IDE, in the File menu we select the Create Project item. Next, in the window that opens, select “Netbeans Modules” -> “Application for the Netbeans Platform”. Click “Next”, write some name of the project and the directory where it will be stored. In the end, click Finish.
The development environment will create a new project in which there is nothing, but despite this, you can run it. As you can see, the list of modules is empty, let's create a new module for the window in which there will be an input field and an action call button. To do this, right-click on "Modules" -> "Add New ...". Again, we come up with a name and click "Next." After that, write the code name “org.word.editor.core”, and click the “Finish” button.
The result is a new module, it can be seen in the list of projects. Right-click on it, select "Create" -> "Other". In the window that opens, in the category "Development of modules" select "Dialog", "Next". Put the position of the main window “editor”, again “Next”, write “Text” in the class name prefix and “Finish”.
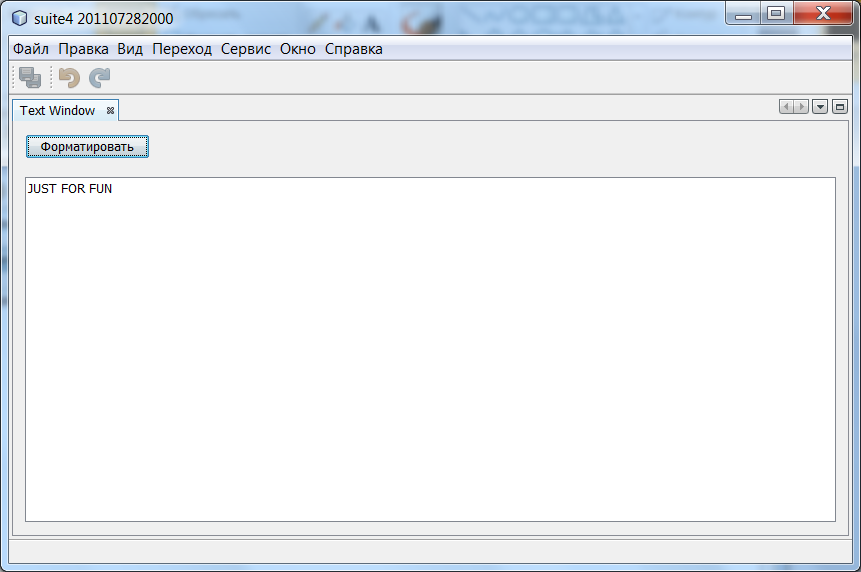
On the opened form, throw a “Text field” and a button.

Rename "jTextArea1" to "text". Next, double-click on your button and paste in the following code: Run the project (F6 key). In the window that appears, select “Window” -> “Text” and a window will appear on the screen, which is described in our module.
In this section, we will create two additional modules. The first module, “TextFilterAPI”, contains the service provider's interface. And the second module, UppercaseFilter, is a service provider for the interface. The GUI module written earlier will in no way refer to the UppercaseFilter service provider code. This is possible because UppercaseFilter will be registered in the META-INF / services folder and loaded using the Netbeans Lookup class, which is similar to the ServiceLoader class from JDK6.
In the project window, create a module called TextFilterAPI. Click “Next” and enter “org.word.editor.api” and “Finish” in the code name field. In the new module, create the TextFormater interface, as follows:
In the properties of the TextFilterAPI module, go to the tab "API Versions" and in the list of public packages put a daw in front of "org.word.editor.api".

We create another module with the name “UppercaseFilter” and the code name “org.word.editor.uppercase”. We open the properties of this module, in the “Libraries” tab add dependencies on “TextFilter” and “Lookup API”.
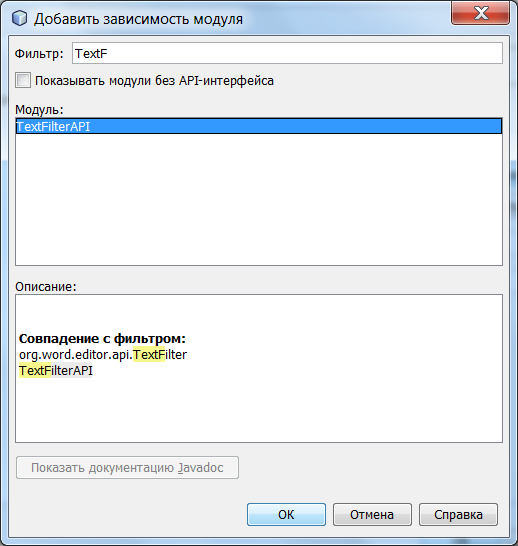
After that, we create the UppercaseFilter class in the package “org.word.editor.uppercase” as follows: Now we move on to the first module responsible for the GUI. In his svostva we establish dependence on "TextFilterAPI" and we change the code of processing a button click to the following: Now you can start the application. You can add the LowercaseFilter module in the same way, which will automatically process the text.
In essence, the Netbeans Platform is an analogue of the Eclipse RCP (Rich Client Platform), only based on Swing, not SWT. I’m not going to find out which is better. There is an opinion that the Netbeans Platform is easier to learn, less “buggy” and, since it is based on Swing, supports more platforms and the application created on it looks the same everywhere. However, some things are missing in it.
Each individual opportunity in the application on Netbeans Platform can be represented by a separate module, which, in turn, is comparable to a plug-in. The Netbeans module is a group of Java classes that provides the application with specific functionality.
Unfortunately, there is very little material in Russian. More precisely, I did not find anything. You should add the netbeans.org/features/platform/all-docs.html page to your bookmarks, there is almost everything that you might need.
Getting to work.
To get started, you should download the Netbeans IDE with support for the Netbeans Platform. We follow this link: netbeans.org/downloads/index.html and download any version where there is a daw opposite the "NetBeans Platform SDK".
As an introduction, we’ll create an application that somehow transforms the entered text.
We launch IDE, in the File menu we select the Create Project item. Next, in the window that opens, select “Netbeans Modules” -> “Application for the Netbeans Platform”. Click “Next”, write some name of the project and the directory where it will be stored. In the end, click Finish.
The development environment will create a new project in which there is nothing, but despite this, you can run it. As you can see, the list of modules is empty, let's create a new module for the window in which there will be an input field and an action call button. To do this, right-click on "Modules" -> "Add New ...". Again, we come up with a name and click "Next." After that, write the code name “org.word.editor.core”, and click the “Finish” button.
The result is a new module, it can be seen in the list of projects. Right-click on it, select "Create" -> "Other". In the window that opens, in the category "Development of modules" select "Dialog", "Next". Put the position of the main window “editor”, again “Next”, write “Text” in the class name prefix and “Finish”.
On the opened form, throw a “Text field” and a button.
Rename "jTextArea1" to "text". Next, double-click on your button and paste in the following code: Run the project (F6 key). In the window that appears, select “Window” -> “Text” and a window will appear on the screen, which is described in our module.
private void jButton1ActionPerformed(java.awt.event.ActionEvent evt) {

    text.setText(text.getText().toUpperCase());

}
A modular application using Lookup.
In this section, we will create two additional modules. The first module, “TextFilterAPI”, contains the service provider's interface. And the second module, UppercaseFilter, is a service provider for the interface. The GUI module written earlier will in no way refer to the UppercaseFilter service provider code. This is possible because UppercaseFilter will be registered in the META-INF / services folder and loaded using the Netbeans Lookup class, which is similar to the ServiceLoader class from JDK6.
In the project window, create a module called TextFilterAPI. Click “Next” and enter “org.word.editor.api” and “Finish” in the code name field. In the new module, create the TextFormater interface, as follows:
package org.word.editor.api;


public interface TextFilter {

    String process(String s);

}
In the properties of the TextFilterAPI module, go to the tab "API Versions" and in the list of public packages put a daw in front of "org.word.editor.api".
We create another module with the name “UppercaseFilter” and the code name “org.word.editor.uppercase”. We open the properties of this module, in the “Libraries” tab add dependencies on “TextFilter” and “Lookup API”.
After that, we create the UppercaseFilter class in the package “org.word.editor.uppercase” as follows: Now we move on to the first module responsible for the GUI. In his svostva we establish dependence on "TextFilterAPI" and we change the code of processing a button click to the following: Now you can start the application. You can add the LowercaseFilter module in the same way, which will automatically process the text.
package org.word.editor.uppercase;


import org.openide.util.lookup.ServiceProvider;

import org.word.editor.api.TextFilter;


@ServiceProvider(service=TextFilter.class)

public class UppercaseFilter implements TextFilter {

    public String process(String s) {

        return s.toUpperCase();

    }

}
private void jButton1ActionPerformed(java.awt.event.ActionEvent evt) {
String enteredText = text.getText();
Collection allFilters = Lookup.getDefault().lookupAll(TextFilter.class);
StringBuilder sb = new StringBuilder();
for (TextFilter textFilter : allFilters) {
String processedText = textFilter.process(enteredText);
sb.append(processedText).append("\n");
}
text.setText(sb.toString());
}