SSH authentication with eToken Pro USB dongle
In this article, I will tell you how to configure SSH authentication using the eToken USB dongle.
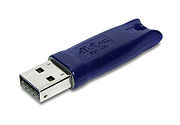
To do this, we need:
- Actually the eToken Pro USB dongle itself (in my case it is eToken Pro 64k)
- Windows operating system with installed eToken PKI Client drivers
- Mozilla Firefox with the installed Key Manager plugin
- SSH client with support for smart cards. Personally, I like PuTTY SC - a modified version of PuTTY.
It is assumed that you already have an initialized USB key with the installed PIN code, it is connected to the computer and ready to work.
Create a public / private key.
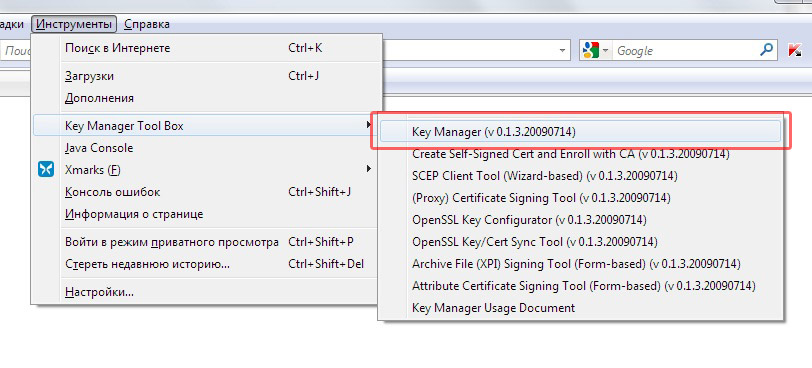
1) Launch Firefox and open the Key Manager (Tools -> Key Manager Tool Box -> Key Manager)
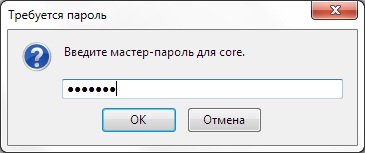
2) Enter the user password for eToken
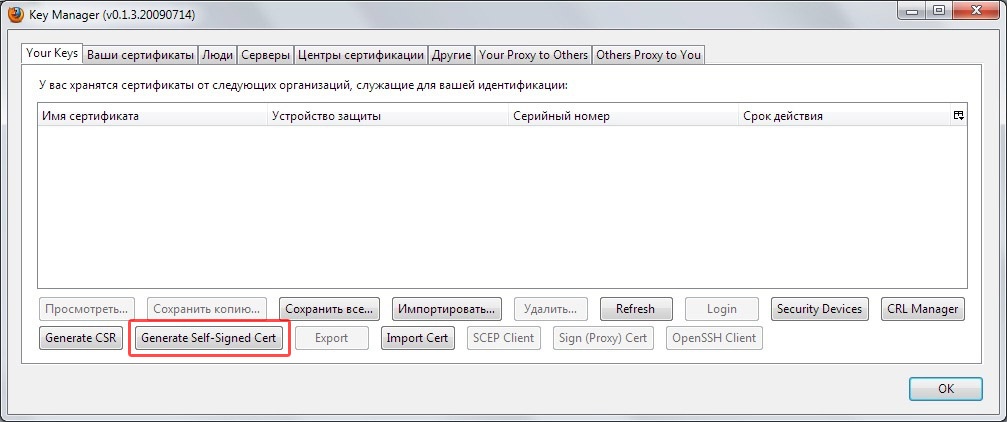
3) In the main menu of Key Manager select "Generate Self-Signed Cert"
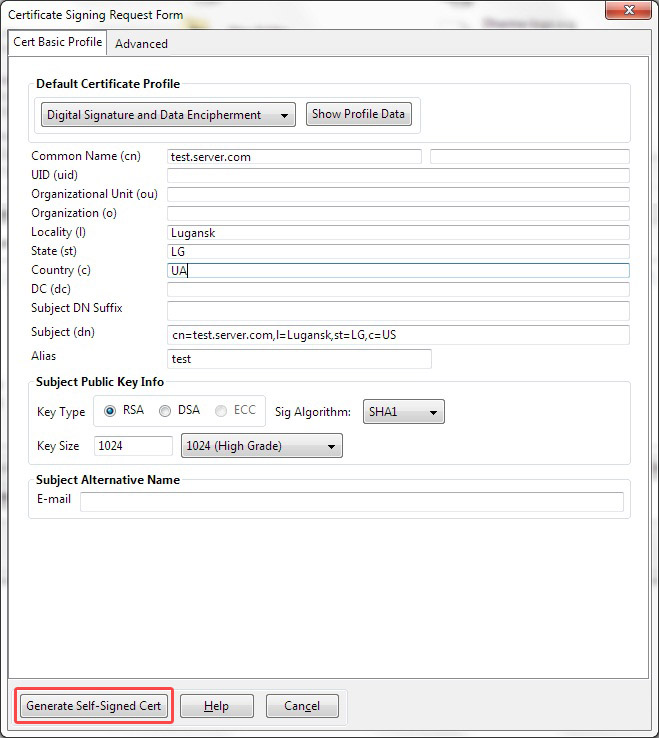
4) Fill in the fields as shown on Figure and click "Generate Self-Signed Cert". Naturally, you need to enter your data, such as city, country, and fqdn server. Also, optionally, you can specify additional properties of the certificate - validity period, etc.
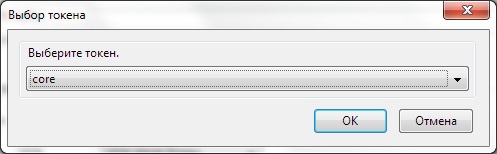
5) Select the desired token from the list and click "OK." Please note that if you generate the certificate immediately on the token, then it will be impossible to export the private key later.
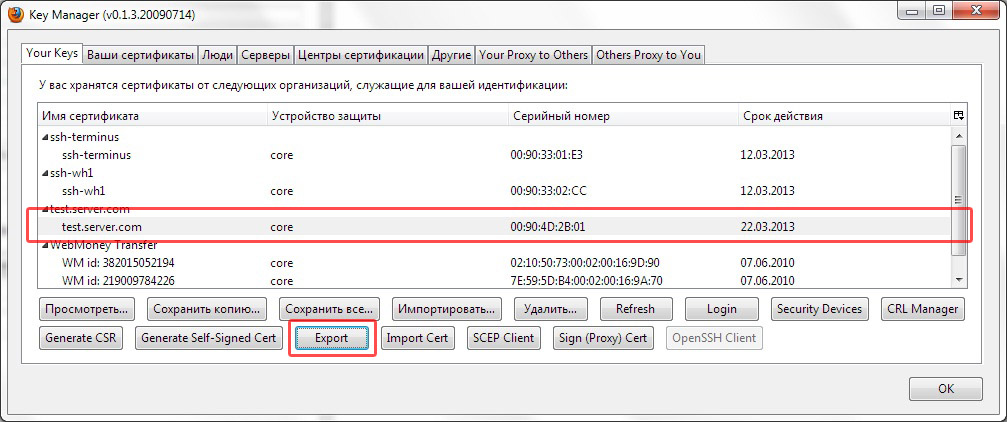
6) In the main menu of Key Manager, highlight the newly created certificate, and click the “Export” button
7) In the window that appears, select the format "OpenSSH Pubkey" and click the "OK" button.

As a result, we get a line like the one below. This is our public key - save it, we will need it in the next step. Configure authentication by key on the server. The server in my case is a machine with Debian Lenny installed. You need to make sure that sshd configuration allows authentication using public keys. To do this, in the sshd_config file , specify the value of the PubkeyAuthentication parameter in yes . Then to the file "~ / .ssh / authorized_keys"
add our public key received earlier (in one line). Please note that the file ".ssh / authorized_keys" is located in the home directory of the user who will then log in using the public key.
Configure PuTTY SC SSH client to use smart cards.
PuTTY SC is a modified version of PuTTY. The only significant difference from the original version is support for smart cards.
The setting in this case is almost no different from ordinary connections - you need to specify the server address, connection type, keyboard type, encoding.
To use authentication with a smart card, go to the “Connection -> SSH -> Pkcs11” section , check the box “Attempt PKCS # 11 smartcard auth (SSH-2)”, specify the path to the eToken library - “C: \ Windows \ System32 \ eToken.dll” , select the token name and private key from the list that we created earlier.

When connected, you will be asked to enter a custom PIN code to the USB key.
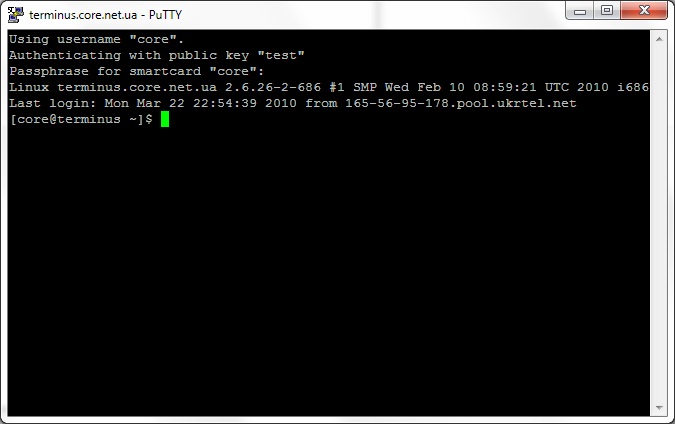
Congratulations, you can now use SSH authentication with eToken Pro!
Note: undoubtedly, keys can be generated in various ways using different software and various operating systems. The bunch of Windows + Firefox was chosen as the most simple and intuitive.
Another note: to your taste, you can disable other authentication methods on the server, leaving only authentication by key.
To do this, we need:
- Actually the eToken Pro USB dongle itself (in my case it is eToken Pro 64k)
- Windows operating system with installed eToken PKI Client drivers
- Mozilla Firefox with the installed Key Manager plugin
- SSH client with support for smart cards. Personally, I like PuTTY SC - a modified version of PuTTY.
It is assumed that you already have an initialized USB key with the installed PIN code, it is connected to the computer and ready to work.
Create a public / private key.
1) Launch Firefox and open the Key Manager (Tools -> Key Manager Tool Box -> Key Manager)
2) Enter the user password for eToken
3) In the main menu of Key Manager select "Generate Self-Signed Cert"
4) Fill in the fields as shown on Figure and click "Generate Self-Signed Cert". Naturally, you need to enter your data, such as city, country, and fqdn server. Also, optionally, you can specify additional properties of the certificate - validity period, etc.
5) Select the desired token from the list and click "OK." Please note that if you generate the certificate immediately on the token, then it will be impossible to export the private key later.
6) In the main menu of Key Manager, highlight the newly created certificate, and click the “Export” button
7) In the window that appears, select the format "OpenSSH Pubkey" and click the "OK" button.
As a result, we get a line like the one below. This is our public key - save it, we will need it in the next step. Configure authentication by key on the server. The server in my case is a machine with Debian Lenny installed. You need to make sure that sshd configuration allows authentication using public keys. To do this, in the sshd_config file , specify the value of the PubkeyAuthentication parameter in yes . Then to the file "~ / .ssh / authorized_keys"
ssh-rsa AAAAB3NzaC1yc2EAAAADAQABAAAAgQDL9ViU3+/80xZka0G91eoDyNuPT4eb1/8ro0iZEBnRI7+B+LwJbWrvqfJxNQluMiGPhftBCao4VjCcby21g0q+1sp42MR1bPD8BgA42ZDuum/sq5gFEM16n+g8+bXxtoZ/kF2bPJ4fGsowmdQCc8I7xECcYazz2AG8oZqU9l0anw==
add our public key received earlier (in one line). Please note that the file ".ssh / authorized_keys" is located in the home directory of the user who will then log in using the public key.
Configure PuTTY SC SSH client to use smart cards.
PuTTY SC is a modified version of PuTTY. The only significant difference from the original version is support for smart cards.
The setting in this case is almost no different from ordinary connections - you need to specify the server address, connection type, keyboard type, encoding.
To use authentication with a smart card, go to the “Connection -> SSH -> Pkcs11” section , check the box “Attempt PKCS # 11 smartcard auth (SSH-2)”, specify the path to the eToken library - “C: \ Windows \ System32 \ eToken.dll” , select the token name and private key from the list that we created earlier.
When connected, you will be asked to enter a custom PIN code to the USB key.
Congratulations, you can now use SSH authentication with eToken Pro!
Note: undoubtedly, keys can be generated in various ways using different software and various operating systems. The bunch of Windows + Firefox was chosen as the most simple and intuitive.
Another note: to your taste, you can disable other authentication methods on the server, leaving only authentication by key.









