How to organize the development and support of a blog on WordPress in 2Q19 and not fix it
Think in advance about scaling, maximize the use of standard Wordpress solutions, make a WP theme with your own hands, take care of the convenience of a layout designer, focus on mobility - and update the company’s blog so that readers, editors and executives love it. We made it.
Promopult 's blog is 9 years old. During this time he went through several transformations. About the latter says Sergei Glazyev , the technology of our blog and other important pieces in Promopult system.
This is no longer discussed, because it has become the norm: a quick and simple standard for a company’s blog, a person, a personal, yes, whatever, WordPress. One can argue, but the fact remains.
I want to talk about what I came to in terms of organizing the code, working with the WordPress blog and its support. This story is about the process, because the current state is the last point in this process and it seems that the current state is the most successful compared to all past iterations in the approaches to the organization.
Первые задачи: мобилизация и дизайн
Как было у нас с работой над кодом
Что хотелось получить, как говорится, «в идеальном мире»
Редизайн, первый подход
Второй подход: новый вариант структуры
Блог PromoPult: как все устроено
Чек-лист перед публикацией
Настройки поста в админке блога
Приятные мелочи
Про интересное техническое
Какие плагины используем
Советы-выводы для тех, кто работает на блогом компании
What was at (my) start - in 2016
It’s rare when a developer creates and thinks through everything from scratch. More often, it turns out so that already ( often even a long time ago, with a separate history ) there is a project that needs to be supported. Redesign, edits, huge TK and requirements. And in the conditions of the existing everything, it is necessary to somehow quickly navigate and solve problems.
I accepted the blog in 2016, when it already had a long history and not everything is as beautiful as I wanted.
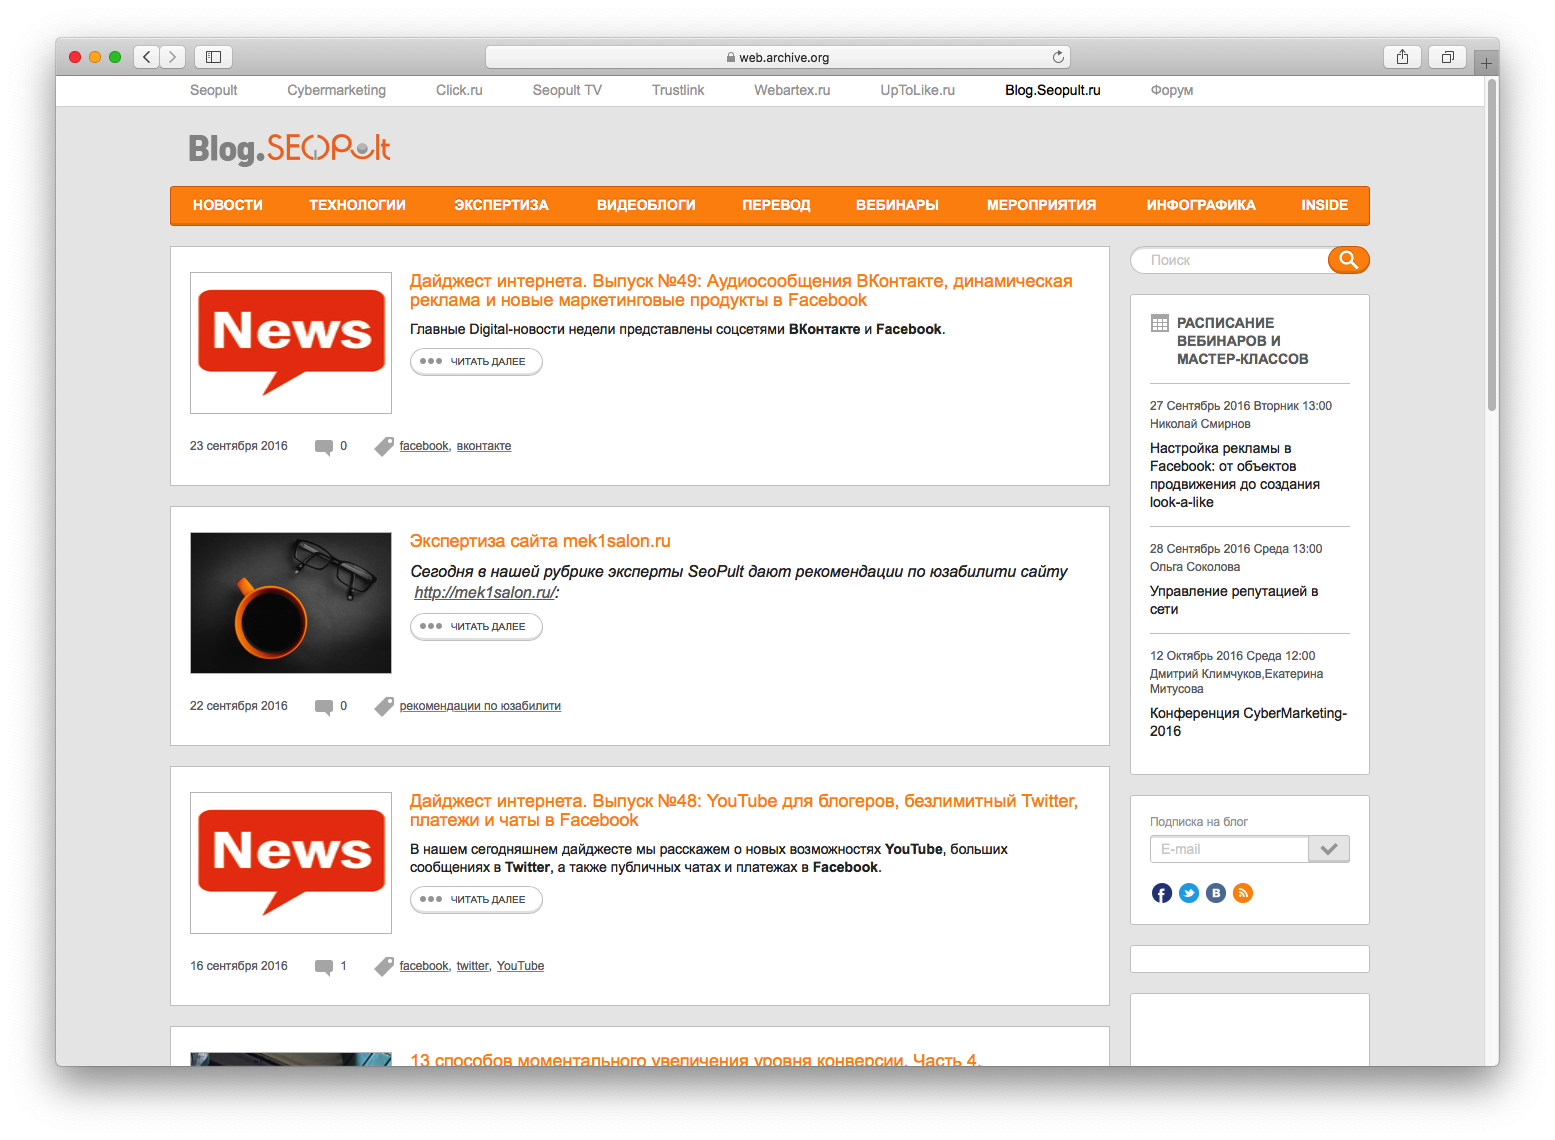
- Old blog design with a nine year history.
- The lack of a mobile / tablet version in any form.
- More than 600 posts.
- Structural problems with content and its organization: 20+ categories and nine-plus hundreds of tags (now more, but we have already stopped).
- The plans already have rebranding and moving to a new domain. This also applies to the blog.
- A long chain of actions when working with code.
- Work without version control (.git).
First tasks: mobilization and design
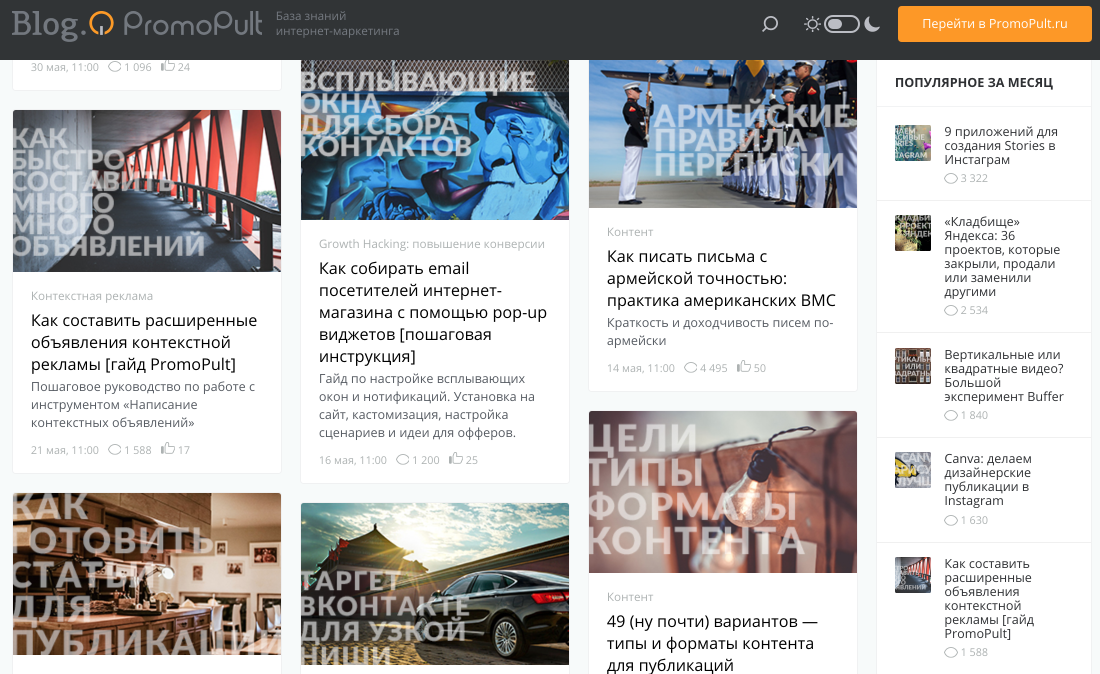
The primary task was to add adaptability to the existing theme of the blog: to make mobile users able to read posts and use the site adequately - they talked and wrote about Mobile First more and more, and statistics showed that they read the blog from mobile.

In parallel with these works, a new design was drawn.
As a developer, I was paired with a designer, without an unnecessary chain of mediators in the discussion, so the communication process was faster and more lively. The obvious fact, of course, but for some reason it is neglected in many processes. And it turns out that the designer is doing something very divorced from reality. Talk with your mouth and discuss all the points. Each participant in the process is interested in doing good and cool. But not everyone understands that the process is a connected chain, and if an individual performer misses or doesn’t do something at his site of work, it will be difficult for the next people in the process.
In the course of work on the mobile version, I saw the disadvantages and weaknesses of the organization of the development process. I wanted to speed up and simplify everything.
As we had with the work on the code on the blog
There was a DEV version of the blog with a separate test database. Work with files took place on a remote server, testing took place at a separate address, inaccessible in the outside world. After work, testing and the birth of a certain unit of meaning - it was rolled out to the battle blog through an appeal to the admin. What he did was a separate magic.
For a blog where something changes once a year, a great process. But with the new edition and its needs, such a process would be a big pain.
What I wanted to get, as they say, "in an ideal world"
All code lies in. git repositories. The combat version of the blog is the masterhighlight of this repository. All work with the code occurs through commits to the devbranch or other branches associated with individual large tasks.
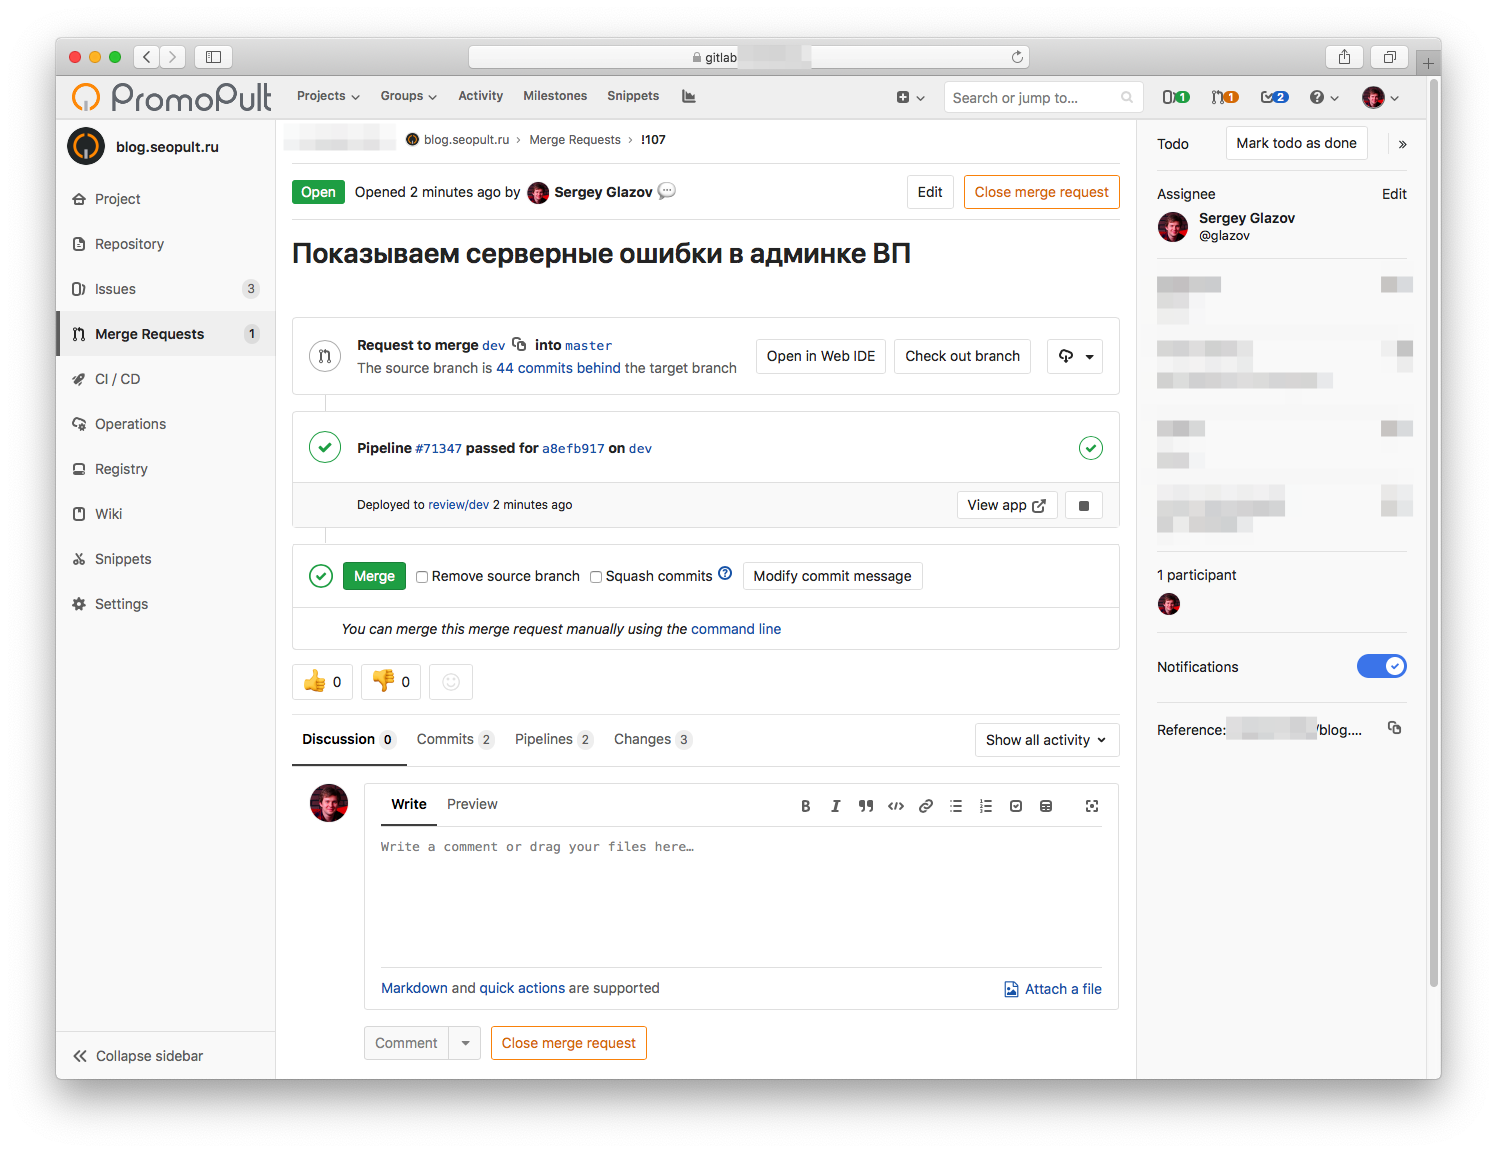
After the task is done, a Pull Request (PR) and / or Merge Request (MR) is created with a set of edits. The meaning in MR and PR is the same, but in different services - a different name. We have GitLab , so Merge Request.
When MR is created, a temporary address of the view becomes available имя-git-ветки-test.dev.blog.promopult.ru, accessible only by IP for live verification on the test environment.
The code in the created MR is reviewed and checked automatically (code linter, which I check the syntax according to predefined rules) and in manual mode (power vertical in the team, the timlid carefully looks at it with its naval convex attentive eye). After passing the review - from the browser interface of the .git repository, the “Merge” button is pressed and all the changes appear on the air of the combat blog after some brief obvious period of time.
Redesign, first approach
Blog redesign work plan:
- Layout of a static prototype for design layouts of all pages;
- Turning ("stretching") layout into a WordPress theme.
Layout - a separate stage of work. For convenient work with styles (CSS), markup and JS, a set of plug-ins and modules was used in the project, which is assembled through the Gulp tasks described in the SPT (Start Project Template) builder.
The keywords that are used in the collector of a static blog topic are: HTML, CSS, JS, Babel, Gulp, PostCSS, SCSS, Nunjucks.
Upon completion of the layout, the structure was as follows ( only first level directories are indicated ):
├── design # Design, layouts and all
├── app / # Project sources: separate modules
├── dist / # The assembled version of the project (html-files) and all the statics
├── gulpfile.js / # Config Gulp.js
└── package.json # Collector config file: packages, scripts
Each individual visual semantic element on the page, for example, a post card ( /components/article_card/), was a folder in which it was:
- markup file ( article_card.html),
- styles file ( article_card.scss),
- JS ( article_card.js) file .
And each page was assembled from such separate component blocks. Blocks are convenient to manipulate, and any changes do not affect neighboring elements.
At the output, the collector created a folder distcontaining ready-made html-files of pages for visual viewing in the browser at the stage of editing and coordination, as well as one style file, all themes and two JS-files: one file ( app.js) described the logic and behavior of the site, the second ( vendor.js) contained all the libraries used for the site (jQuery, fotorama, magnific-popup and others).
Then you need to turn all this into a WordPress theme and think over the file structure. So that you can conveniently work with a static layout, and next to it lay a WP-theme.
List of layouts prepared by the designer. They are the same as the WordPress blog theme files:
- Main page (file
home.php). - Single post / post page (
single.php). - View of a single text page (
page.php). - Newsletter Subscription Page (
subscribe.php). - Error 404 (
404.php). - Separate tag page (
tag.php). - Separate category page (
category.php). - Search and search results (
search.php).
The workflow with this approach and the separation into the static version and the WordPress-version of the theme is as follows: if you need to fix something in the visual part, the changes are made in the static version and are transferred to the theme after the test. If edits are needed in some non-visual part, then only WP-theme files are changed.
Blog Topic Folder bsp. It is located along the path in the folder with the topics of the blog itself:
├── wp-content / # Custom WordPress site files
│ ├── themes / # Site themes
│ │ ├── app / # Sources of a static theme
│ │ │ ├── gulpfile.js / # Gulp-tasks for assembly
│ │ ├── dist / # Build a static topic
│ │ │ ├── assets / # Resources: JS, CSS and graphics
│ │ ├── bsp / # WP-PromoPult Blog Theme
│ │ │ ├── assets / # Resources: JS, CSS and graphics, copying from `/ dist /`
│ │ │ ├── home.php # The main page of the blog and other files at the root of the topic
The place of the wordpress theme is obvious and predetermined by the file structure of WordPress itself.
There are no other topics in the themes directory - everything standard has been deleted. There is a myth about increasing productivity in this way, but we did not notice this. This is done more for order in the code. No need to store what is not used and will definitely not be used.
Also in .git are all the WP plugins that are used. On our site, these are Google XML Sitemaps, RSS for Yandex Turbo, RusToLat and WP-PostViews.
The static, compiled prototype of the blog pages and source files were moved to the blog theme directory: to interact conveniently with the logical part of the template and with everything that is responsible for the appearance and behavior of the elements on the page.
A static version of the project assembly - with the sources and all the dependencies in the first attempt to organize the structure - was placed in the themes directory.
That is, next to the main topic bsp, a directory was added /appin which the source code of the layout of the topic and the gulp-collector are placed. But in this version there was one difficult moment: static files were generated in a separate directory, and in order for the changes to be in the WP-theme, it was necessary to copy the static files of styles and scripts to a folder assetsinside the theme.
Second approach: a new version of the structure
In the first weeks, this was decided by a simple console script that copied the collected files from a static theme to a WP theme. Excessive action leads to errors. Therefore, the option was only to correct the structure.
We have three important directories (all the way from the root):
- WP theme:
/wp-content/themes/bsp - Sources of a static theme:
/app - Collected static theme:
/dist
And inside it - assetswith style files, graphics and JS
You need to arrange everything so that the files of statics of styles and scripts are collected in the desired folder ( /wp-content/themes/bsp/assets).
The new version of the structure was as follows:
├── gulpfile.js / # Gulp-tasks for assembly
├── wp-content / # Custom WordPress site files
│ ├── plugins / # WP-plugins
│ ├── themes / # Site themes
│ │ ├── bsp / # PromoPult Blog Topic
│ │ │ ├── app / # Sources of a static topic
│ │ │ ├── assets / # Resources: JS, CSS and graphics (auto-generation)
│ │ │ ├── home.php # The main page of the blog and other files at the root of the topic
├── wp-admin / # WP-files for admin panel
├── wp-includes / # WP-files of the system
At the root of the whole project are gulp tasks - and are executed from the root. The configuration of gulp-tasks describes the structure that static files are collected from a directory wp-content/themes/bsp/appin wp-content/themes/bsp/assetswithout any additional actions such as copying, etc.
WP-theme files remain unchanged and the work proceeds according to the old scenario: edits in statics → transfer to WP-files. CSS and JS statics are generated immediately in the theme folder and everything just works.
All this was about the work process. Now about how the blog is arranged.
PromoPult Blog: How It Works
The main power of the blog is the team. Editor, authors, layout designers.
The big task is to make working with blog content convenient in the admin area. And taking into account the fact that the topic of our blog was made specifically for content tasks and editorial requests, the admin panel was modified accordingly.
Checklist before publication
Any work is important to control. The layout of the article is a standard, formalized process, which can be easily presented in the form of a check list.
The guys saw the idea from EmailSoldiers . We decided to apply at home.
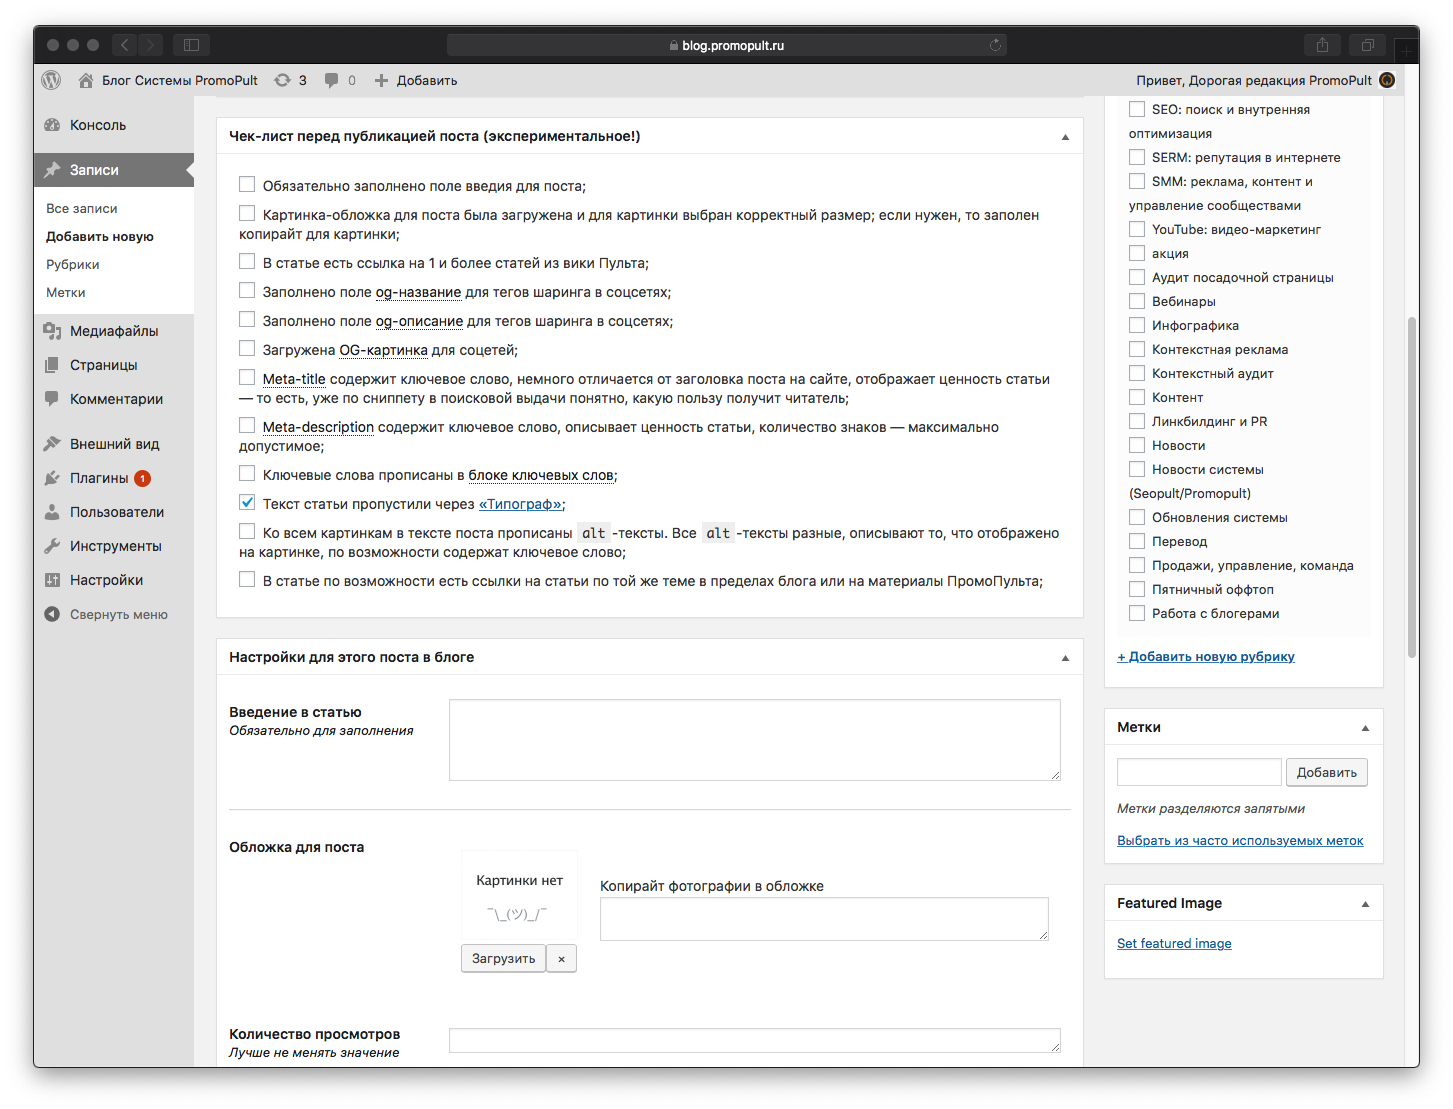
If any item is not checked, the system will warn you before publication.
By clicking on the links, underlined links in the list item - highlight a specific item.
The checklist is compiled in the same order as the additional post settings in the admin panel.
Blog post settings
Closely interwoven with the publication checklist described above.
When developing the topic, I tried not to use plugins, but to make a simple and easy solution for the tasks of the topic. Highlights:
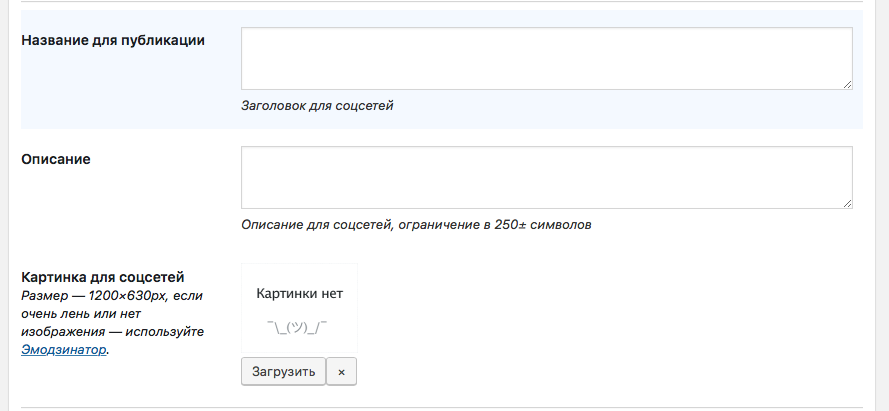
- Descriptions for SEO meta tags.
- Descriptions for OpenGraph tags that use social networks to share material and form nice article cards.
- Convenient work with cover pictures for posts. One picture is required - it is added to the post card in the publication tile, which is displayed on the main page and on the heading or tag page.
- Additional theme settings: a post can be with or without a cover, there is a short announcement text that we show in the header with a cover, and it is also used in the description of the article in the digest mailing list.
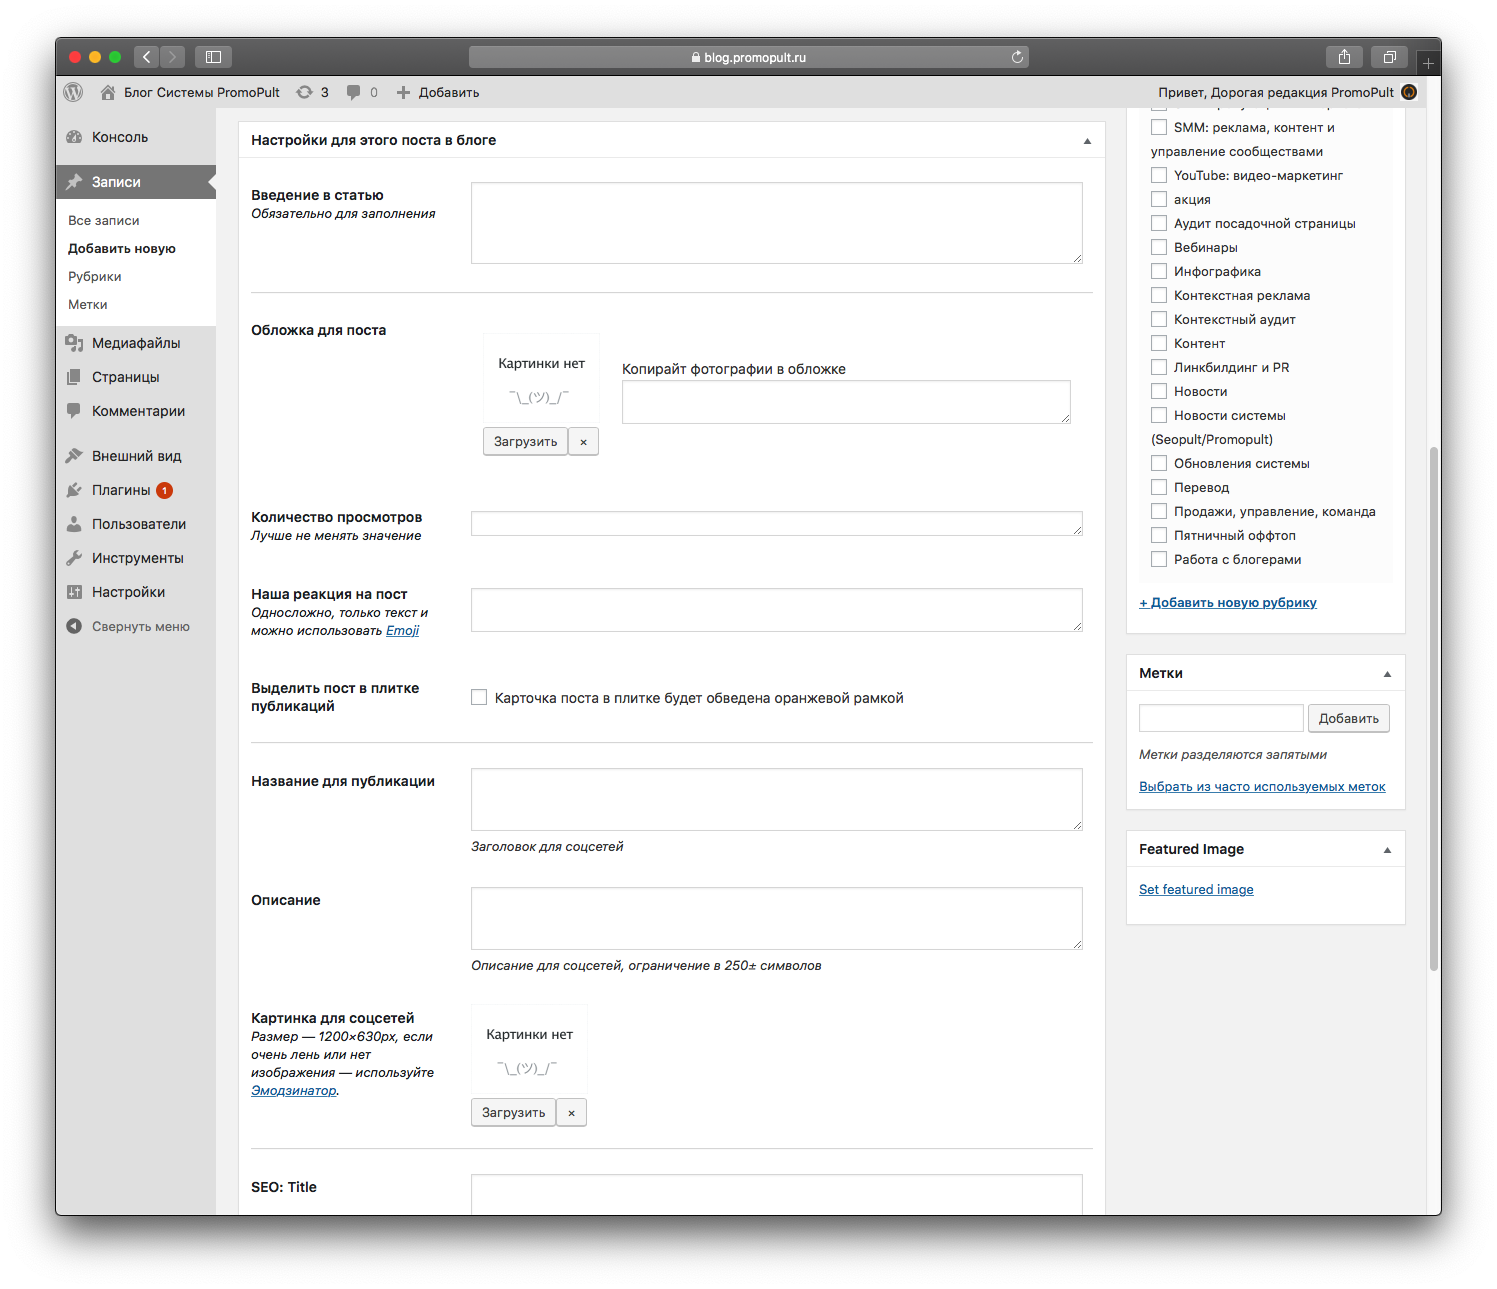
The post settings section is implemented through meta-boxes and custom fields in WordPress.
Through the meta-box, a publication checklist has been added.
In templates, working with fields is simple: if the field is not empty and filled, we get the value and show it. For example, this is how the block reaction to the post is displayed:
<?phpif (get_post_meta($post->ID, 'postreaction', true)) { ?>
<div class="article_reaction">
<divclass="label-reaction"><span><?phpechoget_post_meta($post->ID, 'postreaction', true); ?></span></div>
</div><!-- /.article_reaction -->
<?php } ?>
An example of a reaction output on a post card:

Pleasant trifles
There are some nice little things that maybe no one sees. But if someone noticed - good.
For example, the dates of publication of a post in cards and in a separate post in our Cyrillic alphabet and know how to bow. For some reason, this is not in the WordPress box. If the publication date is in the current year, then the year is not shown with us, if the year differs from the current one, the date is displayed together with the publication year.
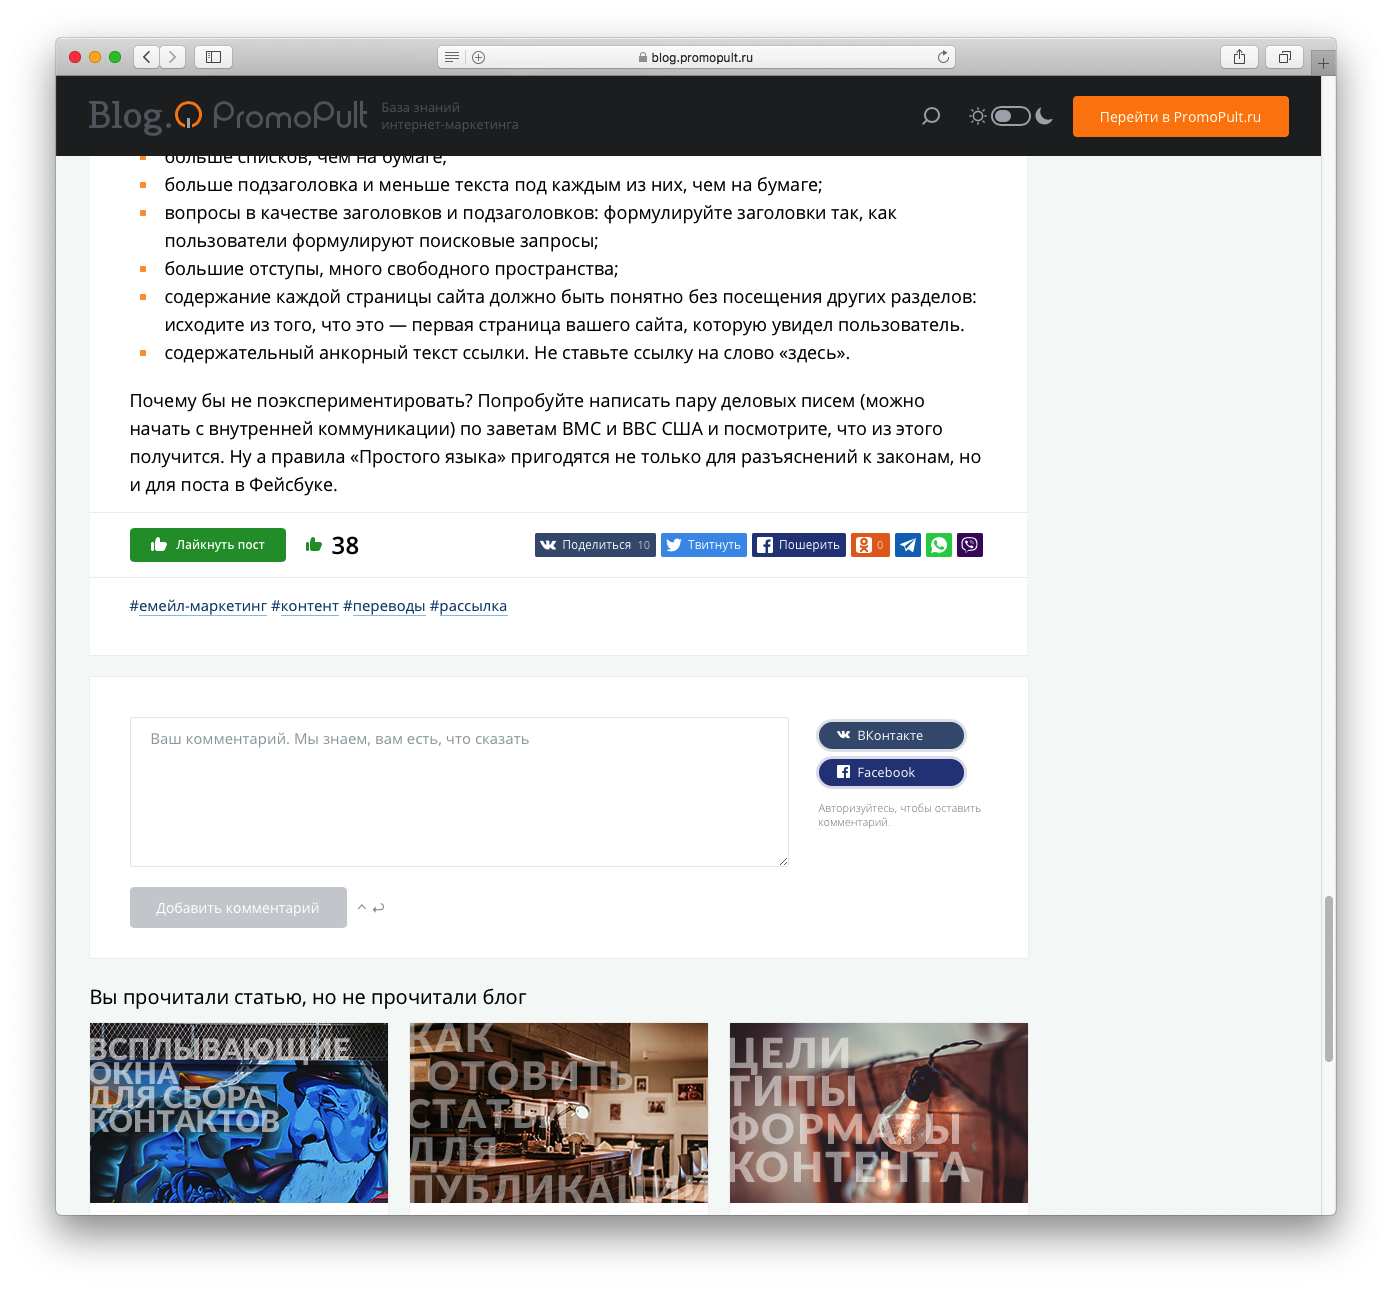
Post comment counter. They argued for a long time that “0 comments” or “no comments” is very confusing. The solution is very simple: do not show the comment counter at all if there are less than one comments.
In general, we are working on a comment system separately and would like to talk about it in a separate large post. We make a simple and convenient comment system with simple authorization through social networks.
Own likes: commenting on or sharing links in social networks is a long matter by the rate of content consumption, but click on “like” and make it clear that the article is cool - simple and quick. We made our simple likes and put the counter on the post card. And the likes arrive pretty fast. And since they are at the bottom of the article, it is also a signal that the text has been read.
They made a dark theme for their blog - now it’s fashionable. Given the modular structure (in fact, the site is a set of blocks that are somehow combined among themselves) and the organization of styles, it turned out to be done pretty quickly.
About an interesting technical
There is minification of markup code , CSS and JS in the topic . CSS and JS are compressed through gulp tasks in the statics collector, but the minification of the markup is done through a WordPress hook WP_HTML_Compression.
And in the comments in the markup, we added a promotional code for those who are interested in how the site is arranged from the inside and who first of all goes to look at the source code:

CSS and JS caching. To cache styles and script files, but always be relevant, if we redid something, we use filemtime (). Many in this case use ?<?php echo time(); ?>. But this option downloads the file and makes a request with each call.
Better to use this trick:
<link rel="stylesheet" type="text/css" href="<?php echo get_template_directory_uri(); ?>/assets/styles/style.css?t=<?php echo filemtime(get_theme_file_path().'/assets/styles/style.css'); ?>" />In this case, the files will be downloaded if they have been changed, and the date the file was modified will be added to the request parameter.
What plugins we use
Despite the possibility and desire in some cases to get by with your decision, we still use plugins. Our list is as follows:
- Google XML Sitemaps - to generate an XML sitemap for robots;
- RSS for Yandex Turbo - turbo pages for Yandex;
- RusToLat - transliteration of Russian characters URL into English;
- WP-PostViews - counts views of materials;
- Classic Editor - includes the classic WordPress editor instead of the new block Gutenberg;
- Limiting authorization attempts is for security: with a few erroneous login attempts, we ban an incoming one for a custom period of time;
- AMP - AMP pages for Google.
Conclusion tips for those working on a company’s blog
- I advise you at the beginning of work on the project to immediately think about scaling.
- Be sure to use
.gitin work. For 2019, of course, weird advice, but this advice can save someone from gray hair and reprimand when something goes wrong. - It is better to divide the development and work on a WordPress theme into two stages: first, make up something static, and already done “pull” it as a WordPress theme.
- If there is an opportunity - time, a team and an understanding of why you need all this - do it yourself, without using ready-made options. Win in order and understanding how everything works. You will not produce crutches.
- Use standard WordPress hooks and features if your blog is built on it. Customizing and making a convenient solution is quick and easy.
- Make it convenient for the user and the editors.
- Do not forget about social networks and micro-layout.
- Do not forget about mobile versions.
- Do not forget about regular updates to plugins and systems.
- Only select proven plugins.
Work on the blog continues - stay with us.