Install sdl2 on major distributions
Hello, Habr. Recently I came across a new series of articles on sdl2, but without the installation procedure. It seems nothing complicated, but if interested, then let's go together along the rake that may await us. I will install for xcode10 on macOS 10.14.5, code :: blocks on Ubuntu 18.04 and Visual Studio 2019 Windows 10. You could, of course, use clion. One ide on all systems, but for some reason I don’t like their product. Nothing personal, just coding.
For verification, I will use the following code.
We put code :: blocks from the store - there are no surprises. Next, create a simple mian.cpp file for the test.
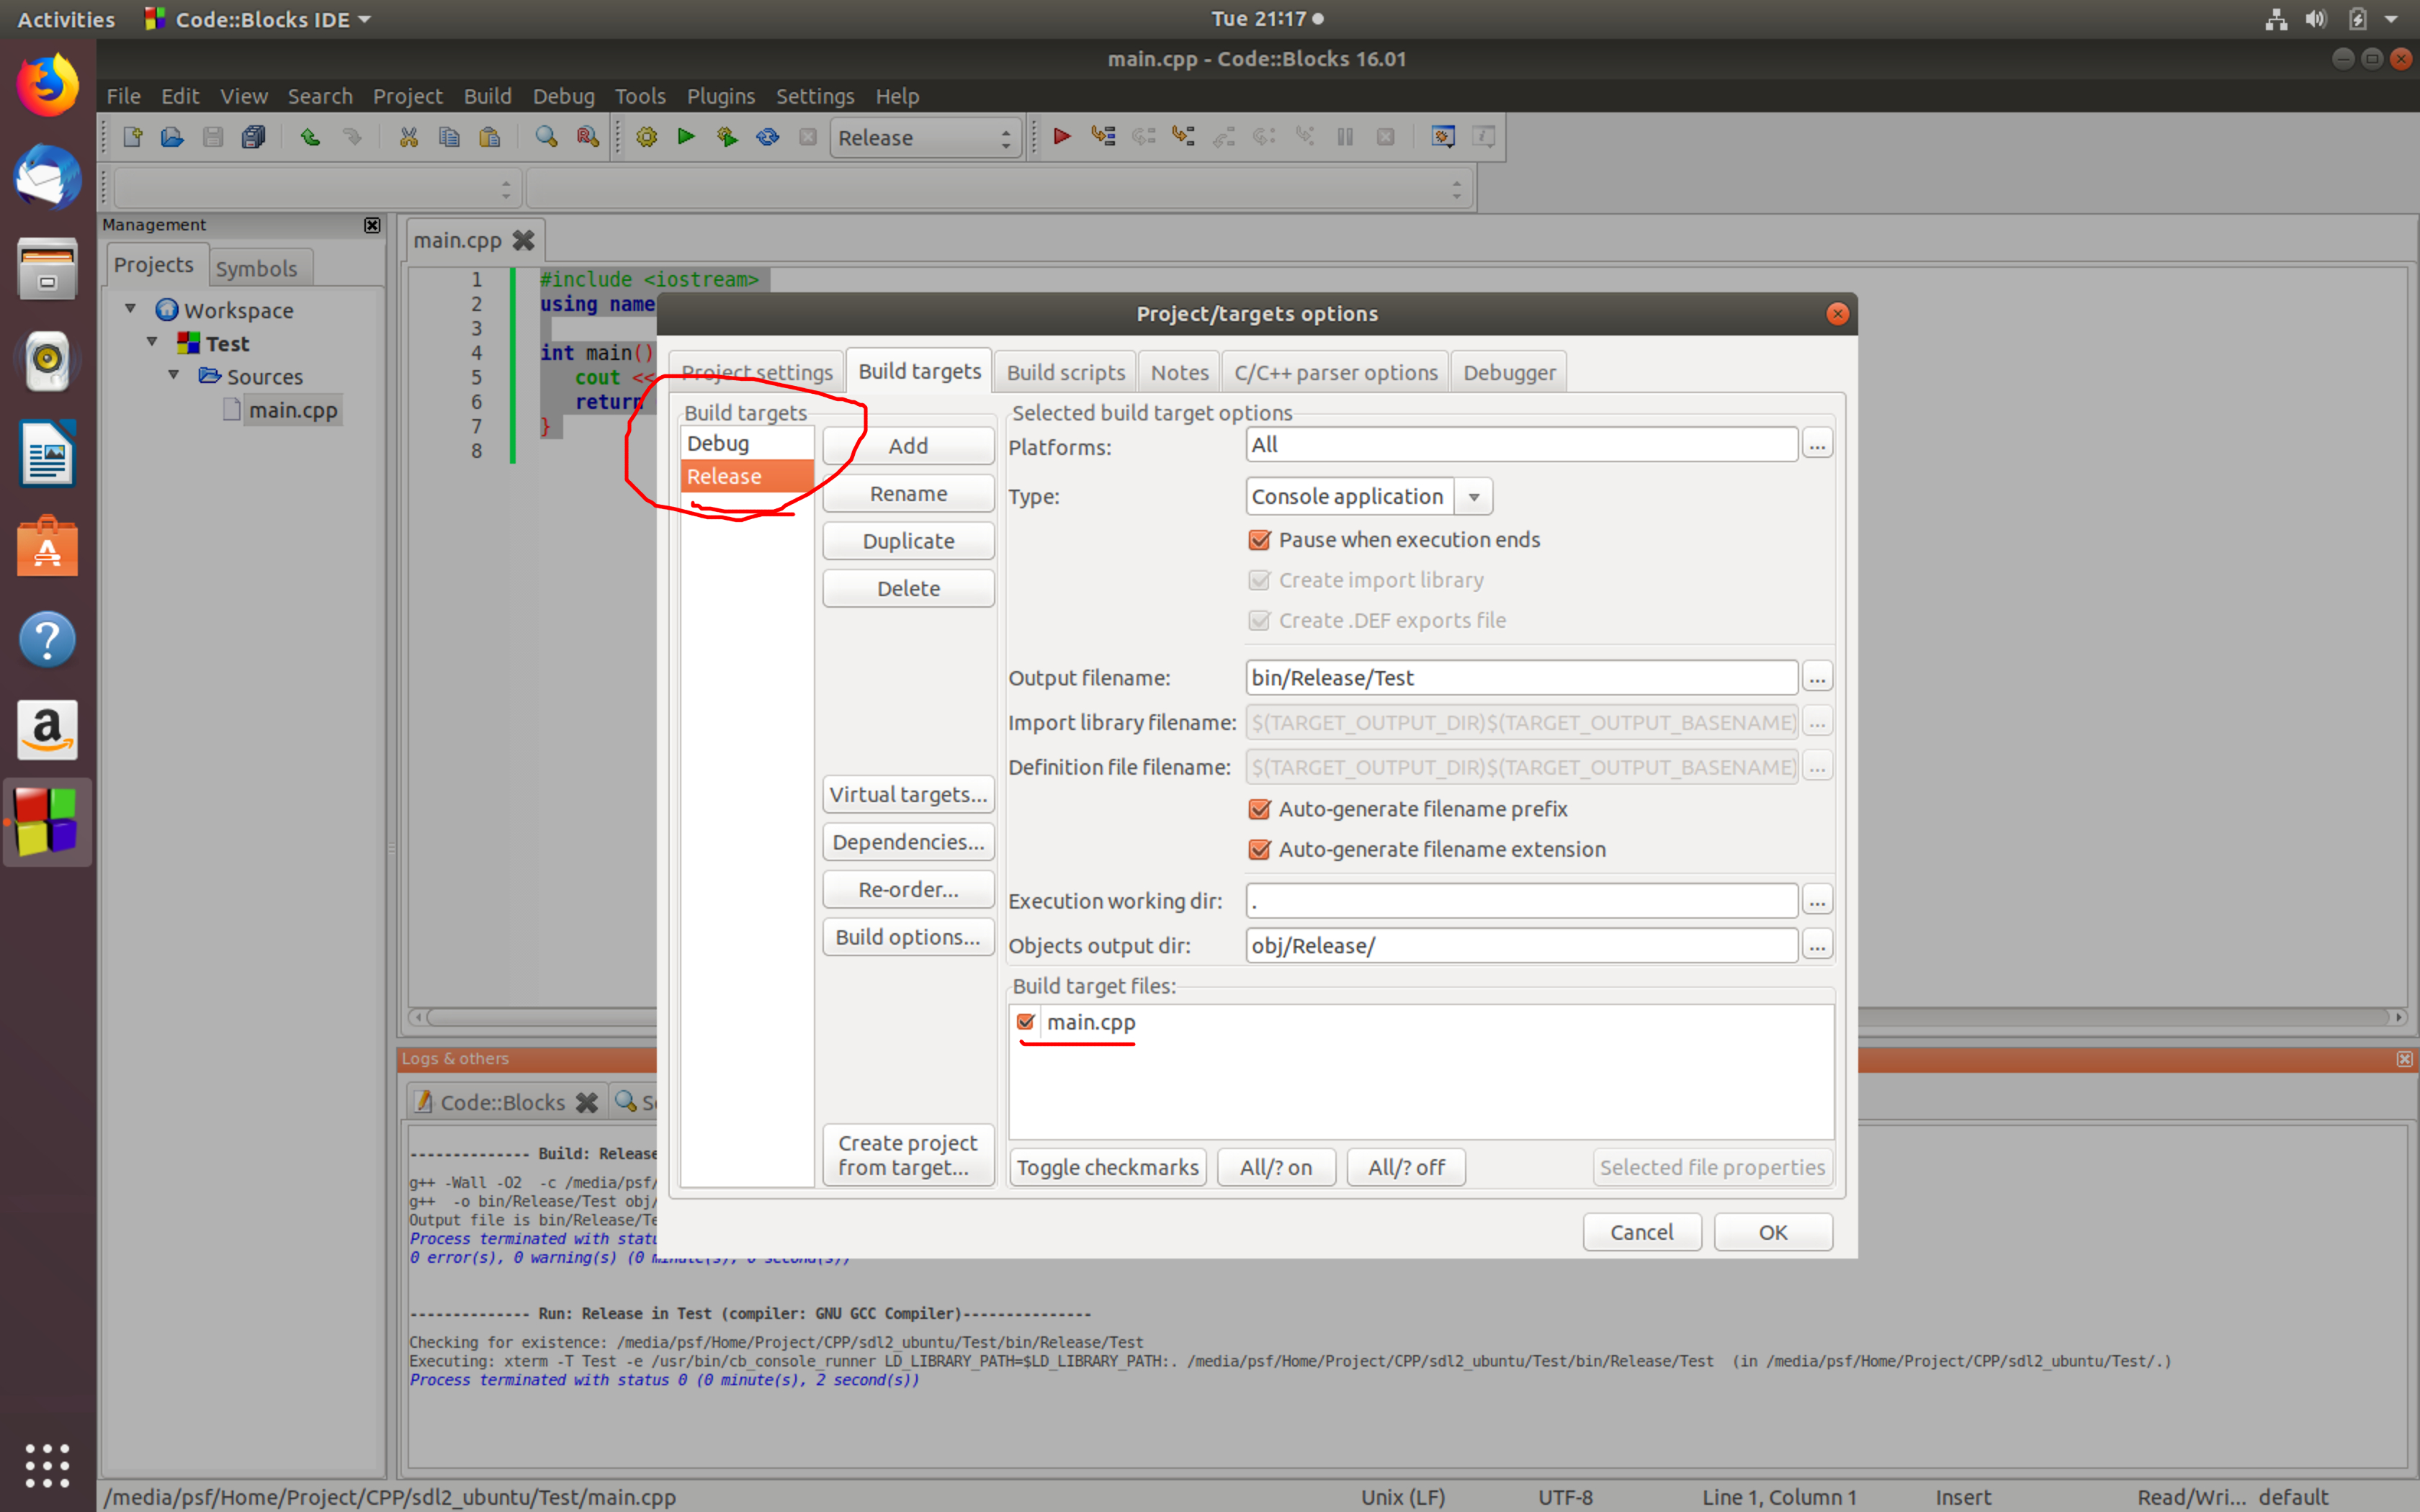
If you are not going to compile from the terminal, then you need to specify target in the project settings.
Excellent. Next, you need to install sdl2 itself. We write in the terminal
After installation, let ide know that you need to use sdl2. Let's go to the section "project" -> "build options". We are interested in the tab “Linker settings”. In the "other linker options" window, add "-lSDL2".

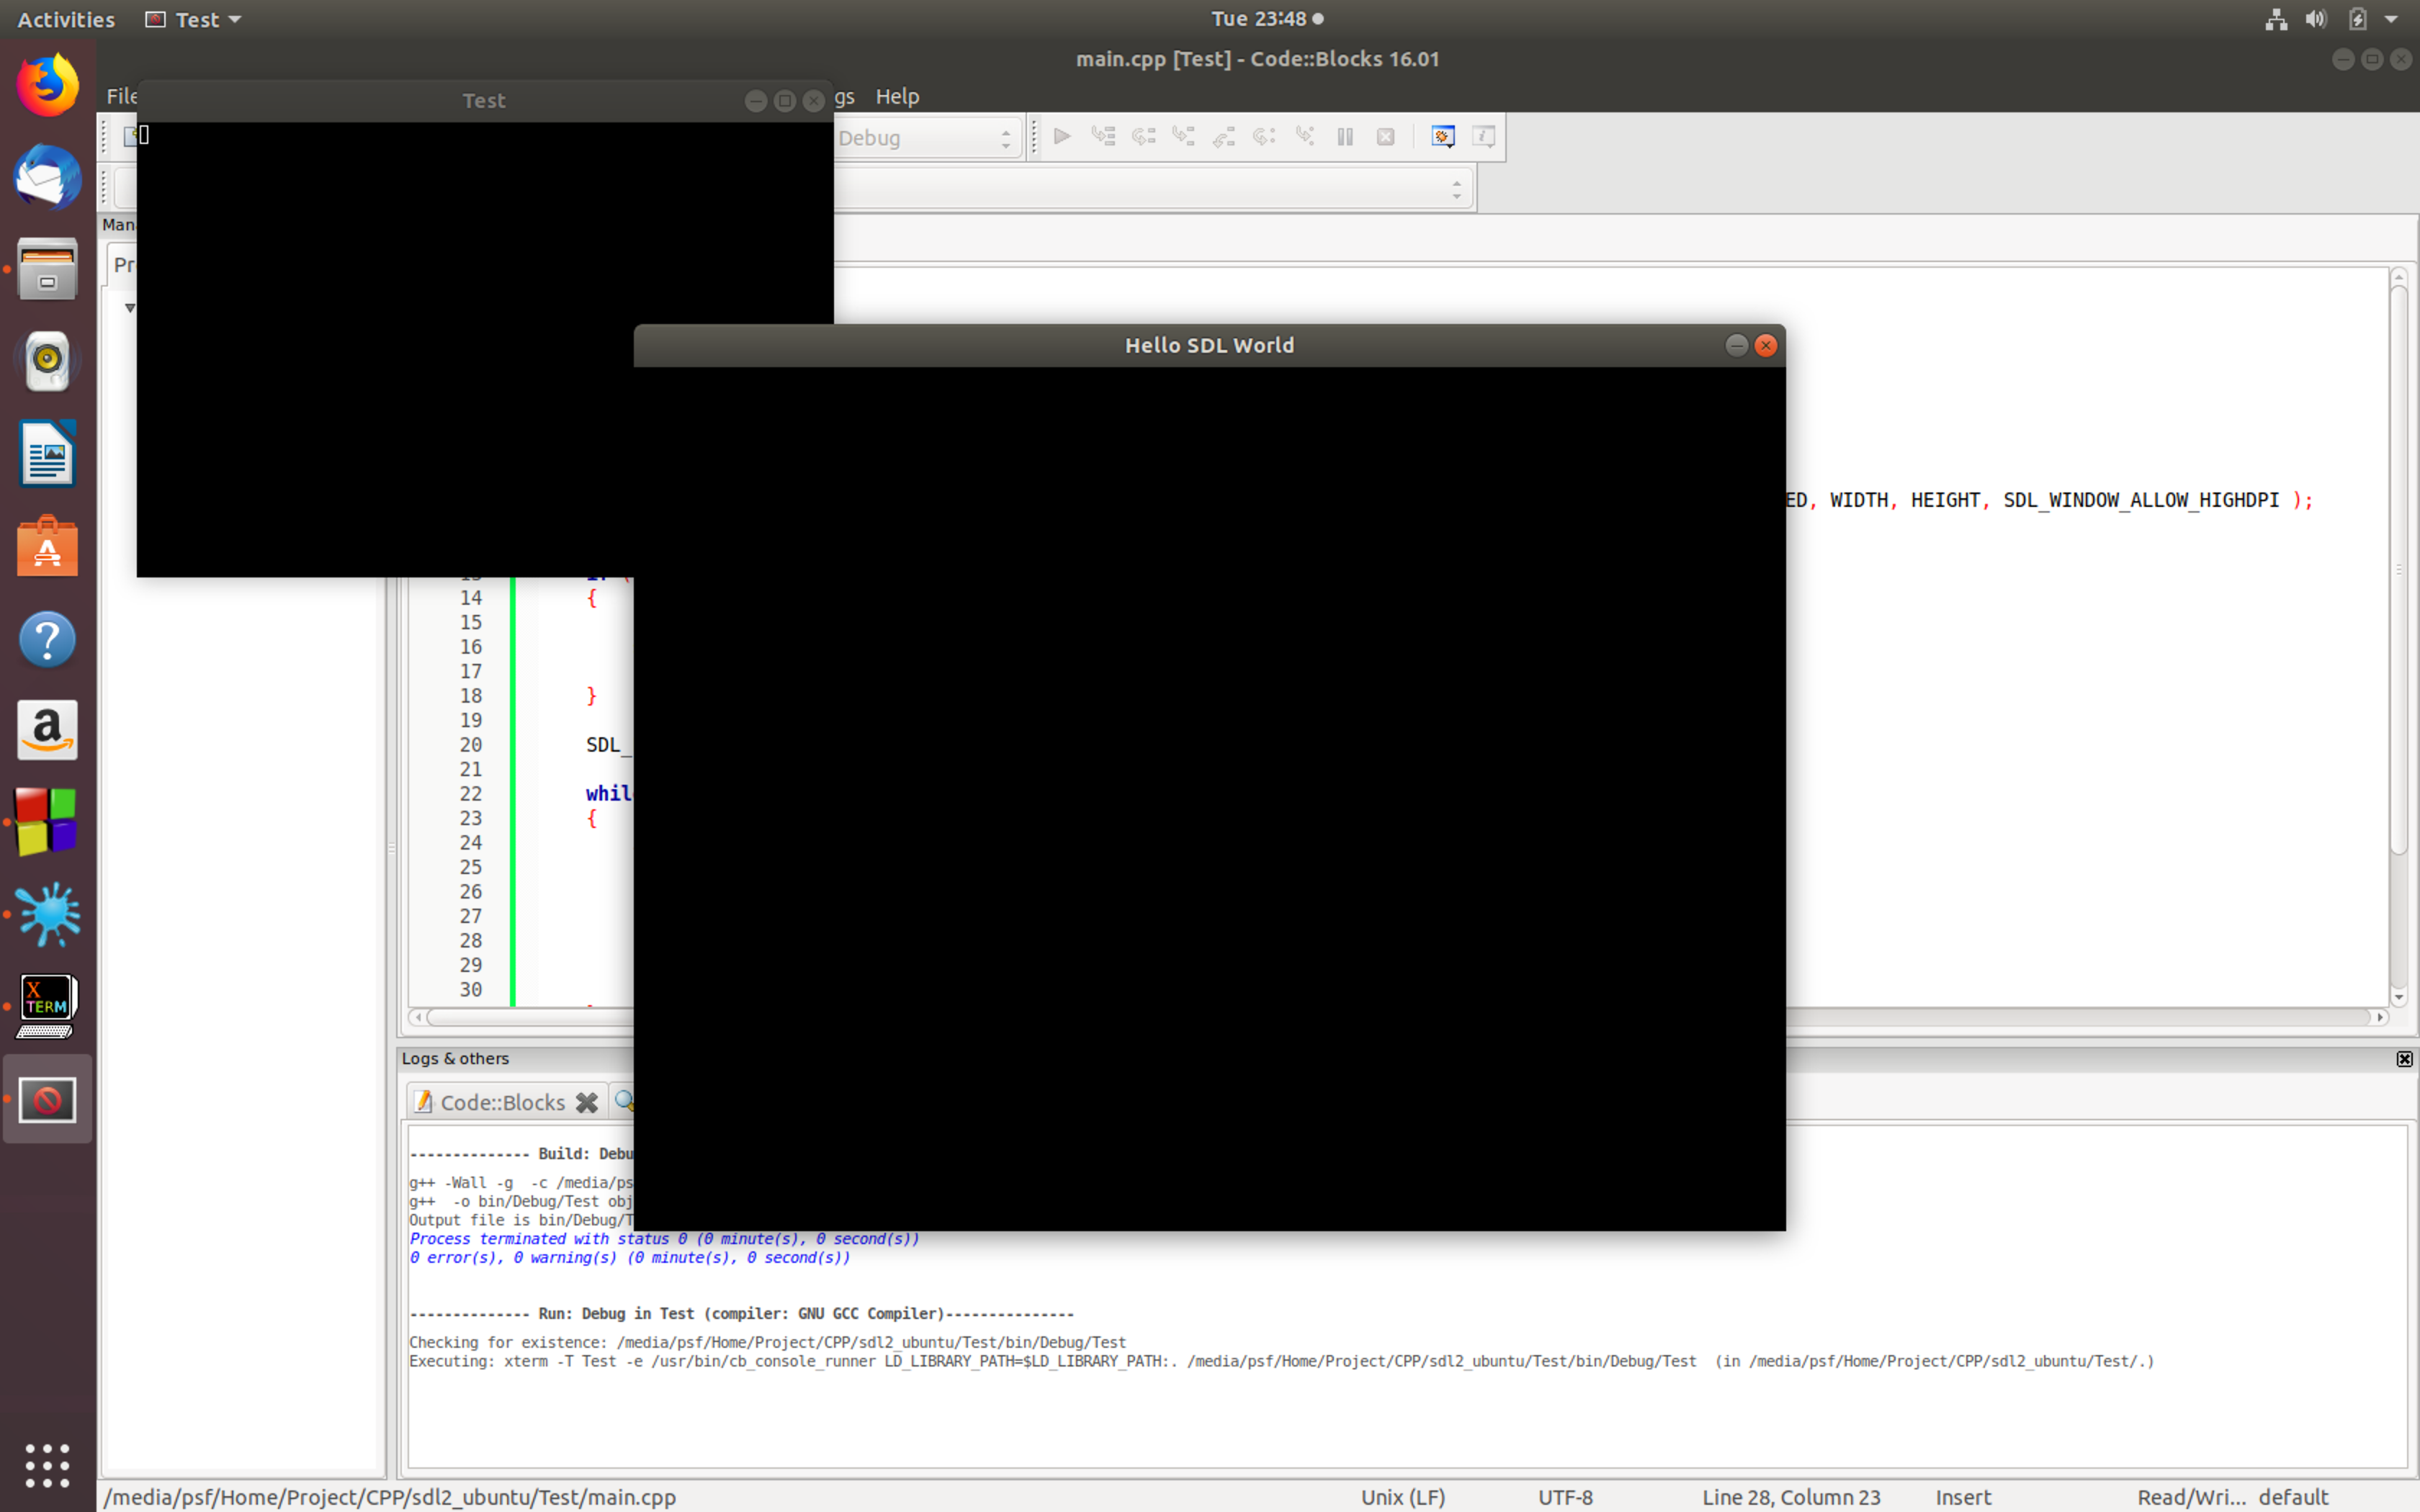
Replace with our code . Great, the window is being drawn.
For installation, you can use the installation image from the Site . At the moment, the latest stable version is 2.0.9.
Download and copy to the / Library / Frameworks directory. Authentication may be required for use.
Run xcode and select the command line tool macOS project. We give a name to the project and choose the C ++ language.
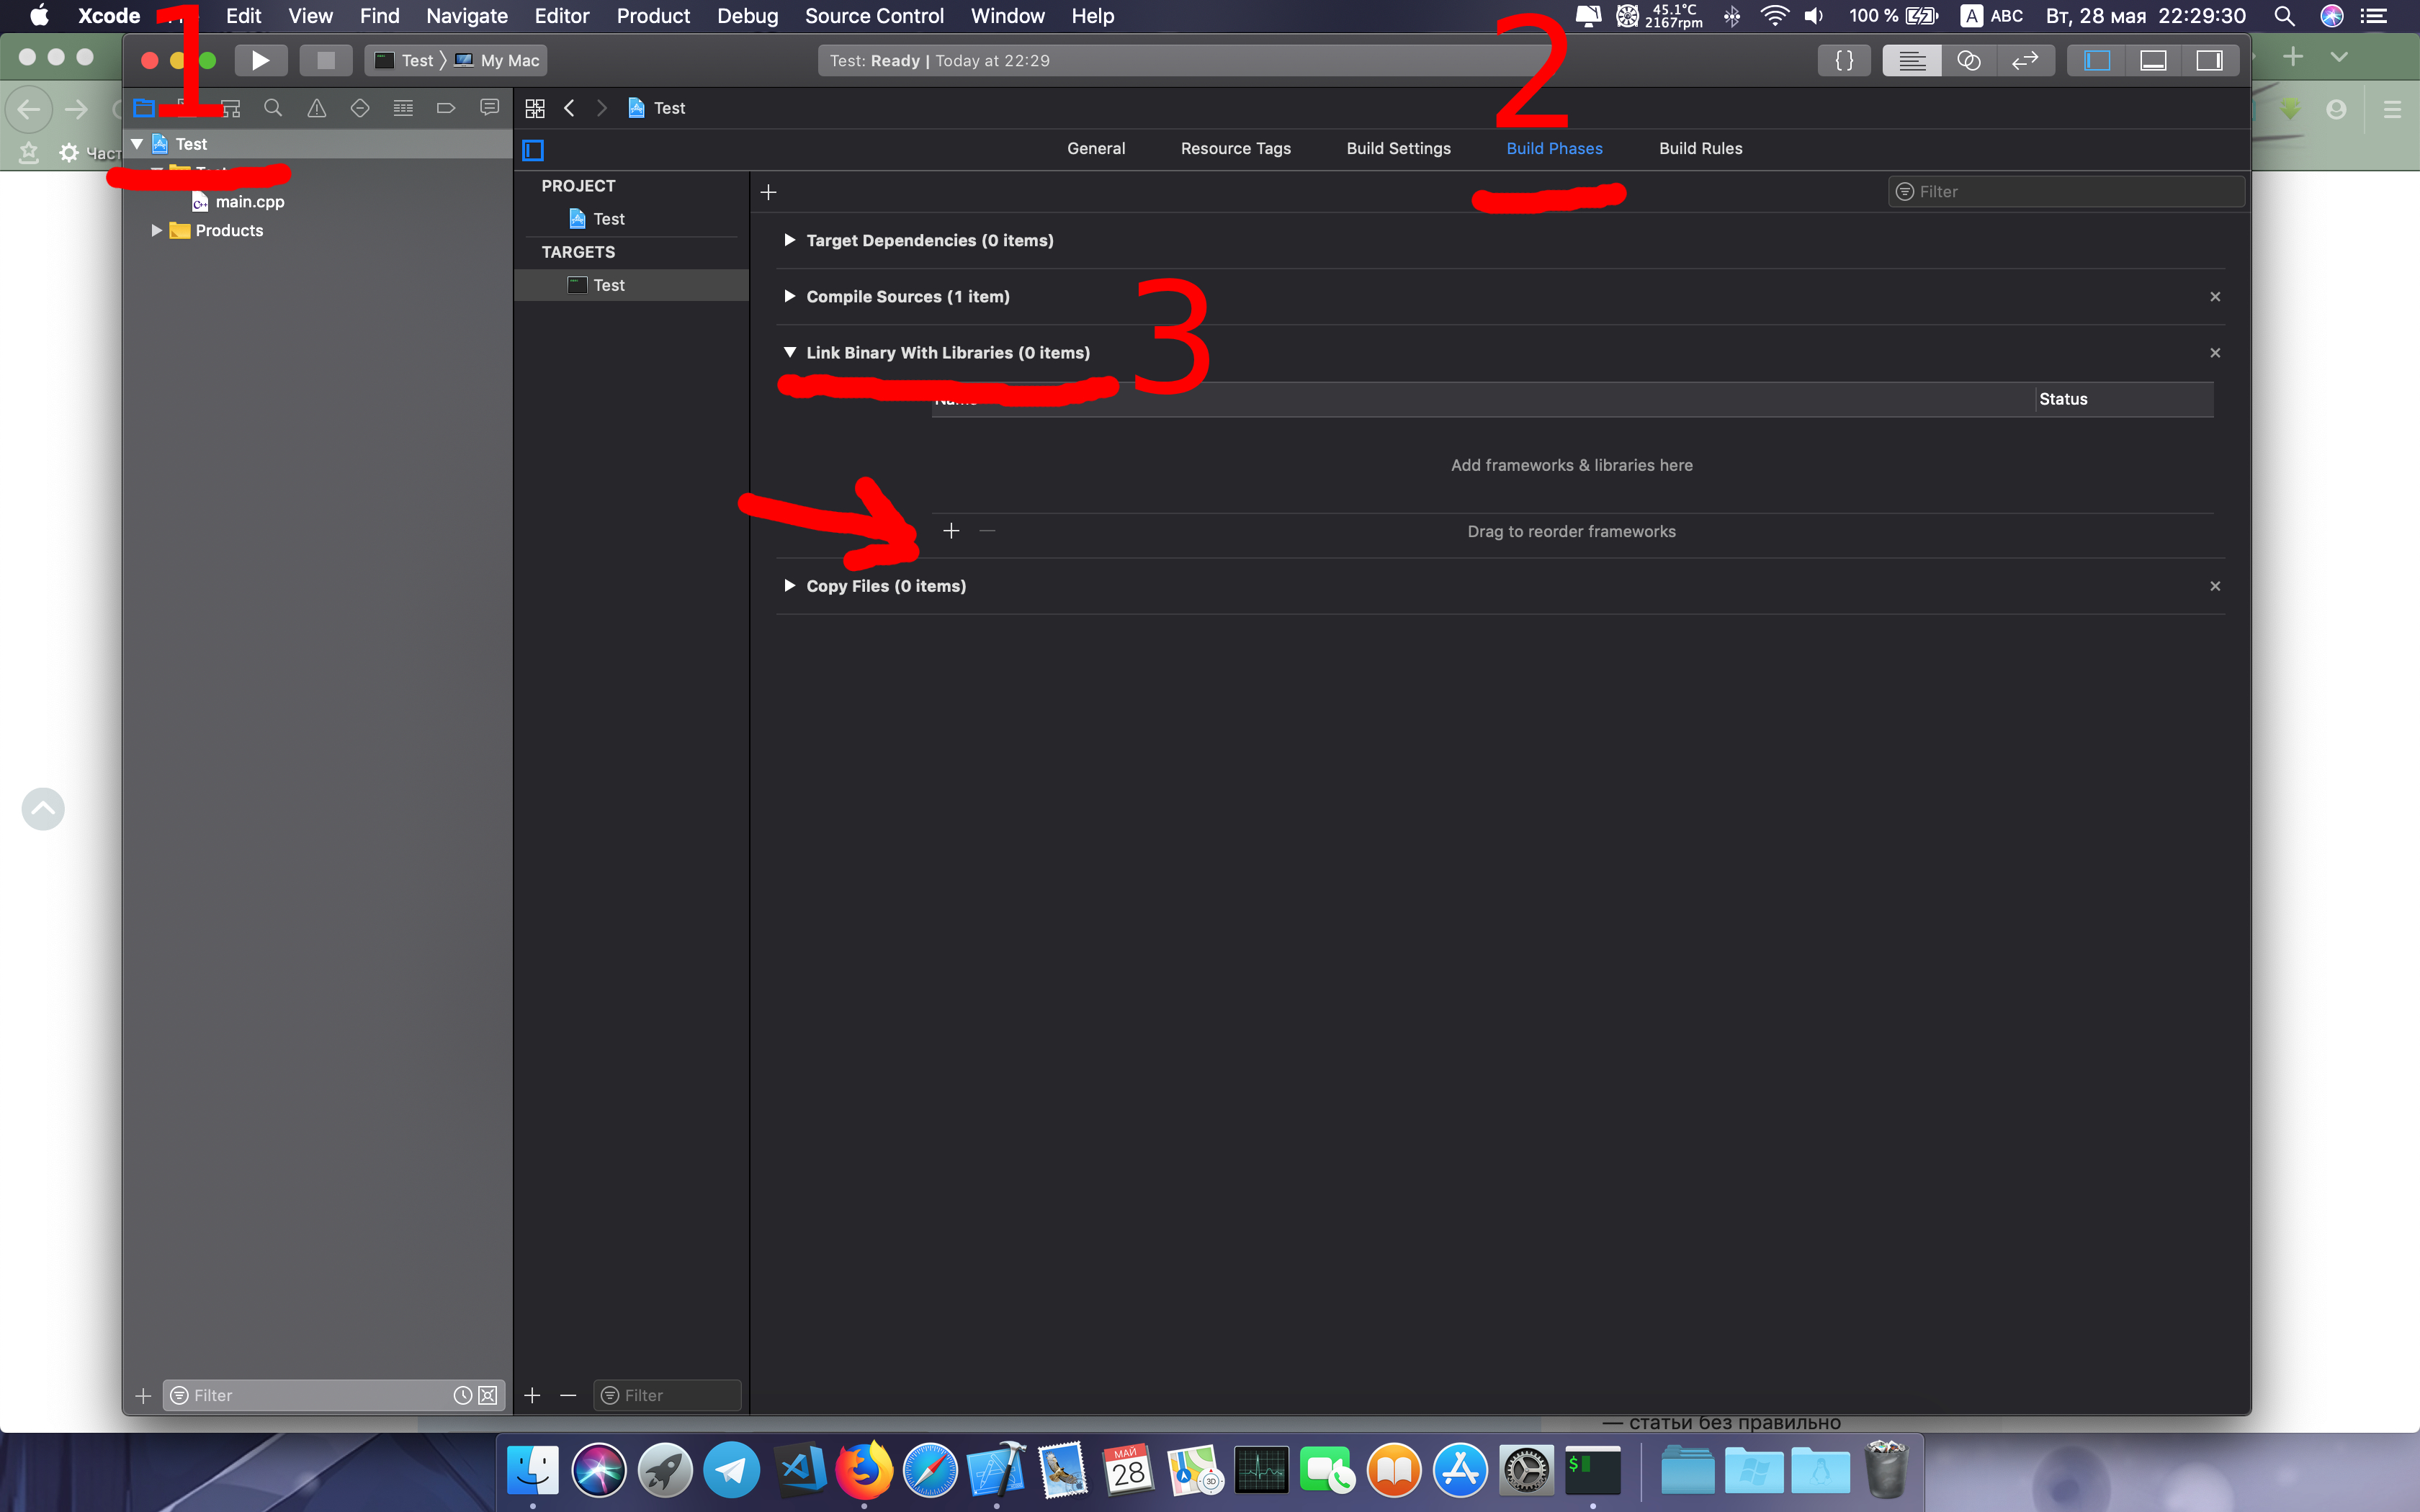
To add support for sdl2, go to "project settings" -> "build phases" -> "link binary with libraries" and add an element. In the window that opens, select “add other”.
Add our file /Library/Frameworks/SDL2.framework and can check.
In case you prefer to use brew, then remember that it installs only static libraries. In this case, pass the -I / usr / local / include flag.
Everything works, let's go further.

Install vs studio. Download the library . Unzip the contents and arrange where you like. I very rarely use windows, so I don’t know where all the other libraries are stored.
We create a project with an empty cpp file, or a console application, as you wish.
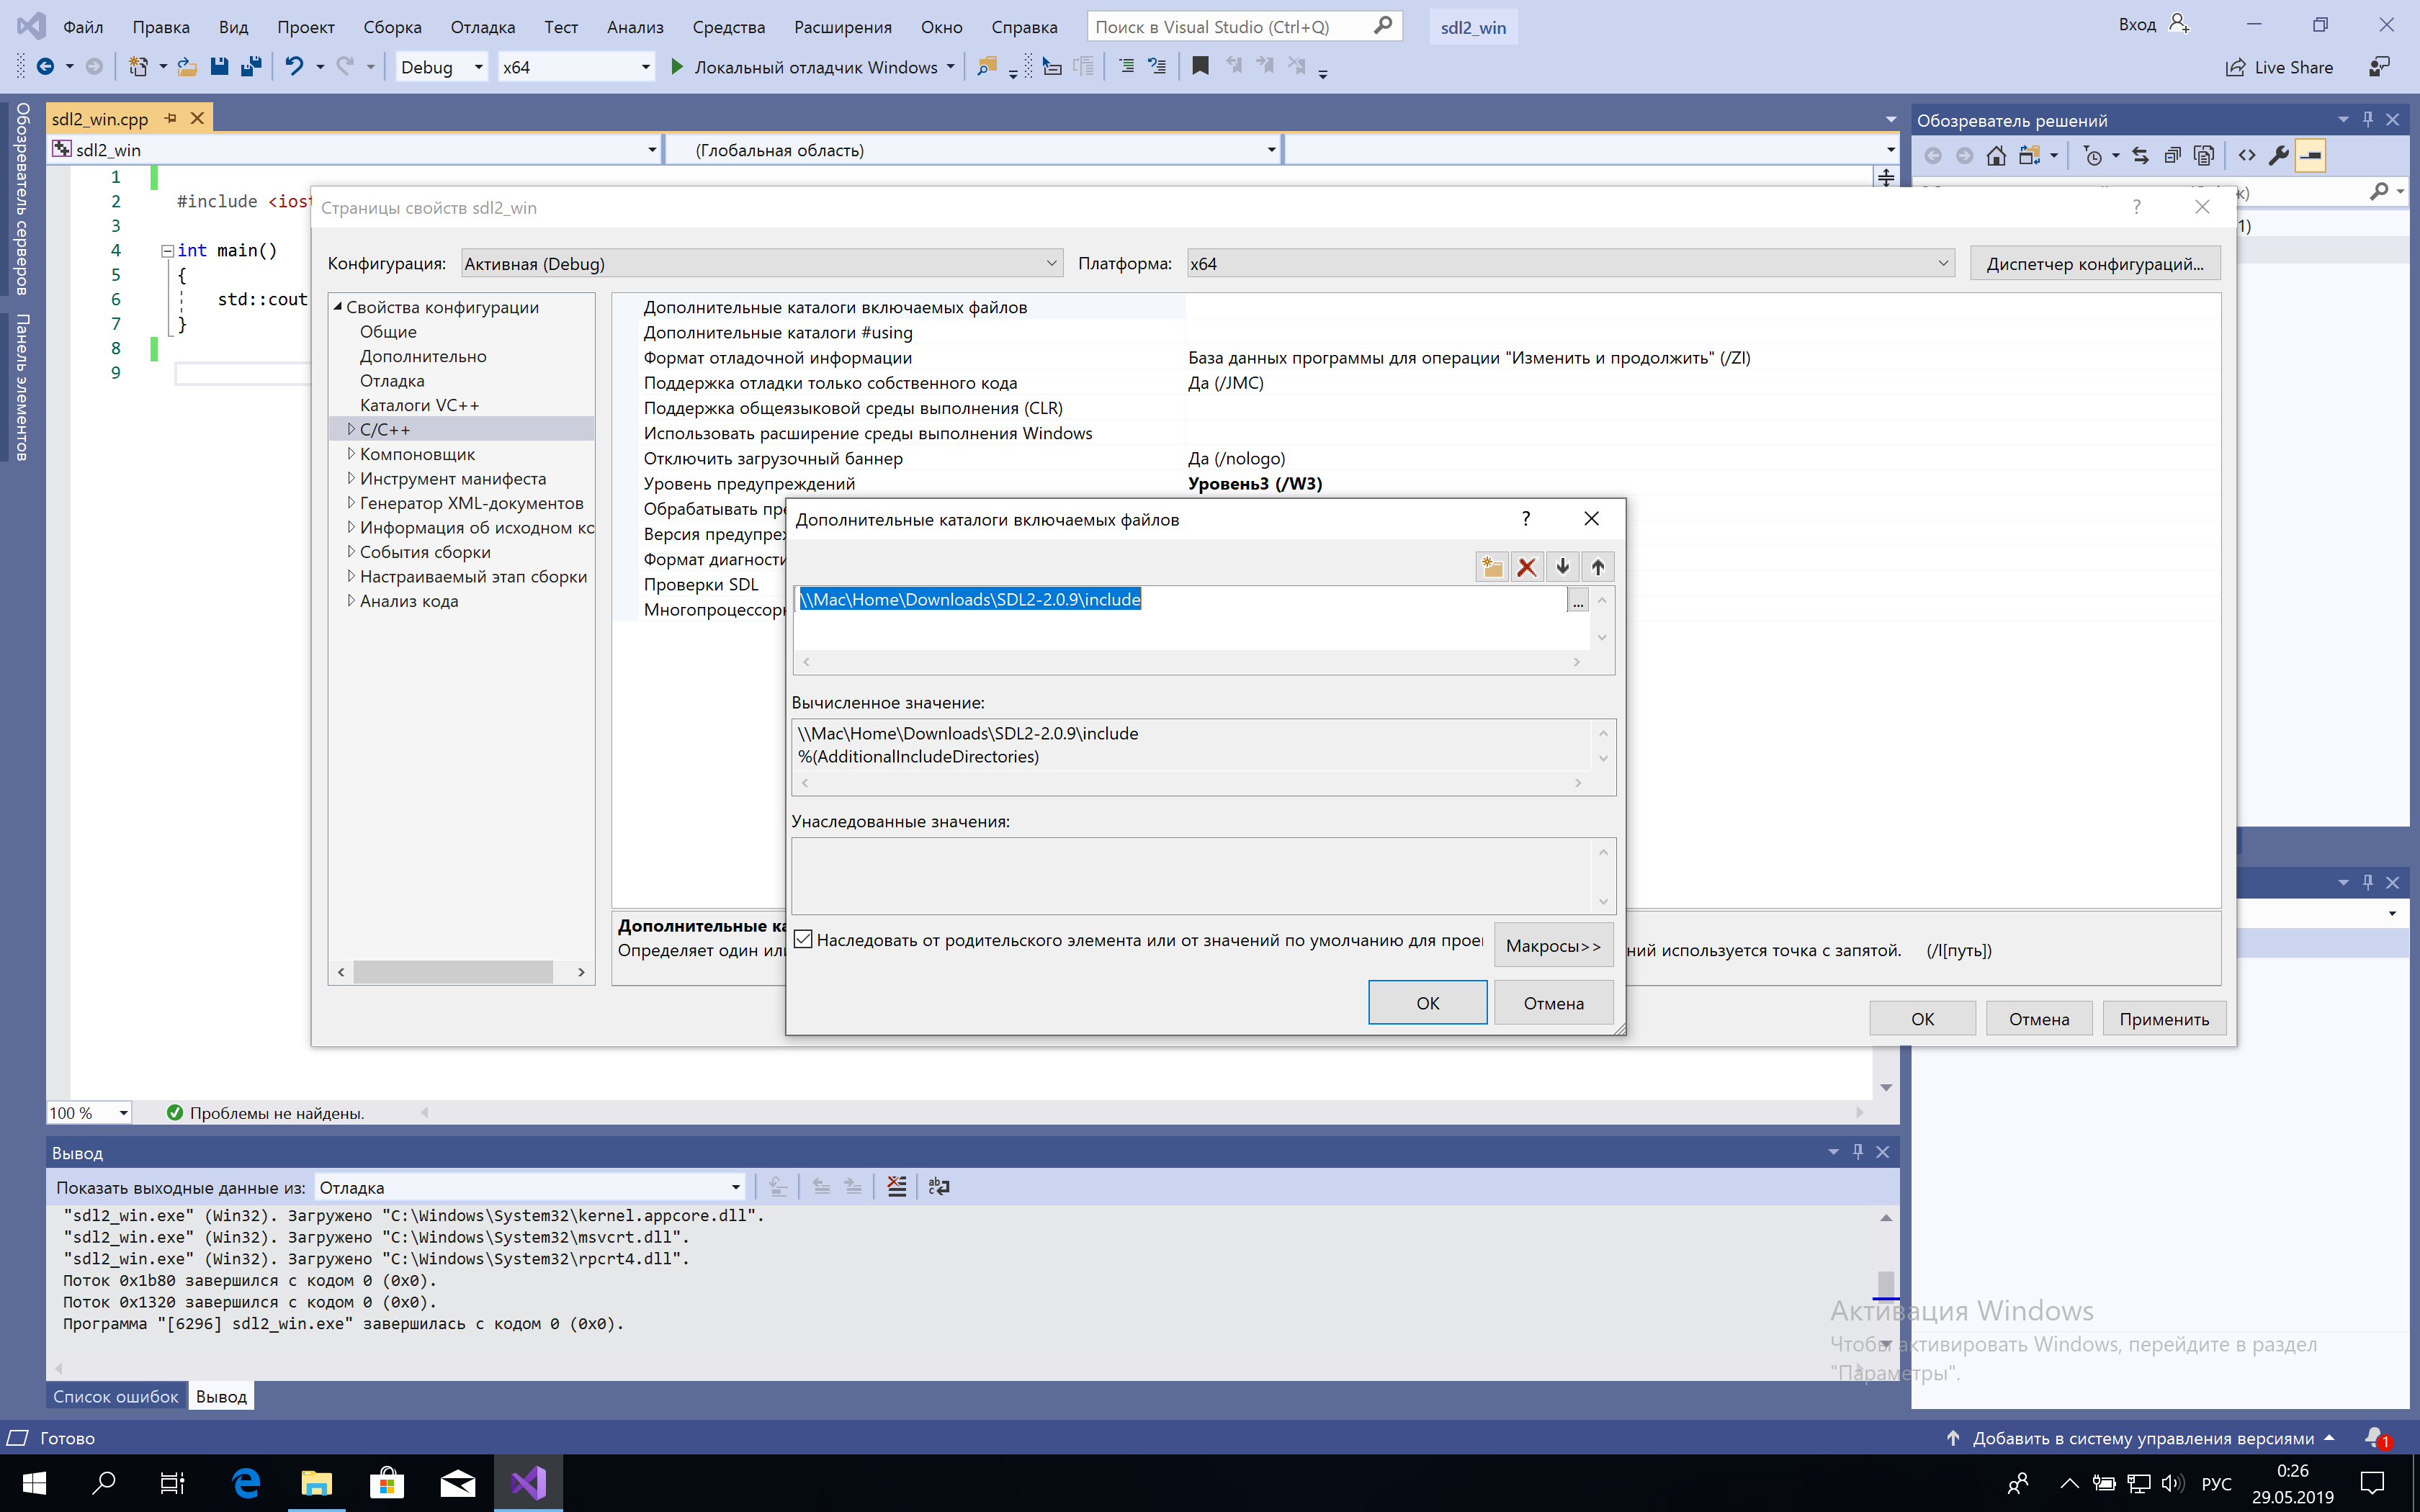
Go to “project” -> “properties” -> “C / C ++” -> “additional directories for included files”. Add the path to the unzipped directory, specifying include. In my case, \\ Mac \ Home \ Downloads \ SDL2-2.0.9 \ include came out, because I have a virtual machine.
After that, in the section “linker” -> “general” -> “additional library directories” you need to specify the path to SDL2.dll, for example \\ Mac \ Home \ Downloads \ SDL2-2.0.9 \ lib \ x64.
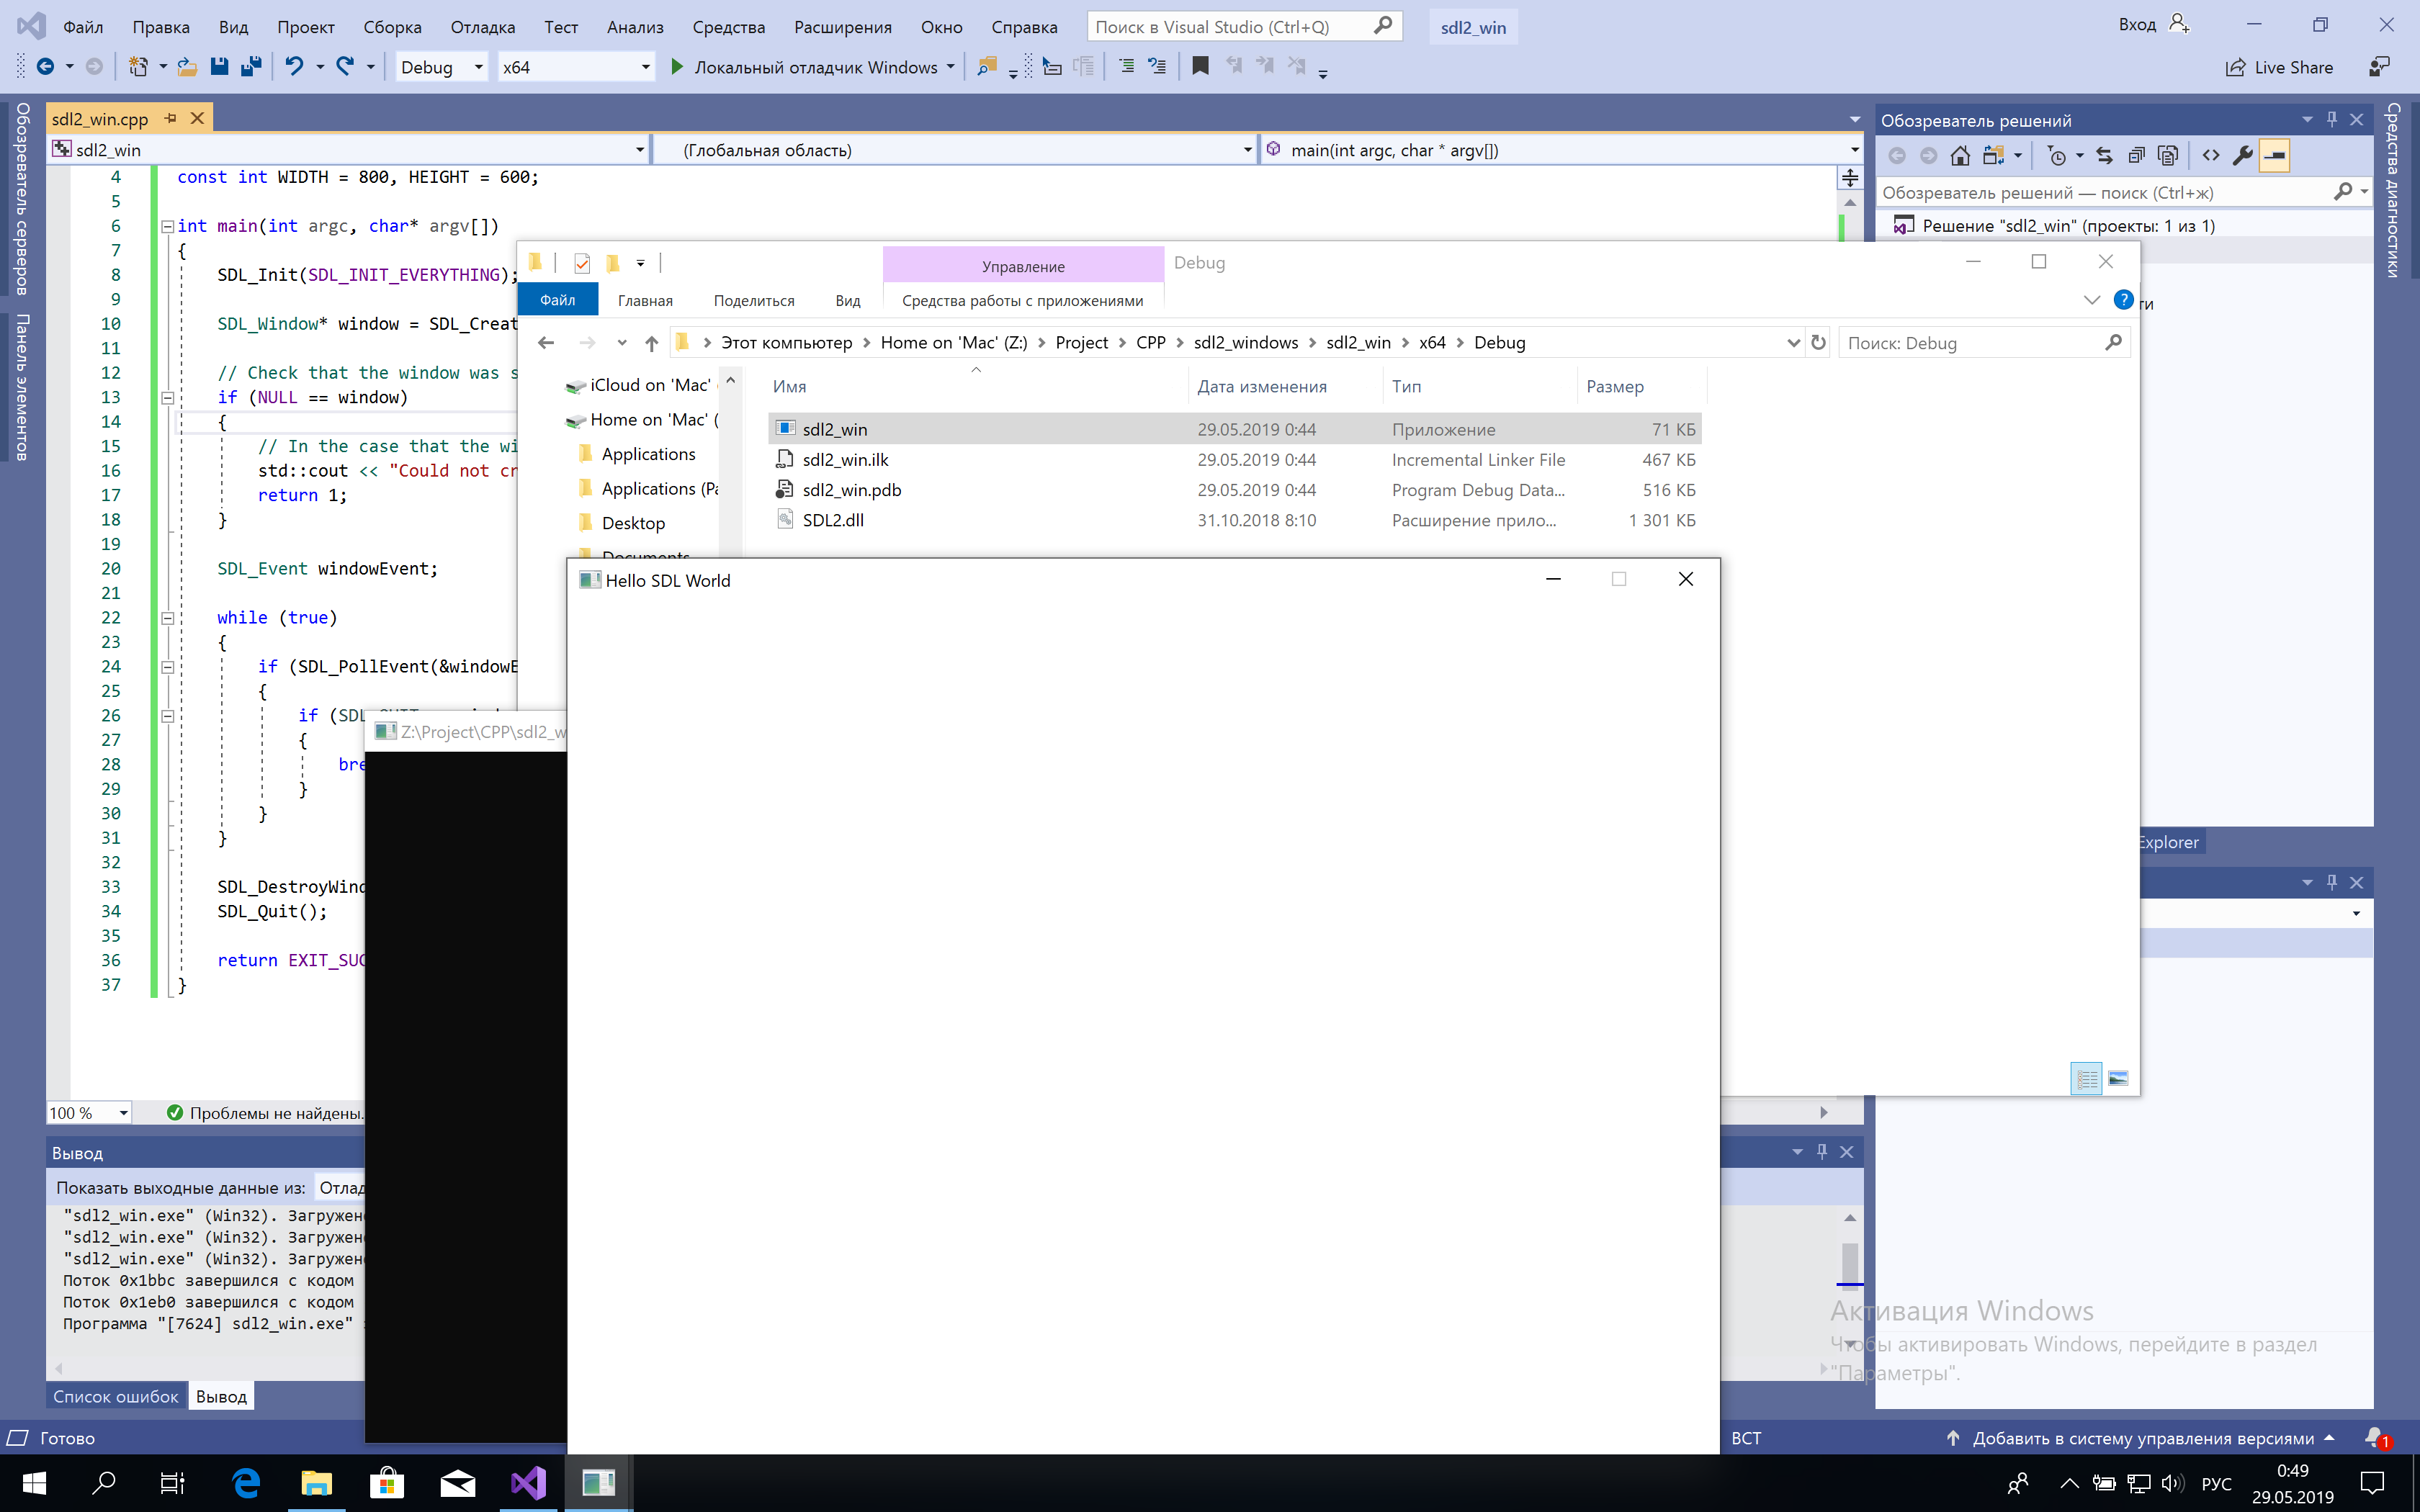
There is not much left, the “linker” -> “input” -> “additional dependencies” we add what we need to use, SDL2.lib, SDL2main.lib, SDL2test.lib. After that it is necessary to assemble the project. Once assembled, copy the SDL2.dll file from the lib \ x64 or lib \ x32 directory and place it next to the executable file. Now try our code . Another point: because in “additional directories of included files” we indicated the path immediately to the connected headers, then
replace with
Congratulations, we have successfully compiled applications for the main platforms. I hope you have no difficulty installing it.
For verification, I will use the following code.
#include
#include
const int WIDTH = 800, HEIGHT = 600;
int main( int argc, char *argv[] )
{
    SDL_Init( SDL_INIT_EVERYTHING );
    SDL_Window *window = SDL_CreateWindow( "Hello SDL World", SDL_WINDOWPOS_UNDEFINED, SDL_WINDOWPOS_UNDEFINED, WIDTH, HEIGHT, SDL_WINDOW_ALLOW_HIGHDPI );
    // Check that the window was successfully created
    if ( NULL == window )
    {
        // In the case that the window could not be made...
        std::cout << "Could not create window: " << SDL_GetError( ) << std::endl;
        return 1;
    }
    SDL_Event windowEvent;
    while ( true )
    {
        if ( SDL_PollEvent( &windowEvent ) )
        {
            if ( SDL_QUIT == windowEvent.type )
            {
                break;
            }
        }
    }
    SDL_DestroyWindow( window );
    SDL_Quit( );
    return EXIT_SUCCESS;
}
Ubuntu
We put code :: blocks from the store - there are no surprises. Next, create a simple mian.cpp file for the test.
#include
int main() {
   std::cout << "Hello, world!" << std::endl;
   return 0;
}
If you are not going to compile from the terminal, then you need to specify target in the project settings.
Excellent. Next, you need to install sdl2 itself. We write in the terminal
sudo apt install libsdl2-dev -yAfter installation, let ide know that you need to use sdl2. Let's go to the section "project" -> "build options". We are interested in the tab “Linker settings”. In the "other linker options" window, add "-lSDL2".
Replace with our code . Great, the window is being drawn.
macOS
For installation, you can use the installation image from the Site . At the moment, the latest stable version is 2.0.9.
Download and copy to the / Library / Frameworks directory. Authentication may be required for use.
Run xcode and select the command line tool macOS project. We give a name to the project and choose the C ++ language.
To add support for sdl2, go to "project settings" -> "build phases" -> "link binary with libraries" and add an element. In the window that opens, select “add other”.
Add our file /Library/Frameworks/SDL2.framework and can check.
In case you prefer to use brew, then remember that it installs only static libraries. In this case, pass the -I / usr / local / include flag.
Everything works, let's go further.
Windows
Install vs studio. Download the library . Unzip the contents and arrange where you like. I very rarely use windows, so I don’t know where all the other libraries are stored.
We create a project with an empty cpp file, or a console application, as you wish.
Go to “project” -> “properties” -> “C / C ++” -> “additional directories for included files”. Add the path to the unzipped directory, specifying include. In my case, \\ Mac \ Home \ Downloads \ SDL2-2.0.9 \ include came out, because I have a virtual machine.
After that, in the section “linker” -> “general” -> “additional library directories” you need to specify the path to SDL2.dll, for example \\ Mac \ Home \ Downloads \ SDL2-2.0.9 \ lib \ x64.
There is not much left, the “linker” -> “input” -> “additional dependencies” we add what we need to use, SDL2.lib, SDL2main.lib, SDL2test.lib. After that it is necessary to assemble the project. Once assembled, copy the SDL2.dll file from the lib \ x64 or lib \ x32 directory and place it next to the executable file. Now try our code . Another point: because in “additional directories of included files” we indicated the path immediately to the connected headers, then
#include replace with
#include Congratulations, we have successfully compiled applications for the main platforms. I hope you have no difficulty installing it.