February 21, 2019 at 10:08
VMware NSX for the smallest. Part 2. Configuring Firewall and NAT
- Tutorial

Part One
After a short break, we return to NSX. Today I will show how to configure NAT and Firewall.
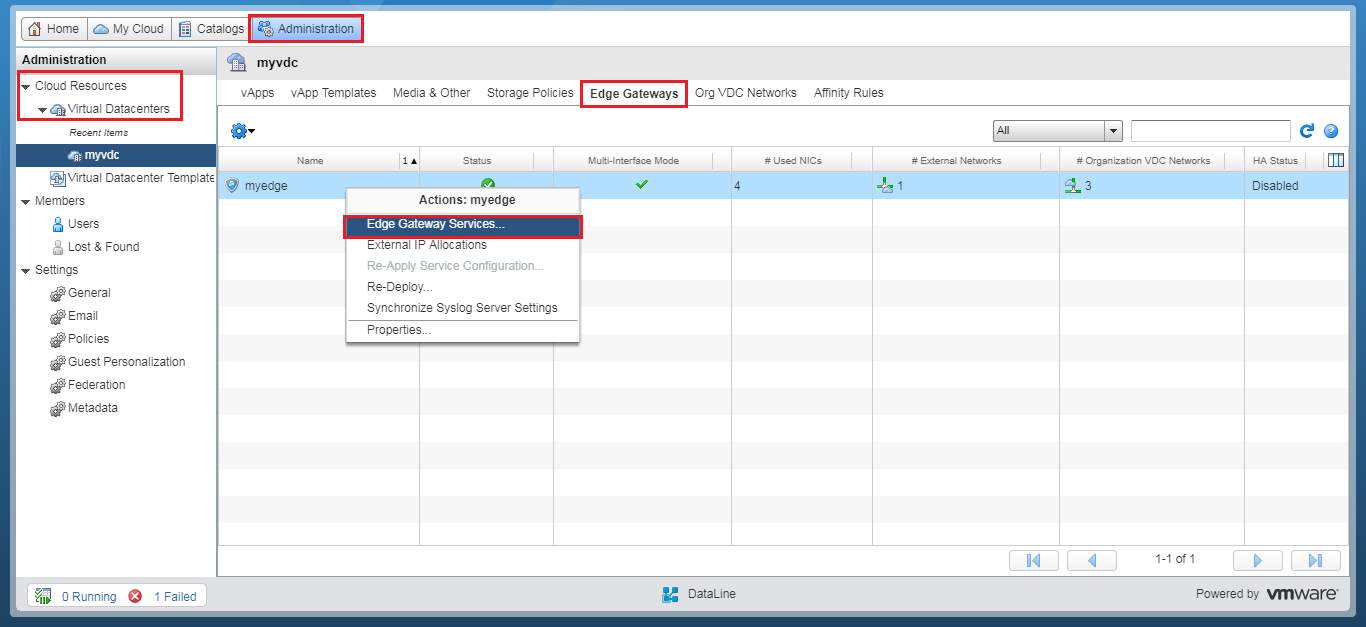
In the Administration tab, go to your virtual data center - Cloud Resources - Virtual Datacenters .
Select the Edge Gateways tab and right-click on the NSX Edge you want. In the menu that appears, select the Edge Gateway Services option . NSX Edge Control Panel opens in a separate tab.
Configure Firewall Rules
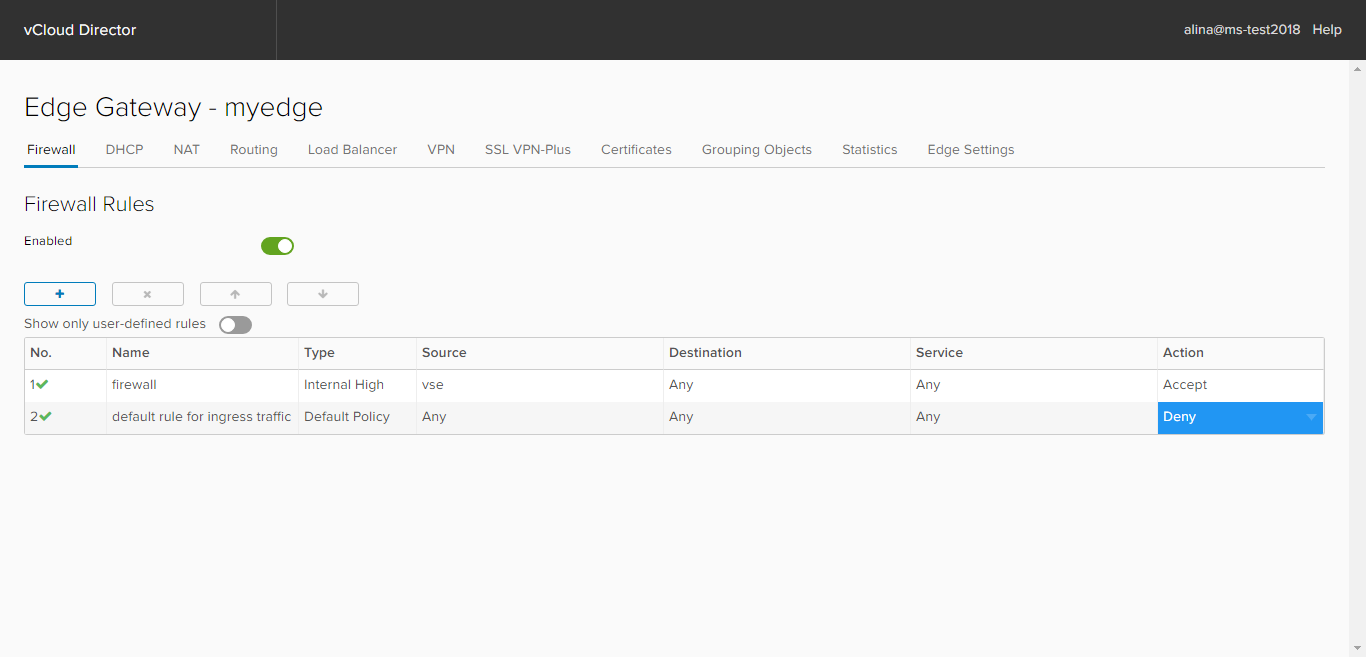
By default , the Deny option is selected in the default rule for ingress traffic item , that is, Firewall will block all traffic.
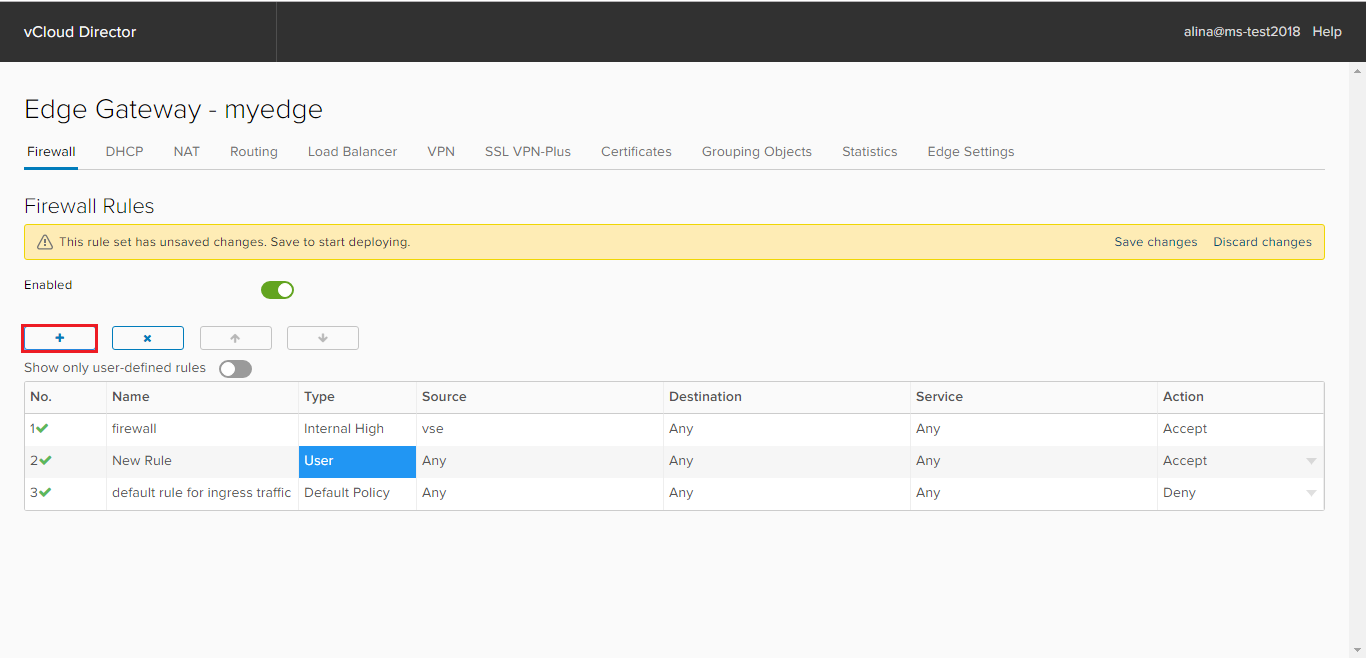
To add a new rule, click +. A new entry will appear with the name New rule . Edit its fields to suit your requirements.
In the Name field, specify the name of the rule, for example Internet.
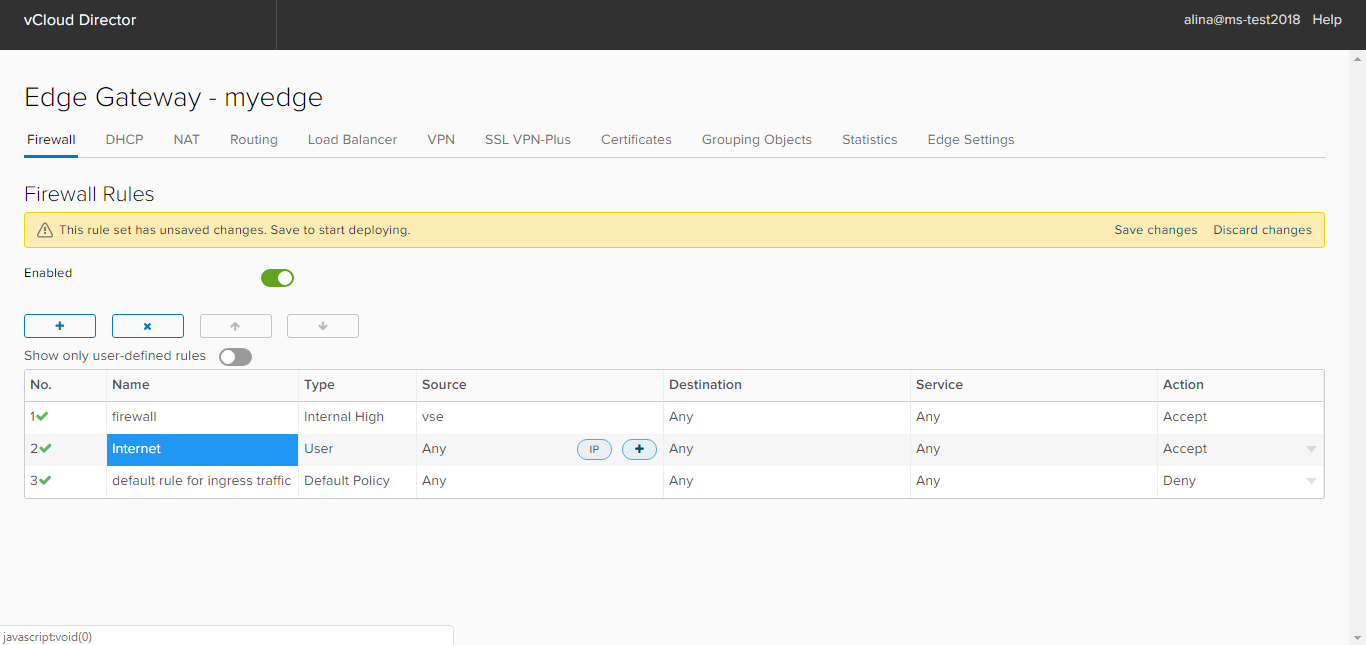
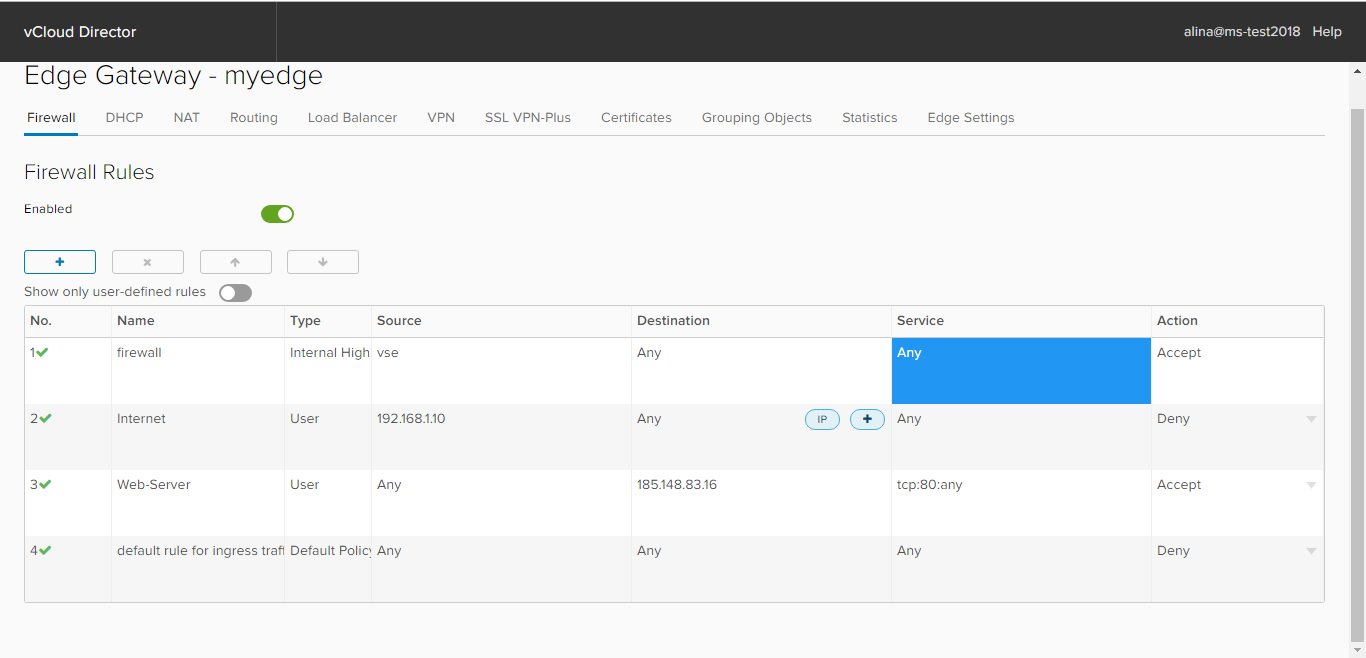
In the Source field, enter the required source addresses. Using the IP button, you can specify a single IP address, a range of IP addresses, CIDR.
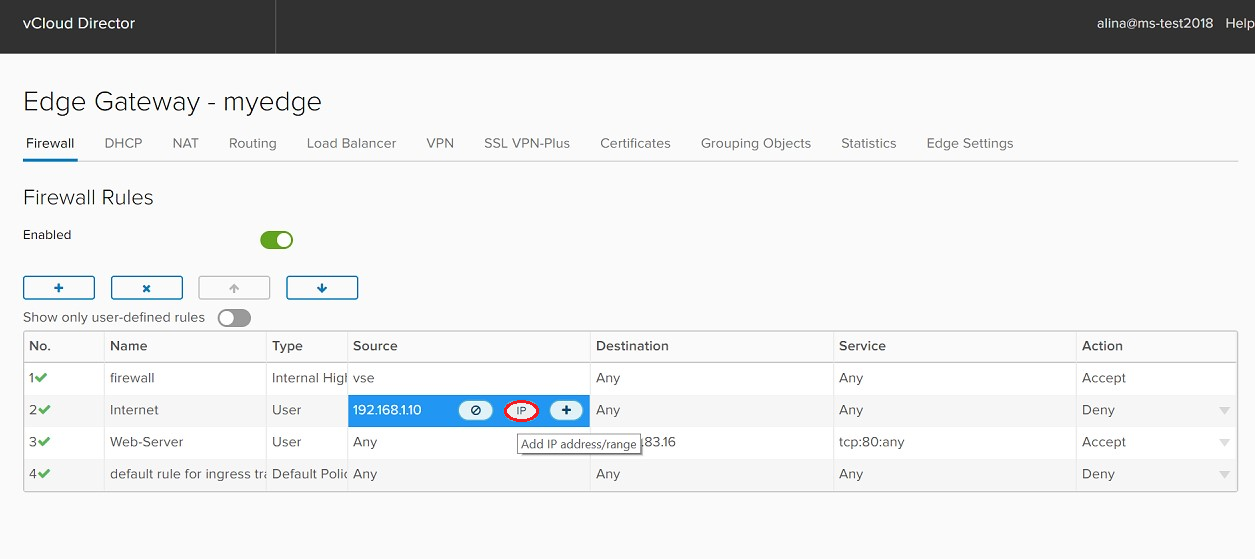
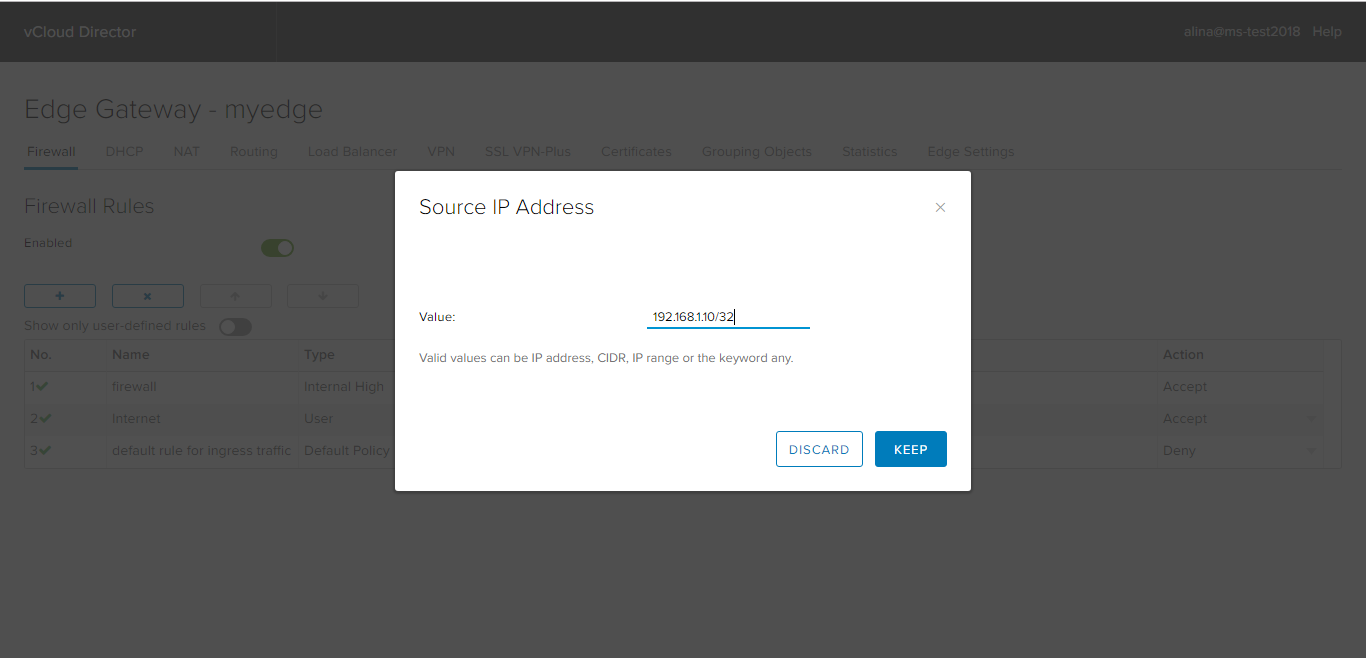
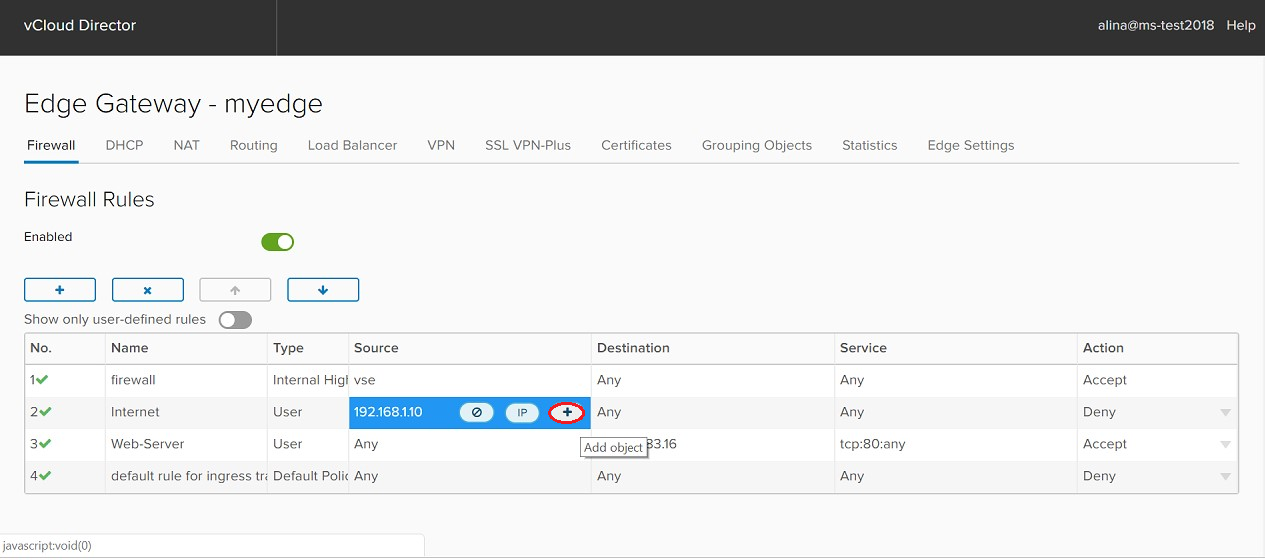
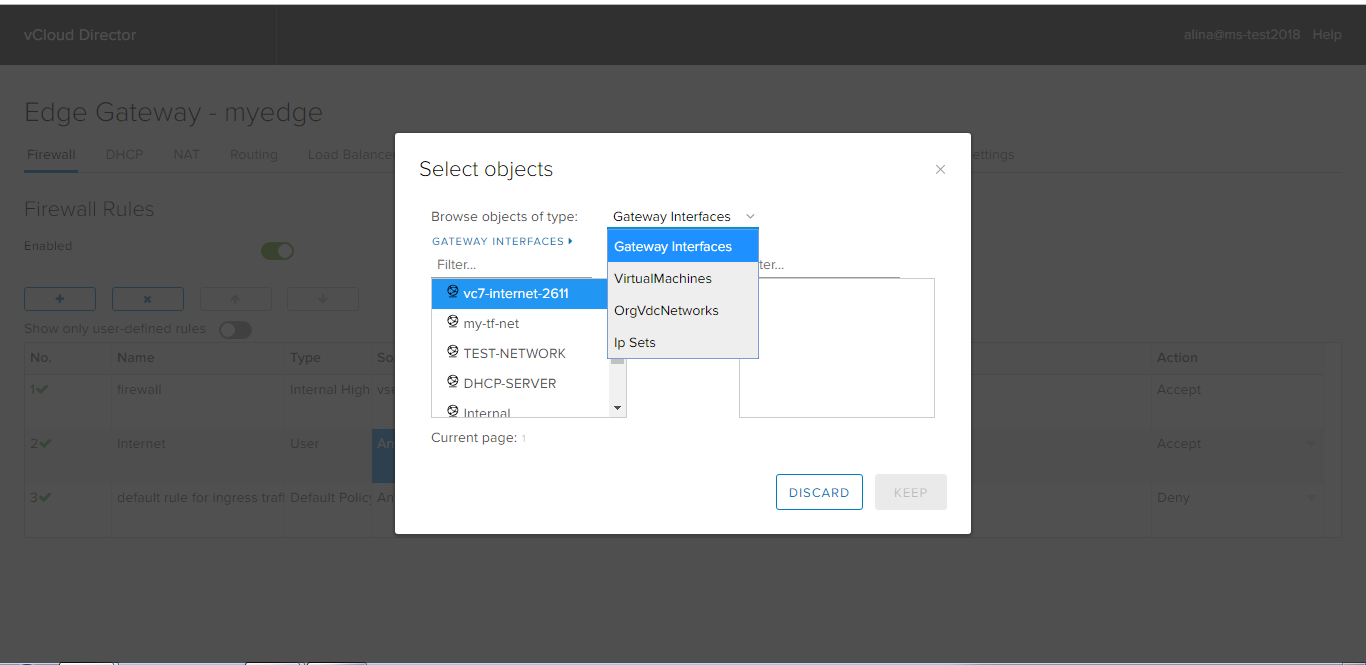
The + button allows you to set other objects:
- Gateway interfaces. All internal networks (Internal), all external networks (External) or Any.
- Virtual machines. Bind the rules to a specific virtual machine.
- OrgVdcNetworks. Organization Level Networks.
- IP Sets. User-created IP address group (created in the Grouping object).
In the Destination field, specify the recipient address. Here are the same options as in the Source field.
In the Service field, you can select or manually specify the destination port (Destination Port), the necessary protocol (Protocol), the sender port (Source Port). Click Keep.
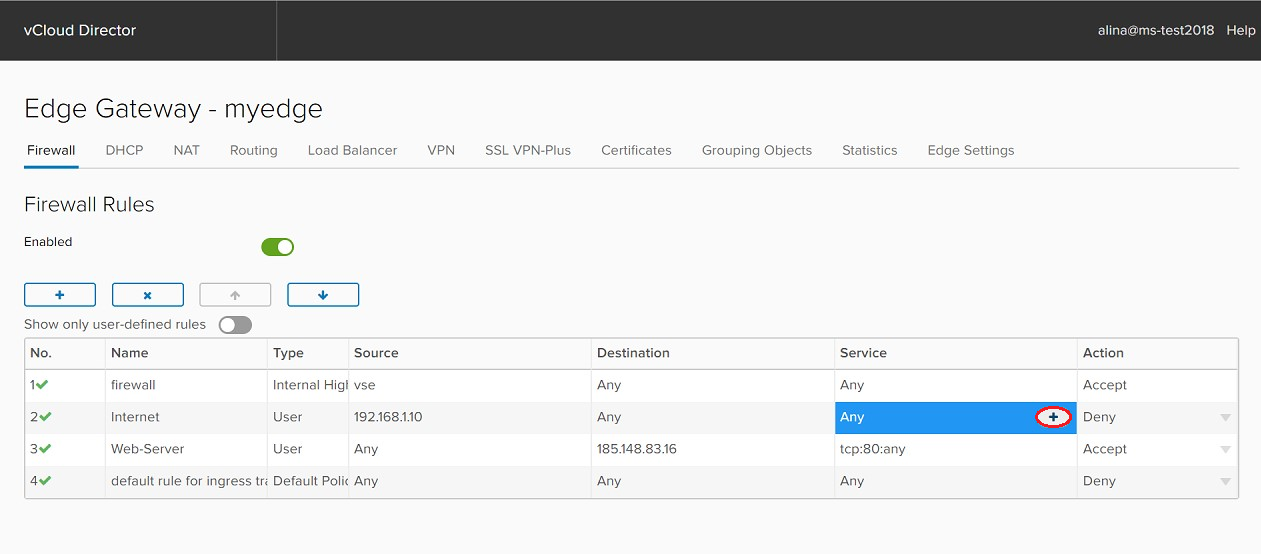

In the Action field, select the required action: allow traffic flow that matches this rule, or deny it.
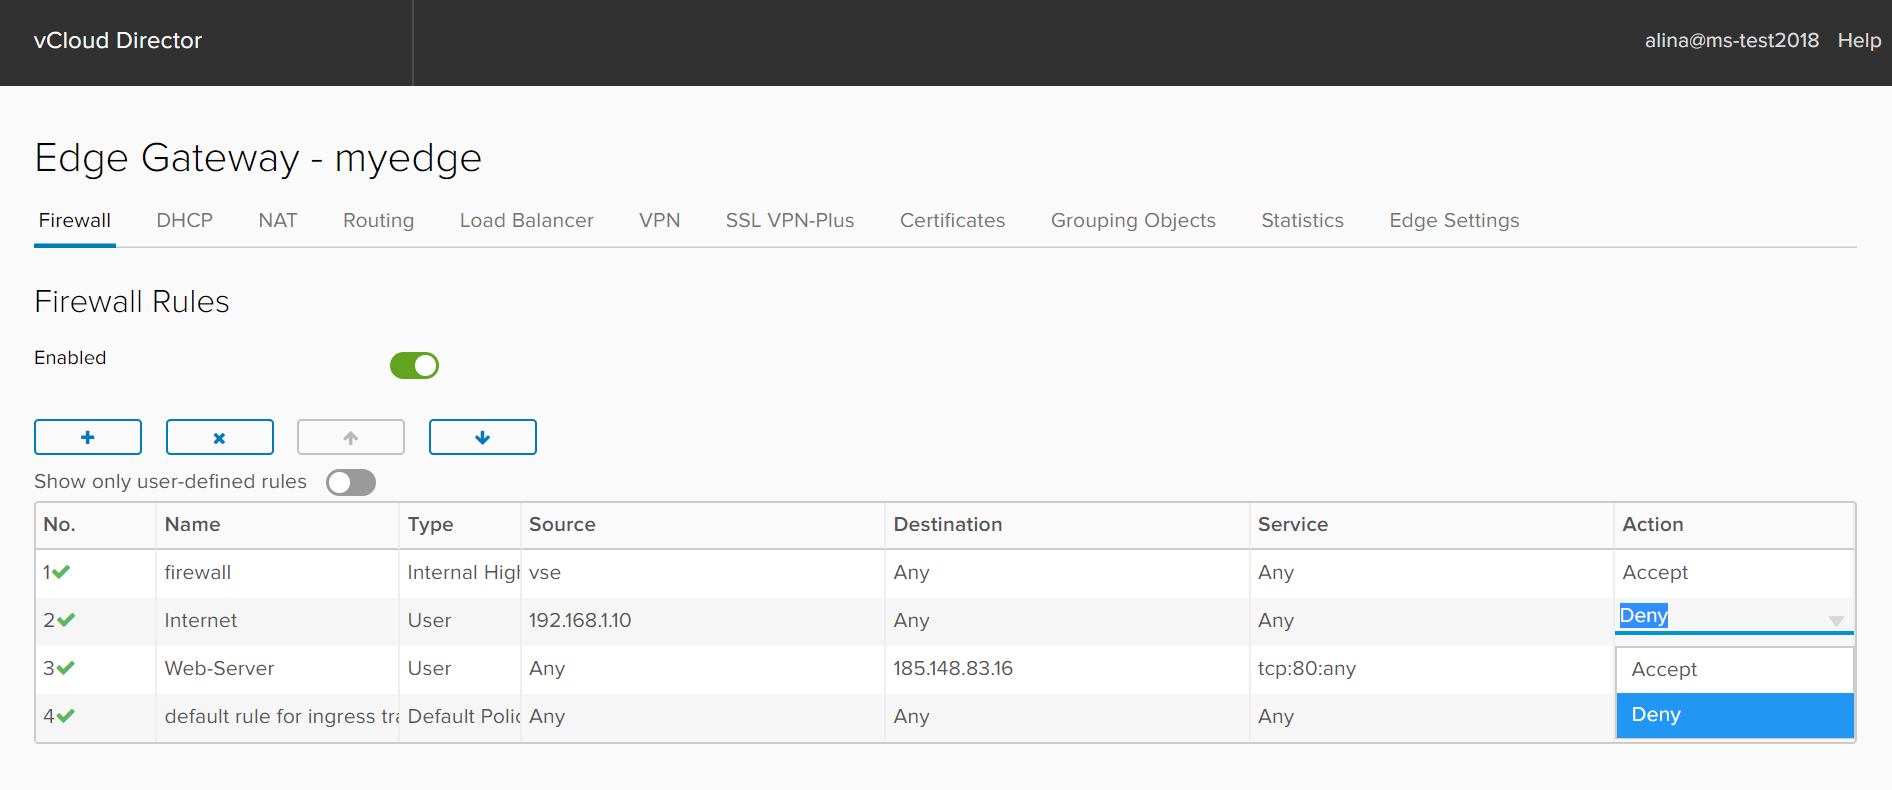
We apply the entered configuration by selecting Save changes .
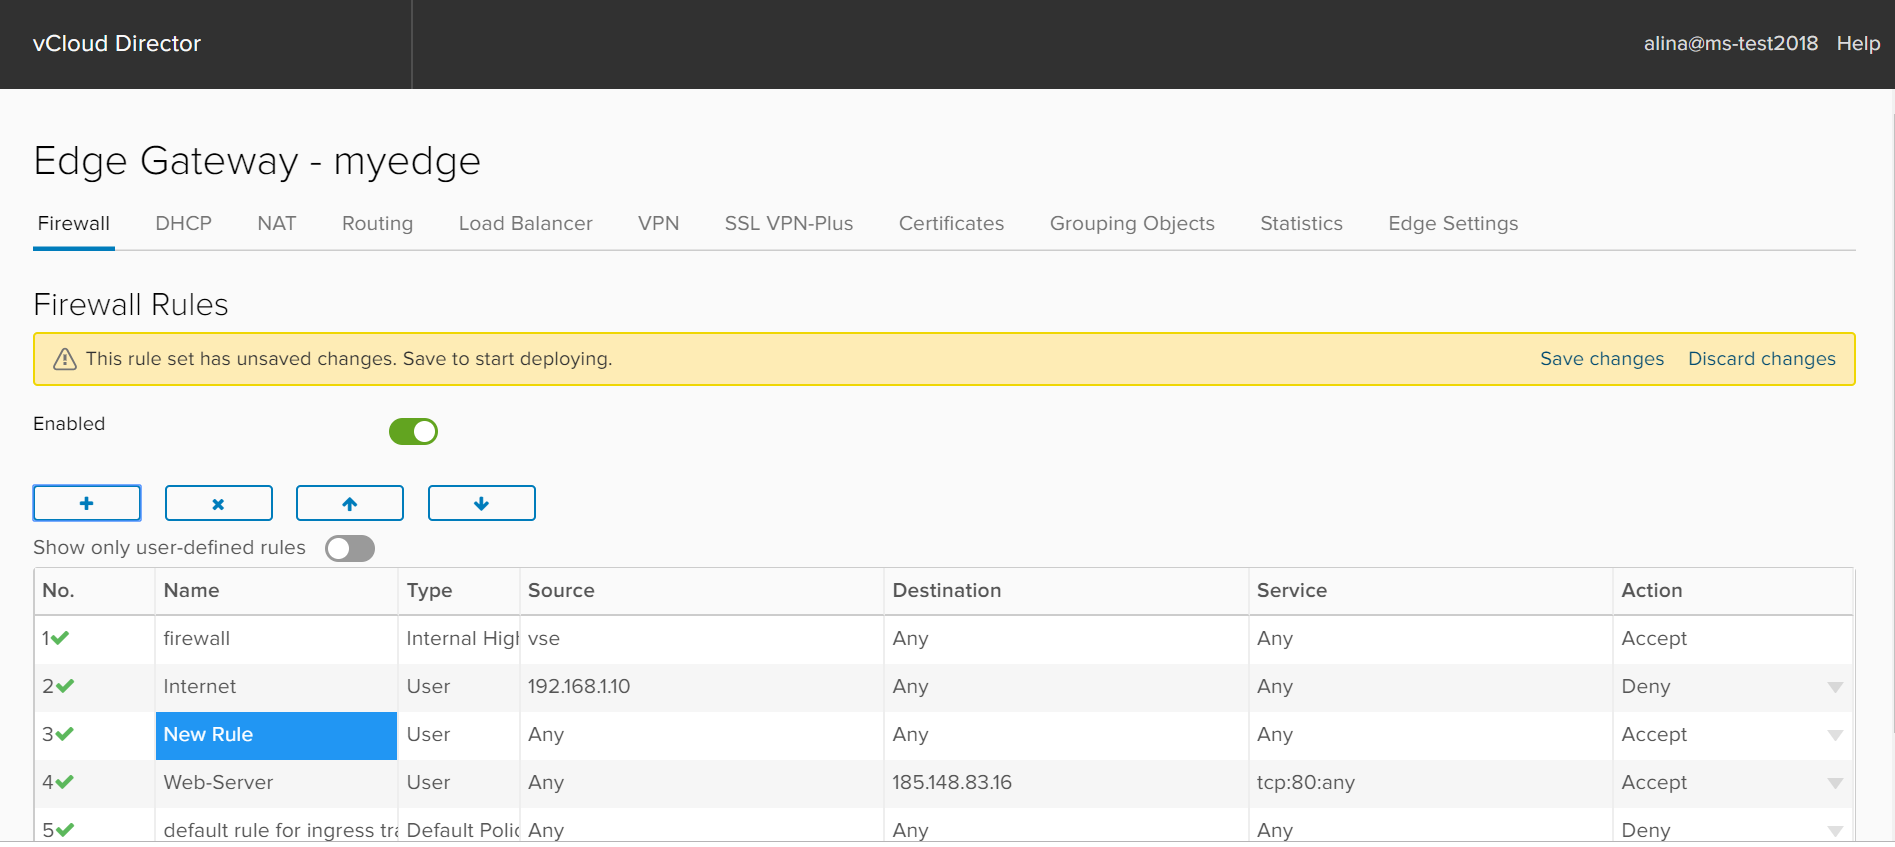
Sample Rules
Rule 1 for Firewall (Internet) allows Internet access through any protocol to a server with IP 192.168.1.10.
Rule 2 for Firewall (Web-server)allows access from the Internet via (TCP protocol, port 80) through your external address. In this case, 185.148.83.16:80.
NAT setup
NAT (Network Address Translation) - translation of private (gray) IP addresses to external (white), and vice versa. Through this process, the virtual machine gains access to the Internet. To configure this mechanism, you need to configure the SNAT and DNAT rules.
Important! NAT only works when Firewall is enabled and the corresponding permitting rules are configured.
Create SNAT rule. SNAT (Source Network Address Translation) is a mechanism whose essence is to replace the source address when forwarding a packet.
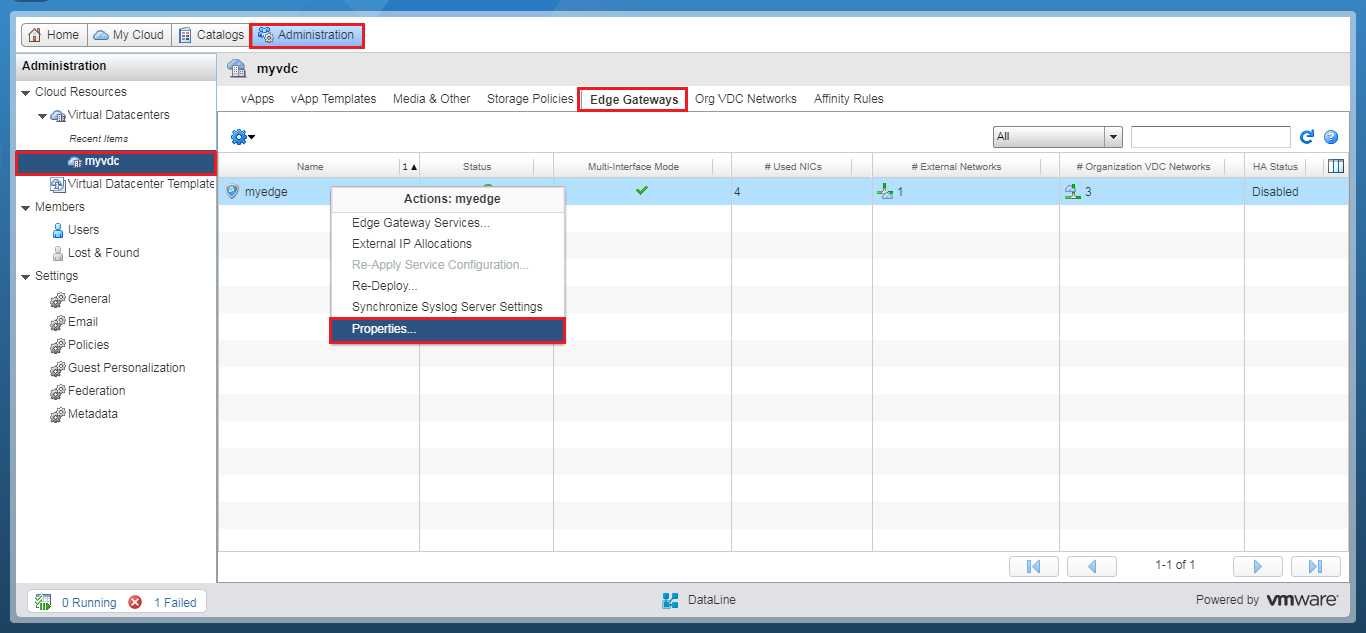
First you need to find out the available external IP address or range of IP addresses. To do this, go to the Administration section and double-click on the virtual data center. In the settings menu that appears, go to the Edge Gateway tabs. Select the desired NSX Edge and right-click on it. Select the Properties option .
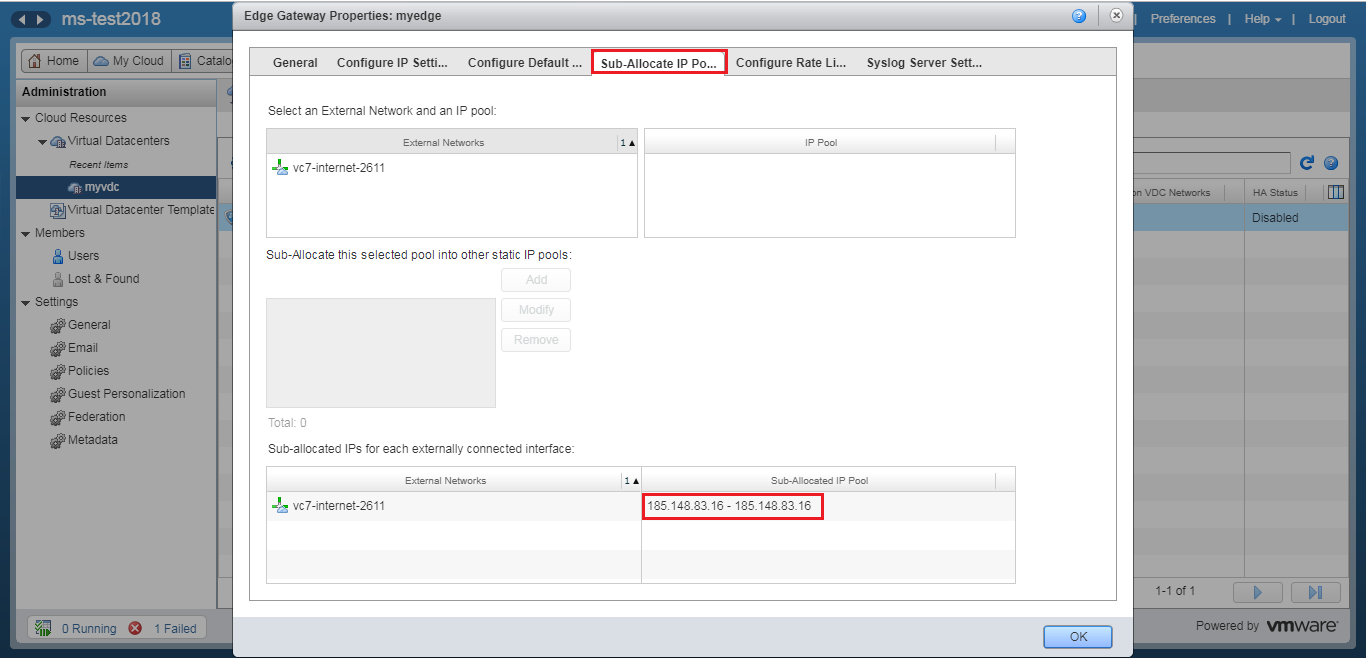
In the window that appears, in the Sub-Allocate IP Pools tab, you can see the external IP address or a range of IP addresses. Record or memorize it.
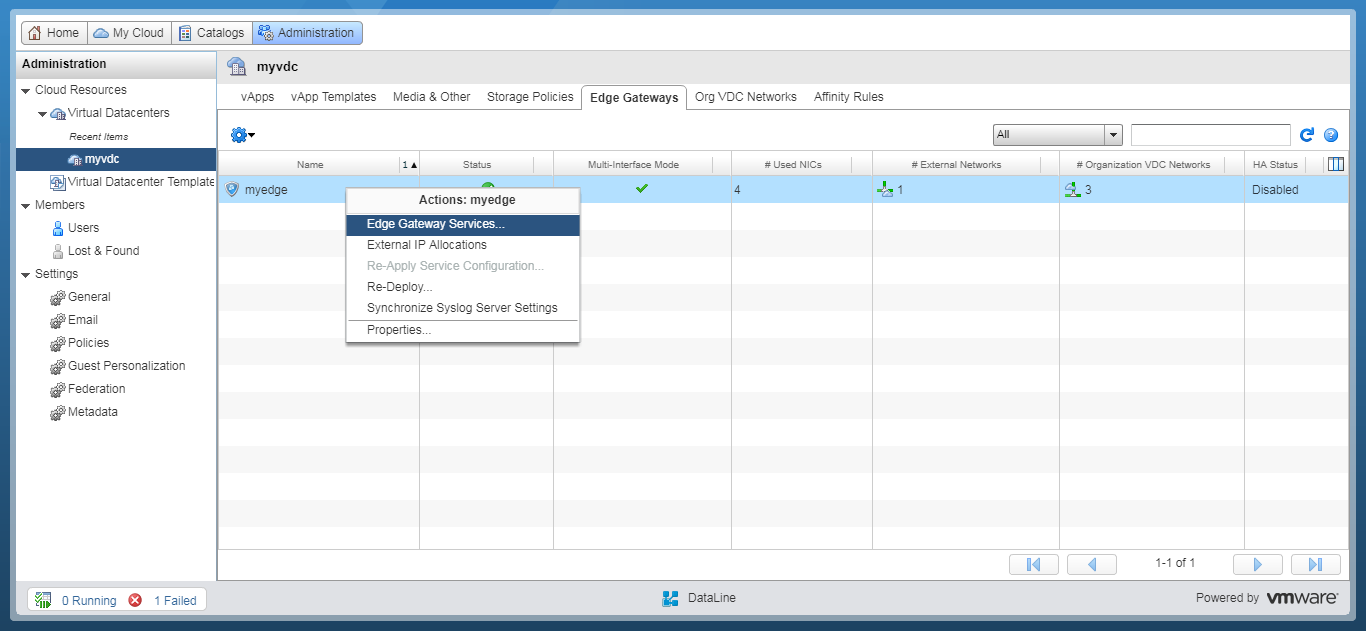
Next, right-click on the NSX Edge. In the menu that appears, select the Edge Gateway Services option . And we're back in the NSX Edge control panel.
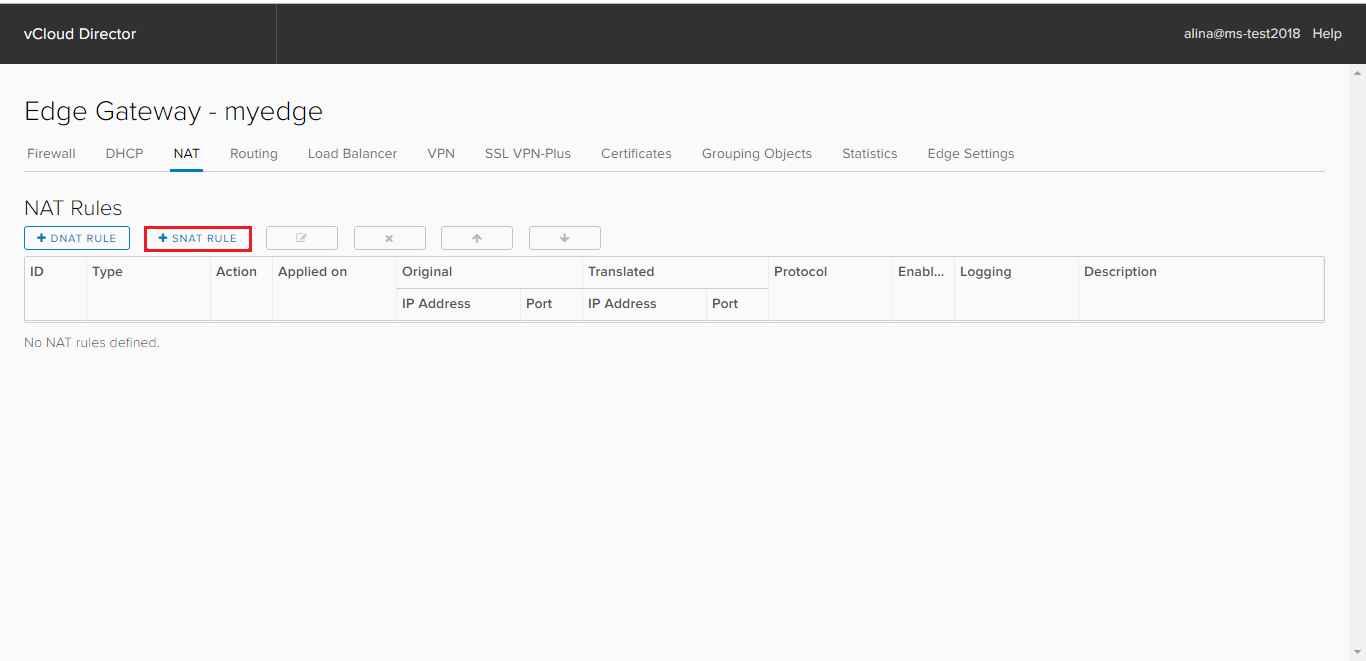
In the window that appears, open the NAT tab and click Add SNAT.
In a new window, specify:
- in the Applied on field - an external network (not an organization level network!);
- Original Source IP / range - internal address range, for example, 192.168.1.0/24;
- Translated Source IP / range - an external address through which Internet access will be provided and which you looked in the Sub-Allocate IP Pools tab.
Click Keep.

Create a DNAT rule. DNAT is a mechanism that changes the destination address of a packet, as well as the destination port. Used to redirect incoming packets from an external address / port to a private IP address / port within a private network.
Select the NAT tab and click Add DNAT.
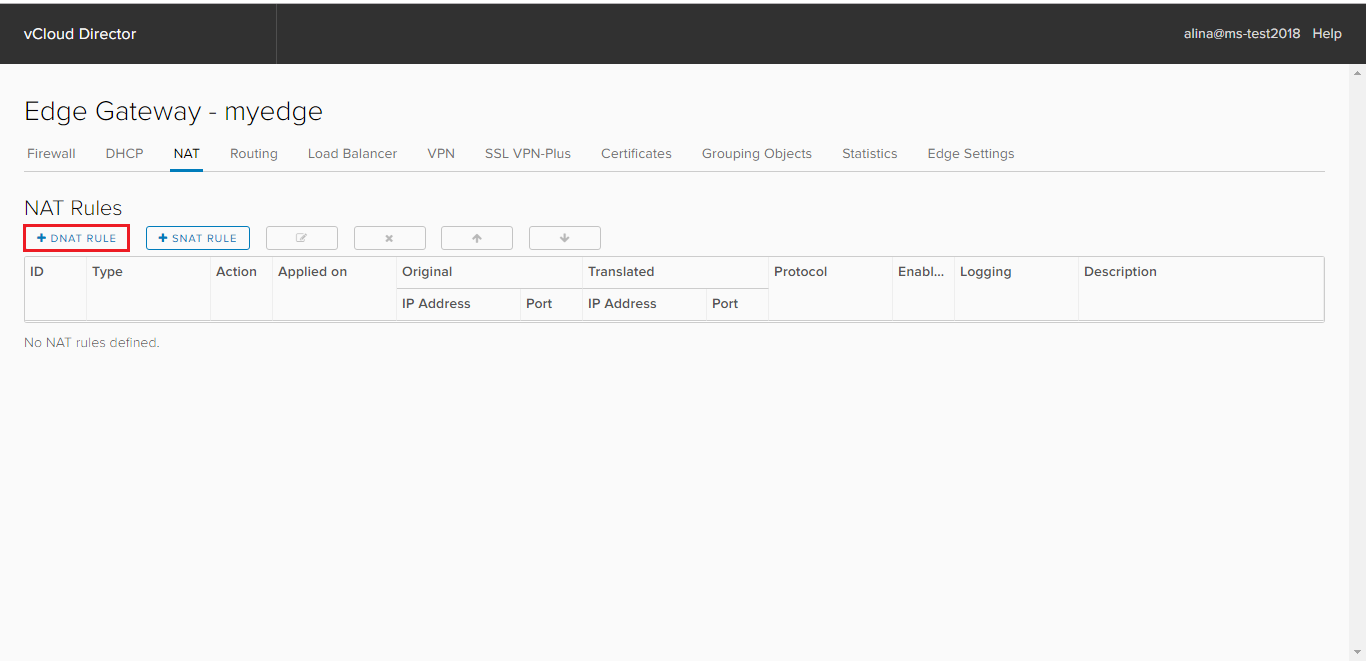
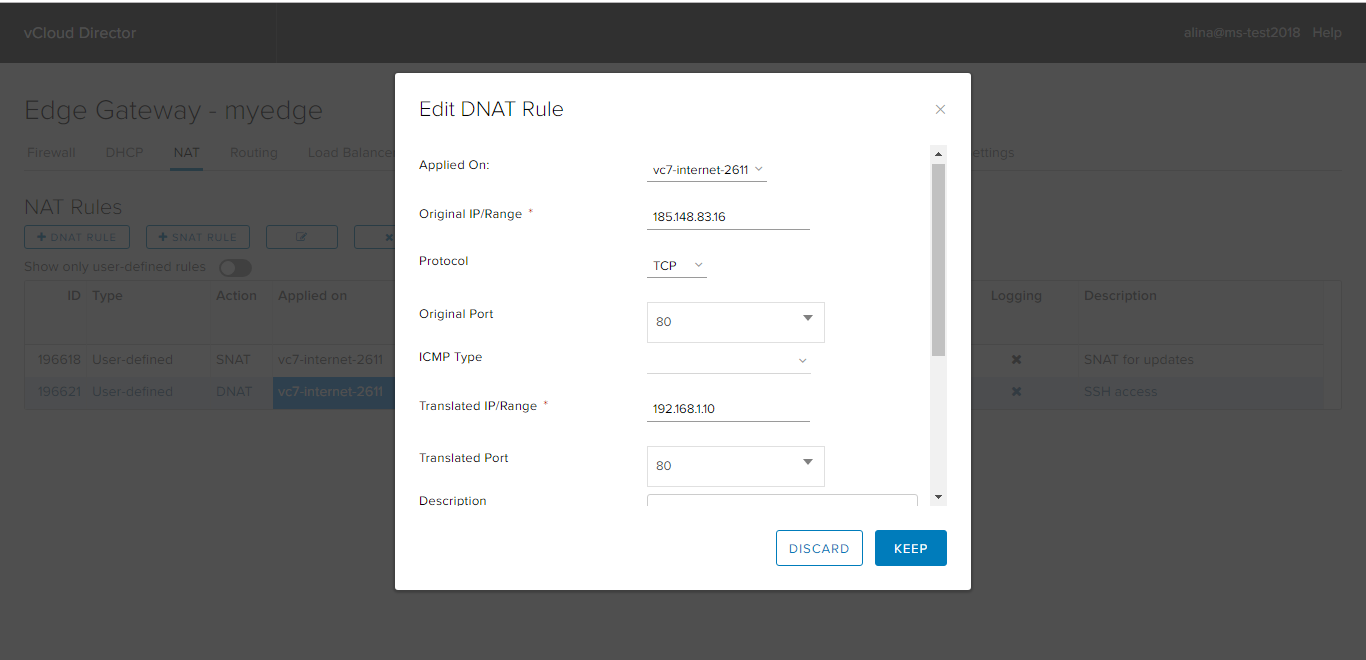
In the window that appears, specify:
- in the Applied on field, an external network (not an organization-level network!);
- Original IP / range - external address (address from the Sub-Allocate IP Pools tab);
- Protocol - protocol;
- Original Port - port for an external address;
- Translated IP / range - internal IP address, for example, 192.168.1.10
- Translated Port - port for the internal address to which the external address port will be translated.
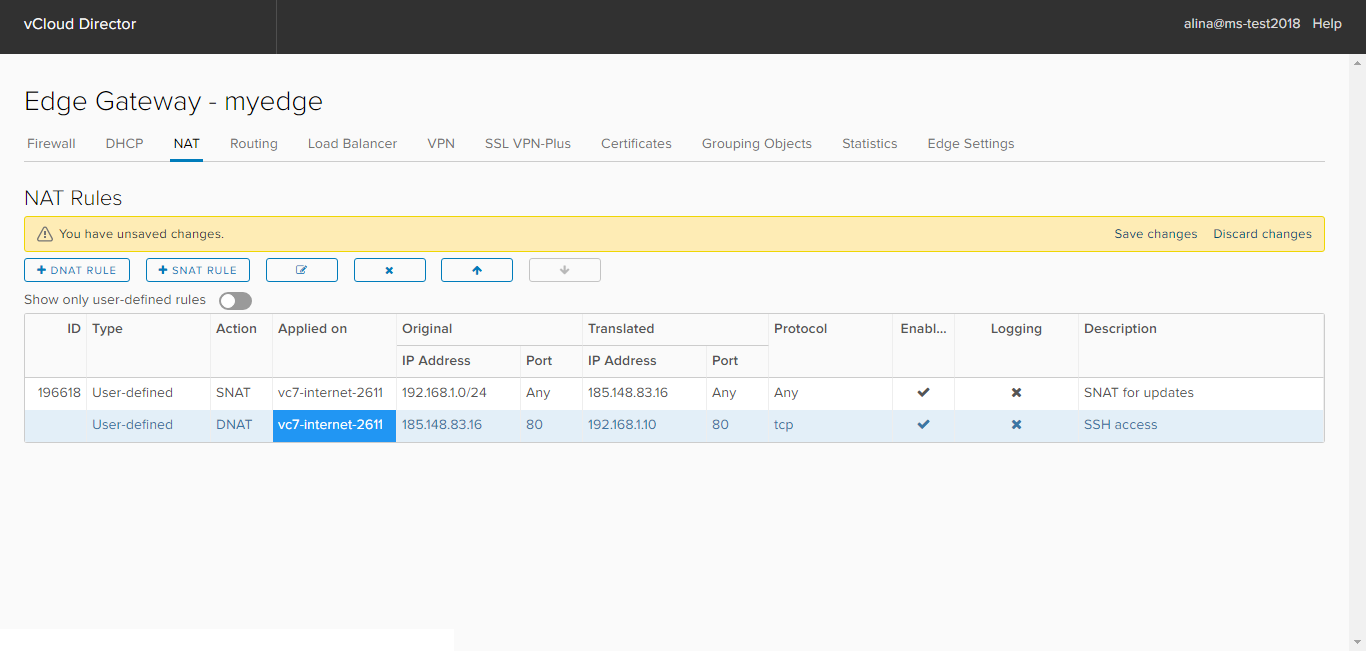
Click Keep.
We apply the entered configuration by selecting Save changes .
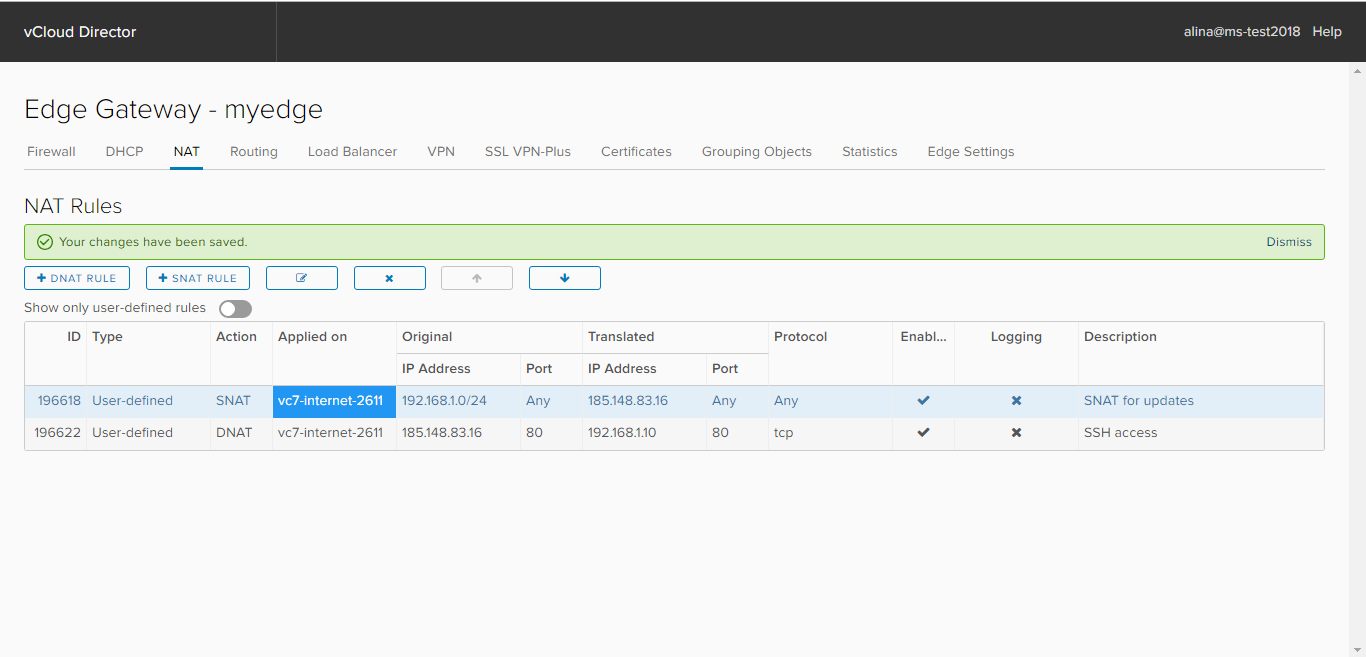
Done.
Next in line is the DHCP manual, including setting up DHCP Bindings and Relay.