Compact server for Django applications
- Tutorial
Introduction
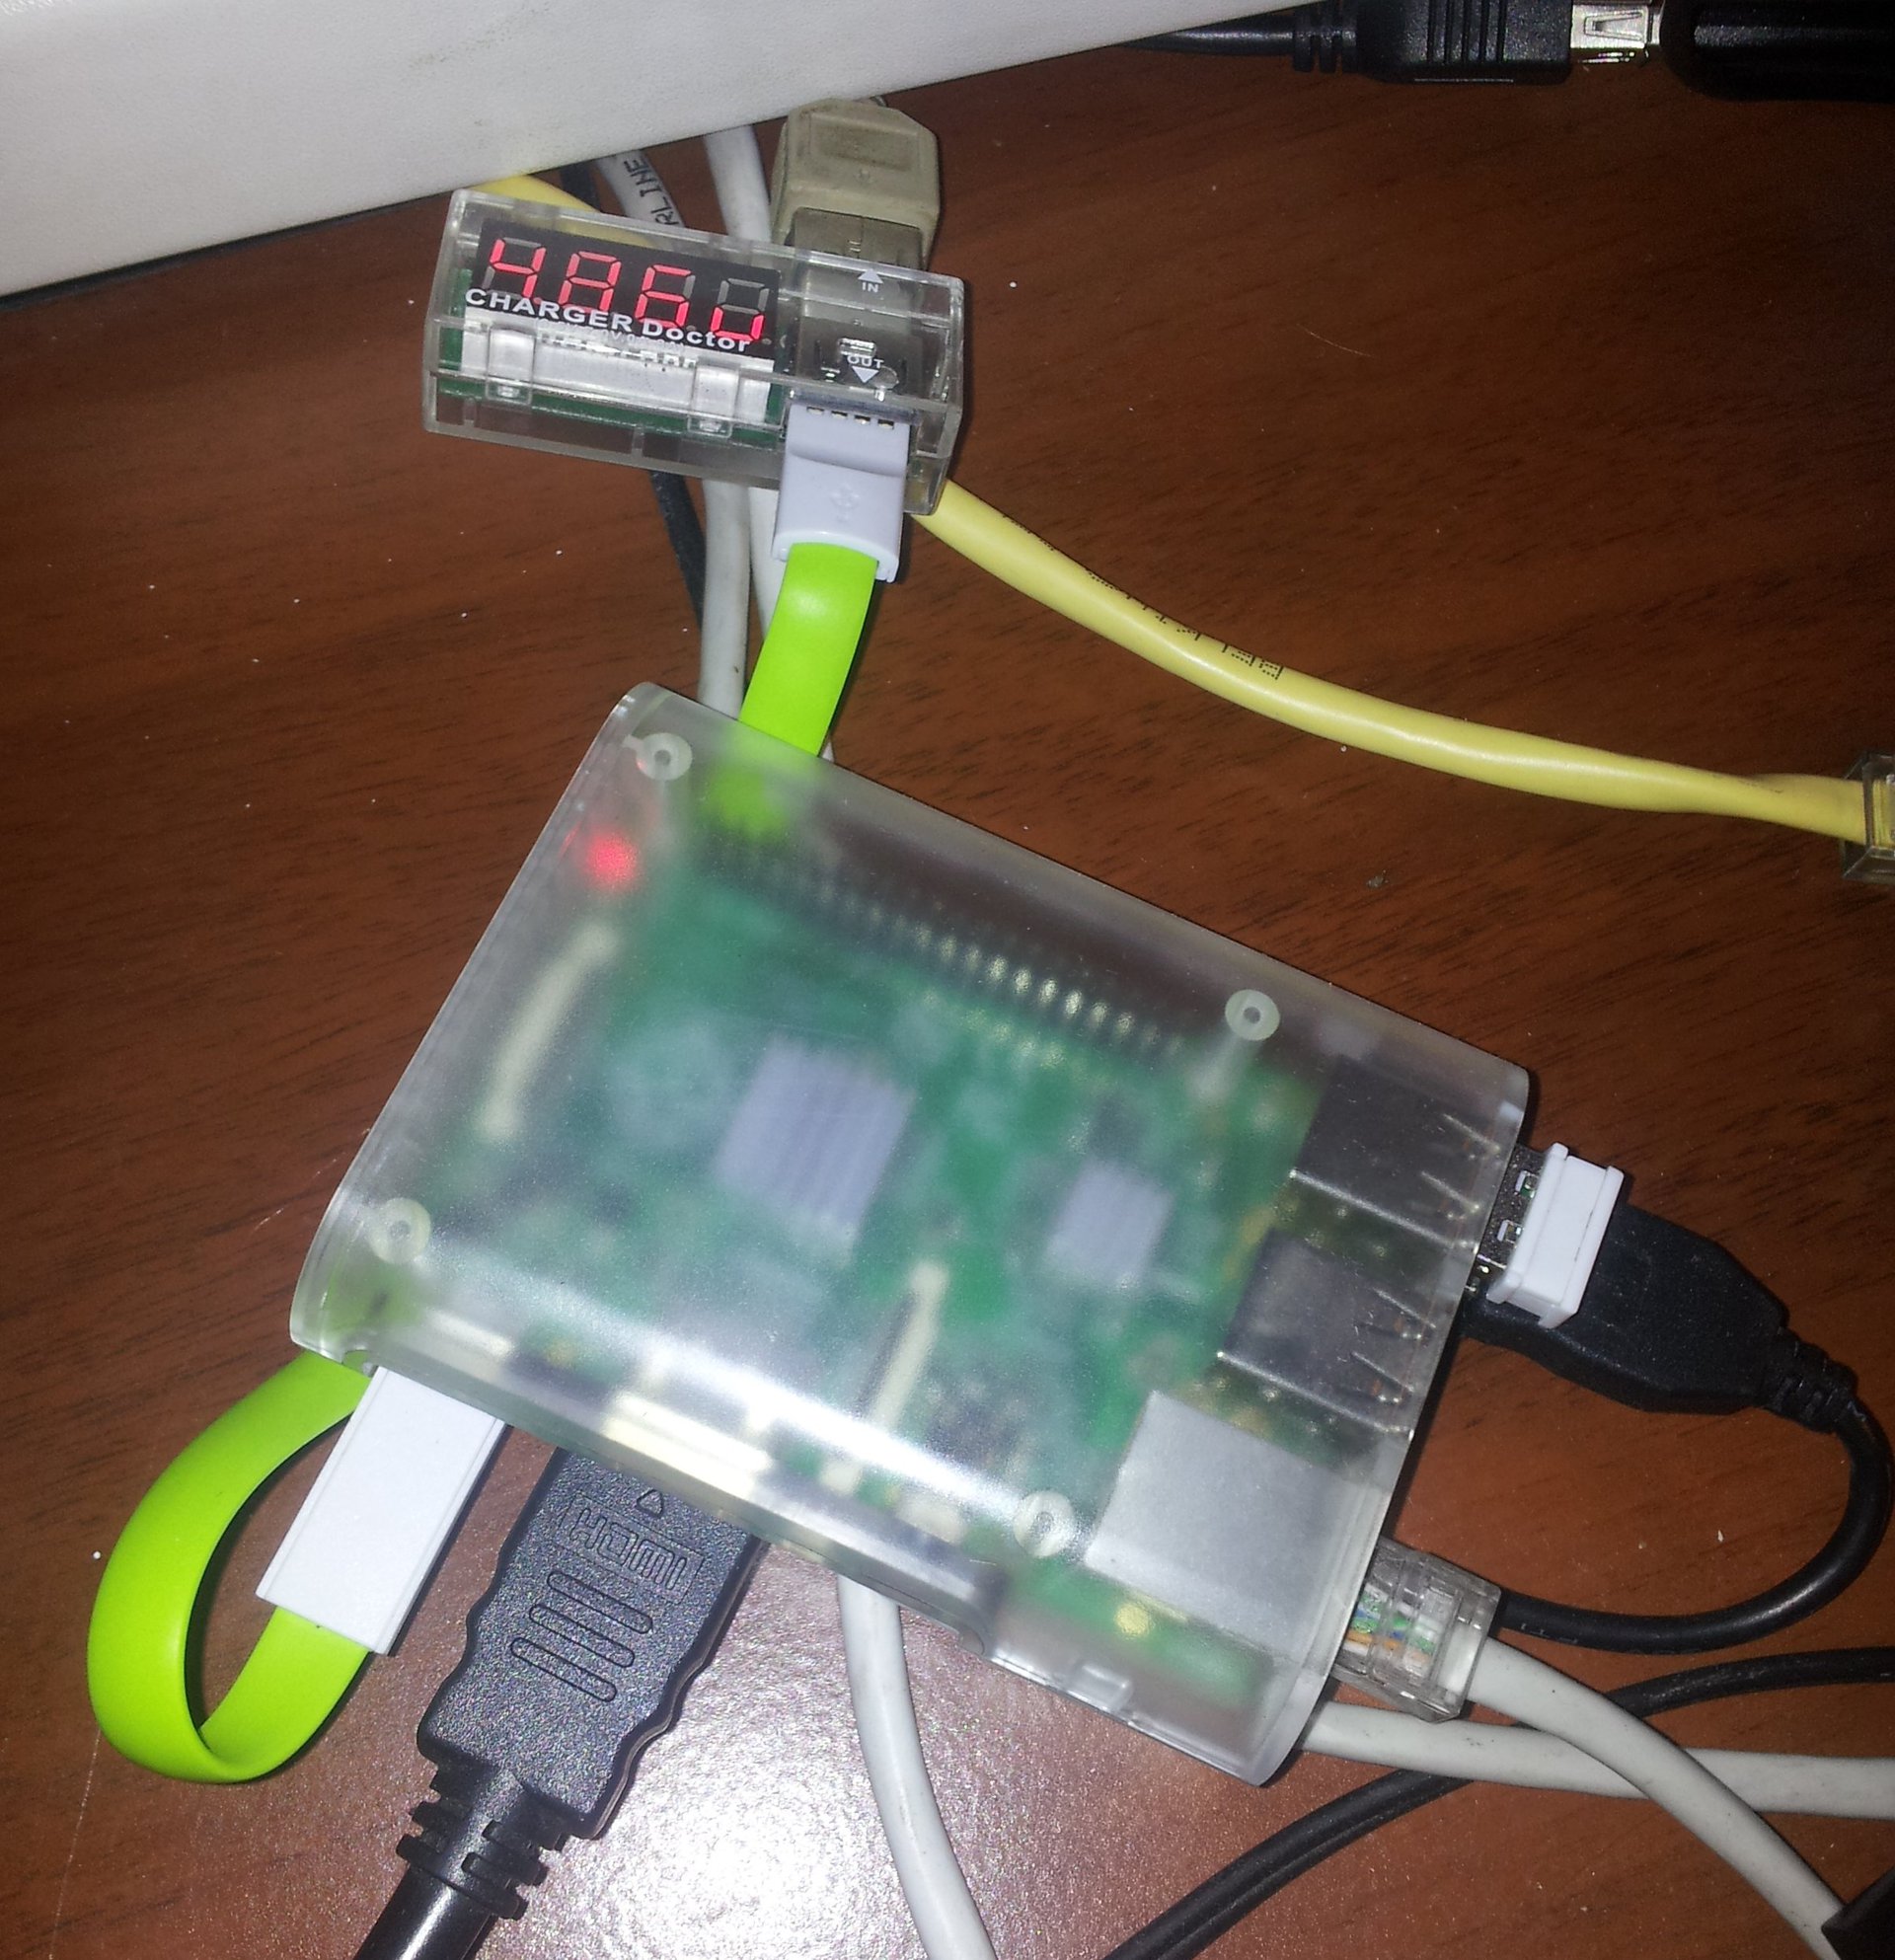
Many beginner web developers are thinking about where to post their creation. Typically, machines running * NIX-like systems are used for these purposes. My choice was Raspberry PI, because raspberry:
- running full Linux
- for a long time lies on the table and gathers dust.
I want to talk about how to configure a server running on a network with a dynamic external IP address. Such a solution is not suitable for launching large projects, but it is quite suitable for demonstrating your portfolio and personal application.
We will need
- Raspberry PI Model B, B +, or Raspberry PI 2 (since the boards on these models have Ethernet) with Raspbian installed and an activated SSH server. You can read about the setting here , here or here . In addition to Raspian for raspberries, there are a large number of alternative distributions . Here, as they say, "for every taste and color."
- Working Django application.
- DDNS-enabled router. This item is optional, since DDNS can be configured on the malink itself.
I will work with the raspberry of model B +.
Training
Raspbian 7.8 is installed on the raspberry.
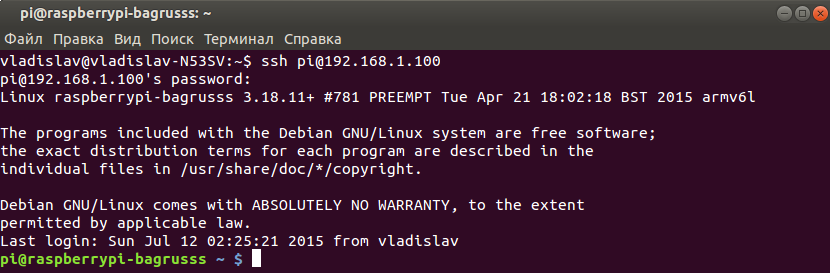
First you need to find the raspberry on the network to connect to it via ssh. In my case, there are two raspberries on the network, one of which is mine with the IP address 192.168.1.100. On some networks, nmap does not show network device names. In this case, you can find raspberry pi by the MAC address, which has the prefix B8: 27: EB. The -B option for grep determines how many preceding lines to print. We are connected to a raspberry on ssh. To get started, we’ll accelerate the raspberry to 1 GHz using raspi-config . Install the python package manager
nmap -sP 192.168.1.1/24 | grep raspberry

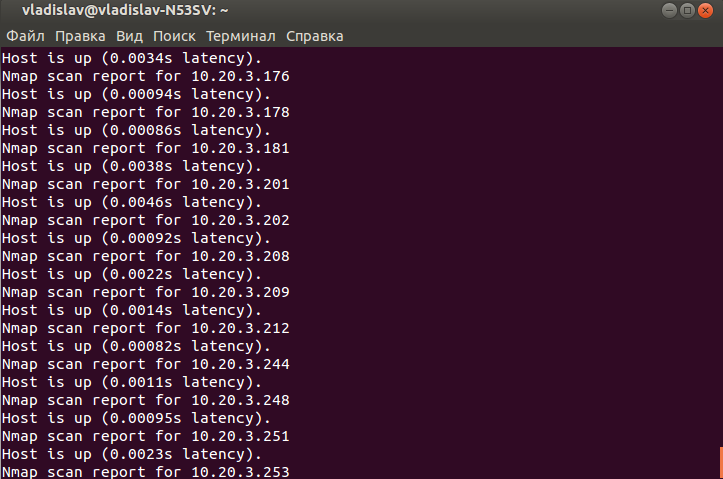
sudo nmap -sP -n 192.168.1.1/24 | grep -B 2 B8:27:EB

ssh [email protected]
sudo apt-get install python-pip
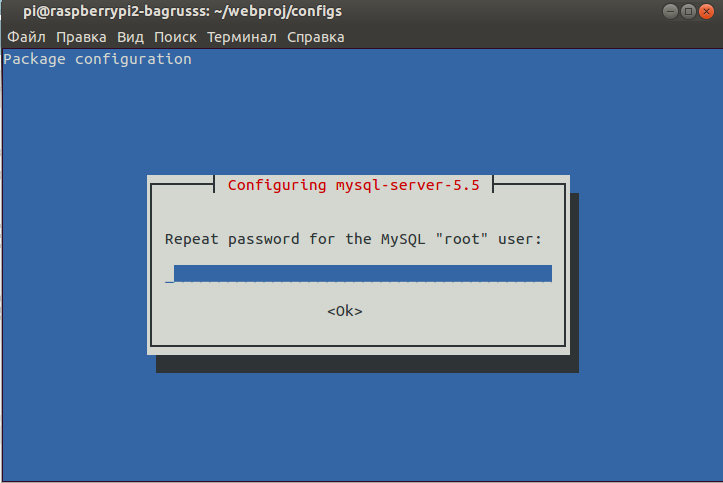
We proceed to install the necessary packages. My web application uses the MySQL DBMS. Frontgin and Backend are nginx and gunicorn respectively. During the installation of mysql, you must enter data for the root user of the DBMS. python-mysqldb is the driver needed when working with models in Django. Django install from python repositories. At the time of writing, the current versions of nginx and gunicorn in the repositories for raspberries 1.2.1 and 0.14.5, respectively. MySQL version for raspberry 5.5. To work with Django, you must install SciPy . nginx 1.2.1 is deprecated. A newer one can be compiled from source . Fresh gunicorn can be installed from python repositories.
sudo apt-get install nginx gunicorn mysql-client mysql-server python-mysqldb
sudo pip install django
sudo apt-get install python-scipy
Server Tuning
We place the web application on the raspberry (for example, in / home / pi).
If you have working configs, then just copy them to the appropriate directories:
- for nginx / etc / nginx / sites-enabled /
- for gunicorn /etc/gunicorn.d/
There is nothing complicated with nginx. I would like to pay attention to the settings for gunicorn.
CONFIG = {
    'mode': 'wsgi',
    'working_dir': '/home/pi/project',
    #'working_dir': '/home/pi/project/project',
    'user': 'www-data',
    'group': 'www-data',
    'python': '/usr/bin/python',
    'args': (
        '--bind=127.0.0.1:8081',
        '--workers=5', # 5 достаточно для малинки
        '--graceful-timeout=60',
        '--timeout=60',
        #'--debug',
        #'wsgi:application',
	'project.wsgi',
    ),
}
If you specify working_dir (the path to the wsgy.py file) and specify
'/home/pi/project/project'in args 'wsgi:application', then the workers first start on the raspberry, then they die without giving a reason (under Ubuntu, for example, gunicorn works with both settings).MySQL Migration
You can dump an existing database using the mysqldump utility . The resulting file consists of a set of SQL statements that restore the structure, as well as the information stored in the database. On the raspberry we create a database. We start mysql shell. Add a new database.
mysqldump -u root -p dbname > dbname.sql
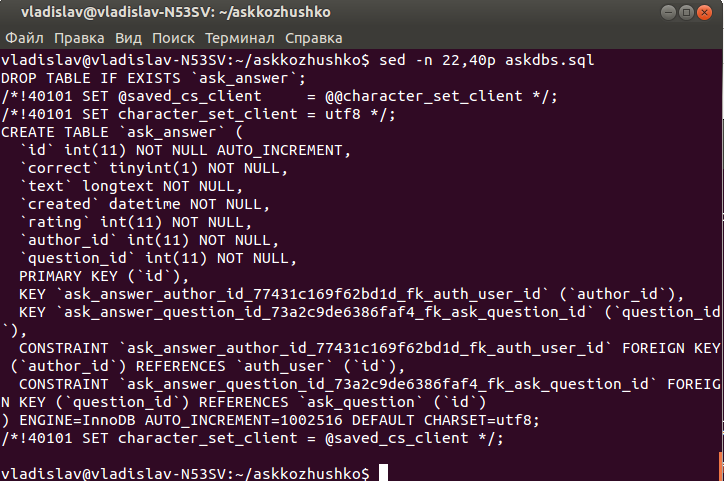
mysql -u root -p
mysql> create database dbname character set utf8 collate utf8_general_ci;
mysql> grant all privileges on dbname.* to someusr@localhost identified by 'somepassword';
We restore data from the dump. With a dump size of 162 MB, the recovery time was about 10 minutes. It should be noted that it is better to store the databases on an external drive, otherwise the micro SD card may quickly become unusable due to frequent write operations. How to do this can be read here . The mysql config is located on the path /etc/mysql/my.cnf
mysql -u root -p dbname < dbname.sql
Check
Restart nginx and gunicorn. If everything is configured correctly, you can open the main page.
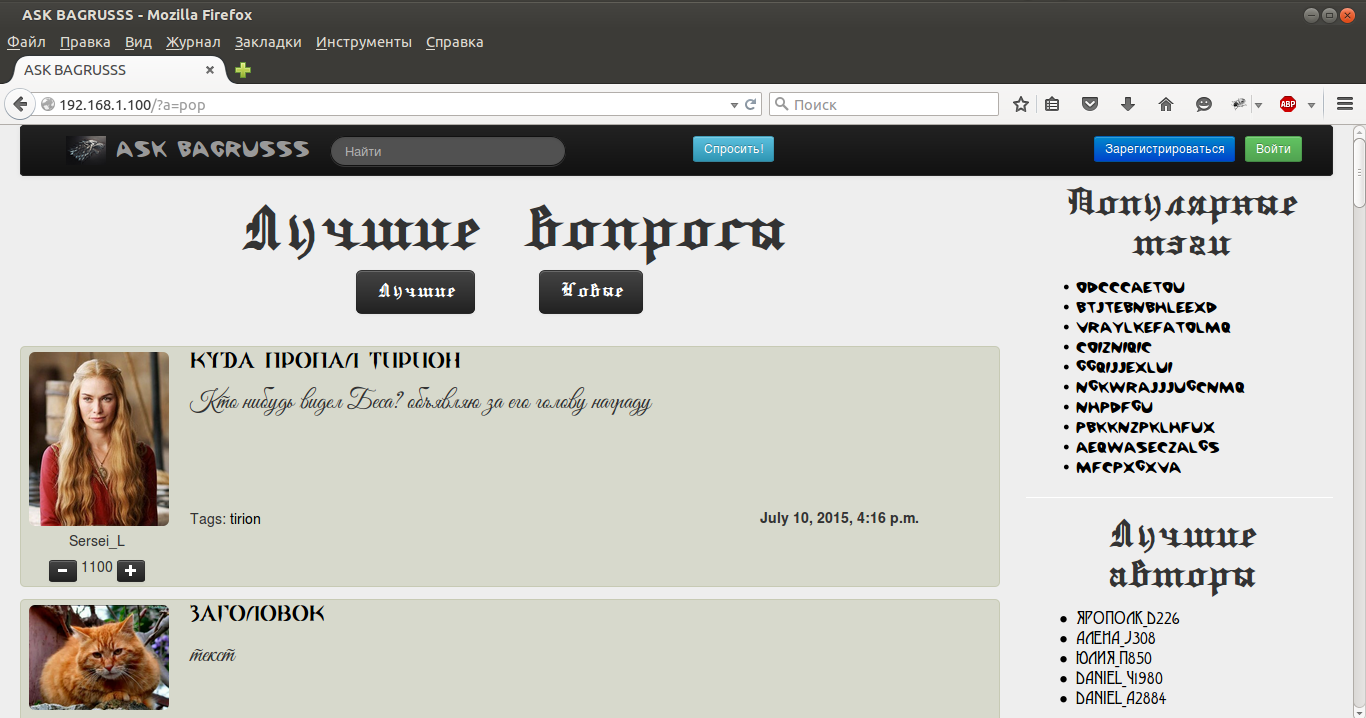
We pass to stress testing. Install apache benchmark. Test in 4 threads with 1000 Raspberry PI model B + queries.
sudo apt-get install apache2-utils
ab -c 4 -n 1000 http://192.168.1.100/
vladislav@vladislav-N53SV:~$ ab -c 4 -n 1000 http://192.168.1.100/
This is ApacheBench, Version 2.3 <$Revision: 1528965 $>
Copyright 1996 Adam Twiss, Zeus Technology Ltd, http://www.zeustech.net/
Licensed to The Apache Software Foundation, http://www.apache.org/
Benchmarking 192.168.1.100 (be patient)
Completed 100 requests
Completed 200 requests
Completed 300 requests
Completed 400 requests
Completed 500 requests
Completed 600 requests
Completed 700 requests
Completed 800 requests
Completed 900 requests
Completed 1000 requests
Finished 1000 requests
Server Software:        nginx/1.8.0
Server Hostname:        192.168.1.100
Server Port:            80
Document Path:          /
Document Length:        24839 bytes
Concurrency Level:      4
Time taken for tests:   1309.607 seconds
Complete requests:      1000
Failed requests:        0
Total transferred:      25018000 bytes
HTML transferred:       24839000 bytes
Requests per second:    0.76 [#/sec] (mean)
Time per request:       5238.429 [ms] (mean)
Time per request:       1309.607 [ms] (mean, across all concurrent requests)
Transfer rate:          18.66 [Kbytes/sec] received
Connection Times (ms)
              min  mean[+/-sd] median   max
Connect:        0    1   0.1      1       1
Processing:  4924 5237  91.4   5227    6419
Waiting:     4919 5227  91.3   5217    6403
Total:       4925 5238  91.4   5228    6420
Percentage of the requests served within a certain time (ms)
  50%   5228
  66%   5245
  75%   5255
  80%   5265
  90%   5296
  95%   5335
  98%   5382
  99%   5667
 100%   6420 (longest request)
Queries are slow, since most of the time the query takes up working with the database. Raspberry PI 2 model B recently came to me. Let's see what it is capable of with the same settings and data.
vladislav@vladislav-N53SV:~$ ab -c 4 -n 1000 http://192.168.1.14/
This is ApacheBench, Version 2.3 <$Revision: 1528965 $>
Copyright 1996 Adam Twiss, Zeus Technology Ltd, http://www.zeustech.net/
Licensed to The Apache Software Foundation, http://www.apache.org/
Benchmarking 192.168.1.14 (be patient)
Completed 100 requests
Completed 200 requests
Completed 300 requests
Completed 400 requests
Completed 500 requests
Completed 600 requests
Completed 700 requests
Completed 800 requests
Completed 900 requests
Completed 1000 requests
Finished 1000 requests
Server Software:        nginx/1.8.0
Server Hostname:        192.168.1.14
Server Port:            80
Document Path:          /
Document Length:        24838 bytes
Concurrency Level:      4
Time taken for tests:   170.083 seconds
Complete requests:      1000
Failed requests:        0
Total transferred:      25017000 bytes
HTML transferred:       24838000 bytes
Requests per second:    5.88 [#/sec] (mean)
Time per request:       680.330 [ms] (mean)
Time per request:       170.083 [ms] (mean, across all concurrent requests)
Transfer rate:          143.64 [Kbytes/sec] received
Connection Times (ms)
              min  mean[+/-sd] median   max
Connect:        0    1   0.1      1       1
Processing:   569  678 104.6    650    1338
Waiting:      567  676 104.1    647    1334
Total:        569  679 104.6    651    1338
Percentage of the requests served within a certain time (ms)
  50%    651
  66%    682
  75%    708
  80%    727
  90%    796
  95%    890
  98%   1045
  99%   1138
 100%   1338 (longest request)
Raspberry PI 2 processes requests on average 6.16 times faster. Raspberry developers are not fooled.
DDNS Setup
You can configure DDNS on the router or on the raspberry itself. I choose No IP because I have been using it for several years. Consider free use.
Host Registration
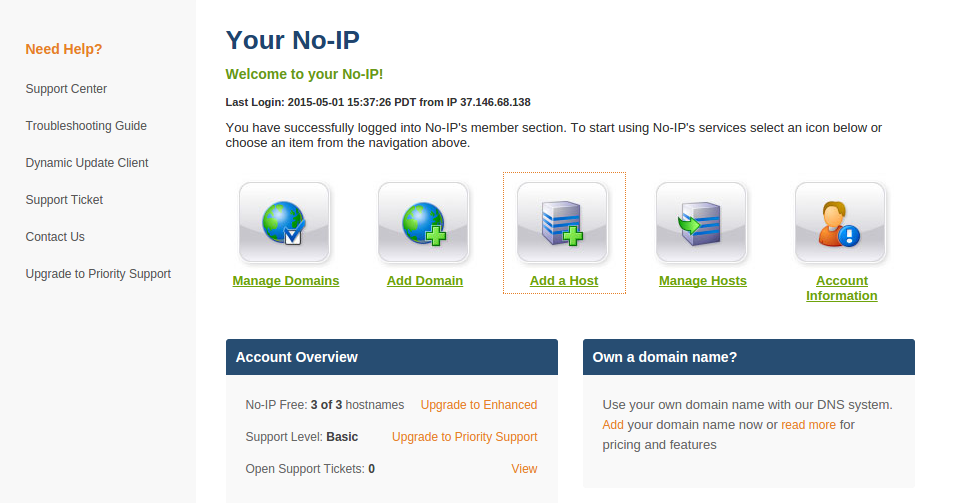
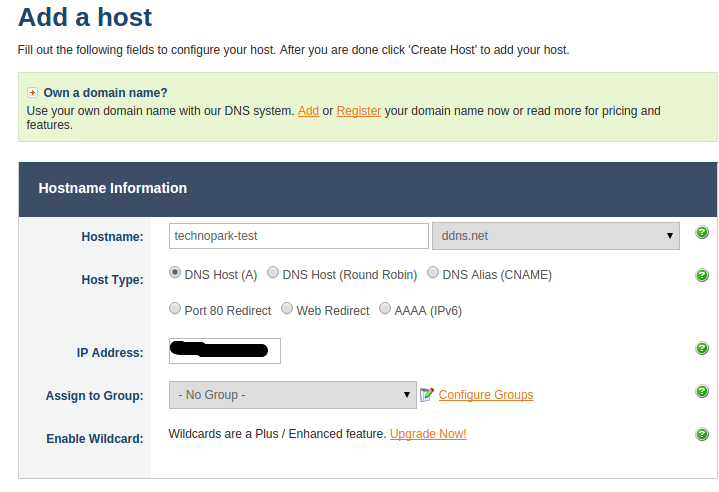
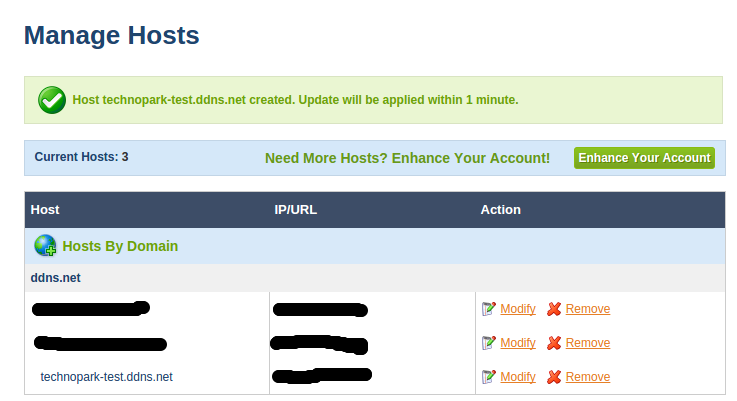
Configure DDNS on the router
For example, I will configure DDNS on the ASUS RT-N56U with firmware from padavan version 3.4.3.9-091. Open the router menu page
(for example, 192.168.1.1). WAN-> DDNS.
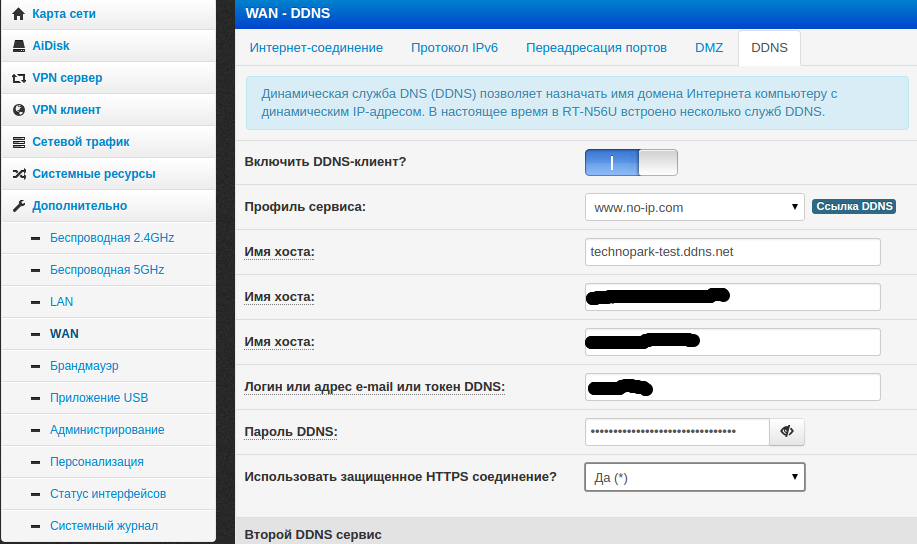
We select the no-ip.com service, specify the registration data, as well as our added host (technopark-test.ddns.net).
We set the remaining parameters at will.
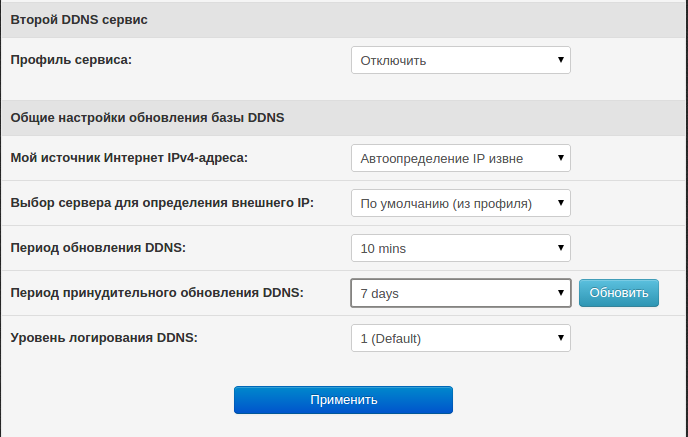
Now, when changing the external IP address, our application remains available on the network.
Port Forwarding Settings
We need that when accessing the host, Malinka gives the web application. The router is responsible for forwarding incoming packets coming from outside from port X to internal port Y. In the router menu, go to WAN-> Port Forwarding. It is necessary to redirect the external 80 port to the raspberry 80 port. Add a new rule and apply the changes.

Now Malinka processes all incoming packets on port 80. Check by entering the host received in No IP in the address bar of the browser.
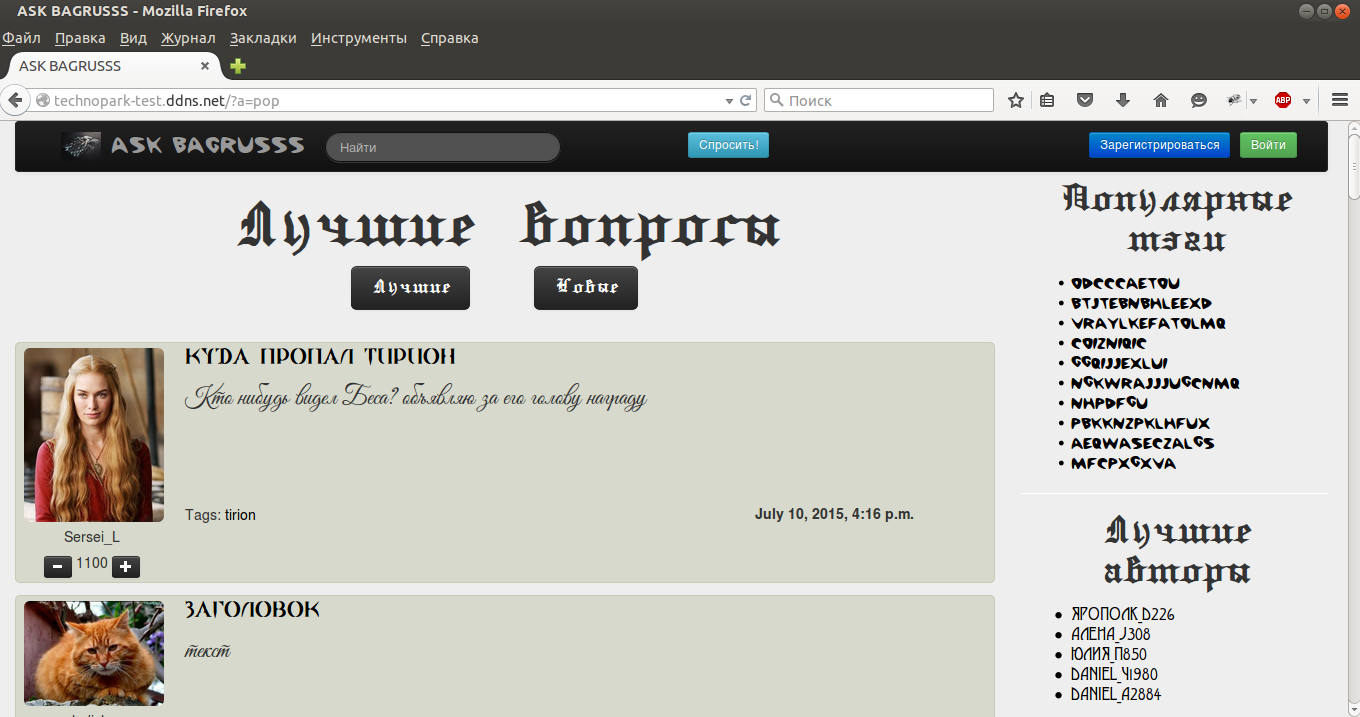
Now our web application is available for Internet users.
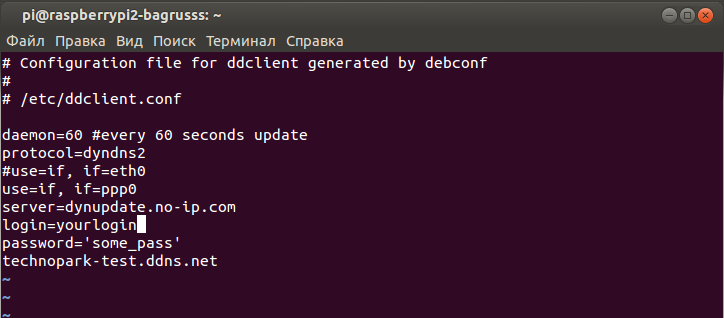
We configure DDNS on a raspberry
This option is not suitable if raspberry has a private IP , because it will forward its local IP address to the No IP service.
sudo apt-get install ddclient
Dessert
My raspberry lay on a table for a long time and was gathering dust, together with tm1638 and DHT11 , displaying indications of temperature and humidity in the room and other information.
Still, I was interested in trying to control the GPIO Raspberry PI from django. I developed a simple web application that combined my early work. It allows you to see the temperature and humidity measured with DHT11, some useful information, controls an 8-relay module (which can be used to control electrical appliances) and sends the text to tm1638.
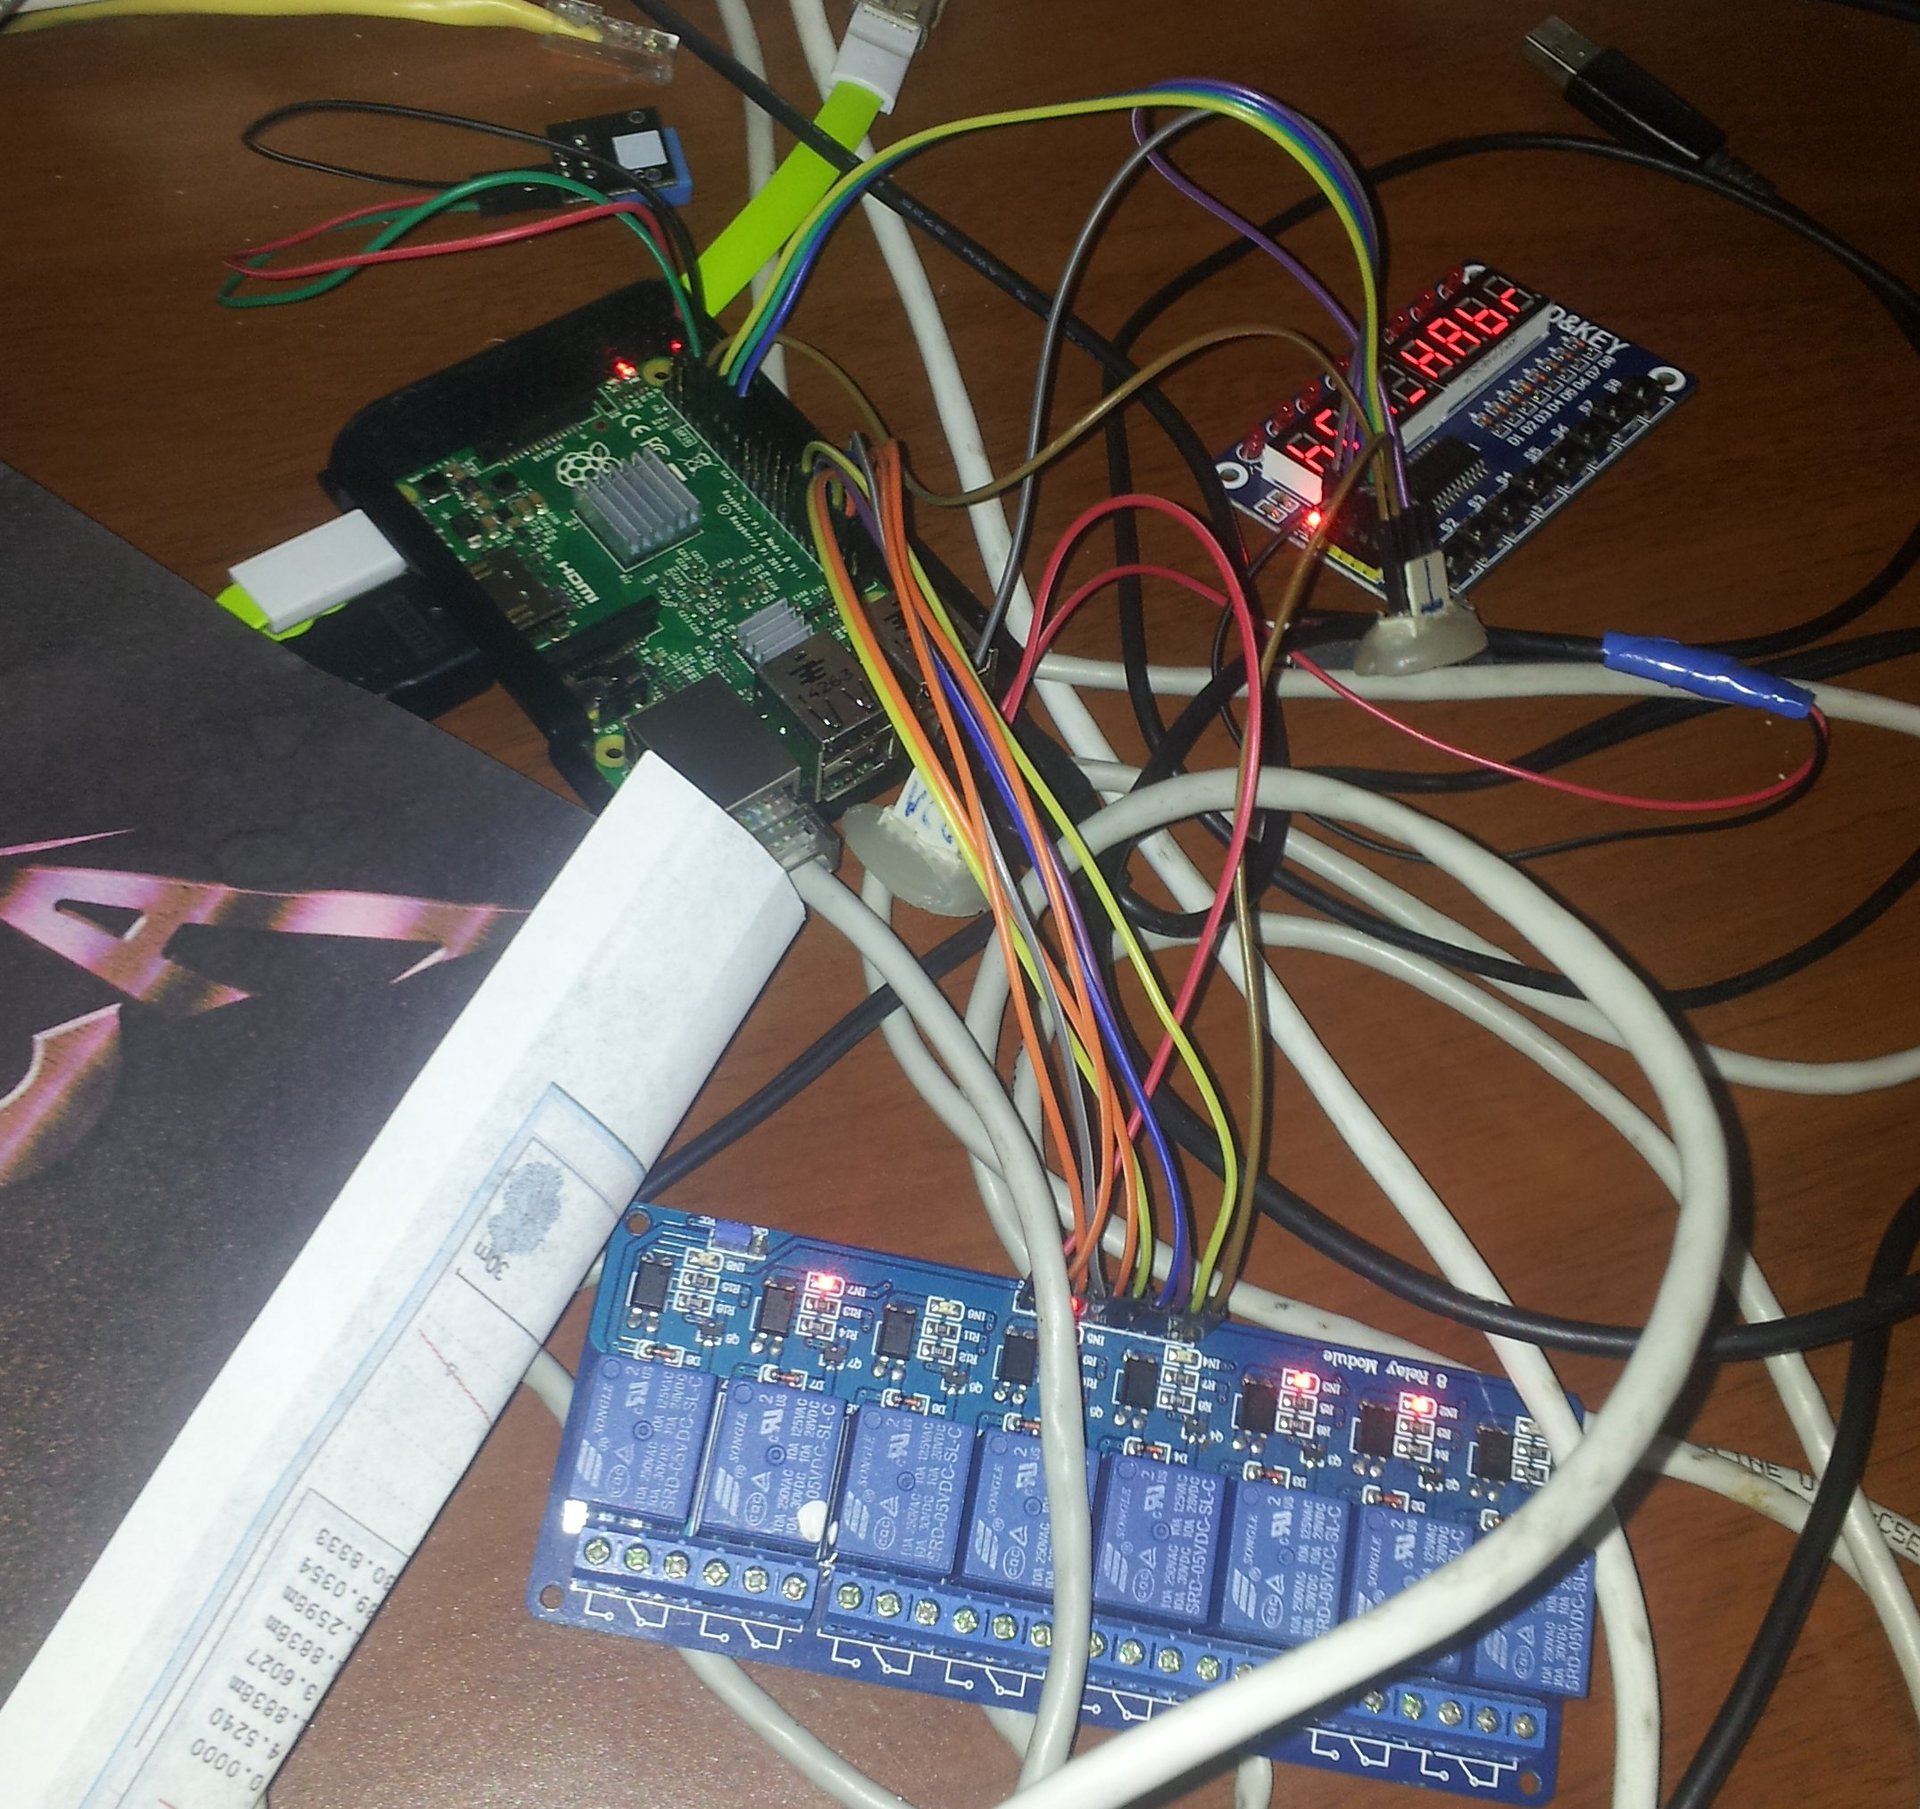
To manage the GPIO, you must run the server with root privileges. This is a potential vulnerability.
The full use of the web application involves the server working without superuser rights, configuring https, adding the ability to administer accounts, logging, sharing access to managed devices, scheduled operation of electrical appliances and much more.
However, this is a completely different
Conclusion
Having Raspberry PI models B, B + or Raspberry PI 2, power bank , as well as an “open” Ethernet jack, we get a compact server that you can use to demonstrate your best practices. Setting up a server for Django applications on a Raspberry PI running Raspbian is not much different from any other Linux build. Packages in repositories may be deprecated. To work with new versions, you can manually compile programs from source.
The source code of the demo application.
PS I want to thank colleagues in the Technopark for their help in preparing the material.
PSS I am ready to listen to good advice and comments, and then correct the material.
This article was created as part of the Technopark Mail.Ru article contest (park.mail.ru).