How I did realtime roulette on NodeJS & VueJS
Hi friends, I want to tell you one very outstanding story about how I made online roulette for one Western customer. And specifically in this article, I will mostly deal with frontend development.
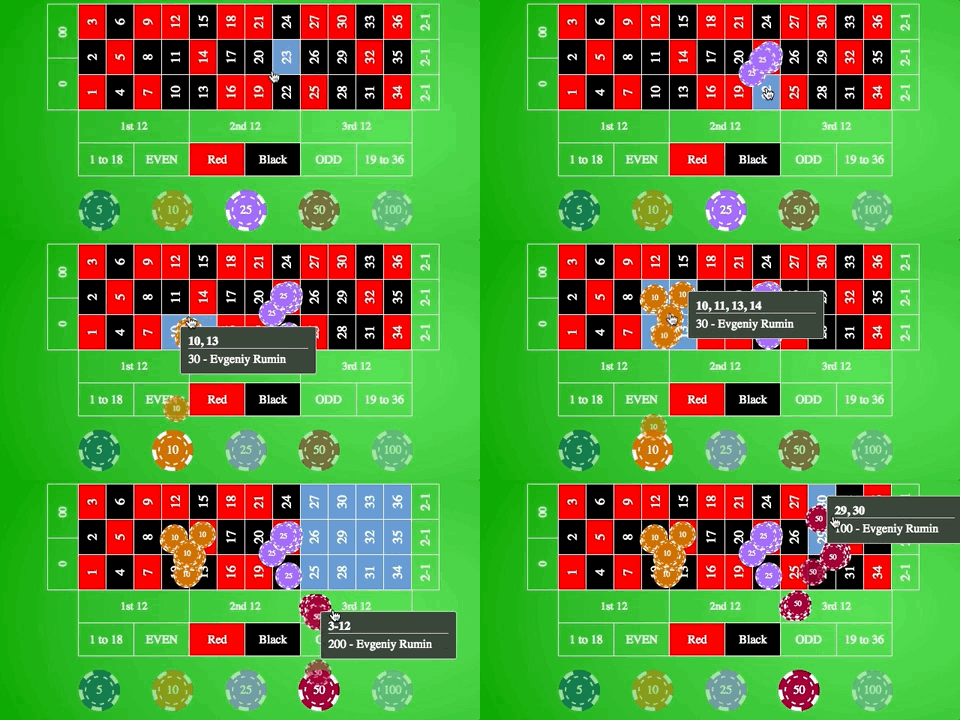
Looking ahead, I want to show the result:
How it all began
One of my old customers turned to me once, and offered to have fun and make a multi-user online roulette on sockets. The budget is not bad, the deadlines are tight. Well, OK. Why not, my hands were already scratching, but without the backend I did not start ... As soon as the first version of the backend appeared. I immediately began to act. A sketch of the design fell into my hands , and it spun.
A little layout
The first thing I did was make up the betting board. Everything is in HTML, CSS, but to be honest, I took it here . Some kind person posted it on gitHub. Kowtow to him. Of course, later I had to finish it. But the foundation is already there
Well ok, the second task is the mechanics of betting

To implement this task, I decided to split my little VueJS application into several modules, or rather Vuex state modules, for convenience I used the built-in namespacing
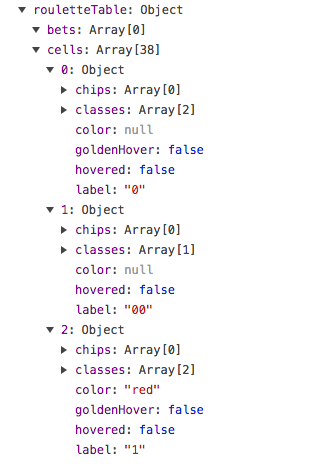
This is how I store cell information

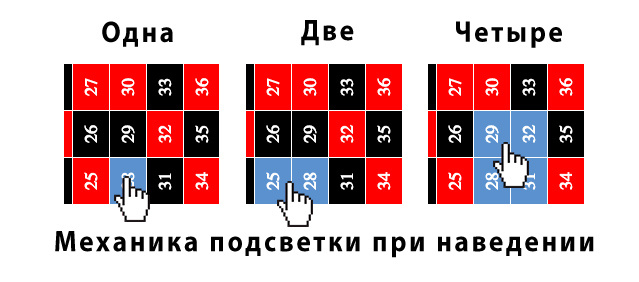
Hover working principle
- All cells are an array of objects with fields such as label, isHover
- Listening to mouseover event over cells
- I get the coordinate from each hover event
- I build a square based on the minimum / maximum, leaving the coordinate in the center of the figure
- I determine which cells are under the square, and put them hover: true, the rest is false
- I mutate state in storage (I use Vuex)
- Voila, VueJS picks up the changes and adds hover classes for the cells under the arm (sounds interesting)
By clicking, the highlighted cells are written to the rates array.
In fact, a whole cycle of actions
As a result, we get such an array of bets

Chip Placement
Chips are placed on the second layer above the board, when a new element appears in the array, the chip flies out of its stack, smooth animation is implemented using the typical transition built into VueJS

Finally
I would like to note the power of the VendJS frontend framework. Its lightness and just that I experienced while working with him. I used to have to work with him a lot, but all tasks are nothing more than SPA for admins / CRM, etc.
In the next part of my story, we will mainly deal with the backend, or rather, its absence and how I got out of this situation.
UPD: For clarity, I added a video with the final result to the beginning of the article.
