November 9, 2016 at 09:42
NetApp ONTAP & ESXi 6.x tuning
Continuing the theme of optimizing the ESXi host to communicate with the storage NetApp ONTAP, this article will be enlightened optimize performance VMWare ESXi 6.X, previous articles have been devoted to tuning the OS the Linux , the Windows and VMware ESXi 5.X among the SAN . NetApp has been working closely with VMware for a long time, and the fact that the sensational vVOL technology was implemented can confirm this.One of the first in the release of Clustered Data ONTAP 8.2.1 (August 2014), while vSphere 6.0 has not yet been released. NetApp was the first to announce vVol support with NFS (Maybe NetApp is still the only one here, I’m not following). Therefore, ONTAP storage systems are extremely popular in this environment.
This article will be useful to owners of storage systems with ONTAP, and the Disk Alignment part will be useful not only to owners of NetApp.
VMWare ESXi 6.X settings can be divided into the following parts:

To search for a bottleneck, a sequential exclusion technique is usually performed. I suggest first things first to start with storage . And then move the storage -> Network ( Ethernet / FC) -> Host ( Windows / Linux / VMware ESXi ) → Application.
There are a couple of basic documents that you need to rely on when configuring VMware + NetApp:
" How to configure VMware vSphere 6.x on ONTAP 8.x
" Virtual Storage Console 6.0 for VMware vSphere Installation
" TR-4128: vSphere 6 on NetApp MetroCluster 8.3
It’s not worth giving all the server resources to the guest OS , firstly, the hypervisor needs to leave at least 4GB of RAM , and secondly, the opposite effect is sometimes observed when adding guest OS resources , this must be selected empirically.
This section has been submitted to a separate post .
Tuning settings is needed for two purposes:
To optimize performance, you may need to eliminate disk misalignment . Misalignment can be obtained in two cases:
Let's look at these cases.
To work with takeover / giveback in the HA pair, you must configure the correct timeouts of the guest OS . For disk FAS systems, this time is 60 seconds, and for All Flash FAS (AFF) it is 2-15 seconds. Since the cluster can contain storage systems of different models, disk, hybrid and AFF systems, and data can migrate between these systems, it is recommended to use the worst value of timeouts (for disk systems), namely 60 seconds:
The default OS values in the case of using NFS are satisfactory, and the settings for the guest OS do not need to be changed.
These values are set manually or using scripts available as part of VSC:
Learn more about zoning guidelines for NetApp in pictures .
For ONTAP 8.X and 9.X, ALUA is always enabled for all block protocols: iSCSI / FC / FCoE .
If the host correctly defined ALUA , then the Storage Array Type plug-in will display VMW_SATP_ALUA . For ALUA , the Most Recently Used or Round Robin algorithm, any , is allowed to be used .

Round Robin will be more productive if there are more than one path to the controller. In case of using Microsoft Cluster + RDM disks, the Most Recently Used balancing mechanism is recommended for use .
Below is a table of recommended load balancing settings. Learn more about NetApp ONTAP, ALUA logic and load balancing for block protocols .
For optimal operation of the ESXi host, it is necessary to set the parameters recommended for it.
There are several ways to do this:
NetApp generally recommends using “default values” for HBA for ONTAP systems with an ESXi host as set by the adapter manufacturer. If they have been changed, they must be returned to the factory settings. Check out the relevant best practices. For example, if we are talking about DB2 virtualization in VMware on NetApp, it is recommended ( see page 21 ) to increase the queue length to 64 on ESXi (how to do this is written in Vmware KB 1267 ).
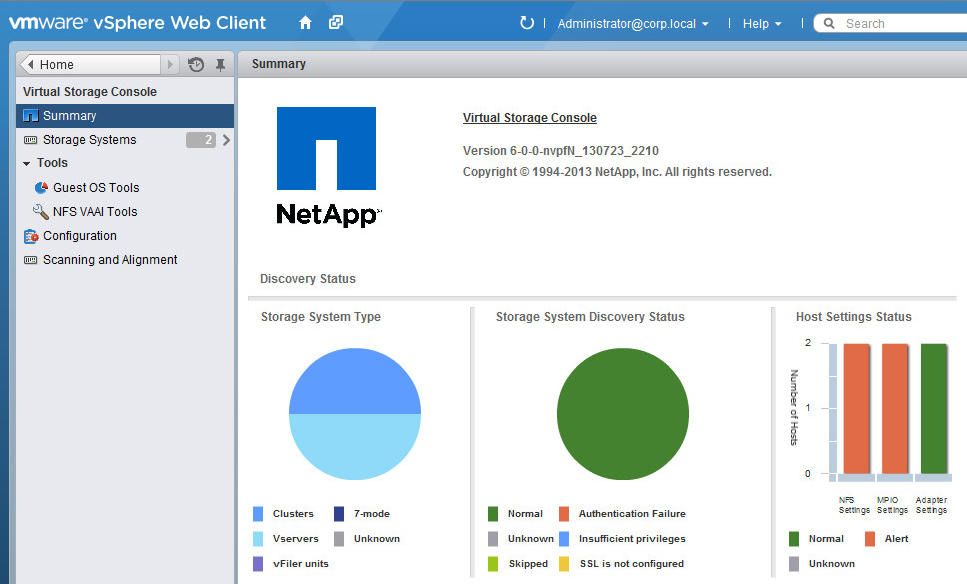
The NetApp VSC plugin (which is free software ) sets the recommended settings on the ESXi host and HBA adapter: queue, delays, and others. The plugin itself integrates into vCenter. Saves time and eliminates the human factor during the test when setting parameters on the ESXi host to work more efficiently with NetApp. Allows you to perform basic operations for managing storage from vCenter required by the administrator of virtualized environments. VSC storage permissions can be flexibly configured for multiple users using RBAC . VSC is required to configure vVOL.
The plugin version is available only for web client. Version 6 and newer is supported.
If you are using iSCSI, it is highly recommended that you use Jumbo Frames on Ethernet at speeds greater than or equal to 1Gb. Read more in the Ethernet article with NetApp ONTAP . Do not forget about VMware's recommendations for LACP, Port-channel, Spanning Tree, PortFast, Flowcontrol settings.
Remember to create the right network adapter — VMware recommends using VMXNEE3. Starting with ESXi 5.0, VMXNET3 supports Jumbo Frames. The E1000e network adapter supports the speed of 1GB networks and MTU 9000 - it is installed for all created VMs by default (except Linux). The Flexible Flexible Standard Virtual Network Adapter supports MTU 1500. More details.

Also, do not forget that the port group installed for the virtual network adapter in your virtual machine must be connected to the virtual switch with the MTU 9000 setting set for the entire switch.

ONTAP systems support VMware VAAI primitives by downloading some of the routine data management tasks on the datastore from the host to the storage, where it is more logical to do this. In a SAN environment with ESXi 4.1+ and higher with ONTAP systems 8.0 and higher, VAAI is automatically supported and does not require any manipulation. For NAS environments, NetApp has released a plugin that allows similar optimizations for the NFS protocol . This requires the installation of a NetAppNFSVAAI kernel module for each ESXi host. VSC can install the NFS VAAI plugin automatically from vCenter. For it to function, it is necessarycorrectly configure the NFS ball for VAAI , for which it is necessary to satisfy several requirements:
VASA is a free software that allows vCenter through the API to learn about the capabilities of the storage and make better use of them. VASA integrates into VSC and allows you to create datastore profiles with specific storage capabilities through the GUI interface (for example, the presence / absence of Thing Provitioning, disk type: SAS / SATA / SSD , the presence of a second level cache, etc.) and enable notifications when there is no one level (e.g. occupied space or load). Starting with version 6.0, VASA is a required component of VSC.and is an important (and mandatory) part of the VMware vVOL paradigm .
Starting with ESXi 5.0, the return of released blocks from the thin moon (datastore) back to the storage is supported. In versions ESXi 5.X / 6.0 with VMFS, manual start is required to return space, for ESXi 6.X with vVOL it works automatically, and starting from version 6.5 it works automatically (with a delay) on VMFS-6 datastores. On the ONTAP side, this functionality is always turned off by default; to enable it, you need to execute several simple commands on the storage system .
This topic deserves special attention and is presented in a separate article .
Widely apply the compatibility matrix in your practice to reduce potential problems in data center infrastructure . For Troubleshoot, contact KB NetApp and VMware .
I am sure that over time I will have something to add to this article on optimizing the ESXi host, so check back here from time to time.
The right settings for the VMWare virtualization environment will not only improve the performance of your infrastructure, but also increase its fault tolerance. Be sure to follow the recommendations of VMware and NetApp when you first start your infrastructure. During the launch, be sure to create a test plan consisting of both load testing and fault tolerance testing, in order to eliminate possible configuration errors and have an idea of the capabilities and behavior of your infrastructure in normal operation and in case of failures.
Translation into English:
ONTAP & ESXi 6.x tuning.
This may contain links to Habra articles that will be published later. Please send messages about errors in the text to the LAN. Comments and additions on the contrary, I ask in the comments.
This article will be useful to owners of storage systems with ONTAP, and the Disk Alignment part will be useful not only to owners of NetApp.
VMWare ESXi 6.X settings can be divided into the following parts:
- Hypervisor Optimization
- Guest OS Optimization ( GOS )
- Optimal SAN Settings ( FC / FCoE and iSCSI )
- NAS Settings ( NFS )
- Checking hardware, firmware, and software compatibility
To search for a bottleneck, a sequential exclusion technique is usually performed. I suggest first things first to start with storage . And then move the storage -> Network ( Ethernet / FC) -> Host ( Windows / Linux / VMware ESXi ) → Application.
There are a couple of basic documents that you need to rely on when configuring VMware + NetApp:
" How to configure VMware vSphere 6.x on ONTAP 8.x
" Virtual Storage Console 6.0 for VMware vSphere Installation
" TR-4128: vSphere 6 on NetApp MetroCluster 8.3
Hypervisor
It’s not worth giving all the server resources to the guest OS , firstly, the hypervisor needs to leave at least 4GB of RAM , and secondly, the opposite effect is sometimes observed when adding guest OS resources , this must be selected empirically.
Swap
This section has been submitted to a separate post .
Guest OS
Tuning settings is needed for two purposes:
- Guest OS performance optimization
- Normal operation in HA pair, in case of failure of one controller (takeover) and resumption of its operation (giveback)
Disk alignment
To optimize performance, you may need to eliminate disk misalignment . Misalignment can be obtained in two cases:
- due to incorrect moon geometry when creating it in the storage system . This error can only be created in a SAN environment.
- inside virtual disks of virtual machines. Maybe in both SAN and NAS environments
Let's look at these cases.
Fully aligned blocks on a VMFS datastore
To begin, consider fully aligned blocks at the boundaries of the VMFS datastore and storage.

First case - Misalignment with VMFS
The first case is when there is a misalignment of the VMFS datastore relative to the storage. To fix the first type of problem, you need to create moons with the correct geometry and move the virtual machines there.

The second case is the offset inside the guest OS
The second situation, with staggered sections of the file system within the guest operating system on the file structure of the WAFL are available in older Linux distributions and operating systems Windows 2003 and older. Since the problem is "inside the virtual machine", it can be observed both on NFS and VMFS datastores, as well as in RDM and vVOL. Typically, this is due to poor placement of the MBR partition table or to machines that have been converted from physical to virtual. You can verify this in Windows guest OS using the dmdiag.exe -v utility (the value of the Rel Sec field must be a multiple of 4KB by WAFL ). Learn more about misalignment diagnostics for Windowscars. See the TR-3747 Best Practices for File System Alignment in Virtual Environments for more information on how to deal with such situations .

Misalignment on two levels
And of course, you can get misalignment at once on two levels: both at the VMFS datastore level and at the file system level of the guest OS . Learn more about finding misalignment from the ONTAP repository .

In the newly created VMFS5 (not an upgrade with VMFS3), the block is 1MB in size with 8KB sub-blocks.
In the newly created VMFS5 (not an upgrade with VMFS3), the block is 1MB in size with 8KB sub-blocks.
takeover / giveback
To work with takeover / giveback in the HA pair, you must configure the correct timeouts of the guest OS . For disk FAS systems, this time is 60 seconds, and for All Flash FAS (AFF) it is 2-15 seconds. Since the cluster can contain storage systems of different models, disk, hybrid and AFF systems, and data can migrate between these systems, it is recommended to use the worst value of timeouts (for disk systems), namely 60 seconds:
| OS | Updated Guest OS Tuning for SAN: ESXi 5 and later, or ONTAP 8.1 and later (SAN) |
|---|---|
| Windows | disk timeout = 60 |
| Linux | disk timeout = 60 |
| Solaris | disk timeout = 60; busy retry = 300; not ready retry = 300; reset retry = 30; max throttle = 32; min. throttle = 8; corrected VID / PID specification |
The default OS values in the case of using NFS are satisfactory, and the settings for the guest OS do not need to be changed.
These values are set manually or using scripts available as part of VSC:
Windows
Set the value of the disk access delay to 60 seconds using the registry (set in seconds, in hexadecimal form).
[HKEY_LOCAL_MACHINE\SYSTEM\CurrentControlSet\services\Disk]
"TimeOutValue"=dword:0000003c
Linux
Set the disk access delay value to 60 seconds by creating a udev rule (specified in seconds, in hexadecimal form).
DRIVERS=="sd", SYSFS{TYPE}=="0|7|14", RUN+="/bin/sh -c 'echo 60 > /sys$$DEVPATH/timeout'"Solaris
You can set the value of 60 seconds delay (specified in seconds, in hexadecimal form) for the disk in the / etc / system file :
Additional settings can be made to the file /kernel/drv/sd.conf :
Solaris 10.0 GA - Solaris 10u6:
set sd:sd_io_time=0x3cAdditional settings can be made to the file /kernel/drv/sd.conf :
Solaris 10.0 GA - Solaris 10u6:
sd-config-list="NETAPP  LUN","netapp-sd-config",
"VMware  Virtual","netapp-sd-config";
netapp-sd-config=1,0x9c01,32,0,0,0,0,0,0,0,0,0,300,300,30,0,0,8,0,0;
Solaris 10u7 and later and Solaris 11
Please note: there are two spaces between vendor ID NETAPP and ID LUN, as well as between the words "VMware" and "Virtual" in the config above.
sd-config-list= "NETAPP  LUN","physical-block-size:4096,retries-busy:300,retries-timeout:16,retries-notready:300,retries-reset:30,throttle-max:32,throttle-min:8",
"VMware  Virtual","physical-block-size:4096,retries-busy:300,retries-timeout:16,retries-notready:300,retries-reset:30,throttle-max:32,throttle-min:8";
Please note: there are two spaces between vendor ID NETAPP and ID LUN, as well as between the words "VMware" and "Virtual" in the config above.
FC / FCoE Switch Zoning Settings
Learn more about zoning guidelines for NetApp in pictures .
Alua
For ONTAP 8.X and 9.X, ALUA is always enabled for all block protocols: iSCSI / FC / FCoE .
If the host correctly defined ALUA , then the Storage Array Type plug-in will display VMW_SATP_ALUA . For ALUA , the Most Recently Used or Round Robin algorithm, any , is allowed to be used .
Round Robin will be more productive if there are more than one path to the controller. In case of using Microsoft Cluster + RDM disks, the Most Recently Used balancing mechanism is recommended for use .
Below is a table of recommended load balancing settings. Learn more about NetApp ONTAP, ALUA logic and load balancing for block protocols .
| Mode | Alua | Protocol | ESXi Policy | ESXi Path Balancing |
|---|---|---|---|---|
| ONTAP 9.x / 8.x (Clustered) | Enabled | FC / FCoE / iSCSI | VMW_SATP_ALUA | Most Recently Used |
| ONTAP 9.x / 8.x (Clustered) | Enabled | FC / FCoE / iSCSI | VMW_SATP_ALUA | Round robin |
Check the applied policy for the checked moon / datastore
~ # esxcli storage nmp device list
naa.60a980004434766d452445797451376b
   Device Display Name: NETAPP Fibre Channel Disk (naa.60a980004434766d452445797451376b)
   Storage Array Type: VMW_SATP_ALUA
   Storage Array Type Device Config: {implicit_support=on;explicit_support=off; explicit_allow=on;alua_followover=on;{TPG_id=1,TPG_state=ANO}{TPG_id=0,TPG_state=AO}}
   Path Selection Policy: VMW_PSP_RR
   Path Selection Policy Device Config: {policy=rr,iops=1000,bytes=10485760,useANO=0; lastPathIndex=0: NumIOsPending=0,numBytesPending=0}
   Path Selection Policy Device Custom Config:
   Working Paths: vmhba2:C0:T6:L119, vmhba1:C0:T7:L119
   Is Local SAS Device: false
   Is USB: false
   Is Boot USB Device: false
ESXi host settings
For optimal operation of the ESXi host, it is necessary to set the parameters recommended for it.
| Parameter | Protocol (s) | ESXi 6.x with DataONTAP 8.x | ESXi 6.x with DataONTAP 9.x |
|---|---|---|---|
| Net.TcpipHeapSize | iSCSI / NFS | 32 | |
| Net.TcpipHeapMax | iSCSI / NFS | 1536 | |
| NFS.MaxVolumes | Nfs | 256 | |
| NFS41.MaxVolumes | NFS 4.1 | 256 | |
| NFS.HeartbeatMaxFailures | Nfs | 10 | |
| NFS.HeartbeatFrequency | Nfs | 12 | |
| NFS.HeartbeatTimeout | Nfs | 5 | |
| NFS.MaxQueueDepth | Nfs | 64 (if you have only AFF, then 128 or 256) | |
| Disk.QFullSampleSize | iSCSI / FC / FCoE | 32 | |
| Disk.QFullThreshold | iSCSI / FC / FCoE | 8 | |
There are several ways to do this:
- Using the Command Line Interface (CLI) on ESXi 6.x hosts.
- Using vSphere Client / vCenter Server.
- Using the Remote CLI tool from VMware.
- Using the VMware Management Appliance (VMA).
- Using the Host Profile, deploy it from the already configured ESXi 6.x to other hosts.
Example of setting advanced options from ESX 6.x CLI
The esxcfg-advcfg utility used in these examples is located in the / usr / sbin folder for the ESXi host.
#Для протоколов iSCSI/NFS
#esxcfg-advcfg -s 32 /Net/TcpipHeapSize
#esxcfg-advcfg -s 512 /Net/TcpipHeapMax
#Для протокола NFS
#esxcfg-advcfg -s 256 /NFS/MaxVolumes
#esxcfg-advcfg -s 10 /NFS/HeartbeatMaxFailures
#esxcfg-advcfg -s 12 /NFS/HeartbeatFrequency
#esxcfg-advcfg -s 5 /NFS/HeartbeatTimeout
#esxcfg-advcfg -s 64 /NFS/MaxQueueDepth
#Для протокола NFS v4.1
#esxcfg-advcfg -s 256 /NFS41/MaxVolumes
#Для протоколов iSCSI/FC/FCoE
#esxcfg-advcfg -s 32 /Disk/QFullSampleSize
#esxcfg-advcfg -s 8 /Disk/QFullThreshold
Check advanced settings from ESX 6.x CLI
#Для протоколов iSCSI/NFS
#esxcfg-advcfg -g /Net/TcpipHeapSize
#esxcfg-advcfg -g /Net/TcpipHeapMax
#Для протокола NFS
#esxcfg-advcfg -g /NFS/MaxVolumes
#esxcfg-advcfg -g /NFS/HeartbeatMaxFailures
#esxcfg-advcfg -g /NFS/HeartbeatFrequency
#esxcfg-advcfg -g /NFS/HeartbeatTimeout
#esxcfg-advcfg -g /NFS/MaxQueueDepth
#Для протокола NFS v4.1
#esxcfg-advcfg -g /NFS41/MaxVolumes
#Для протоколов iSCSI/FC/FCoE
#esxcfg-advcfg -g /Disk/QFullSampleSize
#esxcfg-advcfg -g /Disk/QFullThreshold
Hba
NetApp generally recommends using “default values” for HBA for ONTAP systems with an ESXi host as set by the adapter manufacturer. If they have been changed, they must be returned to the factory settings. Check out the relevant best practices. For example, if we are talking about DB2 virtualization in VMware on NetApp, it is recommended ( see page 21 ) to increase the queue length to 64 on ESXi (how to do this is written in Vmware KB 1267 ).
Example HBA Qlogic setup on ESXi
# посмотреть драйвер для Qlogic на ESXi 5.5 и 6.0
# esxcli system module list | grep qln
# Установить значение для Qlogic на ESXi 5.5 и 6.0
# esxcli system module parameters set -p qlfxmaxqdepth=64 -m qlnativefc
Vsc
The NetApp VSC plugin (which is free software ) sets the recommended settings on the ESXi host and HBA adapter: queue, delays, and others. The plugin itself integrates into vCenter. Saves time and eliminates the human factor during the test when setting parameters on the ESXi host to work more efficiently with NetApp. Allows you to perform basic operations for managing storage from vCenter required by the administrator of virtualized environments. VSC storage permissions can be flexibly configured for multiple users using RBAC . VSC is required to configure vVOL.
The plugin version is available only for web client. Version 6 and newer is supported.
Ethernet
Jumbo frames
If you are using iSCSI, it is highly recommended that you use Jumbo Frames on Ethernet at speeds greater than or equal to 1Gb. Read more in the Ethernet article with NetApp ONTAP . Do not forget about VMware's recommendations for LACP, Port-channel, Spanning Tree, PortFast, Flowcontrol settings.
ESXi & MTU9000
Remember to create the right network adapter — VMware recommends using VMXNEE3. Starting with ESXi 5.0, VMXNET3 supports Jumbo Frames. The E1000e network adapter supports the speed of 1GB networks and MTU 9000 - it is installed for all created VMs by default (except Linux). The Flexible Flexible Standard Virtual Network Adapter supports MTU 1500. More details.
Also, do not forget that the port group installed for the virtual network adapter in your virtual machine must be connected to the virtual switch with the MTU 9000 setting set for the entire switch.
NAS and VAAI
ONTAP systems support VMware VAAI primitives by downloading some of the routine data management tasks on the datastore from the host to the storage, where it is more logical to do this. In a SAN environment with ESXi 4.1+ and higher with ONTAP systems 8.0 and higher, VAAI is automatically supported and does not require any manipulation. For NAS environments, NetApp has released a plugin that allows similar optimizations for the NFS protocol . This requires the installation of a NetAppNFSVAAI kernel module for each ESXi host. VSC can install the NFS VAAI plugin automatically from vCenter. For it to function, it is necessarycorrectly configure the NFS ball for VAAI , for which it is necessary to satisfy several requirements:
- Configure ESXi server access (RO, RW and Superuser must be in SYS or ANY state, and access must be activated via NFS3 and NFS4 protocols). Even if NFS4 will not be used, it must be on the access list.
- All parent volumes in the junction path must allow root read access and NFSv4 access. In most cases, this means that the root volume for Storage Virtual Server (Vserver) should at least have the superuser setting set to SYS for the corresponding client, which will use VAAI access to one of the embedded volumes. It is recommended to deny write access directly to Vserver root volume.
- You must enable vStorage support on the volume.
Example VAAI on ONTAP
cm3240c-rtp::> export-policy rule show -vserver vmware -policyname vmware_access -ruleindex 2
  (vserver export-policy rule show)
                                    Vserver: vmware
                                Policy Name: vmware_access
                                 Rule Index: 1
                            Access Protocol: nfs3   <---- needs to be 'nfs' or 'nfs3,nfs4'
                          Client Match Spec: 192.168.1.7
                             RO Access Rule: sys
                             RW Access Rule: sys
User ID To Which Anonymous Users Are Mapped: 65534
                 Superuser Security Flavors: sys
               Honor SetUID Bits In SETATTR: true
cm3240c-rtp::> export-policy rule show -vserver vmware -policyname root_policy -ruleindex 1
  (vserver export-policy rule show)
                                    Vserver: vmware
                                Policy Name: root_policy
                                 Rule Index: 1
                            Access Protocol: nfs  <--- like requirement 1, set to nfs or nfs3,nfs4
                          Client Match Spec: 192.168.1.5
                             RO Access Rule: sys
                             RW Access Rule: never  <--- this can be never for security reasons
User ID To Which Anonymous Users Are Mapped: 65534
                 Superuser Security Flavors: sys   <--- this is required for VAAI to be set, even in the parent volumes like vsroot
               Honor SetUID Bits In SETATTR: true
                  Allow Creation of Devices: true
cm3240c-rtp::> nfs modify -vserver vmware -vstorage enabled
Vasa
VASA is a free software that allows vCenter through the API to learn about the capabilities of the storage and make better use of them. VASA integrates into VSC and allows you to create datastore profiles with specific storage capabilities through the GUI interface (for example, the presence / absence of Thing Provitioning, disk type: SAS / SATA / SSD , the presence of a second level cache, etc.) and enable notifications when there is no one level (e.g. occupied space or load). Starting with version 6.0, VASA is a required component of VSC.and is an important (and mandatory) part of the VMware vVOL paradigm .
Space Reservation - UNMAP
Starting with ESXi 5.0, the return of released blocks from the thin moon (datastore) back to the storage is supported. In versions ESXi 5.X / 6.0 with VMFS, manual start is required to return space, for ESXi 6.X with vVOL it works automatically, and starting from version 6.5 it works automatically (with a delay) on VMFS-6 datastores. On the ONTAP side, this functionality is always turned off by default; to enable it, you need to execute several simple commands on the storage system .
vVOL
This topic deserves special attention and is presented in a separate article .
Compatibility
Widely apply the compatibility matrix in your practice to reduce potential problems in data center infrastructure . For Troubleshoot, contact KB NetApp and VMware .
I am sure that over time I will have something to add to this article on optimizing the ESXi host, so check back here from time to time.
conclusions
The right settings for the VMWare virtualization environment will not only improve the performance of your infrastructure, but also increase its fault tolerance. Be sure to follow the recommendations of VMware and NetApp when you first start your infrastructure. During the launch, be sure to create a test plan consisting of both load testing and fault tolerance testing, in order to eliminate possible configuration errors and have an idea of the capabilities and behavior of your infrastructure in normal operation and in case of failures.
Translation into English:
ONTAP & ESXi 6.x tuning.
This may contain links to Habra articles that will be published later. Please send messages about errors in the text to the LAN. Comments and additions on the contrary, I ask in the comments.