Just about “smart home”: how to make “smart” lighting
- From the sandbox
- Tutorial
Coming home, it was always uncomfortable: you open the door, and then it's dark, then there was an idea to make the backlight in the hallway, but not easy, and what could be turned on from the phone before coming home. Well said - it means you have to start.
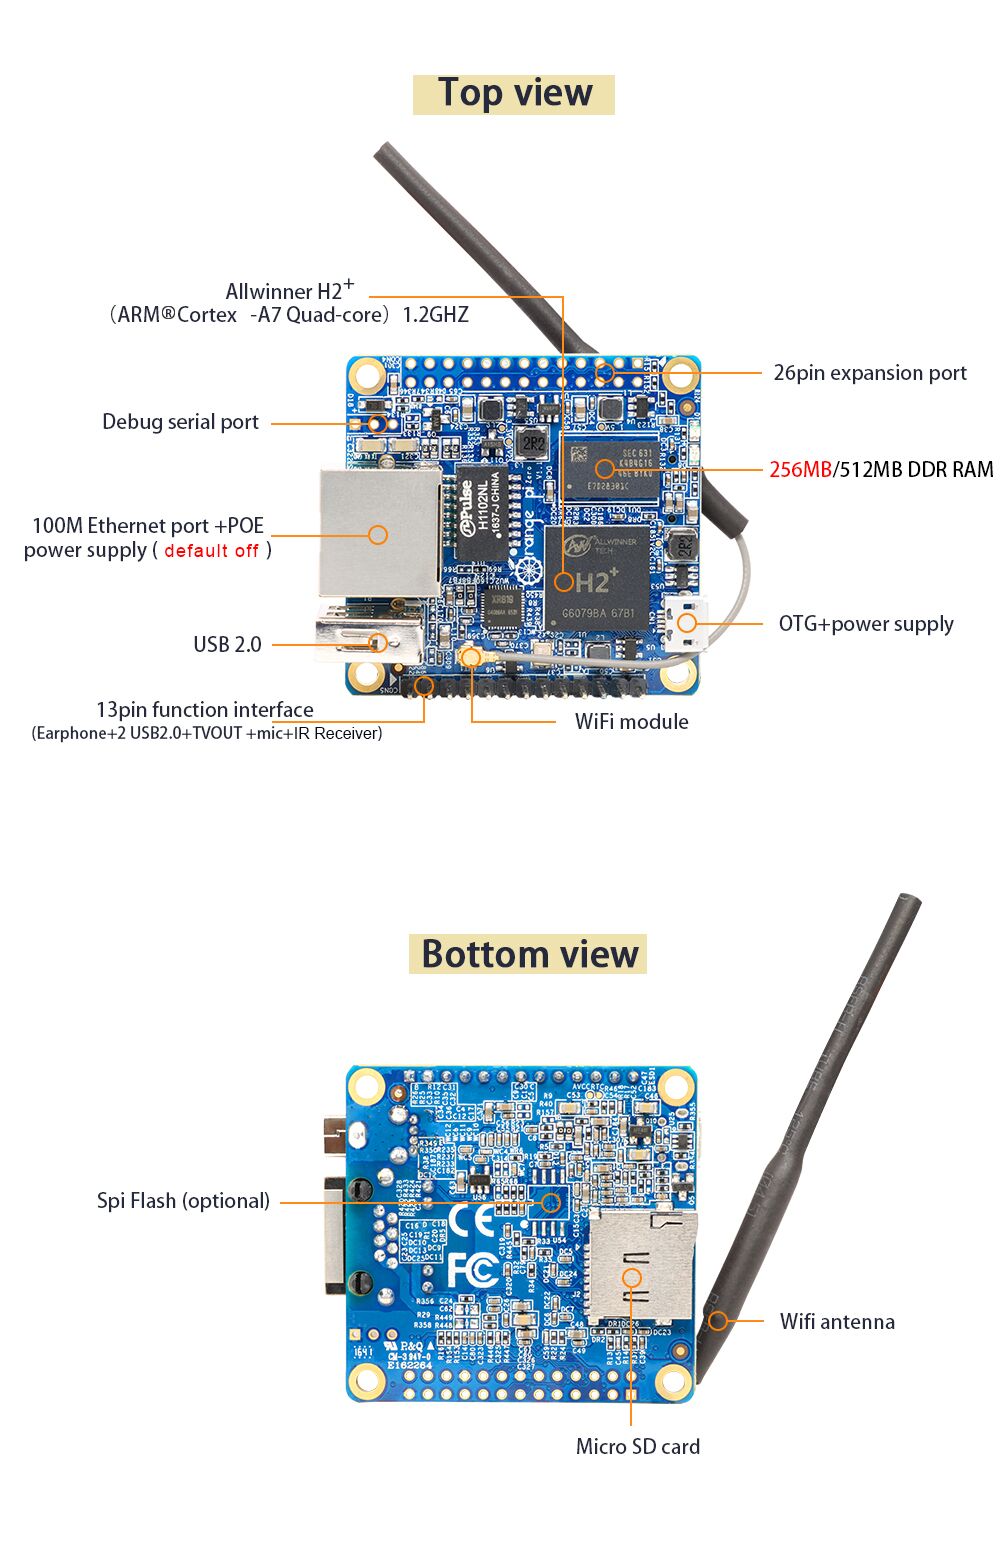
As further extensions of this system are planned (or not), it was decided to take a single-board computer as a basis. With a flick of the mouse on Ali, the cheapest <
orange pi zero 256mb was picked up .
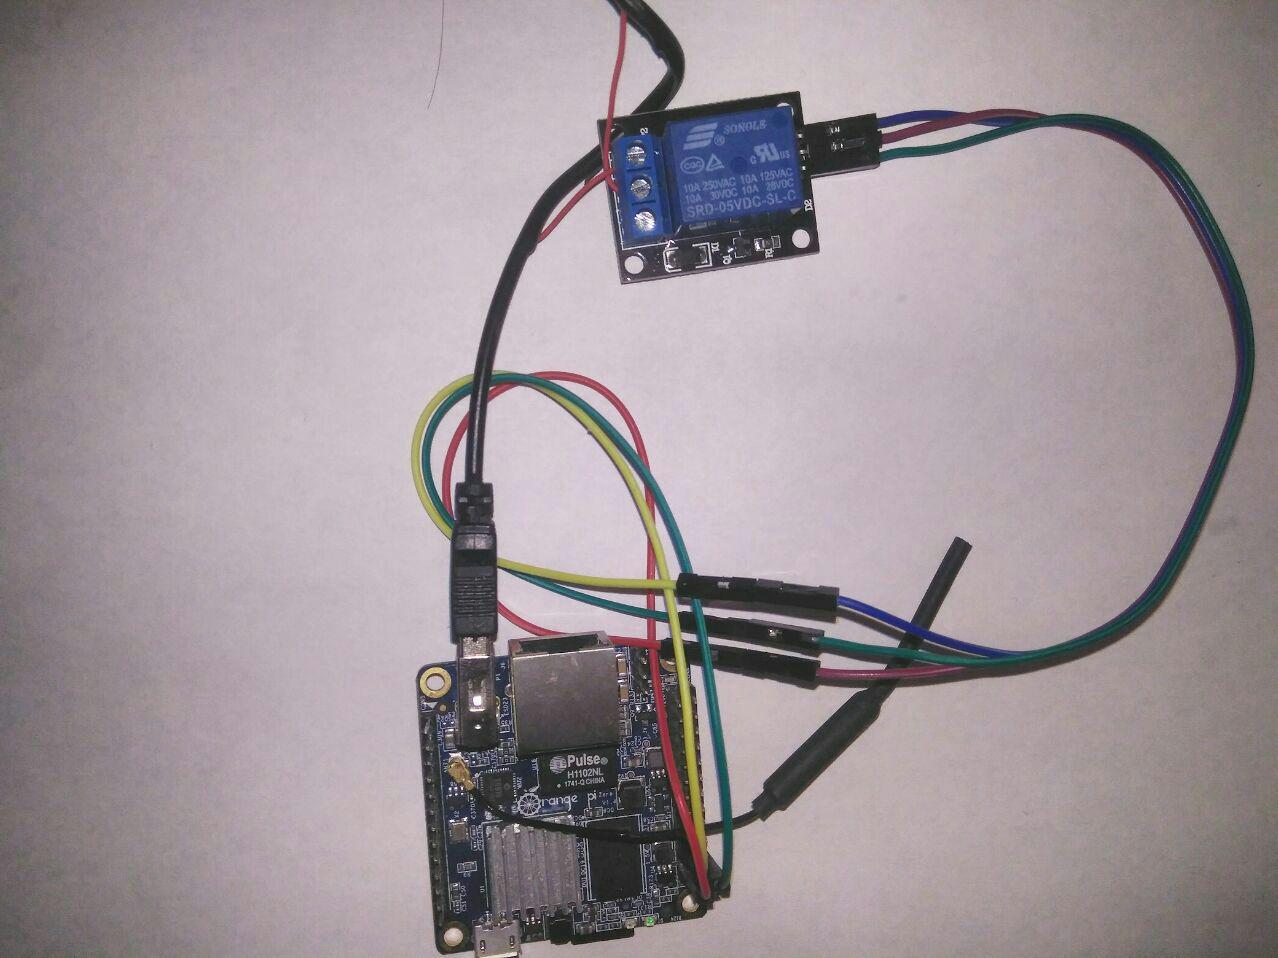
Then the mechanical part, there is nothing complicated. In the same way as for the Arduino board, only according to the outputs on the orange pi.

We take the usual relay for "homemade". On the one hand we connect the power and control pin, on the other hand we cut the power wire of our lamp and insert it into the relay (in my case it was a diode tape).
Scheme:
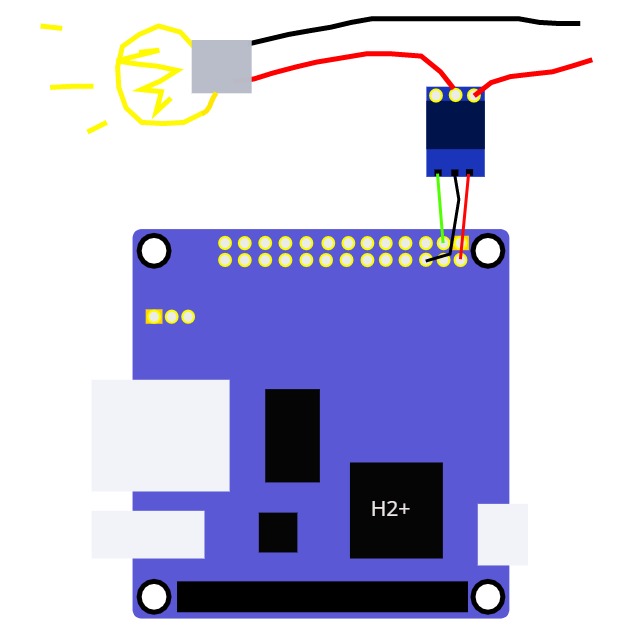
That's all, you are a genius.
With the technical part on this finished. Go to the software, here, too, everything is simple:
On this part with the board finished, go to the computer and your favorite ide.
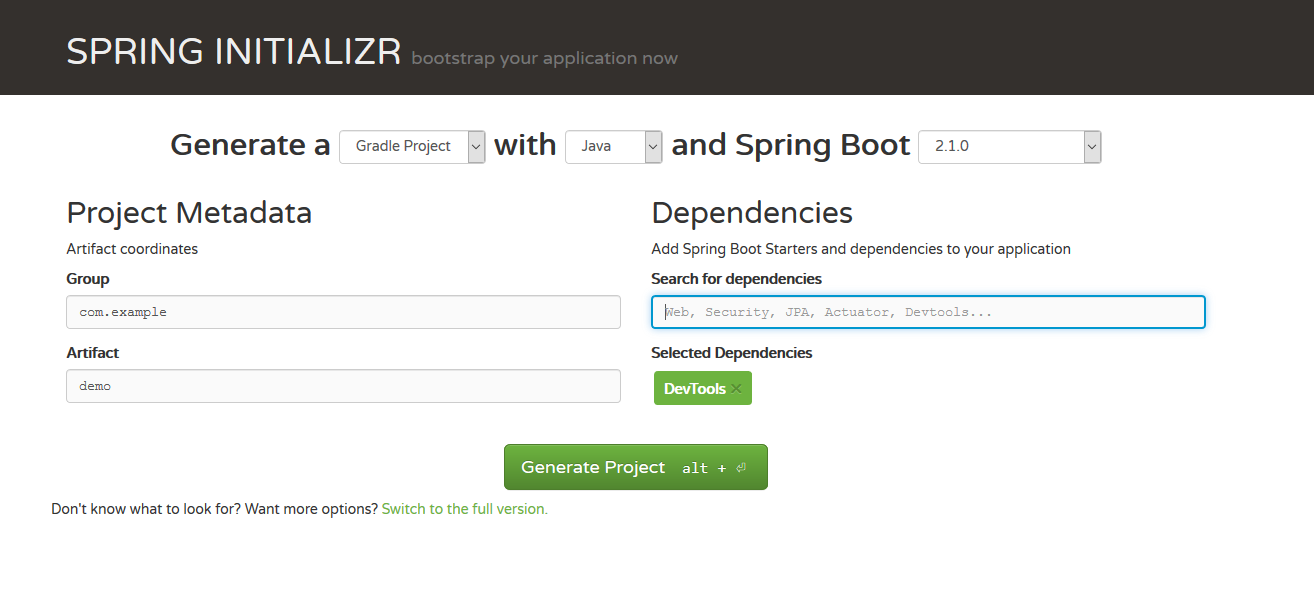
We will deploy the server in spring, so go to their website or in ide we create a spring project with hail.
To work with gpio, you need to install the pi4j library , for this you need to add a repository and a dependency.
And then the final script should look something like this:
Excellent go to the class managing gpio:
The presented code is quite simple and does not imply good management of the board pins, but opens the door to this.
Well, the final stage of the creation of the controller in the spring
Now a couple of recent gestures in the form of creating a jar file using gradle. After that, transferring via sftp to the board (in many ideas, you can configure the deployment directly) and run the jar on the device. Next, we go to the cherished 192.168.0. ***: 8080 / light in the browser
and enjoy, hoping in passing that it will help us keep our fingers at night or turn on the light before coming home.
In the next part (if ever I get to it) I will definitely show different ways of interacting with our “smart” home.
here is the source
and work with the comb (gpio)
Some thoughts from the author before reading this article.
(Перед дальнейшим прочтением статьи, очевидно, я должен влючить сюда комментарий, о том, что прежде всего данный текст нужно рассматривать, как маленикий туториал по работе с gpio при помощи java, показанный на таком вот примере, а никак не инструкцию, убеждающую каждого пользователя, о необходимости идти именно этим путем)
As further extensions of this system are planned (or not), it was decided to take a single-board computer as a basis. With a flick of the mouse on Ali, the cheapest <
orange pi zero 256mb was picked up .
Connection
Then the mechanical part, there is nothing complicated. In the same way as for the Arduino board, only according to the outputs on the orange pi.
We take the usual relay for "homemade". On the one hand we connect the power and control pin, on the other hand we cut the power wire of our lamp and insert it into the relay (in my case it was a diode tape).
Scheme:
That's all, you are a genius.
Some code
With the technical part on this finished. Go to the software, here, too, everything is simple:
- We install armbian or any other Linux on the sd card , but I chose this one. I recommend to write an image using etcher.
- Next, via apt-get, install java into 3 commands:
#sudo add-apt-repository ppa:webupd8team/java #sudo apt-get update#sudo apt-get install oracle-java8-installer - With the help of the guitar, we will add a set of wiringPi for our board (it contains various libraries for working with gpio and all sorts of tools for the same)
It’s also not difficult:#git clone https://github.com/vladikoms/WiringOP-Zero.git#cd WiringOP-Zero#chmod +x ./build#sudo ./build
Well, check:#gpio -v#gpio readall
On this part with the board finished, go to the computer and your favorite ide.
We will deploy the server in spring, so go to their website or in ide we create a spring project with hail.
To work with gpio, you need to install the pi4j library , for this you need to add a repository and a dependency.
And then the final script should look something like this:
build.gradle
buildscript {
    ext {
        springBootVersion = '2.1.0.RELEASE'
    }
    repositories {
        mavenCentral()
    }
    dependencies {
        classpath("org.springframework.boot:spring-boot-gradle-plugin:${springBootVersion}")
    }
}
apply plugin: 'java'
apply plugin: 'eclipse'
apply plugin: 'org.springframework.boot'
apply plugin: 'io.spring.dependency-management'
group = 'com.lary.sh'
version = '0.0.1-SNAPSHOT'
sourceCompatibility = 1.8
jar{
    baseName = 'SH'
    version = '0.0.1-SNAPSHOT'
}
repositories {
    mavenCentral()
    maven{
        url  "https://oss.sonatype.org/content/groups/public"//вот репозиторий
    }
}
dependencies {
    implementation('org.springframework.boot:spring-boot-starter-data-rest')
    implementation('org.springframework.boot:spring-boot-starter-web')
    runtimeOnly('org.springframework.boot:spring-boot-devtools')
    testImplementation('org.springframework.boot:spring-boot-starter-test')
    compile 'com.pi4j:pi4j-core:1.2-SNAPSHOT'//а вот зависимость
}
Excellent go to the class managing gpio:
Gpio.java
publicclassMyGpio{
    private  GpioController gpio ;
    private GpioPinDigitalOutput myLed;
    publicGpio(){
        try { // с ошибками не особо пока что запариваемся только прототип же( наверное)
            PlatformManager.setPlatform(Platform.ORANGEPI);// указываем , что  работаем с OrangePI
        } catch (PlatformAlreadyAssignedException e) {
            e.printStackTrace();
        }
        gpio= GpioFactory.getInstance();
        myLed = gpio.provisionDigitalOutputPin(OrangePiPin.GPIO_08); // инициализируем 8 пин как выход// то есть будем управлять его напряжением
    }
    publicvoidlight(){ // метод отвечающий за свечениеif(myLed.isHigh()) myLed.low(); // если на выбранном пине высокое напряжение сделать его равным напряжению на землеelse myLed.high();// иначе подать высокое напряжение на выбранный пин (8)
    }
     publicvoidblink(){ // ну и так помигать для видуfor (int i =0;i<10;i++) {
            try {
                light();
                Thread.sleep(500);
            }
            catch (Exception e){
                e.printStackTrace();
            }
        }
    }
}
The presented code is quite simple and does not imply good management of the board pins, but opens the door to this.
Well, the final stage of the creation of the controller in the spring
GpioController.java
@ControllerpublicclassGpioController{
    @RequestMapping("/blink")
    @ResponseBodypublic String blink(HttpServletResponse response, HttpServletRequest request ){
        Gpio gpio =new Gpio();
        gpio.blink();
        return"blink";
    }
    @RequestMapping("/light")
    @ResponseBodypublicvoidlight(){
        Gpio gpio =new Gpio();
        gpio.light();
    }
}
Now a couple of recent gestures in the form of creating a jar file using gradle. After that, transferring via sftp to the board (in many ideas, you can configure the deployment directly) and run the jar on the device. Next, we go to the cherished 192.168.0. ***: 8080 / light in the browser
and enjoy, hoping in passing that it will help us keep our fingers at night or turn on the light before coming home.
In the next part (if ever I get to it) I will definitely show different ways of interacting with our “smart” home.
here is the source
and work with the comb (gpio)