Intel RealSense SDK and Oculus Rift DK2
- Transfer
This article describes the technical details and problems that developers may encounter when creating software solutions that use the Intel RealSense SDK for Windows * and the Oculus Rift * glasses (headset). We start with a review of the Oculus Rift Development Kit 2 (DK2), then move on to some of the problems that arise when developing applications that work with multiple infrared cameras. This article also describes the integration of the Intel RealSense SDK and Oculus Rift into the Unity * 5 project.
System requirements
The information in this article is about the use of the Intel RealSense F200 (front view) camera. To complete all the steps described, you need an Oculus Rift DK2 kit , an Intel RealSense camera (F200), and a development system that meets the following requirements.
- 4th Generation or later Intel Core processor (to support Intel RealSense SDK)
- 150 MB of free hard disk space
- 4 GB RAM
- One USB3 port for F200 camera and two USB 2.0 ports for Oculus Rift DK2
- Windows * 8.1
- Dedicated NVIDIA GTX * 600 Series or AMD Radeon * HD 7000 (or more powerful) graphics card with DVI * -D or HDMI * output.
The following software components are required to support the Oculus Rift * DK2 and Intel RealSense Camera (F200).
- Intel RealSense SDK (version 6.0.21.6598 or later)
- Intel RealSense Depth Camera Manager F200 (version 1.4.27.41944 or later)
- Oculus SDK for Windows * (version 0.7.0.0-beta or later)
- Oculus Runtime Environment for Windows * (version 0.7.0.0-beta or later)
- Oculus Utilities for Unity 5 (version 0.1.2.0-beta or later)
To familiarize yourself with Unity, you can use the free personal version (5.2.2 or later), available here .
Oculus Rift * DK2 Kit
Oculus Rift DK2 is a set of hardware and software components that allows developers to create games and virtual reality interfaces. In addition to the glasses (headset), the kit also includes a low-latency position tracking camera to monitor the movement of the user's head.
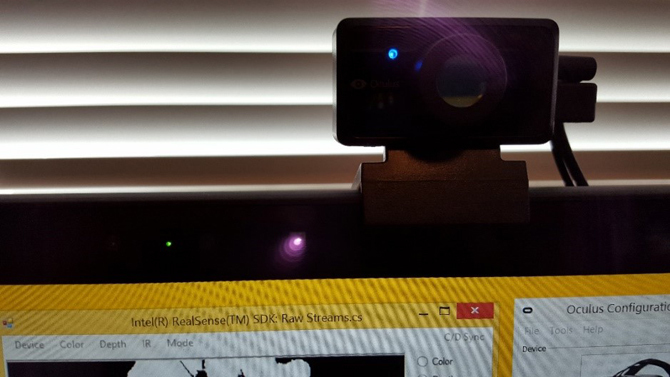
This is, in fact, an ordinary webcam with an infrared filter installed on its lens. Glasses (headset) are equipped with several hidden infrared LEDs, mounted in such a way that the tracking camera uses them to determine the position of the user's head in three-dimensional space. Interestingly, these hidden IR sources are detected by the Intel RealSense camera when viewing the camera IR stream in the Raw Streams example in the SDK.
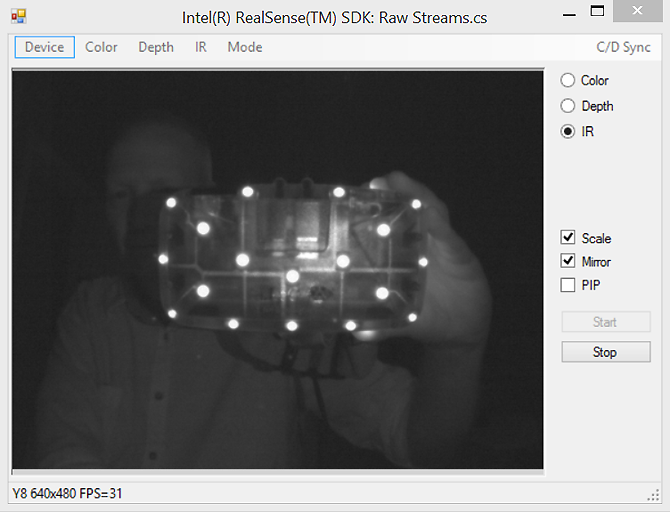
Oculus Rift * IR LEDs visible to Intel RealSense camera
Oculus Rift glasses (headset) include a gyroscope, accelerometer and magnetometer.
In combination with the combined sensor data, this equipment determines the orientation of the user's head and provides the corresponding rotation coordinates around the longitudinal, transverse and vertical axes. The tracking camera provides additional information about the position of the user's head (i.e. spatial coordinates along the X, Y, and Z axes).
To better understand exactly what the DK2 tracking camera adds to the picture of virtual reality, start the demo scene from the Oculus setup program.
Oculus Setup
When viewing a demo scene with a tracking camera connected to a USB port, you will see that the objects on the virtual table will be closer or further when approaching or moving your head away from the camera.
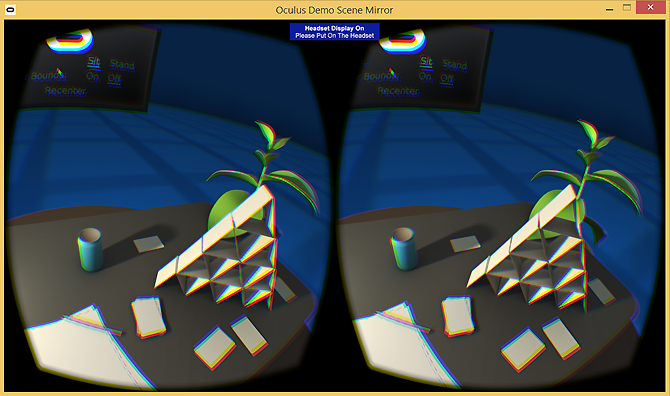
Oculus Rift demo scene
If you then run this demo scene by unplugging the USB connector on the tracking camera, you will see that the orientation data provided by the Oculus Rift sensor (headset) will still set the rotation angles around the longitudinal, transverse and vertical axes, but a sense of depth will disappear when moving the head along the Z axis.
Interference while using the front view camera
Developers using the Intel RealSense SDK and interested in creating virtual reality applications using the Intel RealSense F200 front-facing camera should be aware of the possibility of interference from the mutual influence of the 3D depth camera and the Oculus Rift tracking camera. The image below shows the Lenovo ThinkPad * Yoga 15 ultrabook transformer with an integrated Intel RealSense F200 camera and an Oculus Rift tracking camera installed next to the edge of the screen.
Front view cameras
The Intel RealSense F200 uses light coding technology to project infrared light onto a user and produce an invisible reflected image with an infrared camera. The Oculus Rift headset uses a set of IR LEDs for partial tracking of the head, the glow of which is recorded by its own passive IR camera; This camera is equipped with an optical filter that passes only the infrared region of the spectrum. The effect of the IR LEDs on the Oculus Rift headset on the Intel RealSense camera can be seen as changing noise in the depth stream.
IR interference depth data
Shifting the DK2 tracking camera by a certain angle relative to the Intel RealSense camera may slightly reduce the effect of infrared noise, but the fact that the Oculus headset can be a source of infrared radiation means that it will definitely affect the Intel RealSense front-facing camera. when using the DK2 tracking camera.
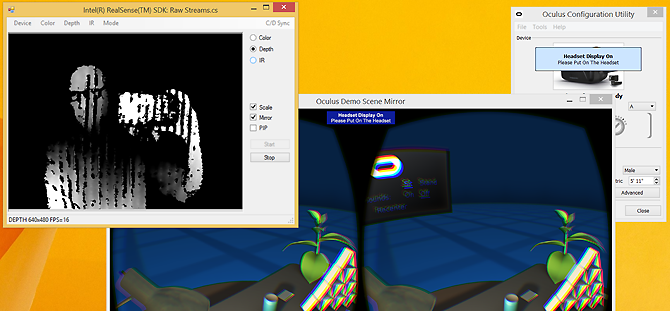
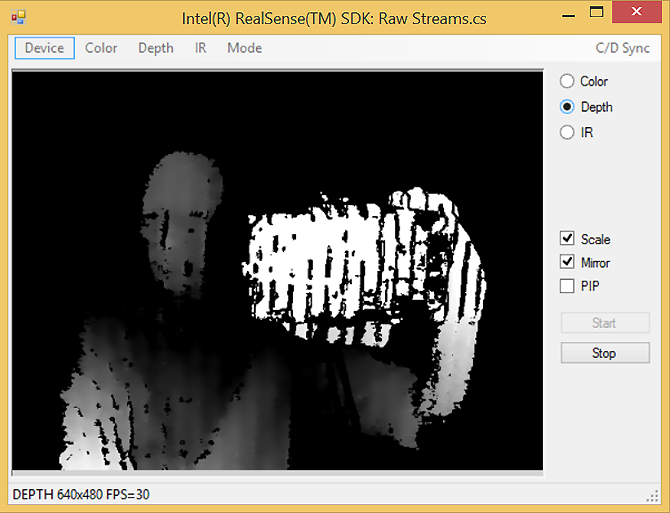
To better understand the effects of such interference, we launched a sample SDK Hands Viewer application by connecting the DK2 tracking camera to a USB port and launching the Oculus Rift virtual reality demo application. As shown in the figure below, there is a significant drop in frame rate. This can be attributed to various factors (for example, for this test we used the NVIDIA GeForce * 840M video adapter, which is less powerful than indicated in the minimum requirements). But it’s still interesting to observe that hand tracking and gesture recognition with Intel RealSense cameras work quite well.
Gesture recognition with infrared Oculus Rift LEDs
Using Unity 5
Earlier, we mentioned possible interference between the Intel RealSense camera and the DK2 camera, but what happens if these technologies are combined in a real project?
In the following sections, we will briefly look at creating a simple Unity 5 project with Intel RealSense camera support, and then turn on virtual reality.
Create a New Unity Project
Start a new Unity project by double-clicking the Unity icon on the desktop. Select New , then select the name and location of the project.
If the Unity editor is already open, create a new project by selecting File , New Project from the menu, then specify the name and location of the project.
Import the RSSDK Unity Toolkit
Import the RSSDK Unity Toolkit by selecting Assets , Import Package , Custom Package ... from the menu.
On the Import Package screen, navigate to the SDK folder where the Unity Toolkit is located. This location may vary depending on where the SDK was installed. In this example, the toolbox is located in the C: \ Program Files (x86) \ Intel \ RSSDK \ framework \ Unity folder .
Select UnityToolkit, then click Open .
(Note: This folder contains two Unity files: UnityToolkit and UnityCSharp . When importing UnityCSharpOnly the required managed and unmanaged DLLs will be added to support the Intel RealSense SDK in the Unity application. If you import UnityToolkit, then the necessary DLLs will be imported into the project along with many other resources to streamline the development of the project with Intel RealSense SDK support.)
The Importing Package screen will appear , on which all plug-ins, actions and workpieces will be selected. Leave the checkboxes selected and click the Import button.
On the Project screen , note that a number of assets are added to the project, which are located in the following folders.
- Plug-ins . Contains the libpxccpp2c.dll file and the C ++ P / Invoke unmanaged DLL.
- Plugins.Managed . Contains the libpxcclr.unity.dll file and the C # managed interface library.
- RSUnityToolkit . Contains the Actions, Internals, Prefabs, and Samples folders .
Add game object
The project will initially contain a main camera and a directional light source. On the Hierarchy screen, click Create , then select 3D Object and Cube . In this case, a game object-cube will be added to the game scene.
In the Project folder in Assets, expand the RSUnityToolkit folder and select Actions.
The Actions folder contains scripts that can be applied to game objects. Click the TrackingAction script , then drag it onto the Cube game object in the Hierarchy screen .
Select Cube on the Hierarchy Screen, and you will see that the Tracking Action (Script) is displayed on the Inspector screen .
Hand Tracking Setup
By default , HandTracking is selected for the tracking action , and for the dimensions of the virtual world box (Virtual World Box Dimensions), the value is 100 on the X, Y, and Z axes. If you are playing a game at this moment, then see that the LED of the 3D depth camera will turn on, indicating that the camera is activated.
If you raise your hand in front of the camera, you (most likely) will see that the game cube object will fly away from the screen. The reason is that the Virtual World Box Dimensions parameter is set too large. Change the Virtual World Box Dimensions settings to 10 for the X, Y, and Z axes.
Notice that in the scene view, the virtual world field outlined in red is now closer to the game object.
Run the game again. Now the game object-cube should track the movement of your hand in a closer virtual space.
You may have noticed that the cube moves intermittently. You can make the movement smoother by setting the Smoothing Factor parameter to 10.

Unity * Editor - tracking action parameters
Enabling Virtual Reality in a Unity Project
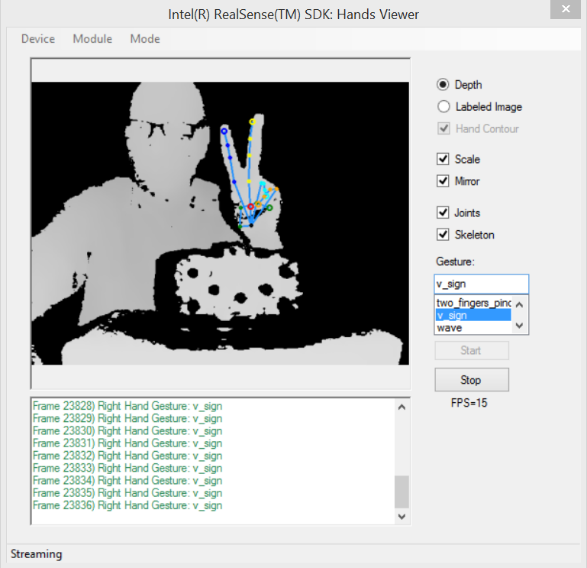
As indicated on the Oculus Rift DK2 website , Unity 5.1+ developers can replace the stereoscopic virtual reality camera with built-in tools to track the orientation and position of the main camera. To do this, select the Virtual Reality Supported checkbox in the Player Settings section . Follow these steps to enable virtual reality in your project.
Select Edit - Project Settings from the menu, then click Player .
In the Inspector window , select the Virtual Reality Supported check box .
Click Playand put on your Oculus Rift glasses. You will immediately see that the transformations of the main camera are now replaced by tracking the orientation of the Oculus Rift glasses. The cube still tracks your hand movement using the TrackingAction script in the Intel RealSense SDK Toolkit for Unity, but now the Unity camera tracks the movement of the glasses.
Unity with virtual reality enabled
Import Oculus Utilities for Unity Package
Utilities is an optional add-on; it includes presets, scenes, and scenarios for developing virtual reality applications. The following shows how to import this package into your project.
Select Assets, Import Package, Custom Package ... from the menu.
On the Import Package screen, navigate to the folder where the OculusUtilities Unity package file is located. Select OculusUtilities , then click Open .
The Importing Package screen appears , on which all Oculus components are selected. Leave all checkboxes checked and click Import .
Note. In this example, we will add the OVRCameraRig preset to the scenefrom the OculusUtilities package. Therefore, there is no need to select the Virtual Reality Supported checkbox in the Inspector window when using the OculusUtilities package.
Drag the OVRCameraRig blank onto the scene.
Turn off the main camera on stage to make sure that only OVRCameraRig is used .
Press the Play button and put on the Oculus Rift glasses. You will see that OVRCameraRig now tracks the movement of the glasses, and the cube transformation is still controlled by the movement of the hand.
Note. See the documentation for complete details on using Oculus Utilities .
Add virtual reality to the Intel RealSense SDK Toolkit for Unity * sample project
Thanks to the built-in virtual reality support in Unity 5.1+, you can very easily enable virtual reality support in the Intel RealSense SDK Toolkit for Unity, for example, in Sample 1 - Translation. Try the following steps.
In the Project folder , expand RSUnityToolkit - Samples - Scenes and double-click Sample 1 - Translation (do not forget to save the previous work first if you need it).
Select Edit - Project Settings from the menu, then click Player .
Ensure that the check box is selected in the Inspector window.Virtual Reality Supported .
Click Play and try it!
Conclusion
In this article, we looked at potential interference problems that might occur when using the Intel RealSense front-facing camera in a project using the Oculus Rift tracking camera. We also talked about simple scenarios in which Intel RealSense camera hand tracking was used in virtual reality. Try it yourself and see what interesting results you can achieve!