Using hardlinks for Synology DSM incremental backup
The DSM system is quite convenient and by default, modules are installed in the system that cover 95% of the needs of an ordinary (and not so) user, which is called “out of the box”.
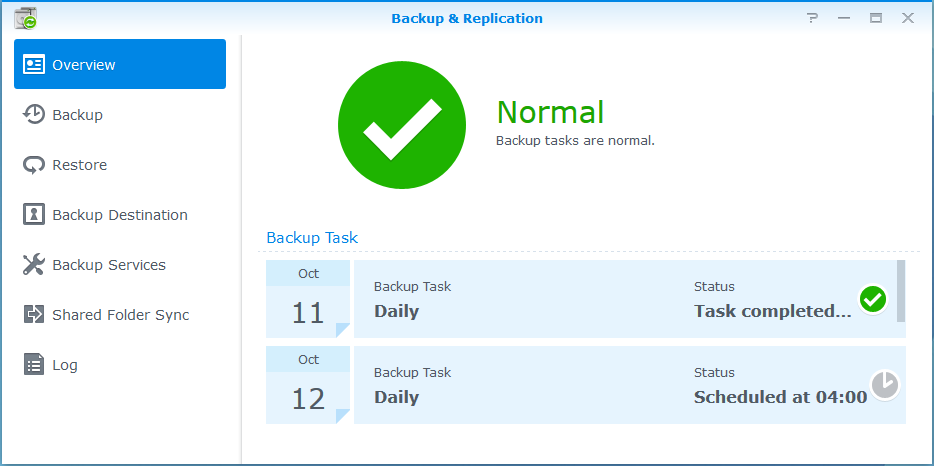
There is also a built-in backup system: Backup & Replication. Simple, clear and reliable. As a network destination, you can use either a similar Synology or rsync server.
Unfortunately, this system does not know how to do incremental backup. The most primitive way to get around this is to set up a separate backup for each day of the week. Thus, we will have 7 folders with backups, but the obvious minus is storing a full copy in each folder - the volume can turn out so that not everyone can afford such a storage.
So - set up a full incremental backup.
First we need a server with a disk sufficient to store archives of important data. Where exactly it will be installed - it depends on the capabilities of everyone. For example, it can be a shared hosting or an old system unit or a virtual machine on a working computer. One can argue about the reliability of the archive server, but even its very presence is a huge plus for the safety of your personal data. Again, if you enable email notifications in DSM, you will know every day if there were any errors during the backup and quickly bring the "fallen" server to backup to life.
The way that the server will communicate with Synology (or vice versa) everyone will choose for themselves - this can be a VPN, local area network or regular Internet. I prefer VPN, but the description of the connection settings is beyond the scope of this article (there may be nuances and I will describe this later).
Now the size of the disk on which the archives will be stored.
The contents of home storage can be confidently divided into: Cinema, Music, Photos and ordinary user files.
And if in the event of the loss of the Cinema data it is possible and not difficult to download again, Music - with a high probability, too, then Photos and personal files can no longer be restored. The amount of such data from my personal experience does not exceed 50-100GB. For example, we will do daily and weekly backups. We take it to the maximum: 100GB + 100GB - we need a 200GB disk. I think? Nowadays, this is rare, but 500GB is easy to find!
Next, I will talk about an example of a virtual machine, but the main idea applies to any Linux-based system (possibly FreeBSD).
So - install the Ubuntu server, and activate SSH and rsync on it:
The file system must have hardlink support. Therefore, let us leave, proposed by default, ext-4.
In principle, rsync can also be run on Windows, but we need hardlink support, and I'm not sure that rsync can work correctly with Windows Junction.
I’ll clarify about the security model on the server - it will be quite simple:
- a separate user for the login (for Synology)
- restriction on the folder for the IP address at the rsync level - user
verification at the rsync level - is absent, although it can be easily configured
- if the server is located in unreliable networks on it, it is recommended to enable the firewall and restrict access by IP.
We start the setup - create a folder for storing archives and give it rights to everyone:
$sudo mkdir -p /bakstorage/syno
$sudo chmod 777 /bakstorage/syno
On the server we need to create an ordinary user, under which Synology will store archive copies:
$sudo adduser backup
Edit rsync config:
cat /etc/rsyncd.conf
# глобальные параметры:
motd file=/etc/motd
log file=/var/log/rsyncd
# название нашего блока
[syno]
# IP address нашего Synology
        hosts allow = 192.168.x.x
# коментарий, для удобства
        comment = Syno archive
# Путь к папке, которую мы делаем доступной и где будут храниться архивы
        path = /bakstorage/syno
# Ниже настройки по умолчанию
        use chroot = yes
        lock file = /var/lock/rsyncd
        read only = no
        list = yes
        uid = nobody
        gid = nogroup
        strict modes = yes
        ignore errors = no
        ignore nonreadable = yes
        transfer logging = no
        timeout = 600
        refuse options = checksum dry-run
        dont compress = *.gz *.tgz *.zip *.z *.rpm *.deb *.iso *.bz2 *.tbz
And put it in startup:
$sudo update-rc.d rsync defaults
Reboot, check that everything has risen.
Now we configure archiving in DSM. Create Network Backup Destination:

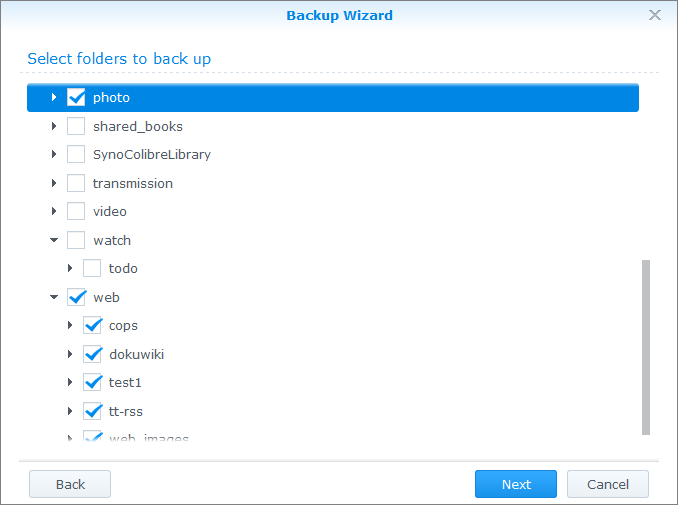
Create a “Data Backup Task”, then create a task for daily backup. Mark the folders that need to be saved:
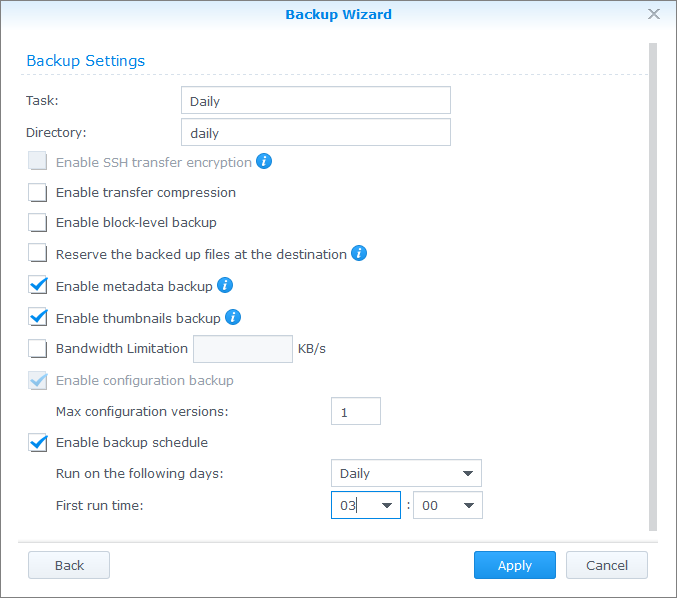
Mark the applications (optional):

And most importantly, make it daily (last option):
Go to the main application window, select the created task and click “Backup now” - the first copy will take a lot of time. Subsequent ones will run much faster — only new or changed files will be transferred.
After copying is configured and working (you can watch it for several days) - proceed to the next part and add incremental copying. To do this, use the excellent rsync property:
If the original file was changed, and the destination file is hardlink, then when copying hardlink “breaks” and the destination file is replaced with the changed version.
Based on the aforementioned rsync property, all we need is to make a copy of the archive folder with the command after the backup is completed : cp -al
This will create a full copy, but all the files inside will be hardlinks, so additional disk space will not be taken up. Well, perhaps under the tree of directories and subdirectories. We will call this the creation of a snapshot. By the way: for a 100GB folder, creating a snapshot takes no more than a minute.
We can execute this command at any time, after the supposed completion of the backup, or, for example, an hour before it.
Thus, if the backup starts at 3:00 and lasts 6 hours (a very unfavorable scenario - usually all changes are copied an order of magnitude faster), then we will do a snapshot at 10 in the morning so that during the day we can make sure that everything worked out as it should.
The next step is to store N snapshots and automatically delete the oldest ones. By the way, when implementing this deletion, folders that are older than N days are usually deleted. But if archiving has not been done for a long time (for various reasons), there is a chance that all folders with archives will be deleted as outdated, but there will be no new ones! Therefore, we are learning this.
Below are the scripts that will do all this work for us:
sudo cat /root/rotate_daily.sh
#!/bin/bash
# Выводим дату
echo -n "Started: "
date
# проверяем, что созданный архив, был создан позднее, чем последняя его копия
if [[ /bakstorage/syno/daily -nt /bakstorage/syno/daily_full ]]; then
    # Есть свежий архив - «сдвигаем» старые архивы
    /root/rotate_folders.sh /bakstorage/syno/daily_full 3
	 # создаем снапшот свежего архива
    echo "Copying current backup..."
    cp -al /bakstorage/syno/daily /bakstorage/syno/daily_full
else
	 # по какой-то причине свежего архива нет — ничего не делаем
    echo "No today backup found!"
fi
sudo cat /root/rotate_folders.sh
#!/bin/bash
# ver 1.0
path=$1
hold=$2
if [ -z $2 ]; then
cat <
Warning! Folders deleted and renamed by mask: path_to_folder_prefix* so please be sure that no any folders in the path
Example: $0 /var/backup/daily 2
The result will be:
  /var/backup/daily   -> /var/backup/daily.1
  /var/backup/daily.1 -> /var/backup/daily.2
  /var/backup/daily.2 -> Deleted
EOT
exit 1
fi
num=$(ls -d $path* | wc -l)
let "num=num-hold"
if [ $num -gt 0 ]; then
    echo "ROTATE_FOLDERS: Found to delete: $num"
    del=$(ls -d $path* | sort | tail -n $num)
    echo "ROTATE_FOLDERS: Deleting folder(s):"
    echo "$del..."
    rm -r $del
else
    echo "ROTATE_FOLDERS: Nothing to delete."
fi
# rename
let "start=$hold-1"
for i in $(seq $start -1 0); do
    let "y=i+1"
    if [ $i -eq 0 ]; then
        echo "ROTATE_FOLDERS: Renaming folders $path to $path.1 ..."
        mv "$path" "$path.1"
    else
        echo "ROTATE_FOLDERS: Renaming folders $path.$i to $path.$y ..."
        mv "$path.$i" "$path.$y"
    fi
done
Remember to make both scripts executable:
chmod 750 /root/rotate_folders.sh
chmod 750 /root/rotate_daily.sh
Add to cron:
$sudo crontab -e
0 10 * * * /root/rotate_daily.sh >>/var/log/rotate_daily.log 2>&1
Please note that all output will be written to the file: /var/log/rotate_daily.log
Actually, with daily copying everything!
If we want to add a weekly backup, we can go in two ways:
1. Set it up by analogy and in parallel with the daily one. Thus, you will have a completely autonomous set of folders weekly, weekly.1 weekly.2, etc. which will never overlap with daily folders. But in this case, it will take up the same amount of disk space as the daily archives.
2. Modify the script and once a week create an additional snapshot of the daily folder to the weekly folder, and then rename the weekly folder to weekly.1, weekly.2, and so on. In this case, only modified files, which usually very few, but if any file is corrupted, it will be corrupted in all folders at once!
By the way, the above technique can be applied not only to backup in Synology DSM, but to any system that supports rsync and hardlink.
Have a nice setting!