DIY robotic vacuum cleaner
I will share my experience in creating a cheap robot vacuum cleaner from improvised means and an omnipotent Chinese store. Initially, he planned to simply study the Arduino environment, but this study grew into a vacuum cleaner.
Necessary details:
- a lot of thick cardboard (free);
- analog of arduino (210 r);
- a small breadboard (80 r);
- 2 Uz-rangefinders (300 r);
- motor controller - H-bridge (80 r);
- 2 gear motors with a wheel (600 r) ;
- battery pack + 18v and charge controller;
- a couple of meters of twisted pair;
- turbine from a vacuum cleaner;
- computer cooler.
First, I used one of the tanks in the Tank Battle game. All the same, no one was playing with them because of the "flatness" of the shots - bullets fired already behind the wall sometimes "flew" at the enemy.
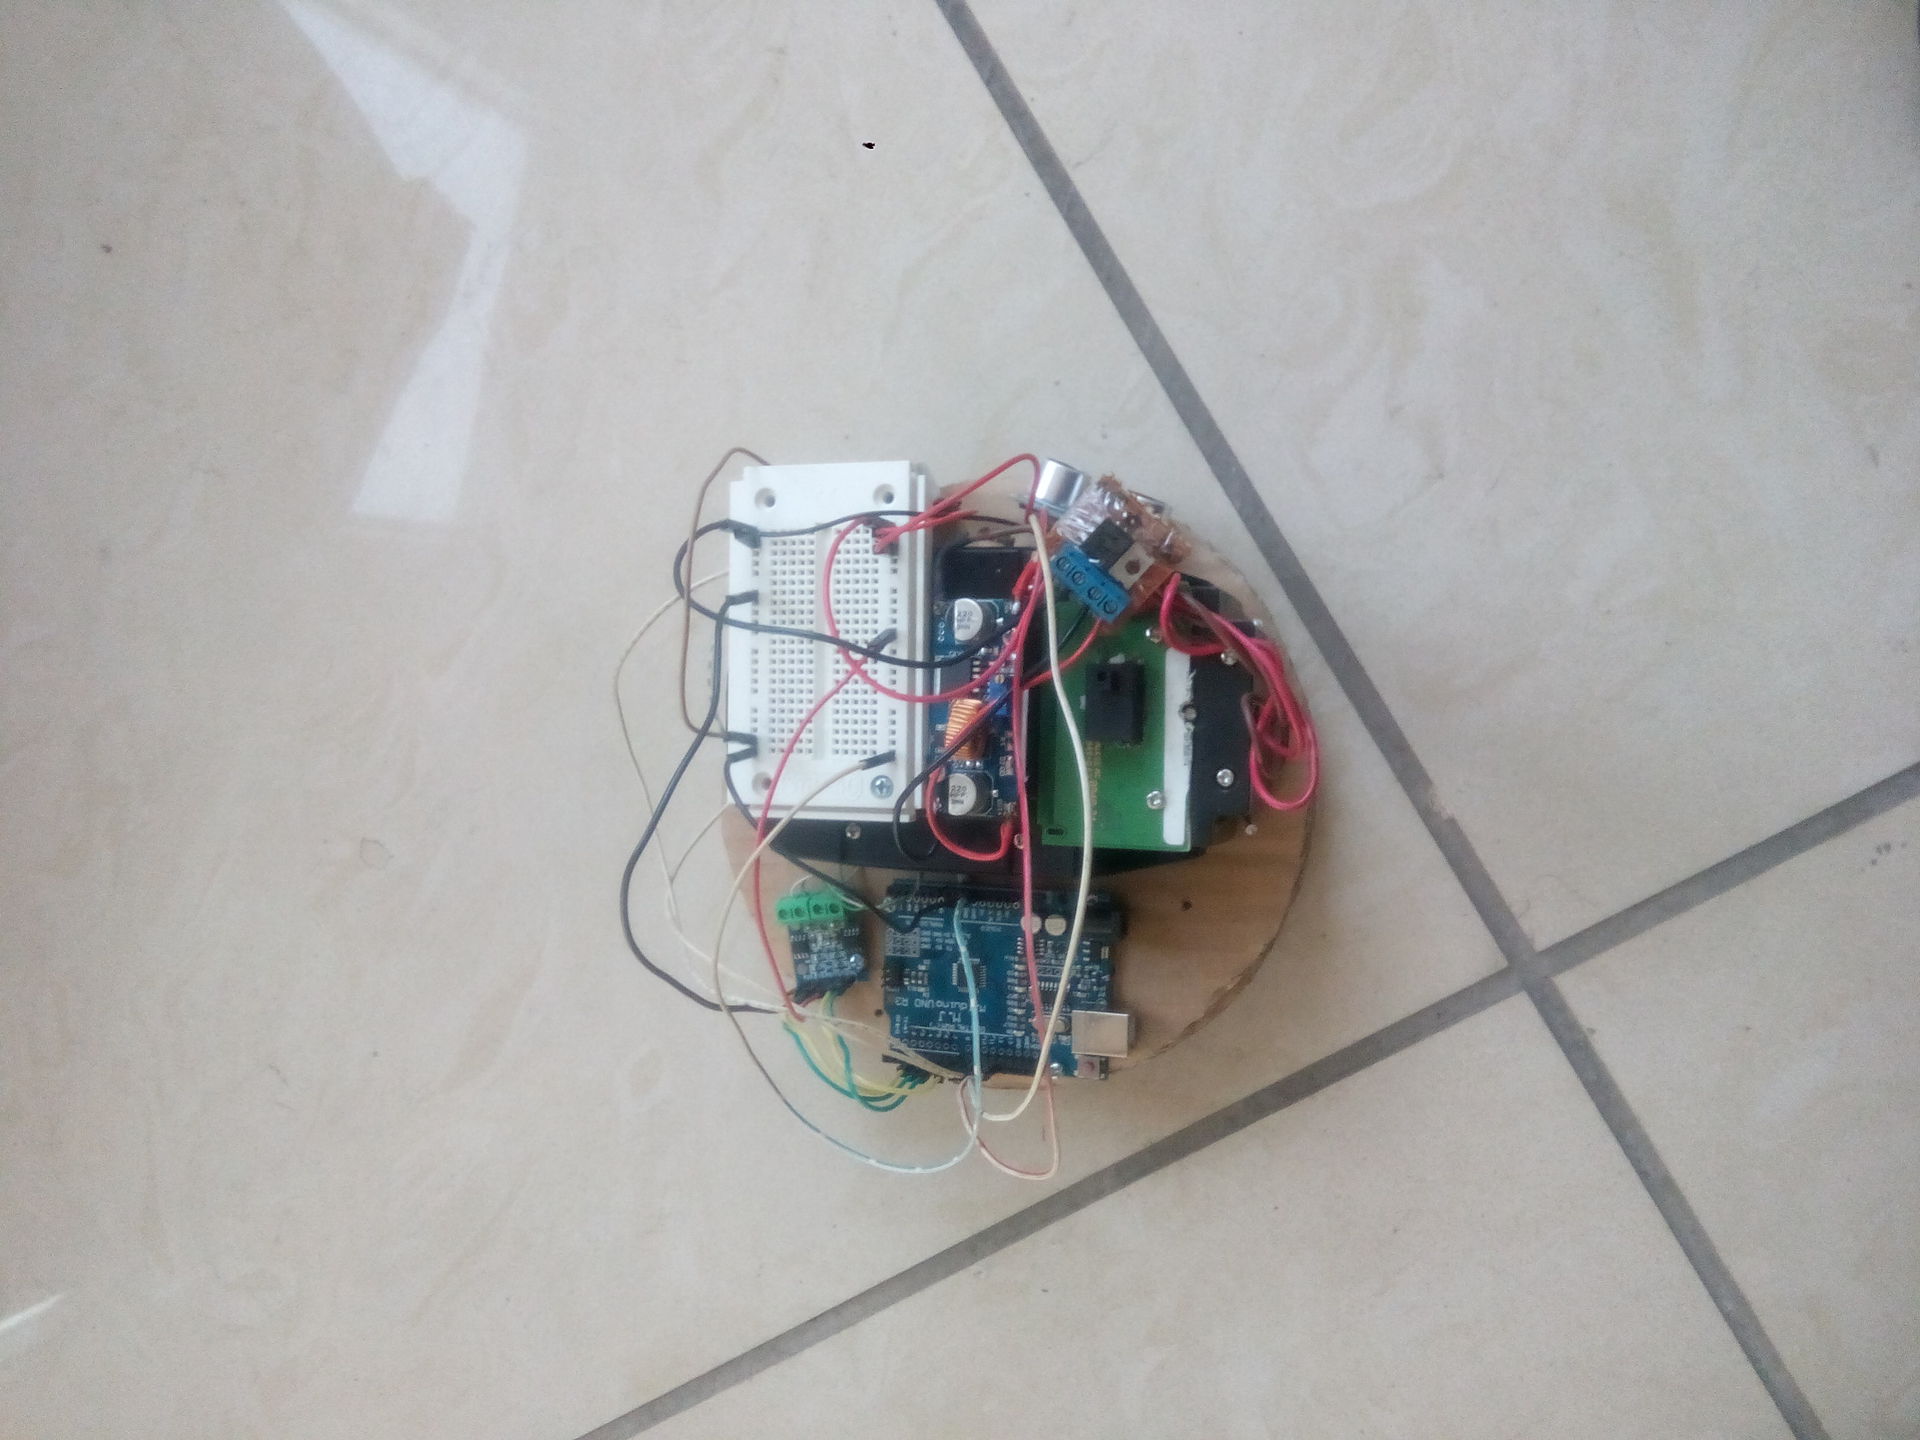
First of all, all unnecessary parts were thrown away, only the engine block and the body itself remained. Installed clone Arduino UNO, motor driver, ultrasonic rangefinder. Power - 3 lithium cells of 3.7v each.
Photos, unfortunately, did not.
The algorithm is simple - to go forward, if the distance to the obstacle is less than 5 cm, stop, turn in the random direction to the random angle, then go further. I picked up small wheels for a long time, since with the big ones this hellish cart ran like crazy around the office and did not have time to react periodically to the readings of the range finder.
The design had a bunch of minuses. The main ones are that the wheels are behind and the platform does not turn when the wheels do not grip well with the floor. Stalls, but moves the front part very slightly.
The next step is an attempt to make a turntable. I cut 2 circles with a diameter of 18 cm from cardboard. I glued them crosswise with fibers - I got good bending strength. The engine block used from the same tank.
I took a slightly modernized battery pack from the Bork handheld vacuum cleaner that was broken for a long time as a power source. There is already a built-in charging controller, charger, indicators and other crap. The output voltage is 18 volts. Logic powered by LM7805, motors from buck converter. In such a connection, it is possible to adjust the speed of the platform "hardware".

The resulting prototype moved much slower and more adequately. But still, the work of the rangefinders did not like.
The next stage - I decided to do it on the same basis, but to collect a larger platform so that I can get into it while the vacuum cleaner is not yet assembled. Diameter - 30 cm. In the same way I glued 2 circles.
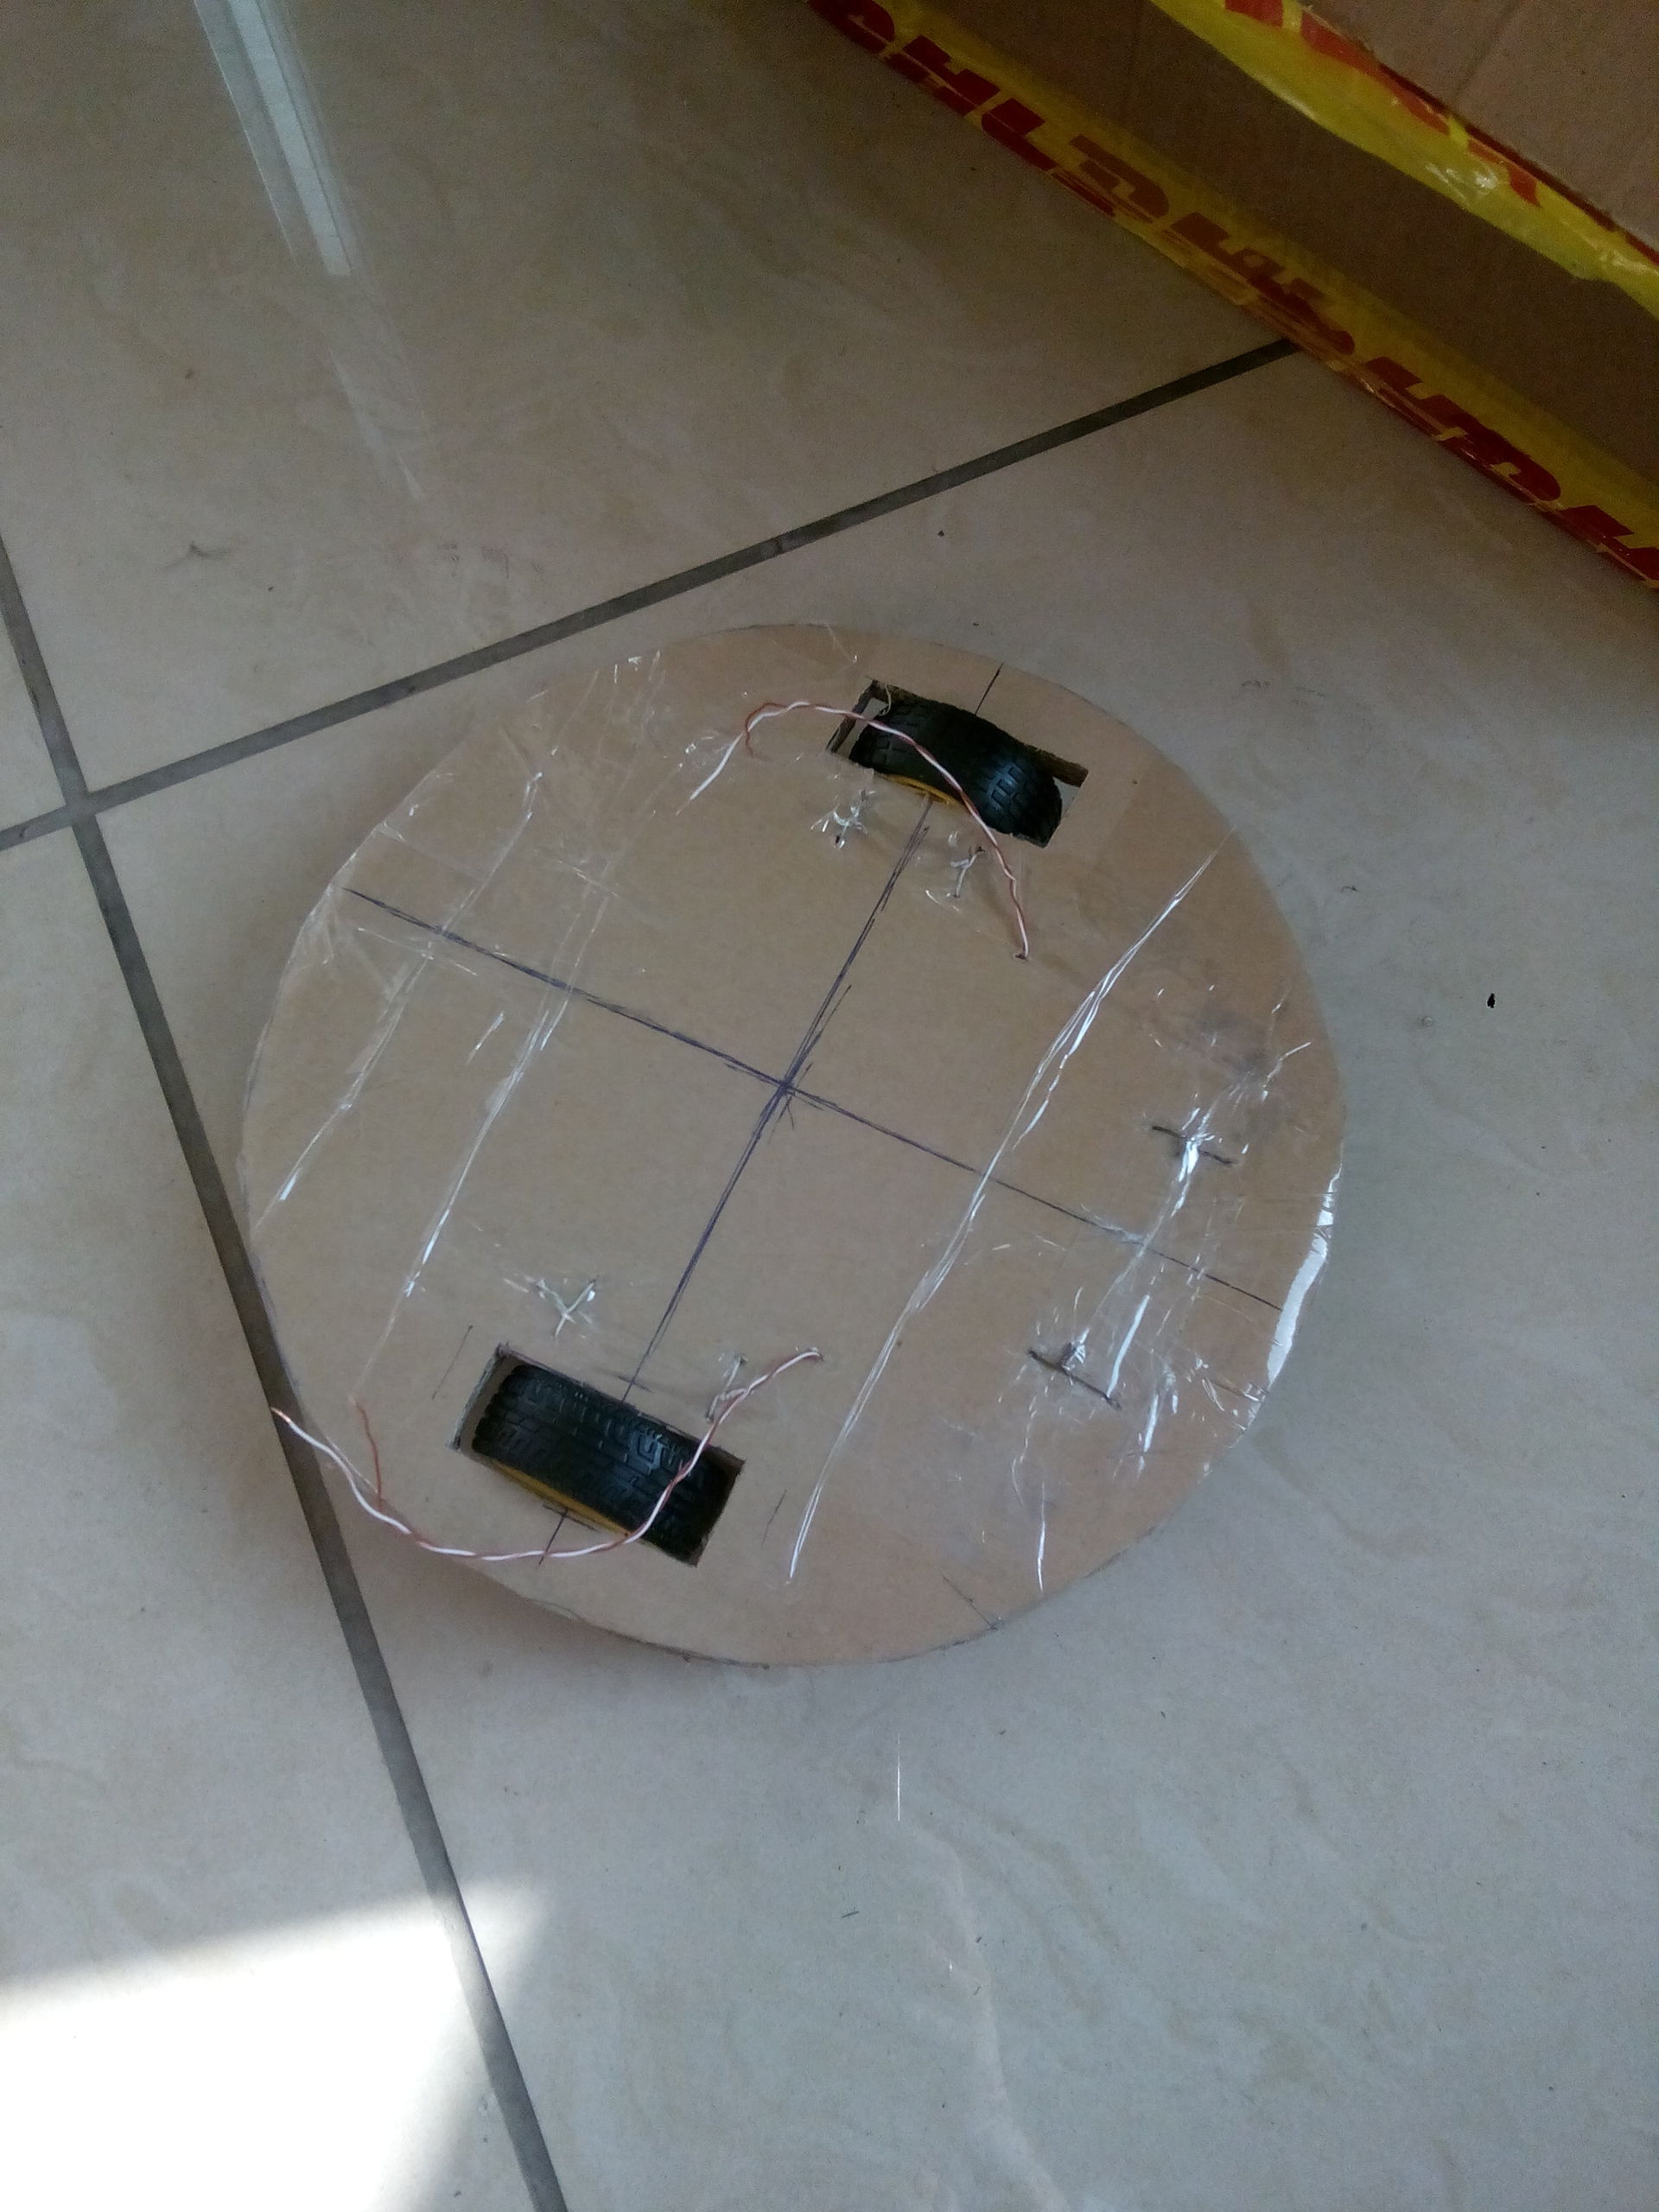

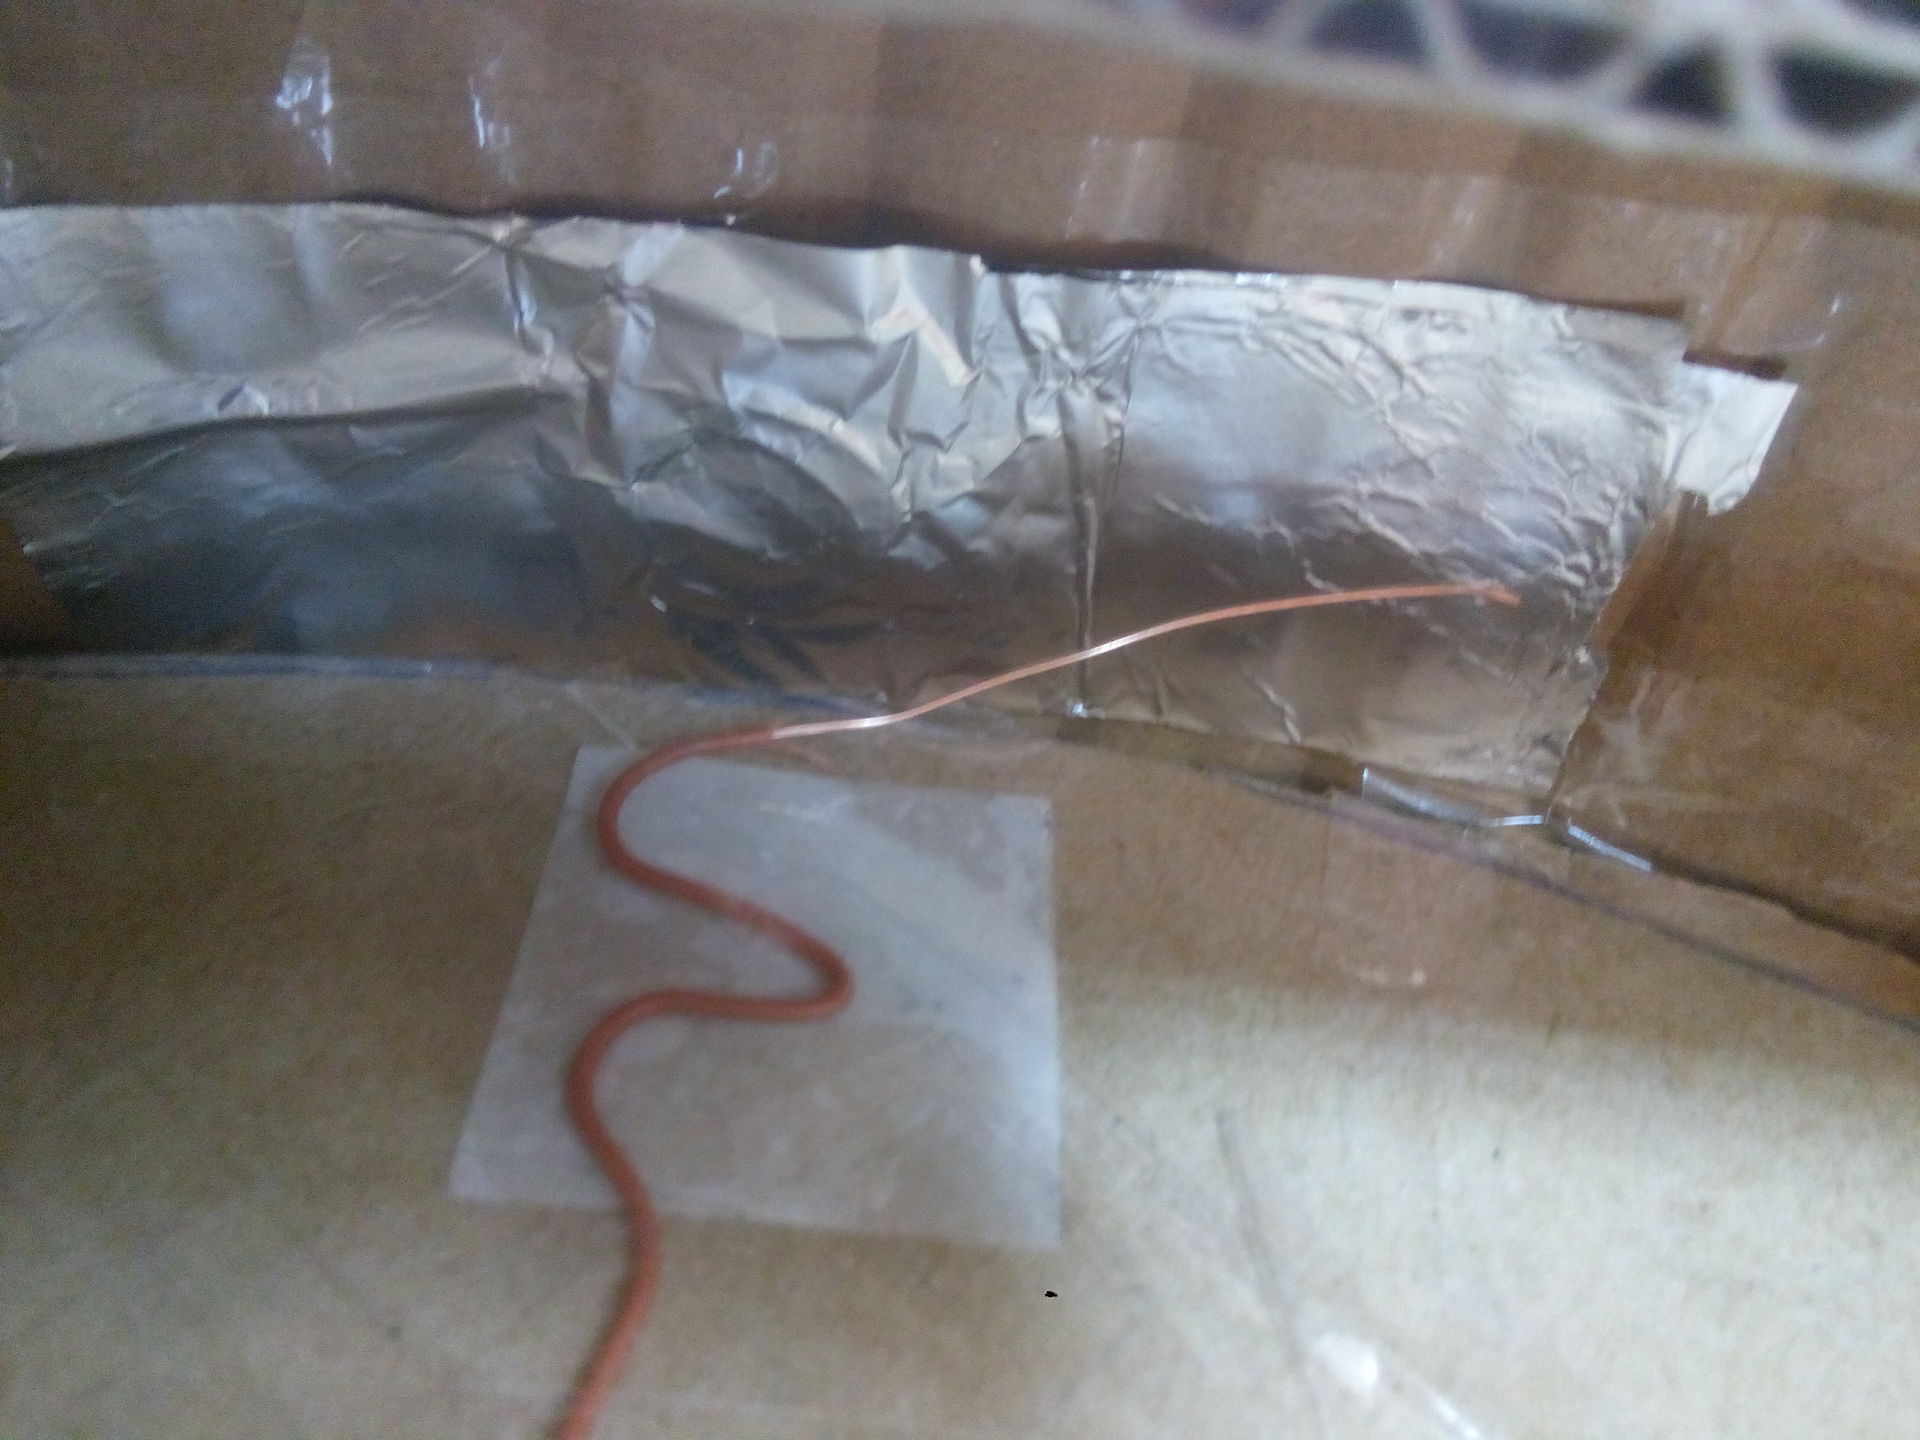
The main problem was to get rid of rangefinders. As a result, very simple contact bumpers are used.


On the inside of the bumpers we glue the foil, bring +5 to them, on the platform opposite them we fix the curved wiring from the twisted pair, pulling it to the negative through the resistor, since without a resistor there will be a lot of false positives.
All this economy successfully moved around the office and behaved much more adequately than with rangefinders.
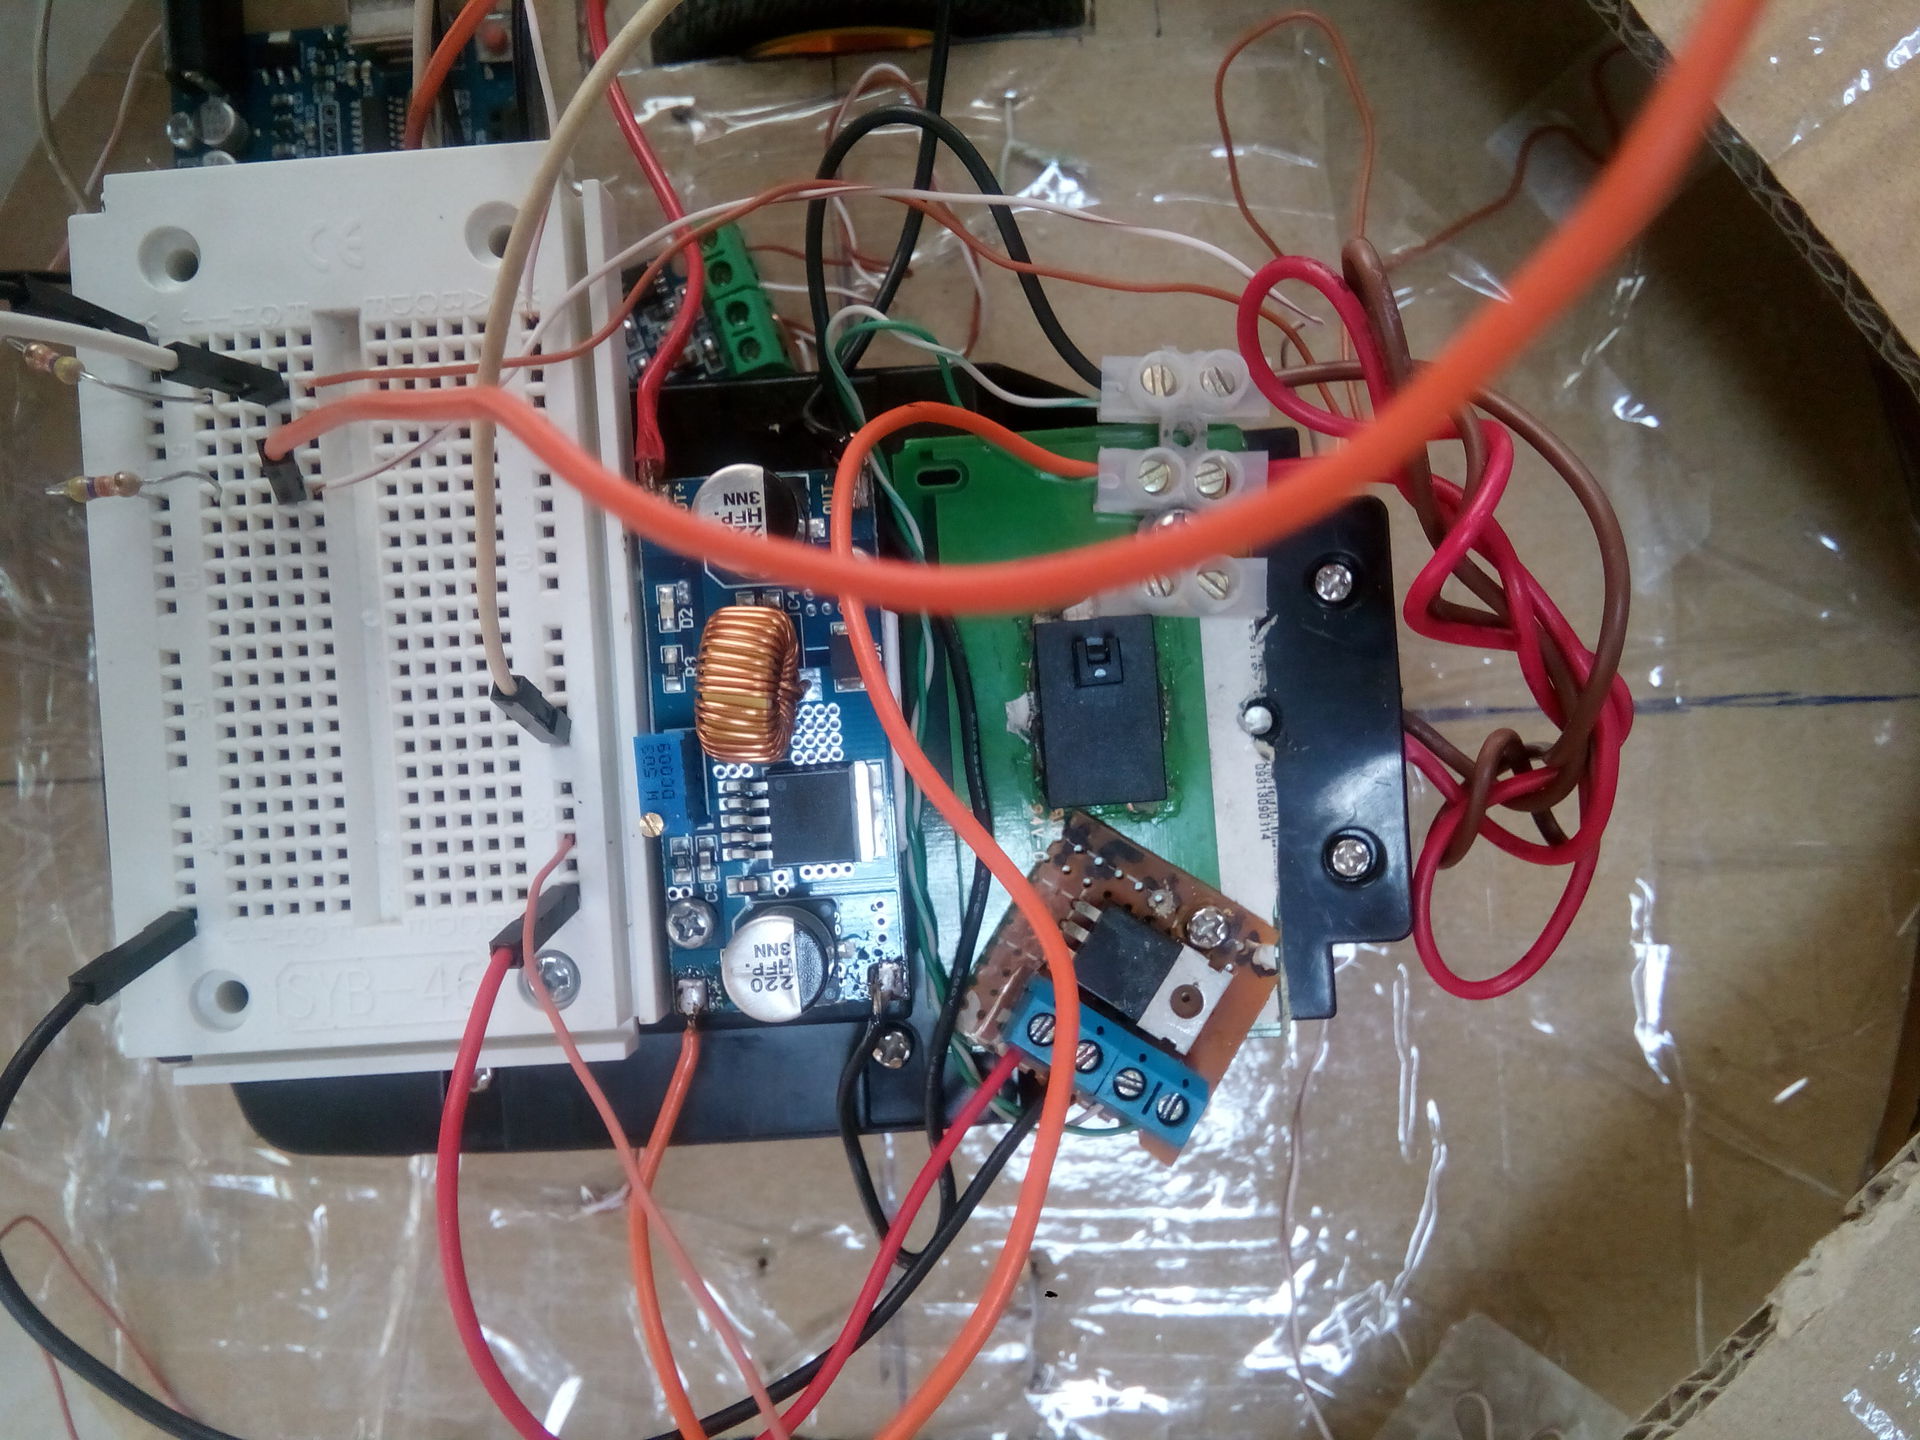
Now the fun part is to build the dust collector and the vacuum cleaner directly. I tried a bunch of options, the benefit of cardboard and scotch tape allows you to design models very quickly, albeit with large tolerances. I use clean + 18v with a power supply as a turbine power supply. Coolers, however, get warm, but nothing works.
In the photo, the very first version of the vacuum cleaner, without filters and other nonsense:
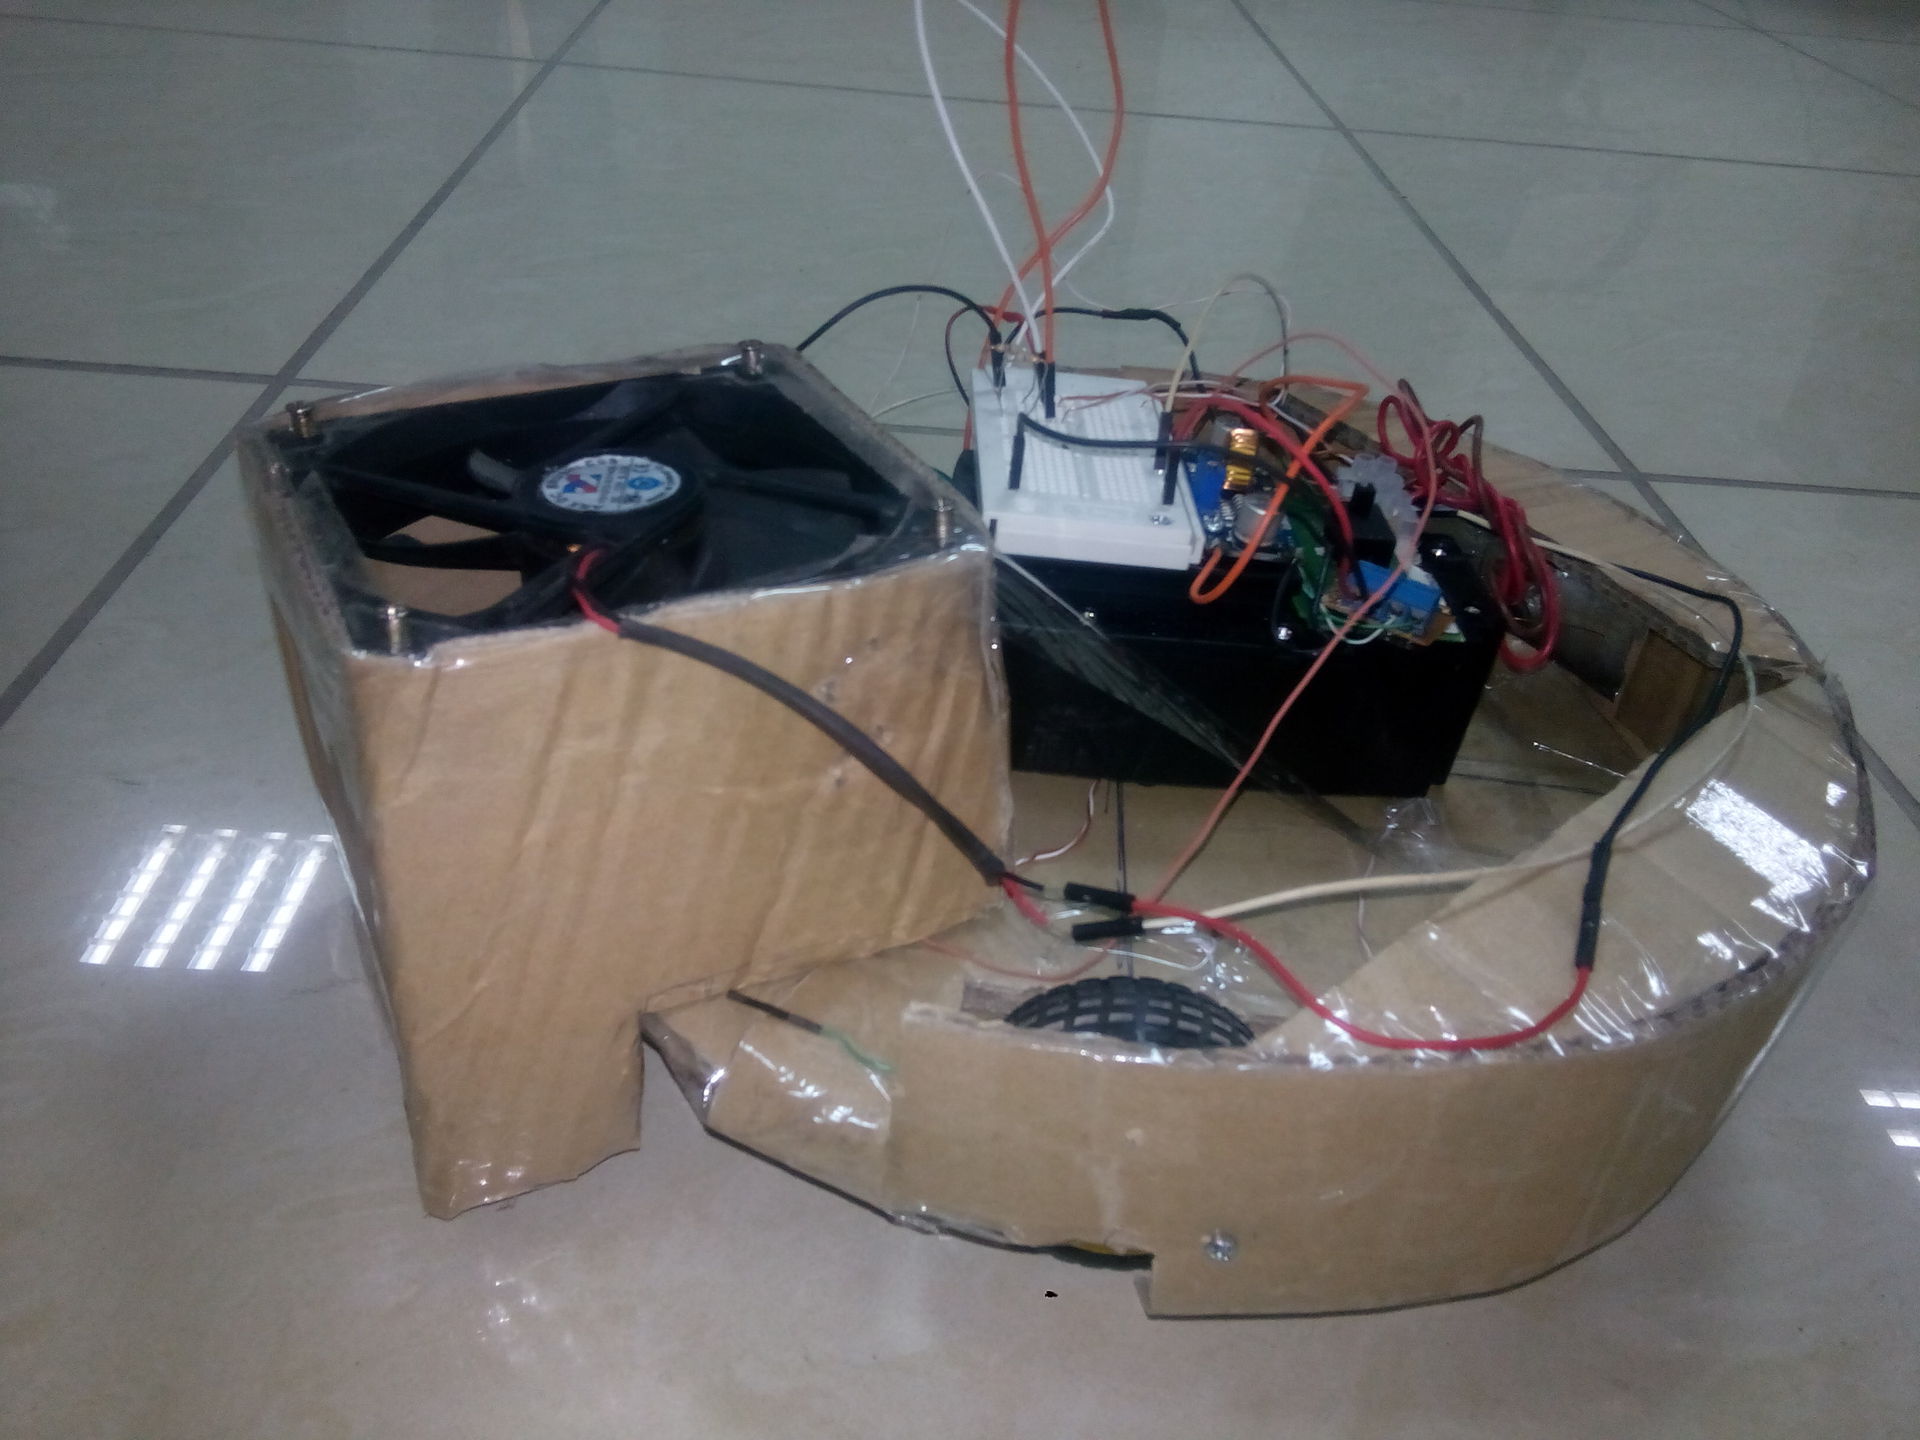
We take the cooler from the processor, break off all the blades. We fix the turbine on superglue. The difficulty lies in balancing, therefore it is necessary to glue accurately and immediately check for imbalance. Difficult, but possible. At 18V input and with a turbine, the cooler delivers about 2600 RPM without load. It draws air well, in general.


Necessary details:
- a lot of thick cardboard (free);
- analog of arduino (210 r);
- a small breadboard (80 r);
- 2 Uz-rangefinders (300 r);
- motor controller - H-bridge (80 r);
- 2 gear motors with a wheel (600 r) ;
- battery pack + 18v and charge controller;
- a couple of meters of twisted pair;
- turbine from a vacuum cleaner;
- computer cooler.
First, I used one of the tanks in the Tank Battle game. All the same, no one was playing with them because of the "flatness" of the shots - bullets fired already behind the wall sometimes "flew" at the enemy.
First of all, all unnecessary parts were thrown away, only the engine block and the body itself remained. Installed clone Arduino UNO, motor driver, ultrasonic rangefinder. Power - 3 lithium cells of 3.7v each.
Photos, unfortunately, did not.
The algorithm is simple - to go forward, if the distance to the obstacle is less than 5 cm, stop, turn in the random direction to the random angle, then go further. I picked up small wheels for a long time, since with the big ones this hellish cart ran like crazy around the office and did not have time to react periodically to the readings of the range finder.
The design had a bunch of minuses. The main ones are that the wheels are behind and the platform does not turn when the wheels do not grip well with the floor. Stalls, but moves the front part very slightly.
The next step is an attempt to make a turntable. I cut 2 circles with a diameter of 18 cm from cardboard. I glued them crosswise with fibers - I got good bending strength. The engine block used from the same tank.
I took a slightly modernized battery pack from the Bork handheld vacuum cleaner that was broken for a long time as a power source. There is already a built-in charging controller, charger, indicators and other crap. The output voltage is 18 volts. Logic powered by LM7805, motors from buck converter. In such a connection, it is possible to adjust the speed of the platform "hardware".
The resulting prototype moved much slower and more adequately. But still, the work of the rangefinders did not like.
The next stage - I decided to do it on the same basis, but to collect a larger platform so that I can get into it while the vacuum cleaner is not yet assembled. Diameter - 30 cm. In the same way I glued 2 circles.
The main problem was to get rid of rangefinders. As a result, very simple contact bumpers are used.
On the inside of the bumpers we glue the foil, bring +5 to them, on the platform opposite them we fix the curved wiring from the twisted pair, pulling it to the negative through the resistor, since without a resistor there will be a lot of false positives.
All this economy successfully moved around the office and behaved much more adequately than with rangefinders.
Now the fun part is to build the dust collector and the vacuum cleaner directly. I tried a bunch of options, the benefit of cardboard and scotch tape allows you to design models very quickly, albeit with large tolerances. I use clean + 18v with a power supply as a turbine power supply. Coolers, however, get warm, but nothing works.
In the photo, the very first version of the vacuum cleaner, without filters and other nonsense:
We take the cooler from the processor, break off all the blades. We fix the turbine on superglue. The difficulty lies in balancing, therefore it is necessary to glue accurately and immediately check for imbalance. Difficult, but possible. At 18V input and with a turbine, the cooler delivers about 2600 RPM without load. It draws air well, in general.
Sketch
// Настраиваем моторы
int L2motor = 4;
int L1motor = 5; // вперед
int R1motor = 6; // вперед
int R2motor = 7;
// бампера
int Rsensor = 10; // правый
int Lsensor = 11;
void setup() {
  pinMode(13, OUTPUT);
  // моторы
  pinMode(L1motor, OUTPUT);
  pinMode(L2motor, OUTPUT);
  pinMode(R1motor, OUTPUT);
  pinMode(R2motor, OUTPUT);
  pinMode(Rsensor, INPUT);
  pinMode(Lsensor, INPUT);
// стартовые значения
  digitalWrite(L1motor, LOW);
  digitalWrite(R1motor, LOW);
  digitalWrite(L2motor, LOW);
  digitalWrite(R2motor, LOW);
  digitalWrite(13, LOW);
  delay(2000);
}
void loop() {
  // натыкаемся на препятствие обоими бамперами
  if ( (digitalRead(Rsensor) == HIGH) & (digitalRead(Lsensor) == HIGH))
  {
    stop();
    delay(50);
    stepBack(10);
    delay(500);
    stepLeft(rnd());
    stop();
    delay(500);
  }
  else if (digitalRead(Rsensor) == HIGH)
  {
    stop();
    delay(50);
    stepBack(2);
    delay(100);
    stepLeft(rnd());
    stop();
    delay(100);
  }
  else if (digitalRead(Lsensor) == HIGH)
  {
    stop();
    delay(50);
    stepBack(2);
    delay(100);
    stepRight(rnd());
    stop();
    delay(100);
  }
  else {
    stepForward(1);
  }
}
int rnd()
{
  int x = random(10) + 5;
  return x;
}
void stepForward(int steps)
{
  for (int i = 0; i < steps; i++)
  {
    digitalWrite(L1motor, HIGH);
    digitalWrite(R1motor, HIGH);
    digitalWrite(13, HIGH);
    delay(100);
  }
  digitalWrite(13, LOW);
}
void stepBack(int steps)
{
  for (int i = 0; i < steps; i++)
  {
    digitalWrite(L2motor, HIGH);
    digitalWrite(R2motor, HIGH);
    digitalWrite(13, HIGH);
    delay(100);
  }
  stop();
  digitalWrite(13, LOW);
}
void stepLeft(int steps)
{
  for (int i = 0; i < steps; i++)
  {
    digitalWrite(L2motor, HIGH);
    digitalWrite(R1motor, HIGH);
    digitalWrite(13, HIGH);
    delay(100);
  }
  digitalWrite(13, LOW);
}
void stepRight(int steps)
{
  for (int i = 0; i < steps; i++)
  {
    digitalWrite(R2motor, HIGH);
    digitalWrite(L1motor, HIGH);
    digitalWrite(13, HIGH);
    delay(100);
  }
  digitalWrite(13, LOW);
}
void stop() {
  digitalWrite(L1motor, LOW);
  digitalWrite(R1motor, LOW);
  digitalWrite(L2motor, LOW);
  digitalWrite(R2motor, LOW);
  digitalWrite(13, LOW);
}
Future plans
- To assemble a platform from plywood;
- Reconfigure all modules and wiring;
- Reconfigure the unit with batteries and charge controller;
- Buy the same normal gear motors with revolutions in the region of 40-80rpm;
- Install 2 rotating brushes in front;
- Direct blown air under the platform (so that the air circulates and blows dust into the intake hole);
- Change Arduino UNO to a small analogue - Arduino mini