Stealth MTProxy Setup on Nginx Port 443 for Telegram
This article addresses a critical challenge for system administrators and developers: deploying Telegram MTProxy on the standard HTTPS port 443 without disrupting existing Nginx-managed web services. This configuration significantly enhances the proxy's resilience against detection and blocking by disguising its traffic as regular web traffic. The primary complexity lies in Nginx's ability to correctly route requests, distinguishing between target HTTP/HTTPS sites and MTProxy while utilizing the same port. This guide details the operational mechanism of the Nginx stream module and its integration with mtprotoproxy to create a robust and discreet solution.
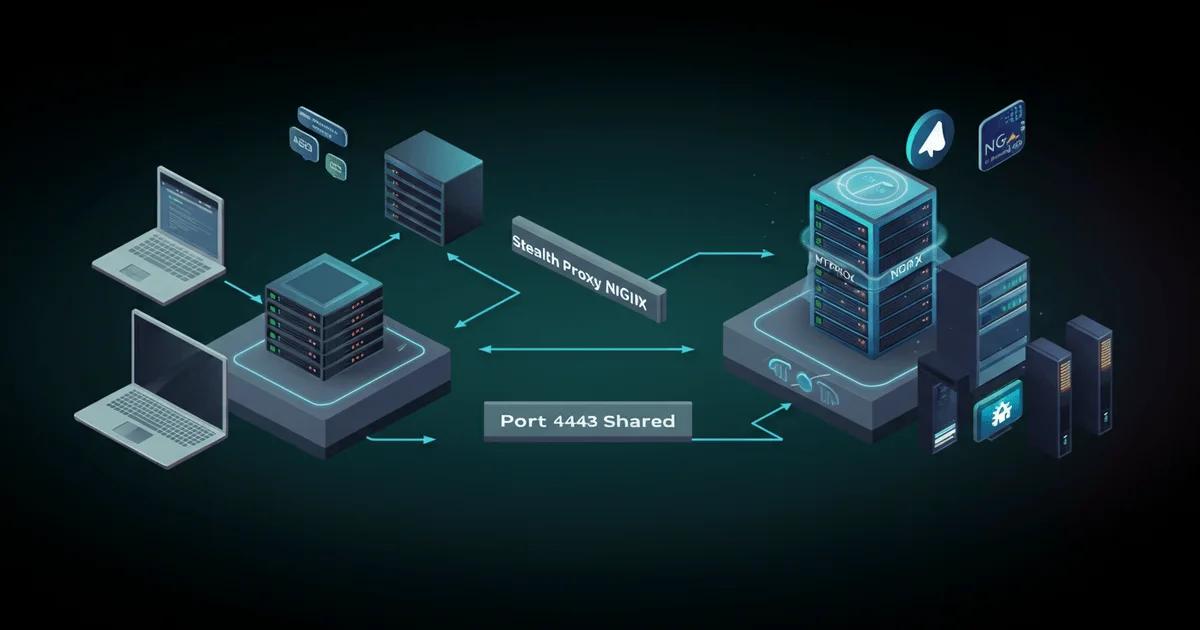
How Nginx Stream Works for Multiplexing
For MTProxy and Nginx to coexist successfully on port 443, an intelligent routing mechanism is essential. The Nginx stream module, operating at the TCP/UDP layer, enables the analysis of initial connection data before full application-layer processing. A key aspect is that the Server Name Indication (SNI) field in a TLS ClientHello message is transmitted in plain text, even for encrypted connections. This allows Nginx to read the requested hostname without decrypting the entire SSL stream.
The proposed solution employs the following logic:
- Port Reassignment for HTTPS Hosts: All existing Nginx HTTPS virtual hosts that previously listened on port 443 are moved to an internal port, such as 4443. This frees up port 443 for a centralized handler.
- Nginx Stream as a Central Router: An Nginx
streamserver is configured on the now-available port 443. This server uses thessl_preread ondirective to extract the SNI from incoming SSL connections. - Dynamic Routing: Based on the extracted SNI, Nginx
streammakes a decision:
* If the SNI matches the chosen domain name for MTProxy (e.g., myprovider.ru), the connection is forwarded to MTProxy (which will listen on a local port, such as 7788).
* If the SNI matches any other domain name, the connection is redirected back to Nginx, but to the internal port 4443, where it will be processed by the standard HTTPS virtual hosts.
- Preserving Real IP: For accurate logging, traffic analysis, and proper functioning of applications behind Nginx,
proxy_protocolis used. This allows the real client IP address to be passed along the proxy chain.
This approach enables MTProxy to masquerade as regular HTTPS traffic, using the same port as the web server. This significantly boosts its resilience against detection and blocking, making its traffic indistinguishable from standard web connections.
Configuring Nginx for Coexistence
The first step is to modify the configuration of all existing Nginx HTTPS virtual hosts. You need to change the port they listen on from 443 to an internal one, for example, 127.0.0.1:4443. This ensures that Nginx will process these requests after the stream module redirects them.
Example server block modification:
server {
  server_name mywebsite.ru;
  listen 127.0.0.1:4443 ssl http2 proxy_protocol;
  set_real_ip_from 127.0.0.1;    # Trust localhost as the PROXY Protocol source
  real_ip_header proxy_protocol; # Extract IP from PROXY Protocol header
  real_ip_recursive on;          # Apply recursively for correct IP determination
  # ... other directives for your server block ...
  ssl_certificate /etc/letsencrypt/live/mywebsite.ru/fullchain.pem;
  ssl_certificate_key /etc/letsencrypt/live/mywebsite.ru/privkey.pem;
  # ... other SSL/TLS settings ...
}
The proxy_protocol directive in listen instructs Nginx to expect a PROXY Protocol header. set_real_ip_from and real_ip_header are crucial for Nginx to correctly identify and pass on the client's real IP address, rather than the local host's IP (127.0.0.1) which will be used by Nginx Stream. Without these settings, all requests to your sites would appear to originate from 127.0.0.1, potentially disrupting application functionality, logging, and security systems.
The next step is to create a new configuration file for the Nginx stream module. It's recommended to place it in /etc/nginx/conf.d/stream.conf or another suitable location that ensures Nginx loads it.
stream {
    log_format stream '$remote_addr [$time_local] host=$ssl_preread_server_name '
                      'prot=$protocol status=$status out=$bytes_sent in=$bytes_received';

    # Optional: enable logging for debugging
    #access_log /var/log/nginx/stream_access.log stream;
    #error_log /var/log/nginx/stream_error.log;

    map $ssl_preread_server_name $backend_name {
        myprovider.ru      tg_proxy;    # Traffic for the selected MTProxy domain
        default            nginx_https; # All other HTTPS traffic
    }

    upstream nginx_https {
        server 127.0.0.1:4443; # Redirect to Nginx's internal port
    }

    upstream tg_proxy {
        server 127.0.0.1:7788; # Redirect to MTProxy's local port
    }

    server {
        listen 443 reuseport; # Listen on the main 443 port
        proxy_pass $backend_name;
        ssl_preread on;       # Enable SNI reading to determine hostname
        proxy_protocol on;    # Enable PROXY Protocol to pass the real IP
    }
}
In this block, map is used to associate the SNI ($ssl_preread_server_name) with a backend name. $backend_name will be either tg_proxy or nginx_https depending on the requested domain. The upstream directive defines where traffic will be forwarded for each backend. listen 443 reuseport allows multiple Nginx processes to listen on the same port, enhancing performance and fault tolerance. ssl_preread on is a crucial directive that enables Nginx to obtain the SNI without decrypting the entire SSL traffic.
If your current Nginx installation does not support the stream module (e.g., it's a minimal build), you'll need to install it. On Debian/Ubuntu, this is done with the command:
sudo apt install nginx-fullAfter making all changes, you must verify the Nginx configuration and restart it:
nginx -t && sudo systemctl restart nginxUsing systemctl restart instead of service nginx restart is the more modern and preferred approach on systemd-based systems.
MTProxy Installation and Configuration
For implementing MTProxy in this setup, we'll use the highly efficient Python implementation mtprotoproxy by alexbers, which integrates well with Nginx proxy_protocol and supports the required TLS masquerading mode.
The installation process involves cloning the repository and switching to the appropriate branch:
(cd /opt || sudo mkdir /opt && sudo chown $(whoami):$(whoami) /opt) && cd /opt
git clone https://github.com/alexbers/mtprotoproxy.git
cd mtprotoproxy
# Important: At the time of writing, stable operation with this configuration is achieved on the master branch
git checkout master
Next, generate a secret for MTProxy. This secret will be used by Telegram clients for authentication and must be unique:
head -c 16 /dev/urandom | xxd -psThe resulting 32-character hexadecimal value should be saved. Now, you need to create or edit the config.py file in the mtprotoproxy directory:
# /opt/mtprotoproxy/config.py
PORT = 7788 # Local port to which Nginx Stream will redirect traffic
LISTEN_ADDR_IPV4 = "127.0.0.1" # Bind to localhost for security
LISTEN_ADDR_IPV6 = None # Disable IPv6 if not needed or configured

# Dictionary of users and their secrets. Multiple can be created for different groups.
USERS = {
    "tg_user_1":  "YOUR_GENERATED_SECRET_HERE",
    # "tg_user_2": "0123456789abcdef0123456789abcdef", # Example of an additional secret
}

# MTProxy operating modes
MODES = {
    "classic": False, # Classic mode, easily detectable
    "secure": False,  # Improved mode, but not optimal for masquerading
    "tls": True       # TLS masquerading mode, most resistant to detection
}

# Domain for TLS mode. MTProxy will check its availability on startup.
# Use the domain you selected in the Nginx Stream configuration.
TLS_DOMAIN = "myprovider.ru" # Domain that will be used for MTProxy
PROXY_PROTOCOL = True # Mandatory setting for working with Nginx Stream
# AD_TAG = "GET_YOUR_AD_TAG_FROM_@MTProxybot" # Optional: for advertising tag
Key settings here include: LISTEN_ADDR_IPV4 = "127.0.0.1" ensures that MTProxy is only accessible via Nginx on the same server, enhancing security. MODES = {"tls": True} activates TLS masquerading mode, making MTProxy traffic indistinguishable from regular HTTPS. TLS_DOMAIN must match the domain name specified in the Nginx Stream map directive for Nginx to correctly identify and forward traffic. Finally, PROXY_PROTOCOL = True allows MTProxy to receive the client's real IP address from Nginx, which is crucial for proper operation and logging.
Verification and Automated Startup
After configuring Nginx and MTProxy, it's essential to thoroughly verify the entire system's functionality.
Verifying MTProxy and Nginx Functionality
- Manual MTProxy Startup: Navigate to the
/opt/mtprotoproxydirectory and manually start MTProxy for an initial check:
```bash
python3 mtprotoproxy.py
```
A line with proxy connection parameters should appear in the console, for example:
```
tg_user_1: tg://proxy?server=YOUR_VM_IP&port=7788&secret=LONG_SECRET
```
Important Note: The secret displayed here will have an ee prefix and contain the encoded TLS_DOMAIN specified in config.py. This is part of the TLS masquerading mechanism. Copy this link.
- Testing with a Telegram Client:
* In the copied link, change the port from 7788 to 443.
* Send the resulting link to your "Saved Messages" in Telegram.
* Click on the link and select "Connect".
* If everything is configured correctly, Telegram should successfully connect via the proxy. For an additional check, you can send the /ping command to any bot (e.g., @MTProxybot) — a message with the current proxy ping should be returned.
- Verifying HTTPS Masquerading: To confirm that MTProxy correctly masquerades as a regular website, perform the following check:
* Add the following line to your local hosts file (for Linux/macOS, this is /etc/hosts; for Windows, it's %SystemRoot%\System32\drivers\etc\hosts):
```
YOUR_VM_IP myprovider.ru
```
* Replace YOUR_VM_IP with the actual IP address of your server.
* Open https://myprovider.ru in your browser.
* If everything is working correctly, you should see the content of myprovider.ru (your provider's website or any other domain you specified in TLS_DOMAIN). This confirms that Nginx Stream redirected the request to MTProxy, and MTProxy, recognizing it as non-Telegram traffic, transparently proxied it to the original web resource, demonstrating successful TLS masquerading.
* Do not forget to remove the added line from your hosts file after verification.
Setting Up MTProxy as a Systemd Service
To ensure MTProxy starts automatically on system boot and runs continuously, it's recommended to configure it as a systemd service.
- Stop the manually running MTProxy (
Ctrl+C). - Create a
systemdunit file at/etc/systemd/system/mtprotoproxy.service:
```ini
[Unit]
Description=MTProto Proxy
After=network.target
[Service]
Type=simple
User=nobody
Group=nogroup
WorkingDirectory=/opt/mtprotoproxy
ExecStart=/usr/bin/python3 /opt/mtprotoproxy/mtprotoproxy.py
Restart=always
RestartSec=3
[Install]
WantedBy=multi-user.target
```
Here, User=nobody and Group=nogroup enhance security by running the service with minimal privileges. WorkingDirectory points to the directory where the mtprotoproxy.py script is located.
- Reload the
systemdconfiguration, enable the service, and start it:
```bash
sudo systemctl daemon-reload
sudo systemctl enable mtprotoproxy.service
sudo systemctl start mtprotoproxy.service
```
- Check the service status:
```bash
systemctl status mtprotoproxy.service
```
The output should indicate that the service is active (running).
- View Logs: For debugging or monitoring, use:
```bash
journalctl -u mtprotoproxy.service -e
```
This comprehensive setup allows you to use Telegram MTProxy on port 443, effectively masquerading it as regular HTTPS traffic, while preserving the full functionality of existing websites on the same server.
What's Important:
- Using
ssl_prereadin Nginx Stream enables traffic routing based on SNI without decryption, which is critical for separating MTProxy and HTTPS traffic on a single port. - Configuring
proxy_protocolin both Nginx and MTProxy ensures the transmission of the client's real IP address, which is vital for logging and security. - MTProxy is configured in
tls: Truemode withTLS_DOMAINspecified, making the proxy traffic indistinguishable from a regular HTTPS connection to that domain. - Binding MTProxy to
127.0.0.1enhances security by restricting direct external access. - The
systemdservice ensures automatic startup and monitoring of MTProxy, guaranteeing its continuous operation.
— Editorial Team


No comments yet.