December 4, 2014 at 17:17
Creating a virtual SSD for vSphere 5.5
- Tutorial
- Recovery mode
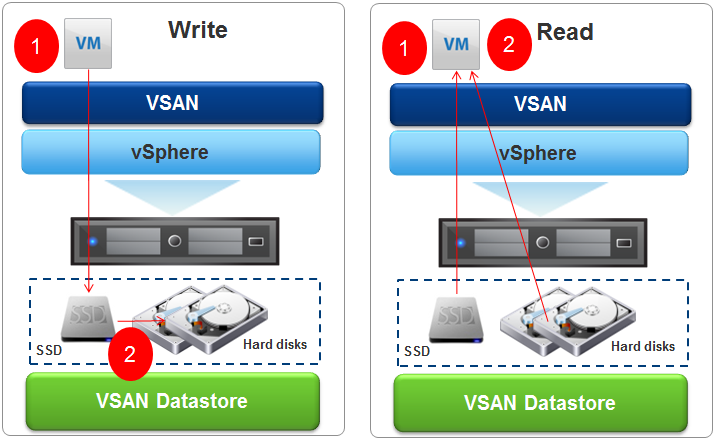
Using a virtual solid state drive can save you both time and money. VMware vSphere 5.5 is the latest version of an advanced virtualization platform, it is a hardware hypervisor that is installed directly on a physical server and divides it into several virtual machines that can work simultaneously using the same physical resources. Disk space required for installation is reduced to 150 MB of the vSphere platform due to the lack of a basic operating system. Management of such a platform can be done remotely.
One of VMware vSphere 5.5's upgrades is Flash Read Cacheor as it is also called vFlash. This is a framework, with its help it is possible to combine the SSD resources of VMware ESXi host servers into a single pool, which is used for caching, which will allow third-party vendors of SSD drives and cache devices to use their own algorithms to create virtual machine cache processing modules that intensively use the subsystem I / O for read operations. This increases the speed of their performance.
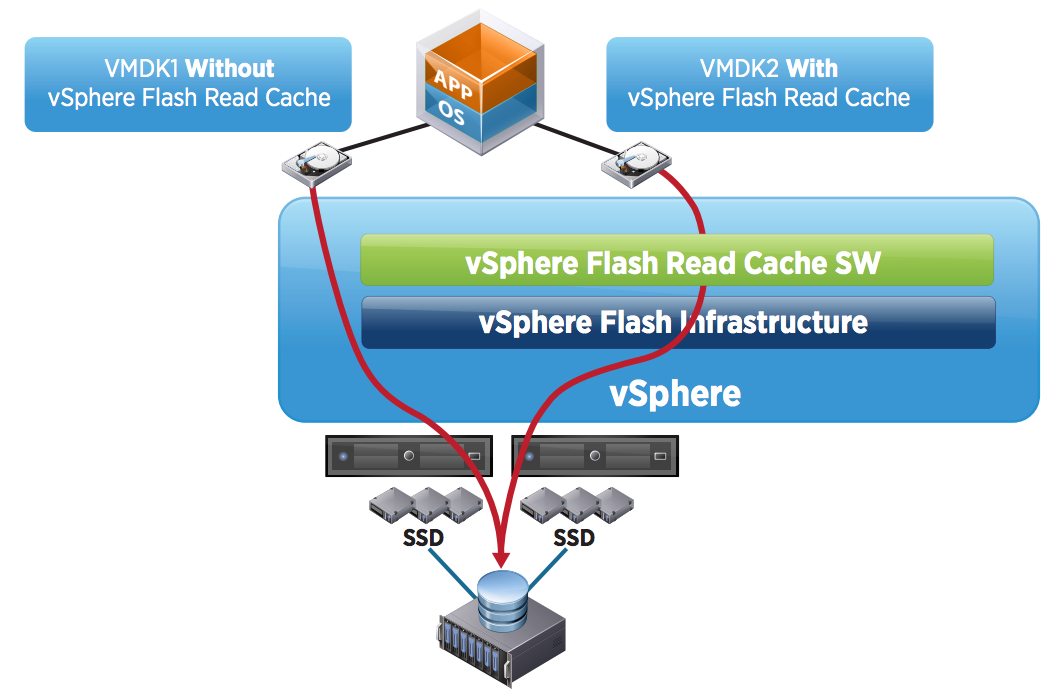
vFlash provides high performance read cache, which greatly accelerates application performance, reliable and cost-effective storage for vSphere environments. To speed up applications running on multiple virtual machines, you can use vFlash. It is possible to do this without having a physical SSD, replacing it with a virtual SSD, using the vSphere trick using a virtual SSD instead of a physical one.
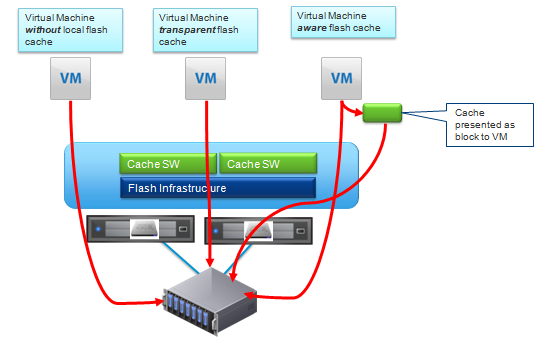
The process of creating a virtual SSD is simple. Although this is just a temporary replacement for the physical SSD. Virtual SSDs can save money on hardware without affecting performance in any way. Here are the steps to create a virtual SSD:
Storage Array Type Plugin (SATP) will allow your vCentre I / O storage to load balance properly when using a new virtual disk. In all VMware vSphere environments, load balancing is performed using the Distributed Resource Scheduler (DRS) scheduler implemented on the vSphere platform. DRS combines ESX and ESXi hosts to provide them with optimal load balancing from running virtual machines (VMs).
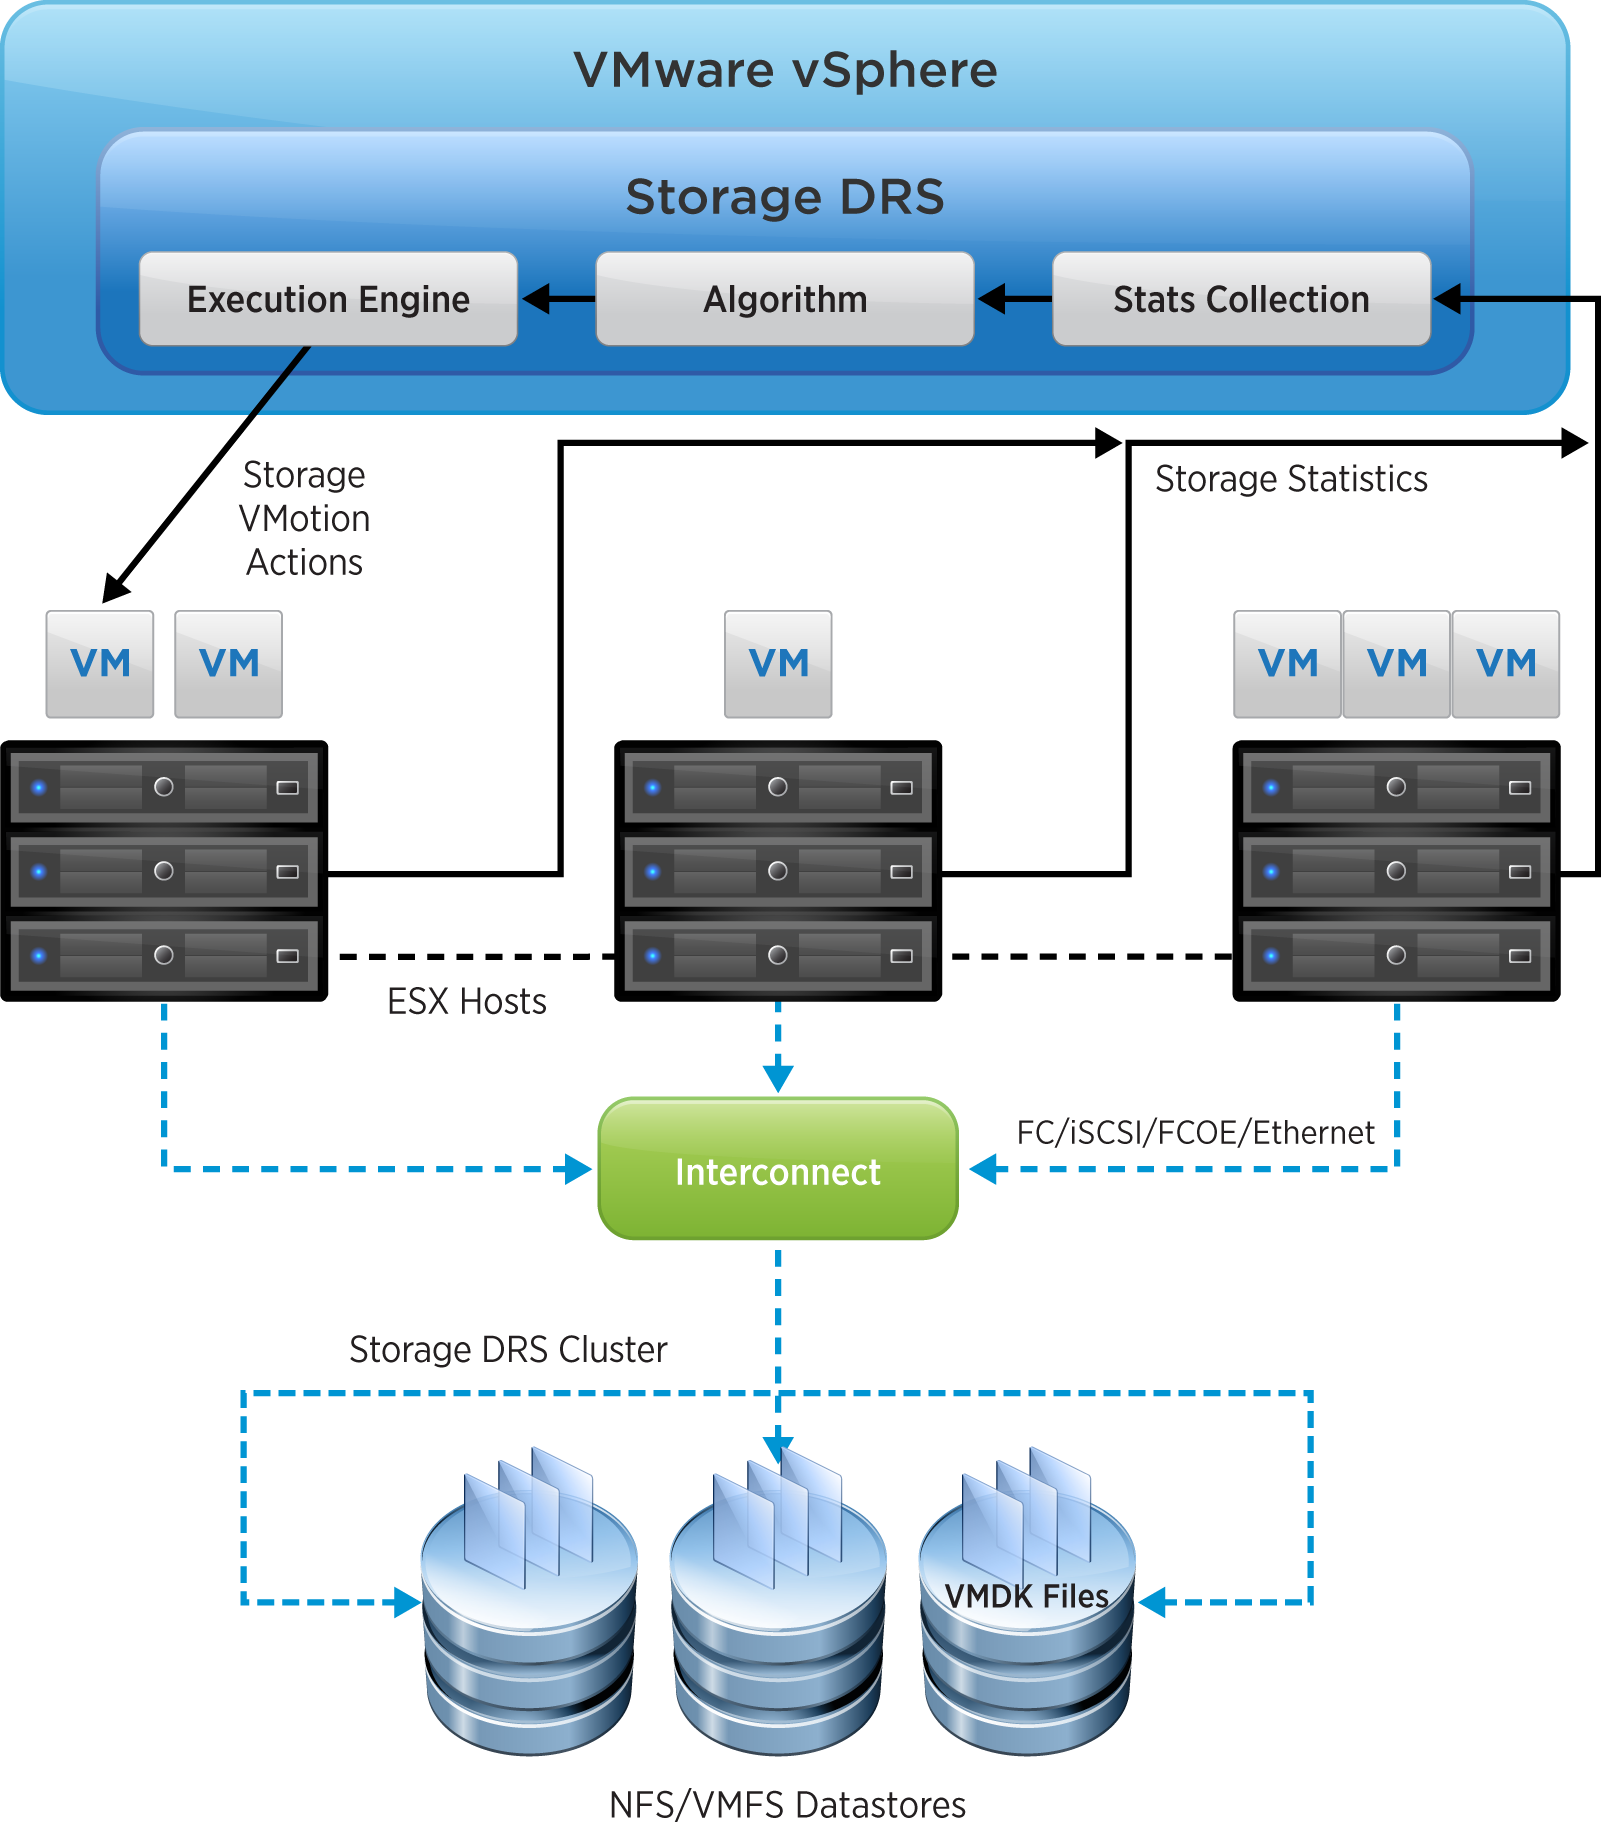
Here is the code that creates the SATP rules and activates the SSD line:
The next step is to validate the creation of SATP rules:
Conclusion:
The following is the complaint of the new virtual SSD, which would facilitate the application of SATP rules:
Finally, verify that a new virtual SSD has been created:
Conclusion:
If your Is SSD is entered correctly, the local drive can now be considered virtual. You can use the graphical user interface or the following command to update vSphere storage:
Now that your virtual SSD has been created and verified, you can add it to your ESXi host (s) and start using vFlash. It is easy to configure - just configure it on the vCenter Web client.

Now that your vFlash is up and running, you can start using the benefits it provides. Do not forget to make sure that you have VM version 10, since on another version your virtual machines will not benefit from the advantages of vFlash. It is recommended that you configure vFlash for each ESXi Host. With the advent of such media, you can create reliable and cost-effective storage for vSphere environments. Favorable price-performance ratio.
One of VMware vSphere 5.5's upgrades is Flash Read Cacheor as it is also called vFlash. This is a framework, with its help it is possible to combine the SSD resources of VMware ESXi host servers into a single pool, which is used for caching, which will allow third-party vendors of SSD drives and cache devices to use their own algorithms to create virtual machine cache processing modules that intensively use the subsystem I / O for read operations. This increases the speed of their performance.
vFlash provides high performance read cache, which greatly accelerates application performance, reliable and cost-effective storage for vSphere environments. To speed up applications running on multiple virtual machines, you can use vFlash. It is possible to do this without having a physical SSD, replacing it with a virtual SSD, using the vSphere trick using a virtual SSD instead of a physical one.
The process of creating a virtual SSD is simple. Although this is just a temporary replacement for the physical SSD. Virtual SSDs can save money on hardware without affecting performance in any way. Here are the steps to create a virtual SSD:
- create a physical local virtual disk on the ESXi host that you want to make vFlash, make sure that the size of the local virtual SSD does not exceed the size of the physical ESXi host;
- specify the path for the ESXi host of the local virtual disk (eg, mpx.vmhba1: C0: T0: L0);
- open a Secure Shell (SSH) session for each ESXi host;
- converting a physical local virtual disk to a local virtual SSD using the following esxcli command lines to modify.
Storage Array Type Plugin (SATP) will allow your vCentre I / O storage to load balance properly when using a new virtual disk. In all VMware vSphere environments, load balancing is performed using the Distributed Resource Scheduler (DRS) scheduler implemented on the vSphere platform. DRS combines ESX and ESXi hosts to provide them with optimal load balancing from running virtual machines (VMs).
Here is the code that creates the SATP rules and activates the SSD line:
~ # esxcli storage nmp satp rule add -s VMW_SATP_LOCAL -d mpx.vmhba1:C0:T0:L0 -o enable_ssd
The next step is to validate the creation of SATP rules:
~ # esxcli storage nmp satp rule list | grep enable_ssd
Conclusion:
VMW_SATP_LOCAL         mpx.vmhba1:C0:T0:L0
enable_ssd                         user
The following is the complaint of the new virtual SSD, which would facilitate the application of SATP rules:
~ # esxcli storage core claiming reclaim -d mpx.vmhba1:C0:T0:L0
Finally, verify that a new virtual SSD has been created:
~ # esxcli storage core device list -d mpx.vmhba1:C0:T0:L0
Conclusion:
mpx.vmhba1:C0:T2:L0
Display Name: Original VM  Disk (mpx.vmhba1:C0:T0:L0)
Has Settable Display Name:  false
Size: 5120
Device Type: Direct-Access
Multipath Plugin: NMP
Devfs Path: /vmfs/devices/disks/mpx.vmhba1:C0:T0:L0
Vendor: VMware
Model: Virtual disk
Revision: 1.0
SCSI Level: 2
Is Pseudo: false
Status: on
Is RDM Capable: false
Is Local: true
Is Removable: false
Is SSD: true
Is Offline: false
Is Perennially Reserved:  false
Thin Provisioning Status:  unknown
Attached Filters:
VAAI Status: unsupported
Other UIDs:  vml.0000000000577d274761343a323a47
If your Is SSD is entered correctly, the local drive can now be considered virtual. You can use the graphical user interface or the following command to update vSphere storage:
~ #vim-cmd hostsvc/storage/refresh
Now that your virtual SSD has been created and verified, you can add it to your ESXi host (s) and start using vFlash. It is easy to configure - just configure it on the vCenter Web client.
VFlash setup:
- In vSphere Web Client, navigate to the site.
- after that go to the “Manage” tab and select “Settings”;
- in the vFlash section, select “Virtual Flash Resource Management”, then click “Add Capacity”;
- from the list of available SSD devices, select the newly created local virtual SSD disk, and to start it click “OK”.
Some tips
Now that your vFlash is up and running, you can start using the benefits it provides. Do not forget to make sure that you have VM version 10, since on another version your virtual machines will not benefit from the advantages of vFlash. It is recommended that you configure vFlash for each ESXi Host. With the advent of such media, you can create reliable and cost-effective storage for vSphere environments. Favorable price-performance ratio.