Creating and configuring a portable assembly Jupyter Notebook and Lab on Windows. Part 1
- Tutorial
Hello. When I started learning Python, installed Jupyter Notebook for the first time, then I tried to transfer the application I created to it to the company, I often encountered various problems. That Cyrillic in the user name interferes, then the settings are not transferred, then something else. I mostly overcame all these problems on my own, using Google and spending a lot of time on solving them.
As my experience grew, I learned how to create a folder in which virtual Python is transferred from one computer to another, Jupyter and Matplotlib settings, portable programs (ffmpeg, etc.) and fonts. I could write a program at home, copy the entire folder to the computer of the enterprise, and be sure that nothing will be lost or broken on level ground. Then I thought that this folder could be given to a newbie in Python, and he would get a fully configured and portable environment.
Table of contents
- Introduction
- Brief instructions for creating a portable assembly Jupyter
- Install Miniconda (Python 3.7)
- Creating a directory structure
- Creating a portable Python virtual environment
- Preparing a portable build of Jupyter for launch
- Conclusion
Introduction
In recent years, Python has become a popular programming language. It is often used for writing mathematical calculations, analyzing big data, machine learning and building neural networks. After the emergence of designs asincand awaitit became possible to write fast web frameworks. Python performance gradually increases from release to release, and using Cython or Numba can make an application even faster than in other programming languages. For example, the speed of the web framework Vibora (en) is comparable to the speed of the solutions on the Go (en) . In 2018, Python officially became the language of study in schools and universities of France (en) and Kazakhstan (en). In Russia, at least some of the departments have switched to Python, for example, the department of the RK-6 (ru) at MSTU. N.E. Bauman.
When starting to learn Python, new users sometimes have difficulty installing the necessary libraries and setting up the programming environment. If the Windows user name contains non-Latin characters, some libraries might not install or run. Novice users may have problems configuring the Jupyter Notebook on their local computer. If it is installed on the disk C:\, how to open the file on the disk D:\? When I took the first steps in Python, I also had to overcome these difficulties.
Finally, if all the problems are behind, it can be difficult to transfer the application to another user. I came across a situation where the virtual Python environment I created refused to work on another computer. In addition, Jupyter Notebook and Matplotlib store their settings in the user's folder, which complicates the transfer of applications that use specific settings.
The solution to the problems described above will be to create a fully portable assembly of Jupyter Notebook and / or Jupyter Lab on Windows. It keeps the Python interpreter, its libraries and settings, the settings of all the necessary third-party libraries, including Matplotlib and Jupyter, is not tied to the user name and will not swear if you run it on another computer. We can archive such an assembly into an archive, or write a script or program that will create the same assembly on an absolute beginner's computer. For more advanced users, a portable build may be useful in that it allows you to store the Python environment and settings in libraries in different places. You can place the settings folder in a special place that is synchronized with the cloud storage: Dropbox, Mail.ru * cloud, Yandex or Google.
* Yes, the one whose client does not connect to Linux anymore (ru) . If they remove the same for Windows, I will have to look for a replacement. 1 TB on the road for free is not lying.
For simplicity, I decided to describe the creation of a portable assembly under Windows. But this instruction with minimal changes is suitable for creating an assembly on Linux and Mac OS. The article is primarily intended for beginners, so I tried to describe as much as possible and easier to read.
The article consists of two parts. In the first part we will create a portable assembly, in the second we will deal with the settings for Jupyter Notebook, Jupyter Lab, IPython and Matplotlib.
Brief instructions for creating a portable assembly Jupyter
Create a folder
C:\Dev. It will install Minconda and the portable assembly Jupyter *.
* Here and below Jupyter = Jupyter Notebook + Juputer Lab.Download the Miniconda installer from https://conda.io/miniconda (en) . Choose Python 3 for Windows 64 bits or 32 bits depending on the bitness of your operating system. Install Miniconda to the folder
C:\Dev\Miniconda3.Create the following directory structure for the portable Jupyter build:
C:\
    Dev\
        Jupyter\
            dist\
                apps\
                conf\
                    backup\
                    ipython\
                    jupyter\
                    matplotlib\
                fonts\
            projects\
Create a virtual Python environment with
conda*:C:\Dev\Miniconda3\Scripts\conda.exe create -p C:\Dev\Jupyter\dist\pyenv3.7-win64 --copy --yes python=3 conda* You can use the channel
conda-forgeto install more recent libraries by adding an argument-c conda-forge:C:\Dev\Miniconda3\Scripts\conda.exe create -p C:\Dev\Jupyter\dist\pyenv3.7-win64 --copy --yes -c conda-forge python=3 condaActivate the environment and install Python packages using
pip*:C:\Dev\Jupyter\dist\pyenv3.7-win64\Scripts\activate pip --no-cache-dir install numpy scipy matplotlib jupyter jupyterlabNote: if you need to install Numpy and Scipy, which use Intel's MKL library to speed up calculations, use (en)
intel-numpyinstead ofnumpyandintel-scipyinsteadscipy(installed only in Python 3.6!):pip --no-cache-dir install intel-numpy intel-scipy matplotlib jupyter jupyterlabAfter installation, run:
conda.bat deactivate* If errors occur during installation, try this:
C:\Dev\Jupyter\dist\pyenv3.7-win64\Scirpts\activate
conda config --add channels conda-forge
conda install numpy scipy matplotlib jupyter jupyterlab
and after installation
conda.bat deactivateIn the folder,
C:\Dev\Jupyter\distcreate a filesetenv.batthat will control where Jupyter and Matplotlib will store their settings:@echo off set conf_path=%~dp0\conf set JUPYTER_CONFIG_DIR=%conf_path%\jupyter set JUPYTER_DATA_DIR=%conf_path%\jupyter\data set JUPYTER_RUNTIME_DIR=%conf_path%\jupyter\data\runtime set IPYTHONDIR=%conf_path%\ipython set MPLCONFIGDIR=%conf_path%\matplotlib REM Matplotlib search FFMPEG in PATH variable only! set PATH=%~dp0\apps\ffmpeg\bin;%PATH%In the folder,
C:\Dev\Jupyter\distcreate a filerun_jupyter_notebook.batto run Jupyter Notebook with the specified parameters:@echo off call %~dp0\setenv.bat call %~dp0\pyenv3.7-win64\Scripts\jupyter-notebook.exe --notebook-dir=%1Similarly, in the folder,
C:\Dev\Jupyter\distcreate a filerun_jupyter_lab.batto run Jupyter Lab with the specified parameters:@echo off call %~dp0\setenv.bat call %~dp0\pyenv3.7-win64\Scripts\jupyter-lab.exe --notebook-dir=%1In the folder,
C:\Dev\Jupyter\distcreate a fileenable_extension.batthat activates the specified extension in Jupyter Notebook:@echo off REM Enable extension in Jupyter Notebook. REM Example: REM enable_extension.bat widgetsnbextension call %~dp0\setenv.bat call %~dp0\pyenv3.7-win64\Scripts\jupyter-nbextension.exe enable %1Suppose the work files are in a folder
D:\my-projects. In this folder, create shortcuts to filesrun_jupyter_notebook.batandrun_jupyter_lab.bat. After creating each of the shortcuts, go to its properties and clear the line "Working folder". If you do not clear - Jupyter will not see the folder you need!Portable assembly Jupyter created and ready for configuration and operation. To get started, just click on the created shortcuts. If you decide not to delete the installed Miniconda, you can reduce the size of the folder with the
C:\Dev\Miniconda3following command:C:\Dev\Miniconda3\Scripts\conda.exe clean --allAfter executing this command, go to the folder
C:\Dev\Miniconda3\pkgsand clear the contents of the folder.trash. Only then will we really reduce the size of the folderMiniconda3.
Install Miniconda (Python 3.7)
Let's create a C:\folder in the root of the disk Dev. In this folder, I add all the programs and development tools that for some reason prefer to be installed not in C:\Program Files. For example, there I install Ruby, Go, Python, Jupyter, Msys, SQLite Studio, etc.
First we need to install Python. Python has two branches: Python 2 and Python 3. Python 2 is supported (en) until 2020, so we will install only Python 3.
To install Python 3, they usually refer to the official site python.org (en) , from where they download it and install it. However, we want to get a portable build, so we’ll do it differently: we download and install Miniconda.
What is Miniconda? In fact, it is Python with a preinstalled and configured package manager conda. The console program condawill allow us to create a folder in which there will be a Python version we need no matter what version of Python comes with as part of Miniconda. Also using condathis folder you can install almost all known libraries for Python: Numpy, Scipy, Matplotlib, Sympy, etc. The folder in which Python and its libraries are installed is called a virtual environment. Python libraries come in the form of special archives, called packages.
The conda has distinctive features that make it convenient for both novice and experienced users:
- Python packages, which are installed via conda, are already compiled under Windows. There is less chance that an attempt to install it will result in an error *.
- You can create a virtual environment with the version of Python that you need. It does not matter which version of Python is installed with Miniconda.
* It should be noted that the situation with installing packages in Python is improving from year to year. A few years ago I was unable to install Numpy through pip(an error was issued), and I used conda. In 2018, I tried the latest version pip, and downloaded the file with the extension .whl(the so-called “wheel”) with the already compiled Numpy, and everything was fine.
So, we need to download and install Miniconda. To do this, go to https://conda.io/miniconda (en) and select the 64-bit version for Windows in Python 3. If you have a 32-bit computer, you should download the 32-bit version.
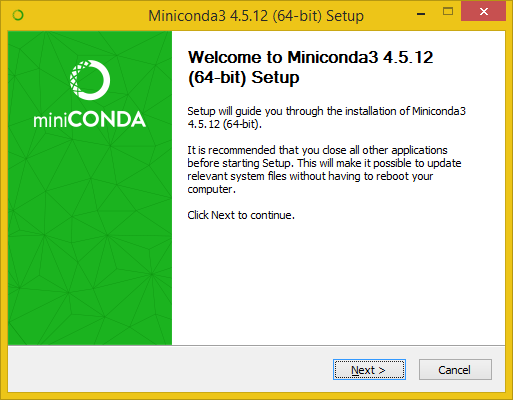
Miniconda is installed in the same way as a regular Windows application:
Run the installer, click Next.
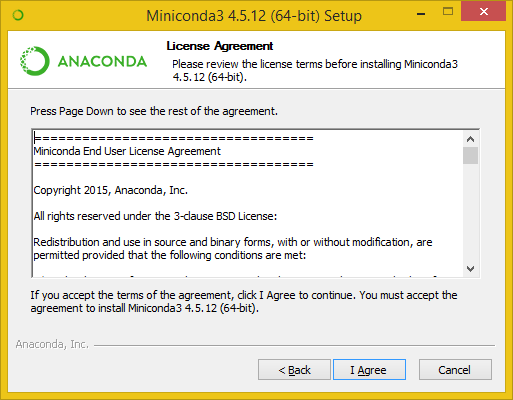
We agree with the license agreement I Agree
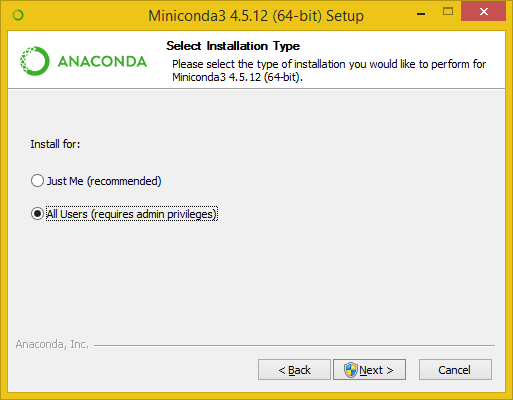
I prefer the installation for all users, because it will give me the opportunity to specify the path to install. Select the item "All users":
Adjust the path for installation on
C:\Dev\Miniconda3: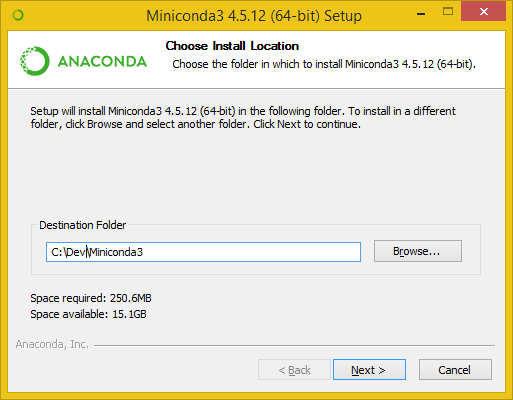
Here I put both checkboxes. The checkbox “Add Anaconda to the system PATH environment variable” will make the command
condaavailable in the terminal from any directory. If you do not check this box, the only thing that will change is that in the terminal instead ofcondayou will need to type the full path toconda.exe. I do not install Anaconda, because it puts a lot of unnecessary things to me, so I ignore the undesirability of setting this flag. If you check this box and change your mind after installation, you can simply remove itcondafrom the system variables. It's simple. But if you do not know, you can google or ask. Contact at the end of the article.
I also check the box “Register Anaconda as the system Python 3.7”. If any program suddenly needs Python, it will use Python installed with Miniconda. Also this flag will make the commandpythonavailable in the terminal from any folder. This checkbox is recommended if you have not installed Python before. If some Python is already installed, I would not advise checking this box now, but adjust the system variables if necessary.
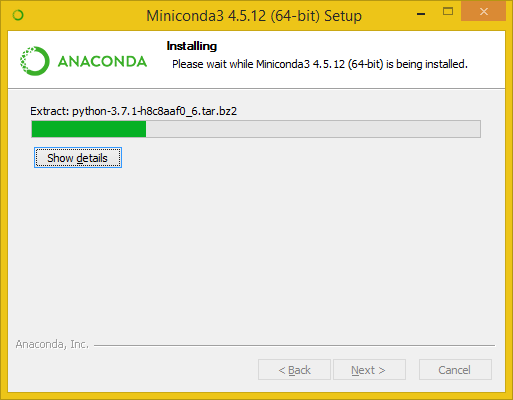
After that, click Install and the installation process will start: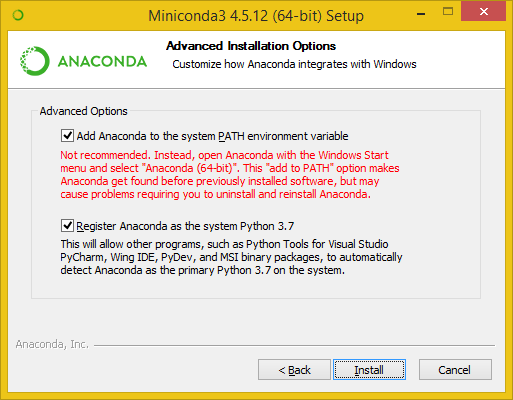
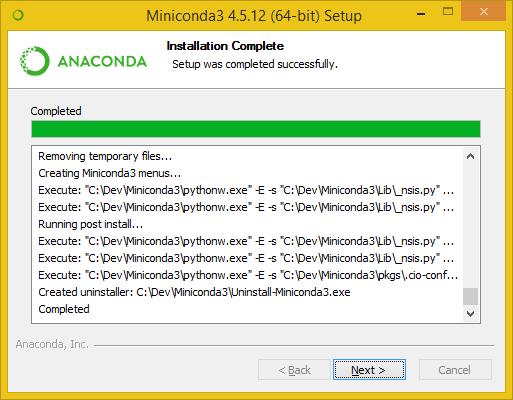
During installation, you can click Show details. Thereby you will see more information about what exactly happens during installation. But this is optional.
When the installation is complete, the phrase “Completed” will appear, and the Next button will become available. Click Next
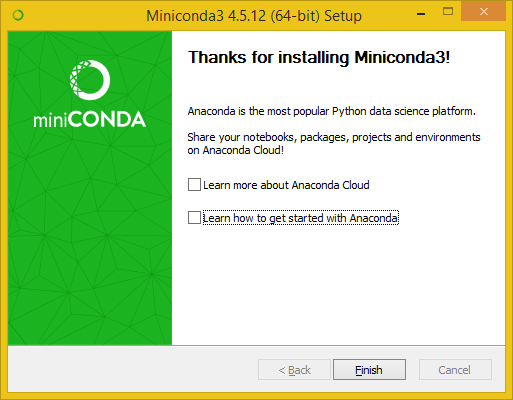
In the last window, we are invited to learn about Anaconda Cloud (this is the first box) and how to start working with Anaconda (second box). I don't need any of this, so I clear all the checkboxes and click Finish. Miniconda installation is complete.
After installing Miniconda in the folder, C:\Devwe will see a new folder Minicondaweighing about 340 MB. Yes, it is a lot, and she will still swell. Later I will show how to reduce its volume quickly and safely.
Go to the folder Miniconda. Scrolling a little list of files, we will see python.exe. The same Python 3.7, which was installed in my case (in the screenshot of Directory Opus).

If you double-click on python.exe- the console window will open, in which you can enter Python commands.
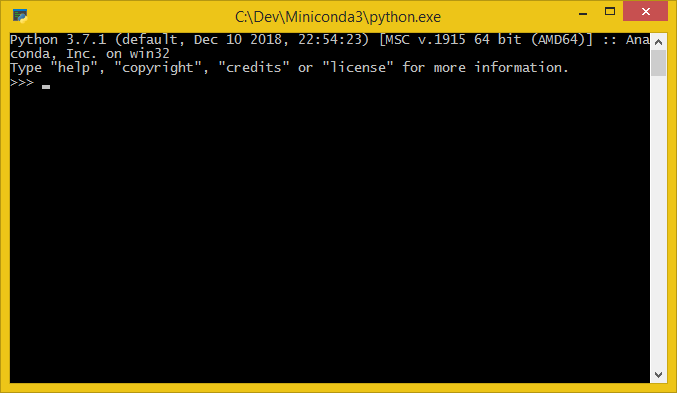
You can >>>enter for the test after :
import antigravityand press Enter. A default browser will open with a Python comic on xkcd .
In the folder C:\Dev\Miniconda\Scriptswe find conda.exe. This is the console command with which we will create a virtual Python environment.
Creating a directory structure
Now we are ready to start creating a portable assembly Jupyter Notebook. First, create the following directory structure:
C:\
Dev\
Jupyter\
dist\
apps\
conf\
backup\
ipython\
jupyter\
matplotlib\
fonts\
projects\In the folder Dev, create a folder Jupyter. In turn, in the folder Jupytercreate folders distand projects. The folder distwill contain a virtual Python environment with all the necessary libraries, configuration files, additional programs, fonts - all that is necessary for our development in Python in the Jupyter Notebook or Jupyter Lab environment. Folder projectsis the default location for projects. I myself usually do not use this folder, and it remains empty. But if I need to transfer the program to another user along with the configured Jupyter, I will put my program in this folder projects, make an archive of the entire folder Jupyterand send the archive to the user.
The folder appscontains support programs. For example, I often put there a portable version of FFMPEG that Matplotlib needs to create animations.
The folder confcontains settings for various libraries. In our case for IPython, Jupyter and Matplotlib.
In the folder, conf\backupI put copies of my settings files in case there is a future mess in the future with settings.
The folder fontscontains fonts that can be used, for example, in Matplotlib. Personally, I liked Roboto and PTSerif.
In addition to folders apps, confand fontsyou can create other folders as you like. For example, a folder tempfor temporary files.
Creating a portable Python virtual environment
Creating a virtual environment with conda
Open a command prompt (  + R →
+ R → cmd.exe→ Enter) and enter *:
C:\Dev\Miniconda3\Scripts\conda.exe create -p C:\Dev\Jupyter\dist\pyenv3.7-win64 --copy --yes python=3 conda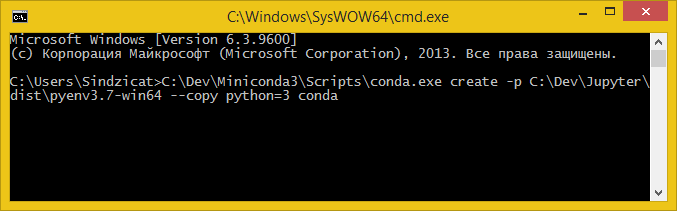
* To install more recent versions of libraries, you can connect the channel conda-forgethrough an argument -c conda-forge:
C:\Dev\Miniconda3\Scripts\conda.exe create -p C:\Dev\Jupyter\dist\pyenv3.7-win64 --copy --yes -c conda-forge python=3 condaIf you later need to delete a channel conda-forge, go to the folder in Explorer %userprofile%, find the file in it .condarc, open it with a notepad and delete the line conda-forge.
Consider this command. First comes the full path to conda.exe. If during the installation of Minconda you checked the “Add Anaconda to the system PATH environment variable” checkbox, instead of the full path, it’s enough to just write conda.
The word creategives the command to create a new environment. The argument -psays that this environment should be created where we specify, and not in the folder C:\Dev\Miniconda3\envs. The example contains the full path and name of the future folder pyenv3.7-win64(decoding: python 3.7 environment for Windows 64-bit). If you have a command line open in a folder distor you cdhave moved to this folder with the help of a command , you could simply write instead of a full path pyenv3.7-win64.
The argument --copystates condathat the packages themselves must be installed in the virtual environment. Otherwise, the package will be installed in the folder C:\Dev\Miniconda3, and in the virtual environment there will be a link to it. You will not notice this substitution until you try to start a virtual environment on another computer.
Next is the enumeration of packages. First of all, we have to install the third version of Python itself. Also, I must point out conda. Those. the program condawill be installed twice: in Miniconda and in a virtual environment. Installing condain a virtual environment increases its size quite a bit, but will allow the user to update packages in a virtual environment on a computer where Miniconda is not installed. This makes the virtual environment completely autonomous. You can even uninstall Miniconda after creating a virtual environment, and it will continue to work as if nothing had happened. I, however, leave Miniconda in case some application needs Python.
In general, besides Python and conda, you could immediately specify the necessary packages, but in 2018 I stopped doing this and instead began using it to install packages pip. First, the newest versions pipbegan to download .whlfiles with already compiled libraries, and the problems with installing a number of libraries disappeared. Secondly, the size of the virtual environment when installing packages through pipis 3 times smaller than when installing packages through conda.
Bug fixes HTTP 000 CONNECTION FAILEDwhen creating a virtual environment
One of the users when executing the command
C:\Dev\Miniconda3\Scripts\conda.exe create -p C:\Dev\Jupyter\dist\pyenv3.7-win64 --copy --yes -c conda-forge python=3 condaencountered the following error:
> C:\Users\Asus>C:\Dev\Miniconda3\Scripts\conda.exe create -p C:\Dev\Jupyter\dist\pyenv3.7-win64 --copy --yes -c conda-forge python=3 conda Collecting package metadata: failed CondaHTTPError: HTTP 000 CONNECTION FAILED for url <https://conda.anaconda.org/conda-forge/win-64/repodata.json> Elapsed: - An HTTP error occurred when trying to retrieve this URL. HTTP errors are often intermittent, and a simple retry will get you on your way. SSLError(MaxRetryError('HTTPSConnectionPool(host=\'conda.anaconda.org\', port=443): Max retries exceeded with url: /conda-forge/win-64/repodata.json (Caused by SSLError("Can\'t connect to HTTPS URL because the SSL module is not available."))'))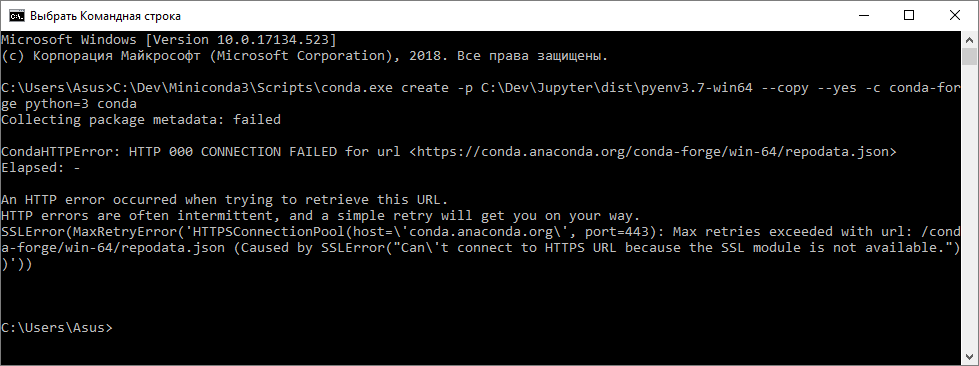
It took me more than one hour to deal with it, because at first glance the problem is either with an incorrect installation of Miniconda or with the network. Some corporate users actually blocked this resource, but the problem occurred with the user at home. Reinstalling Miniconda did not help.
As a result, it turned out that this error means that it conda.exedid not find the file openssl.exe. As a result, the following solution was applied:
Created a folder
C:\Dev\openssl.In the folder
C:\Dev\Miniconda3\pkgsfound a folder whose name begins withopenssl. Egopenssl-1.1.1a-he774522_0. If there are several folders, select the one with the higher number in the title.In the found folder, look for the file
openssl.exeand copyopenssl.exeand all the files and folders that lie along withopenssl.exe, inC:\Dev\openssl.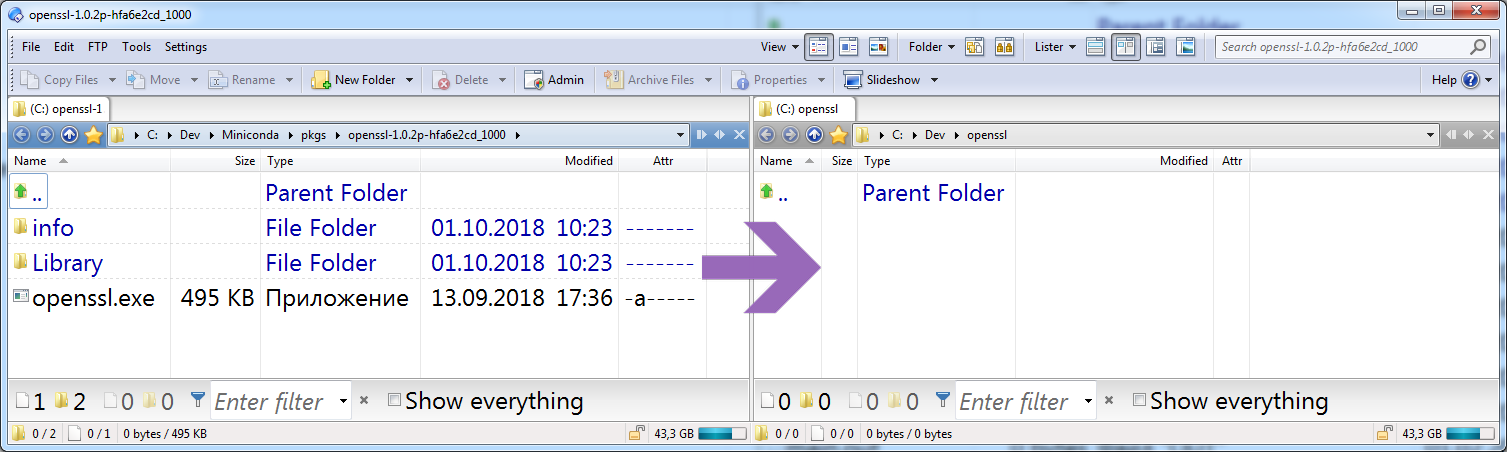
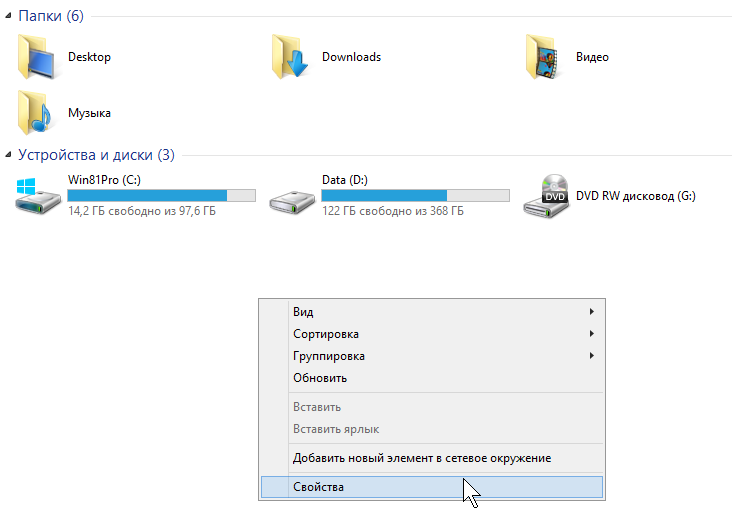
In Windows Explorer, go to "This computer" (which lists all the drives on the computer). In the free space, right-click the mouse to open the context menu and select the “Properties” item at the very bottom.
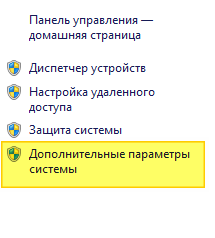
In the window that opens, we find the “Advanced system settings”:
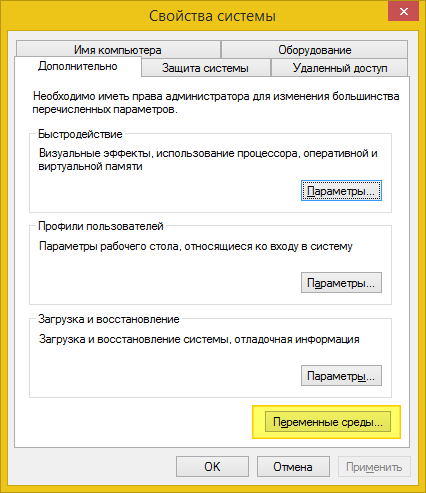
On the Advanced tab, we find the Environment Variables button:
For Windows 7 and 8: in the “Environment Variables for User” section, double click on the variable
Path. If there is no semicolon at the end of the line, put it, and at the end of this line we add:C:\Dev\openssl;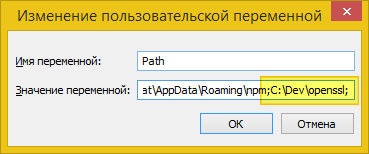
For Windows 10: in the “Environment Variables for User” section, double click on the variable
Path. As a result, this window should appear: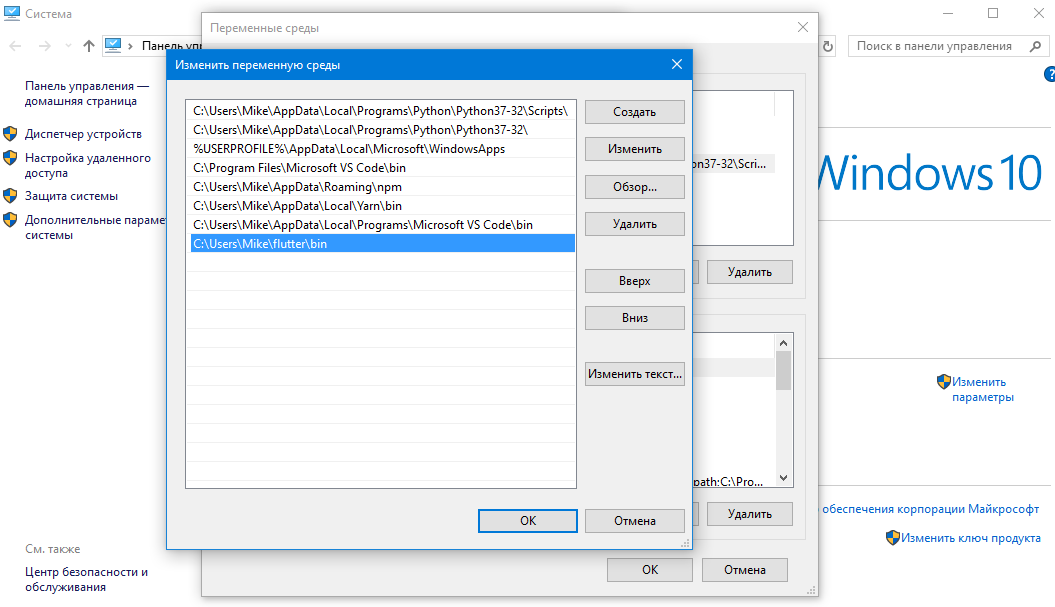
Click the "Create" button and paste the pathC:\Dev\openssl.Close and open the command prompt again. Now everything should work. If it doesn’t work, you have to google a mistake or go to the forums.
Activation of the virtual environment
When the creation of the virtual environment is finished, the window will look like this:
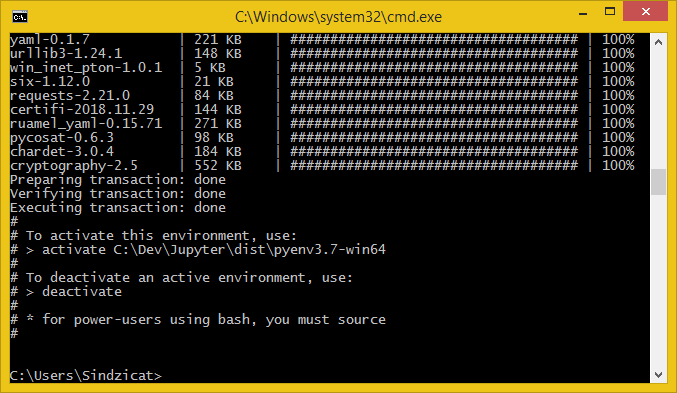
After creating the virtual environment, install the packages via pip. First you need to activate the virtual environment. To do this, in the command window, enter:
C:\Dev\Jupyter\dist\pyenv3.7-win64\Scripts\activateAs a result, you should get something like this:

The word (base)at the beginning of the line indicates that we have entered the virtual environment we need.
Installing Python packages in a virtual environment
Now you can install the packages *:
pip --no-cache-dir install numpy scipy matplotlib jupyter jupyterlab
The argument --no-cache-dirstates pipthat you should not cache downloaded packages. This will allow us not to increase the size of the virtual environment folder.
* There is an Intel-developed MKL (Math Kernel Library) library (en) that speeds up work on big data for popular Python libraries, in particular, Numpy and Scipy. If you want to install Numpy and Scipy that use MKL, you should use (en)intel-numpy instead of numpyand intel-scipyinstead of scipy:
pip --no-cache-dir install intel-numpy intel-scipy matplotlib jupyter jupyterlabI managed to install intel-numpyand intel-scipyonly in a virtual environment with Python 3.6. If you want to use Numpy and Scipy with MKL in an environment with Python 3.7, you need to use the command:
conda install numpy scipyIf you are not sure what to bet, just use numpyand scipy.
If the installation process fails through installation pip, try installing the problematic packages through conda. Example:
conda install numpy scipy matplotlib jupyter jupyterlabExit from the virtual Python environment
After the installation is complete, you need to exit the virtual environment. To do this, type * in the command line:
conda.bat deactivate* I used to type simply deactivate, but for some reason this is out of date, and you need to type conda.bat deactivate. It conda deactivatewill even be wrong.
Preparing a portable build of Jupyter for launch
We will create several .batfiles that will force Jupyter and Matplotlib to store the settings in the folder dist\config, as well as manage the launch of Jupyter Notebook and Jupyter Lab.
Setting environment variables for Jupyter, IPython and Matplotlib
The directories for placing settings are determined by the variables of the Windows environment. By changing these variables, we will force Jupyter and Matplotlib to store their files where we need it. In the folder, C:\Dev\Jupyter\distcreate the setenv.batfollowing file :
@echo off
set conf_path=%~dp0\conf
set JUPYTER_CONFIG_DIR=%conf_path%\jupyter
set JUPYTER_DATA_DIR=%conf_path%\jupyter\data
set JUPYTER_RUNTIME_DIR=%conf_path%\jupyter\data\runtime
set IPYTHONDIR=%conf_path%\ipython
set MPLCONFIGDIR=%conf_path%\matplotlib
REM Matplotlib search FFMPEG in PATH variable only!
set PATH=%~dp0\apps\ffmpeg\bin;%PATH%Let us see what is being done in this file.
The command is @echo offnecessary so that the command line does not display a message when each line of our file is executed.
The command setcreates a variable. Construction %~dp0means full path to setenv.bat. Please note that =there should be no spaces before and after the sign .
Then we set up variables for Jupyter:
JUPYTER_CONFIG_DIR- folder for Jupyter configuration files ( documentation (en) ),JUPYTER_DATA_DIR- folder for data files to be installed (extensions and kernels (kernel) for Jupyter) ( documentation (en) ),JUPYTER_RUNTIME_DIR- folder for Jupyter (runtime files) executables ( documentation (en) ),IPYTHONDIR- folder for IPython configuration files ( documentation (en) ),MPLCONFIGDIR- folder where Matplotlib stores its settings and cache ( documentation (en) ).
If you plan to create animations with Matplotlib, you will need FFMPEG (ru) . I download (en) zip archive FFMPEG, unpack its contents C:\Dev\Jupyter\dist\apps\ffmpeg.
The line that begins with REMis a comment. For some reason, Matplotlib is looking for FFMPEG only in %PATH%. I write down the path to the FFMPEG at the beginning %PATH, and not at its end, so that when I search, the first one to be found is the FFMPEG I put in dist\apps.
Creating a file to run Jupyter with user settings
In the folder, C:\Dev\Jupyter\distcreate the run_jupyter_notebook.batfollowing file :
@echo off
call %~dp0\setenv.bat
call %~dp0\pyenv3.7-win64\Scripts\jupyter-notebook.exe --notebook-dir=%1
Similarly, in the folder, C:\Dev\Jupyter\distcreate the run_jupyter_lab.batfollowing file :
@echo off
call %~dp0\setenv.bat
call %~dp0\pyenv3.7-win64\Scripts\jupyter-lab.exe --notebook-dir=%1Each of these files first executes setenv.bat, i.e. sets up environment variables, then launches Jupyte Notebook or Jupyter Lab and tells him where the folder with our files for the project is.
Suppose there is a folder D:\my-projectsin which we will store Jupyter Notebook or Lab files. In this folder, create shortcuts to files run_jupyter_notebook.batand run_jupyter_lab.bat. After that, without fail, open the properties of each of these shortcuts and make an empty line “Working folder”. If you don’t, Jupyter will not see your folder!
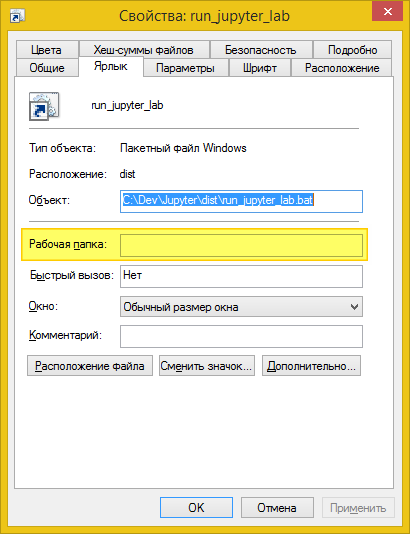
After you have done this, you can double-click on any of the shortcuts. First, a new command prompt window will appear, then the default browser will open and Jupyter Notebook or Lab will start in a new tab. Congratulations: quest is over!
Additional files for housekeeping
For Jupyter Notebook written extensions (to be more in part 2). But they are not enough to install. They still need to activate. According to the documentation , you need to do the following (do not execute this command!):
jupyter nbextension enable <nbextension require path>But we can not execute the command in this form, because the settings will be outside the portable assembly. We must do otherwise:
C:\Dev\Jupyter\dist\setenv.bat
C:\Dev\Jupyter\dist\pyenv3.7-win64\Scripts\jupyter.exe nbextension enable <nbextension require path>To simplify our task, we can C:\Dev\Jupyter\distcreate a file in the enable_extension.batfollowing folder :
@echo off
REM Enable extension in Jupyter Notebook.
REM Example:
REM enable_extension.bat widgetsnbextension
call %~dp0\setenv.bat
call %~dp0\pyenv3.7-win64\Scripts\jupyter-nbextension.exe enable %1As a result, our entry in the command window will shrink and become like this:
C:\Dev\Jupyter\dist\enable_extension.bat <nbextension require path>If from time to time you need to launch various actions in the command window jupyter, you can create the following C:\Dev\Jupyter\distfile in the folder jupyter.bat:
@echo off
call %~dp0\setenv.bat
call %~dp0\pyenv3.7-win64\Scripts\jupyter.exe %1 %2 %3 %4 %5 %6 %7 %8 %9
Similarly, you can do to run IPythonand other cases.
Conclusion
Part 1 came to an end. We have created a fully portable and portable build of Jupyter and can work with files that lie in the folder we need. To do this, create shortcuts on run_jupyter_notebook.batand run_jupyter_lab.bat, in the properties of the shortcuts, you must clear the line Working folder, and everything is ready for work.
Part 2 will cover various issues of Jupyter Notebook, Jupyter Lab and Matplotlib customization. Let's learn how to connect extensions to Jupyter Notebook and Jupyter Lab, adjust keyboard shortcuts, font size and other settings, write our “magic commands”.
If you have any questions, but do not have an account on Habré, here are my contacts:
Telegram: https://t.me/sindzicat
E-mail: sh.andr.gen@yandex.ru