DIY 10-monitor desktop
For a long time I came up with a convenient, multi-monitor workplace. In life, one has to solve problems related to programming, testing, virtual machines and processing rarely changed dynamic information. For a long time I used a bunch of three monitors, which my son really liked:
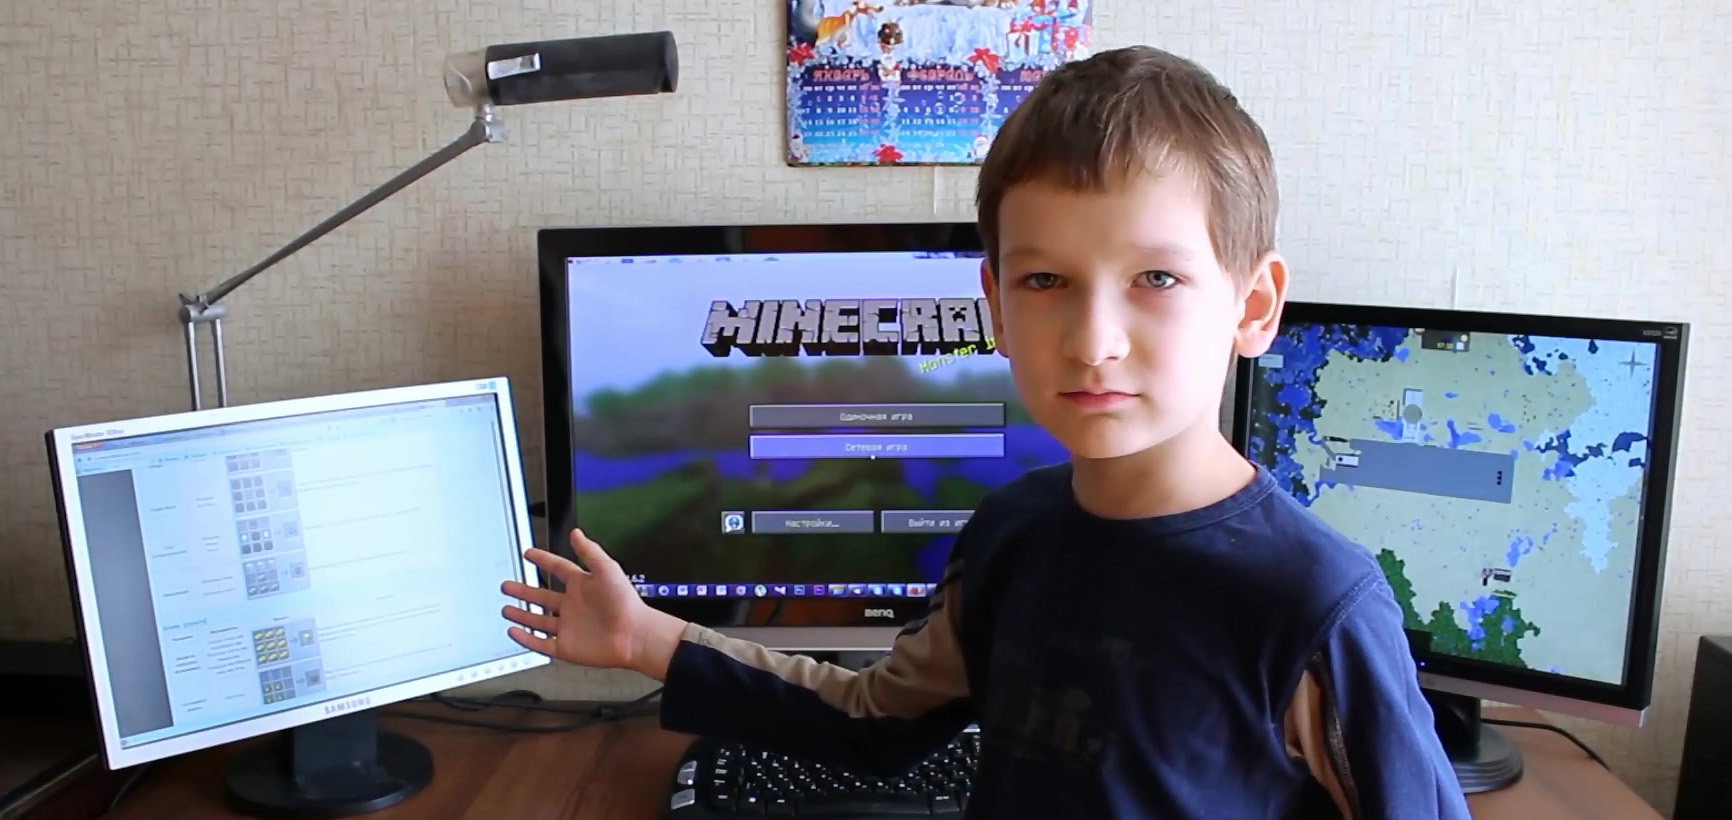
But this was disastrously not enough - I had to constantly switch between windows. As a result, after allocating a separate apartment for the laboratory, I decided to assemble a 10-monitor desktop, where all monitors are connected to the same system unit and organize one single workspace.
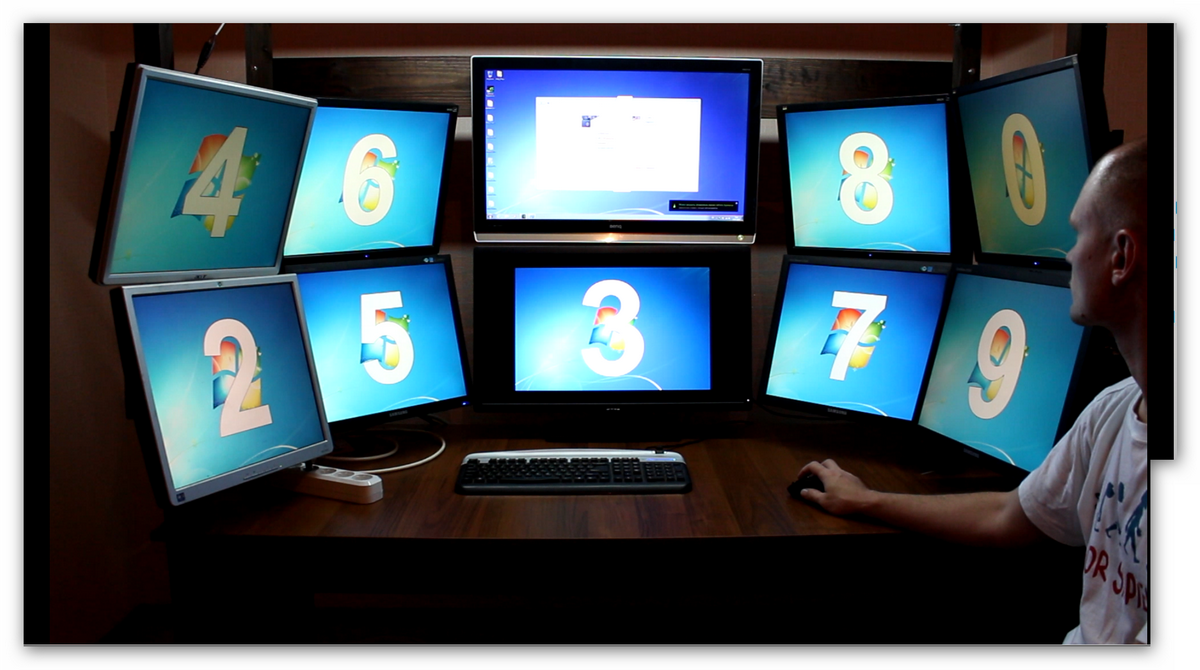
Purchased in different places:
1) The usual spacious office desk;
2) A case for the system unit (you need a large and quiet one, for a large number of hard ones);
3) Modern components: a motherboard for 2011 socket, with support for 64 GB of RAM (4-channel mode) and with the ability to connect up to 12 hard drives, a video card, with the ability to connect up to 4 monitors to each (all without risers in one system unit accommodates three modern graphics cards). Video cards must be passively cooled, silent power supply, modern processor, etc.
4) Monitors (10 pieces in total): in the center - 2 monitors 27 inches in size, lower (main workspace) with a higher resolution and upper, which will act as a control panel, display catalogs, auxiliary work environment in graphic and video editors;
5) UPS (2 pieces) - one for the system unit and the second for monitors;
6) A wooden beam, to create a table frame, a furniture panel for the roof, lighting, fasteners, wires and more.

First, the idea was to fix the side monitors to the brackets for two monitors that are mounted on the edge of the table. The inconvenience was revealed in the form of difficulty in orienting monitors in space, and the system was responsive to any movements:
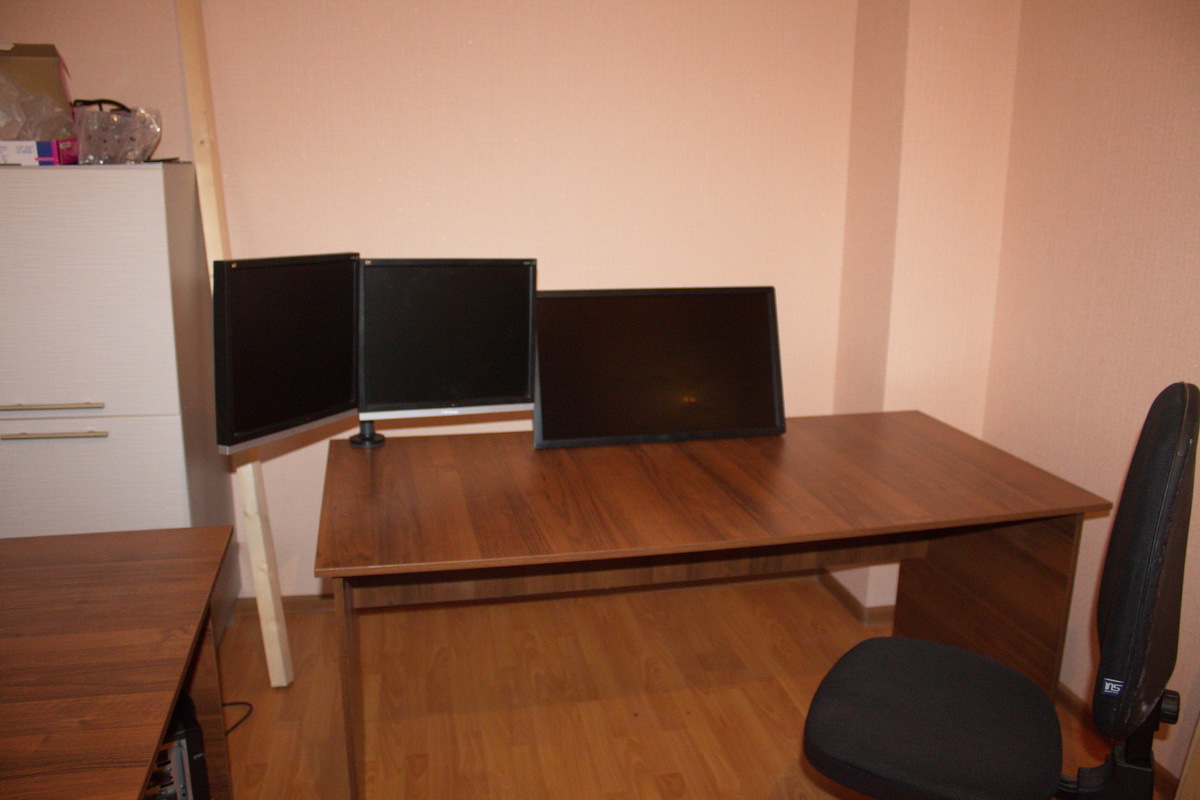
Therefore, I had to abandon this idea and make a bracket for each monitor separately. For fastening each bracket, bars are used that, when assembled, form a frame above the table. Using wood made it possible to build a frame in a very short time. Fastenings to the table are carried out by bolted connections, which will provide the ability to disassemble the next move:
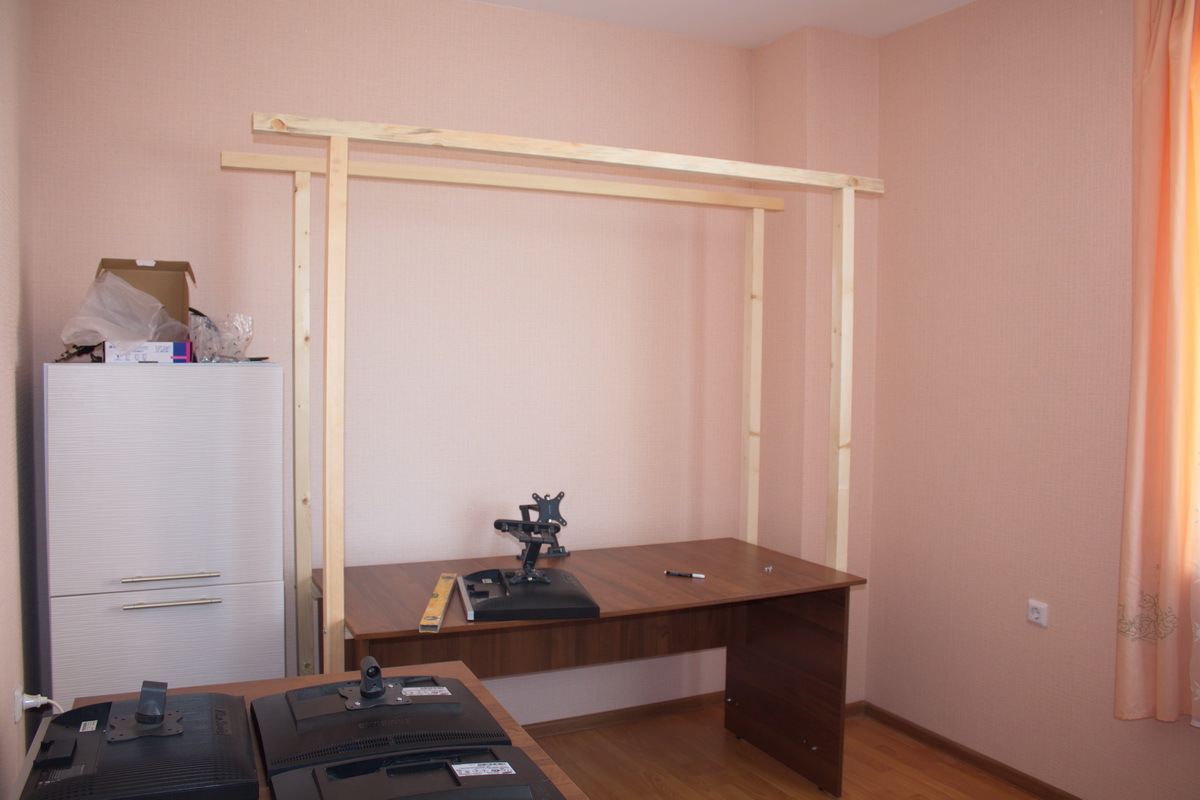
I decided to use the Kromax company brackets, model Techno-1, as the main brackets. I consider them to be excellent universal brackets, and at a very affordable cost:

After marking the holes for the brackets and the final fitting, the wood was treated with wood stain, which allowed to protect and create a shade suitable for the table:

Sawed the cover from the furniture panel. Subsequently, he attached a lamp to the lid.
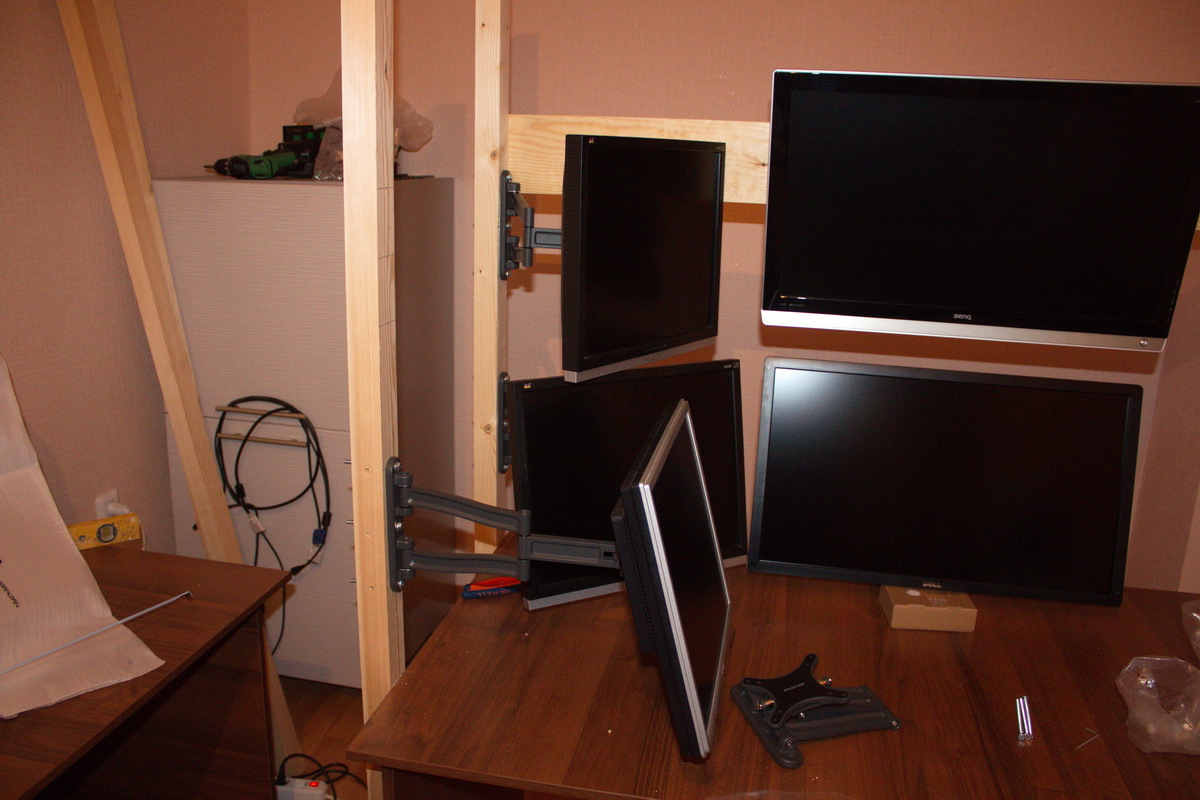
After completing all the preparatory measures, we proceed to hanging the monitors in their places:


For a neat arrangement of cables, screw the cable channel to the inner back of the table top. Construction hooks work great - cables fit perfectly in them, and for reliable fixation we tighten with plastic ties.
For comfortable and fruitful work, powerful iron is needed. The initial idea was about 12 monitors, I was going to hang two 42-inch panels on the side walls, but for the money I already went beyond 150 tr, so we'll wait until the fall.
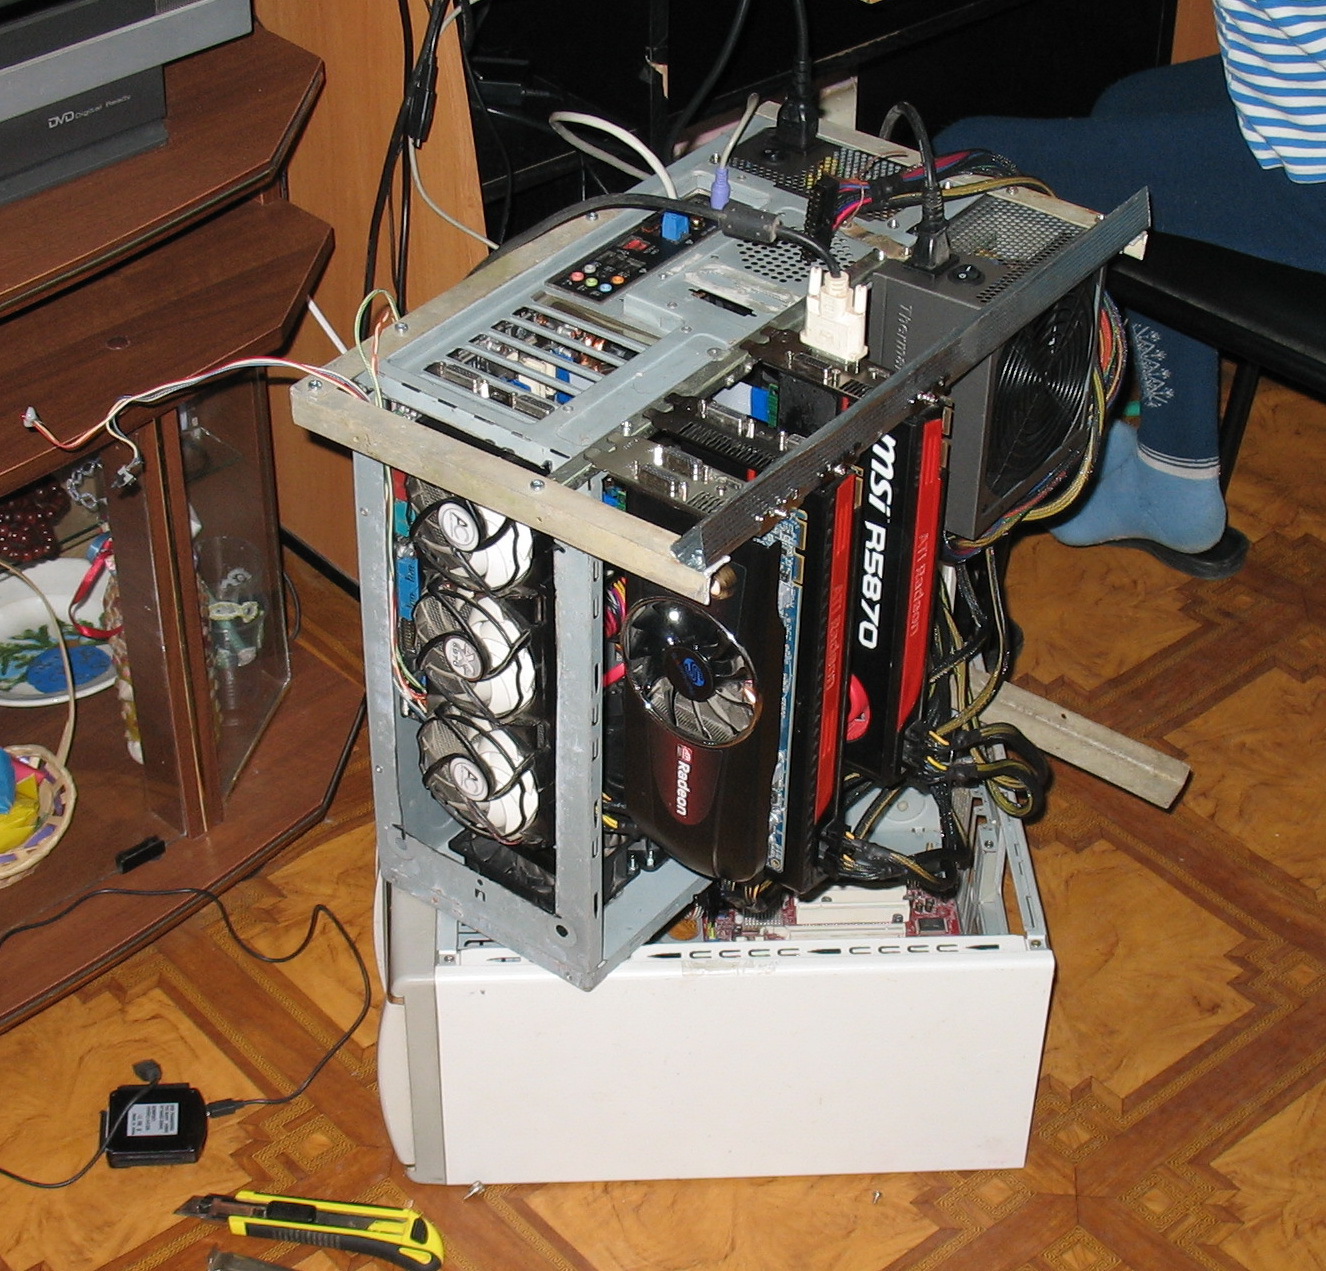
Due to the fact that the system will be located in one system unit, the use of standard video cards in which the output to three monitors was unacceptable to me. I didn’t want to “collective farm” with risers, and the two-row system unit resembled my crypto farms from the distant 2011:
There were ATI video card models with the ability to connect up to 6 monitors at the same time, but special adapters were needed to connect so many auxiliary monitors equipped with DVI connectors and VGA.
The situation was saved by the Nvidia Gt640 video cards, which have 4 ports for connecting monitors at once. The scheme is as follows: “powerful” 27 ”monitors are connected via HDMI, the rest via DVI and VGA. Thus, it becomes possible to connect up to 12 monitors to one system unit without alterations! On top of that, they are passively cooled!

Therefore, I had to take a spacious Corsair Obsidian Black 900 case. This, without exaggeration, monster easily accommodates not only video cards, but also 9 hard drives + there are 3 free slots in 5.25 ”bays, in which you can install a slide with hard drives. Total in the case can fit 12 hard drives. Also, a huge plus is the ability to install two power supplies and ready-made places for landing a CBO radiator (everything is available, I will install it in the fall).

Accordingly, the case needs a productive motherboard with the ability to connect 12 hard drives. Why 12? It is necessary to keep several virtual machines constantly running (from 4 to 10), and it is better when for each of your dedicated ssd drives, for the other two - a system and high-speed file storage for video processing. The raid array for storing files and backups of virtual machines is located on a separate server. And so, the motherboard ASUS X79-Deluxe for 2011 socket.

In order not to be boring, I’m speeding up: the Corsair TX850M power supply, the feature of which is that while the load is small, the cooling fan is not involved, which ensures complete silence. Next, ssd Samsung 256 Gb for the system, BlueRay drive and 4 pairs of RAM, with a total volume of 64 GB - expanse for virtual machines.
Now we turn to the issue of uninterrupted power: we separate the flies from cutlets and connect the monitors to one UPS, and the system unit to another. This separation will reduce the load and increase battery life.
Also, a convenient mouse is the Logitech G600, which is convenient for recording macros of the most frequent sequences of actions and the Logitech Wireless Keyboard K350.
At first, I wanted to install a Linux system, but a number of tasks did not allow even virtual machines to be used, so the scales leaned toward Windows. When comparing Windows 7 and Windows 8.1, several details were revealed that facilitate the work. So, for example, the system of working with a multimonitor system has been improved in figure eight, namely, each desktop is now equipped with its own individual add-on and has a common panel. In the seven, you had to move the mouse into the main monitor window and make a choice there.
But there was a flaw that I hadn’t figured out yet: in both systems the sequence of windows is completely lost if you use “Alt” + “Tab”! Fortunately, the number of working screens allows you to place most of the open working windows on your own monitor, but at first I found myself behind automatic window switching.
At first, there were worries about an excessive load on vision, as well as inconvenience in the environment of so many monitors. Two weeks have passed since the launch and now I can formulate my feelings: it’s extremely convenient, but there is a limitation of human perception (although it may not have fully adapted yet). The bottom line is this: when you post so many windows, when you mentally switch between tasks, you think for a while about where you recently left the necessary window. At first, I had to click on the icons of running applications several times, but where they appeared, it didn’t come right away. I plan to win by clearly assigning a specific task to each monitor: the main lower one is the workspace, the upper file managers, tray, shortcuts and directories. The side left is reserved for graphic viewing (Acdsee) and the tab for the source of information (browser, document). Side right under the general information tabs (directories). Nearest side monitors are also used for virtual machines. It will be nice to use the stereo effect - to output a sound notification of an application in the column in the side of which the application is located, which, thanks to the rumor, will speed up the process of determining the side you need to turn into. I think that clearly spaced signals in the 5.1 (or 7.1) system will contribute to an even more accurate source determination - this is the task for the laboratory for the fall! It will be nice to use the stereo effect - to output a sound notification of an application in the column in the side of which the application is located, which, thanks to the rumor, will speed up the process of determining the side you need to turn into. I think that clearly spaced signals in the 5.1 (or 7.1) system will contribute to an even more accurate source determination - this is the task for the laboratory for the fall! It will be nice to use the stereo effect - to output a sound notification of an application in the column in the side of which the application is located, which, thanks to the rumor, will speed up the process of determining the side you need to turn into. I think that clearly spaced signals in the 5.1 (or 7.1) system will contribute to an even more accurate source determination - this is the task for the laboratory for the fall!
Far side monitors are only suitable for rarely changed information. Several Skype windows, an e-mail program, task manager, system information sensors and signaling devices for automatically tracking changes on sites are great here. On 11 and 12 monitors it was planned to start displaying TV / media content and displaying video from surveillance cameras on the landing and parking lots.

In general, it was possible to organize such a workplace for a vacation. It is also necessary to finish the side shelves for the printer and scanner. Also, according to a similar skeleton diagram, I made a table for photo and video reviews, where the main role is given to lighting and an arm for attaching the camera and camera. While I like everything, I plan to collect a second such place for an assistant in half a year (there is a need to process an increasing flow of information), so I will listen to criticism / suggestions with pleasure!
UPD: With the permission of the administration, I post a video report:

But this was disastrously not enough - I had to constantly switch between windows. As a result, after allocating a separate apartment for the laboratory, I decided to assemble a 10-monitor desktop, where all monitors are connected to the same system unit and organize one single workspace.

Purchased in different places:
1) The usual spacious office desk;
2) A case for the system unit (you need a large and quiet one, for a large number of hard ones);
3) Modern components: a motherboard for 2011 socket, with support for 64 GB of RAM (4-channel mode) and with the ability to connect up to 12 hard drives, a video card, with the ability to connect up to 4 monitors to each (all without risers in one system unit accommodates three modern graphics cards). Video cards must be passively cooled, silent power supply, modern processor, etc.
4) Monitors (10 pieces in total): in the center - 2 monitors 27 inches in size, lower (main workspace) with a higher resolution and upper, which will act as a control panel, display catalogs, auxiliary work environment in graphic and video editors;
5) UPS (2 pieces) - one for the system unit and the second for monitors;
6) A wooden beam, to create a table frame, a furniture panel for the roof, lighting, fasteners, wires and more.

1. Prepare the table
First, the idea was to fix the side monitors to the brackets for two monitors that are mounted on the edge of the table. The inconvenience was revealed in the form of difficulty in orienting monitors in space, and the system was responsive to any movements:

Therefore, I had to abandon this idea and make a bracket for each monitor separately. For fastening each bracket, bars are used that, when assembled, form a frame above the table. Using wood made it possible to build a frame in a very short time. Fastenings to the table are carried out by bolted connections, which will provide the ability to disassemble the next move:

I decided to use the Kromax company brackets, model Techno-1, as the main brackets. I consider them to be excellent universal brackets, and at a very affordable cost:


After marking the holes for the brackets and the final fitting, the wood was treated with wood stain, which allowed to protect and create a shade suitable for the table:

Sawed the cover from the furniture panel. Subsequently, he attached a lamp to the lid.
2. Assembly of the structure
After completing all the preparatory measures, we proceed to hanging the monitors in their places:


For a neat arrangement of cables, screw the cable channel to the inner back of the table top. Construction hooks work great - cables fit perfectly in them, and for reliable fixation we tighten with plastic ties.
3. Iron
For comfortable and fruitful work, powerful iron is needed. The initial idea was about 12 monitors, I was going to hang two 42-inch panels on the side walls, but for the money I already went beyond 150 tr, so we'll wait until the fall.
Due to the fact that the system will be located in one system unit, the use of standard video cards in which the output to three monitors was unacceptable to me. I didn’t want to “collective farm” with risers, and the two-row system unit resembled my crypto farms from the distant 2011:
There were ATI video card models with the ability to connect up to 6 monitors at the same time, but special adapters were needed to connect so many auxiliary monitors equipped with DVI connectors and VGA.
The situation was saved by the Nvidia Gt640 video cards, which have 4 ports for connecting monitors at once. The scheme is as follows: “powerful” 27 ”monitors are connected via HDMI, the rest via DVI and VGA. Thus, it becomes possible to connect up to 12 monitors to one system unit without alterations! On top of that, they are passively cooled!

Therefore, I had to take a spacious Corsair Obsidian Black 900 case. This, without exaggeration, monster easily accommodates not only video cards, but also 9 hard drives + there are 3 free slots in 5.25 ”bays, in which you can install a slide with hard drives. Total in the case can fit 12 hard drives. Also, a huge plus is the ability to install two power supplies and ready-made places for landing a CBO radiator (everything is available, I will install it in the fall).

Accordingly, the case needs a productive motherboard with the ability to connect 12 hard drives. Why 12? It is necessary to keep several virtual machines constantly running (from 4 to 10), and it is better when for each of your dedicated ssd drives, for the other two - a system and high-speed file storage for video processing. The raid array for storing files and backups of virtual machines is located on a separate server. And so, the motherboard ASUS X79-Deluxe for 2011 socket.

In order not to be boring, I’m speeding up: the Corsair TX850M power supply, the feature of which is that while the load is small, the cooling fan is not involved, which ensures complete silence. Next, ssd Samsung 256 Gb for the system, BlueRay drive and 4 pairs of RAM, with a total volume of 64 GB - expanse for virtual machines.
Now we turn to the issue of uninterrupted power: we separate the flies from cutlets and connect the monitors to one UPS, and the system unit to another. This separation will reduce the load and increase battery life.
Also, a convenient mouse is the Logitech G600, which is convenient for recording macros of the most frequent sequences of actions and the Logitech Wireless Keyboard K350.
4. The operating system
At first, I wanted to install a Linux system, but a number of tasks did not allow even virtual machines to be used, so the scales leaned toward Windows. When comparing Windows 7 and Windows 8.1, several details were revealed that facilitate the work. So, for example, the system of working with a multimonitor system has been improved in figure eight, namely, each desktop is now equipped with its own individual add-on and has a common panel. In the seven, you had to move the mouse into the main monitor window and make a choice there.
But there was a flaw that I hadn’t figured out yet: in both systems the sequence of windows is completely lost if you use “Alt” + “Tab”! Fortunately, the number of working screens allows you to place most of the open working windows on your own monitor, but at first I found myself behind automatic window switching.
5. Conclusion
At first, there were worries about an excessive load on vision, as well as inconvenience in the environment of so many monitors. Two weeks have passed since the launch and now I can formulate my feelings: it’s extremely convenient, but there is a limitation of human perception (although it may not have fully adapted yet). The bottom line is this: when you post so many windows, when you mentally switch between tasks, you think for a while about where you recently left the necessary window. At first, I had to click on the icons of running applications several times, but where they appeared, it didn’t come right away. I plan to win by clearly assigning a specific task to each monitor: the main lower one is the workspace, the upper file managers, tray, shortcuts and directories. The side left is reserved for graphic viewing (Acdsee) and the tab for the source of information (browser, document). Side right under the general information tabs (directories). Nearest side monitors are also used for virtual machines. It will be nice to use the stereo effect - to output a sound notification of an application in the column in the side of which the application is located, which, thanks to the rumor, will speed up the process of determining the side you need to turn into. I think that clearly spaced signals in the 5.1 (or 7.1) system will contribute to an even more accurate source determination - this is the task for the laboratory for the fall! It will be nice to use the stereo effect - to output a sound notification of an application in the column in the side of which the application is located, which, thanks to the rumor, will speed up the process of determining the side you need to turn into. I think that clearly spaced signals in the 5.1 (or 7.1) system will contribute to an even more accurate source determination - this is the task for the laboratory for the fall! It will be nice to use the stereo effect - to output a sound notification of an application in the column in the side of which the application is located, which, thanks to the rumor, will speed up the process of determining the side you need to turn into. I think that clearly spaced signals in the 5.1 (or 7.1) system will contribute to an even more accurate source determination - this is the task for the laboratory for the fall!
Far side monitors are only suitable for rarely changed information. Several Skype windows, an e-mail program, task manager, system information sensors and signaling devices for automatically tracking changes on sites are great here. On 11 and 12 monitors it was planned to start displaying TV / media content and displaying video from surveillance cameras on the landing and parking lots.

In general, it was possible to organize such a workplace for a vacation. It is also necessary to finish the side shelves for the printer and scanner. Also, according to a similar skeleton diagram, I made a table for photo and video reviews, where the main role is given to lighting and an arm for attaching the camera and camera. While I like everything, I plan to collect a second such place for an assistant in half a year (there is a need to process an increasing flow of information), so I will listen to criticism / suggestions with pleasure!
UPD: With the permission of the administration, I post a video report:
