Features of using SailsJS for beginners (Part 1)
- Tutorial

Synopsis
This article contains SailsJS development methods and techniques useful for beginners, which may not be known or understandable to those who have just embarked on the development path in this convenient and multifunctional framework. It can be everything - from ordinary commands, generators or services, and ending with built-in query methods. Here are useful platform trivia that can protect you from writing crutches or bicycles. Interested in?

Using CoffeeScript in the backend
Perhaps not everyone knows, but Sails implements not only the automatic compilation of CoffeeScript not only in the front-end part, but also when writing other components of the system. To use this feature, you must install coffee-script in the local environment of the project:
npm install coffee-script --save
Next, you need to slightly correct the app, js file in the root of the project. At the top of the file (before declaring the sails variable) add the following line.
require('coffee-script');
These were small manipulations to rule out a built-in problem that some might stupor.
And now, to generate the Coffee API we need, in Sails there is the argument --coffee
Entire API generation (model + controller)
sails generate api post --coffee
where post is the name of our api.
Model generation
sails generate model post --coffee
Controller generation
sails generate controller post --coffee
Here with the help of such simple manipulations, we turned on Coffee support in SailsJS, it works in version 0.10x. In off. The documentation is not described.

Built-in basic answer system
I think many of us were faced with a situation where it was necessary to create or use a page with a multiple-use answer, starting with a simple 404 error response, and ending with the formation of any of the input without using controllers. For these cases, Sails provides a response system which is located in api / responses . From the default built-in answers, you can consider:
- res.serverError () - error 500
- res.notFound () - error 404
- res.forbidden () - error 403
- res.ok () - answer 200
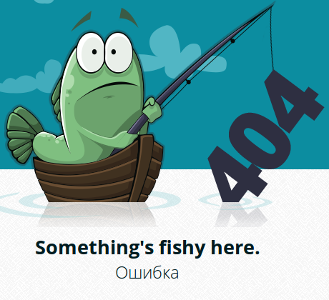
These are not just status handlers like res.send (404), but a fully-formed response representation - error pages that you see when you open a page not specified in sails or erroneous processing, and get a visual error response of 404 or 500 with the error text. Usage example.
res.notFound('Ошибка'); // возбуждает ошибку 404 и выводит текст ошибки (первый аргумент)
res.notFound('Ошибка', '/'); // передает текст ошибки, и страницу куда перенаправить с случае возникновения
In the basic case, with a simple transfer of one argument with the error text, it will look something like this:
These are simple and convenient utilities that some beginners may not notice. Also, if you conduct a small audit of the code of these answers (which is very simple and well commented out), you can easily compose your answers yourself. You can read more about answers in Sails here .

Services
When we want to process something regardless of a particular controller, something that we want to use many times, or make a wrapper convenient for us for any library or module, we can use SailsJS services for this. Services are easy-to-use modules with which you can work locally in your application. All services are located in api / services , many skills are not required to use the services. Now I'll put it on my fingers. Suppose we want to create some Custom service with the N method executed by it , and then call it from the controller. To do this, create the CustomService.js file in api / services, now in this file we have to define the method N - for this, such simple content is enough.
exports.N = function(opt1, opt2) { // Объявляем метод N - функция
.....
}
You can call method N in any of our controllers like this
CustomService.N();
As you can see, everything is extremely simple and clear, also using services you can successfully and clearly create APIs for generators.

Configurations
Some of the beginners make a non-lethal but very ill-considered mistake - they store the values of some custom variable variables or objects for configuring their applications in the controllers themselves (or even store them as the defaultsTo attribute in models). Instead, it’s wiser to store all of your configurations in the place they place in the framework — config /. Now we will look at how to quickly create and use configurations. Suppose we want to create a Custom configuration with 2 stored parameters - N and S, and then use them in our controller. To do this, in config / create a custom.js file with this content.
module.exports.custom = {
    N: '.....',
    S: 'custom'
}
To access the configuration from any part of your application - just use the simplest tools.
var N = sails.config.custom.N;
var S = sails.config.custom.S;
Finally
This concludes the first part of a small introductory course introduction for new to SailsJS. The following article will cover such useful issues as “Implementing uploading files to the server using standard Sails tools” and many other features that have appeared in Sails since version 0.10.