How we made a small-sized cloud DVR from a regular IP camera
The topic of video surveillance has become acute for me with the advent of suburban housing. On the Internet you can find a bunch of information on the organization of video surveillance. Unfortunately, most of the options came down to buying ready-made kits from China. From friends heard a lot of criticism on this matter. Somehow he even took part in setting up the equipment purchased from Aliexpress. Somewhere half of the stated functions did not work as stated, some options could not be configured at all, although the registrar was not cheap. And there were a lot of such reviews and opinions. Also, many are critical of the fact that the video is stored on Chinese cloud services. And then the thought appeared - what if you try to make your DVR with minimal functionality? Why? At that time, I started to get involved in linux tightly, wrote applications with elementary functionality on bash, experimented with the web ... In principle, everything you need to solve the problem. No sooner said than done.
Go. Iron selection
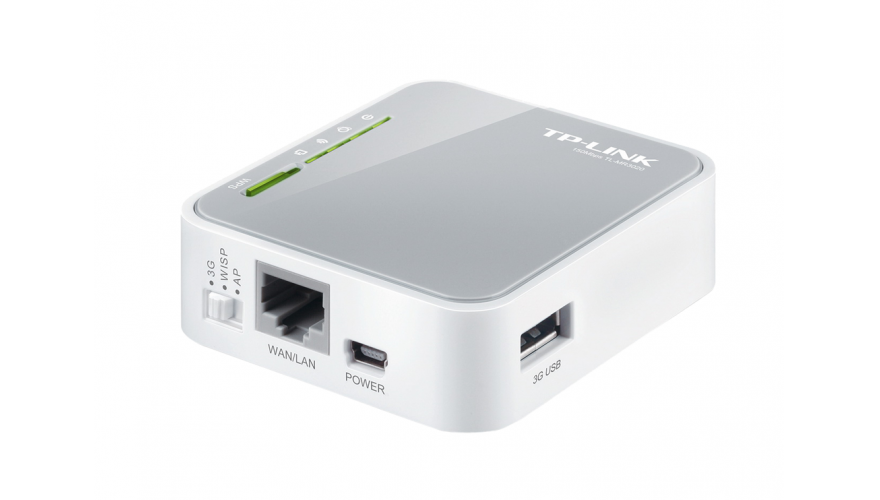
A popular TP-LINK TL-MR3020 router with a stitched OPENWRT on board was selected as the test subject.
Characteristics of the router:
- 300 MHz MIPS processor;
- 32 MB of RAM;
- 4MB flash chip;
- USB port 2.0;
- RJ-45 port with full duplex 100 MB;
- GPIO pins both free and with LEDs;
- Button and switch on GPIO pins;
The camera is a regular Chinese HD IP camera ordered in China. Video take on RTSP protocol. The openRTSP utility, which was part of the OPENWRT repository and had all the necessary functionality, helped us in this. We decided to work with the Yandex.Disk cloud service using the webdav protocol. For each new user, this service provides 10Gb free disk space. Well, there as necessary, you can buy more.
The essence of the idea
According to the rtsp protocol, we take a video stream from an IP camera. Make a buffer directory. In her record videos. Using the utility CURL protocol webdav send clips to the cloud. In our case, this is Yandex.Disk.
We try
Having connected the IP camera via ethernet to the router, we launched a test recording of a 10-second video in .mp4 format on the Yandex disk:
OPENRTSP -V -B 51200 -b 200000 -4 -f 25 -d 10>/tmp/ya_disk/test.mp4Then sent it to the cloud:
curl -v -m 180 --stderr /tmp/log -k -u $email:$pass -T /tmp/ya_disk/test.mp4 https://webdav.yandex.ru/Works!
Began tests with different lengths of commercials, different recording intervals, periodic recording. In general, the tests were successful. However, there was a problem with recording very short videos (about 5 seconds). The clips were recorded with greater speed and their length was less than the established. We solved the problem by editing the openRTSP sources: we ensured that the program strictly fulfilled the fps value entered by the user, and not taken from SDP, and dropped frames less than 100 bytes.
We think over the functionality
After successful tests, it was decided to make a management interface. At that time I started to get acquainted with the web, so I decided to make a web version. Technology side-user stack (frontend): HTML5, CSS3, JQUERY, AJAX. On the side of iron (backend): UHTTPD, CGI, BASH. With the design did not subtilize, used the tiled arrangement of the buttons on the main page.

Management and data entry pages were made using JQUERY. With the first successful results of managing the
So, the functional:
- Support any IP camera;
- Support 3G / 4G modems;
- Record to cloud storage (free of charge) and / or to usb drive;
- Periodic and / or motion recording;
- Loop recording to disk;
- Set the length of the roller;
- Recording modes: by time, by movement, day, night;
- Autonomous work in case of power failure (approximately 20 minutes);
Client side implementation
There are 6 buttons in the settings menu of the recorder: WI-FI, REC, CAMERA, 3G / 4G, STORAGE and HELP. So, in order:
WI-FI
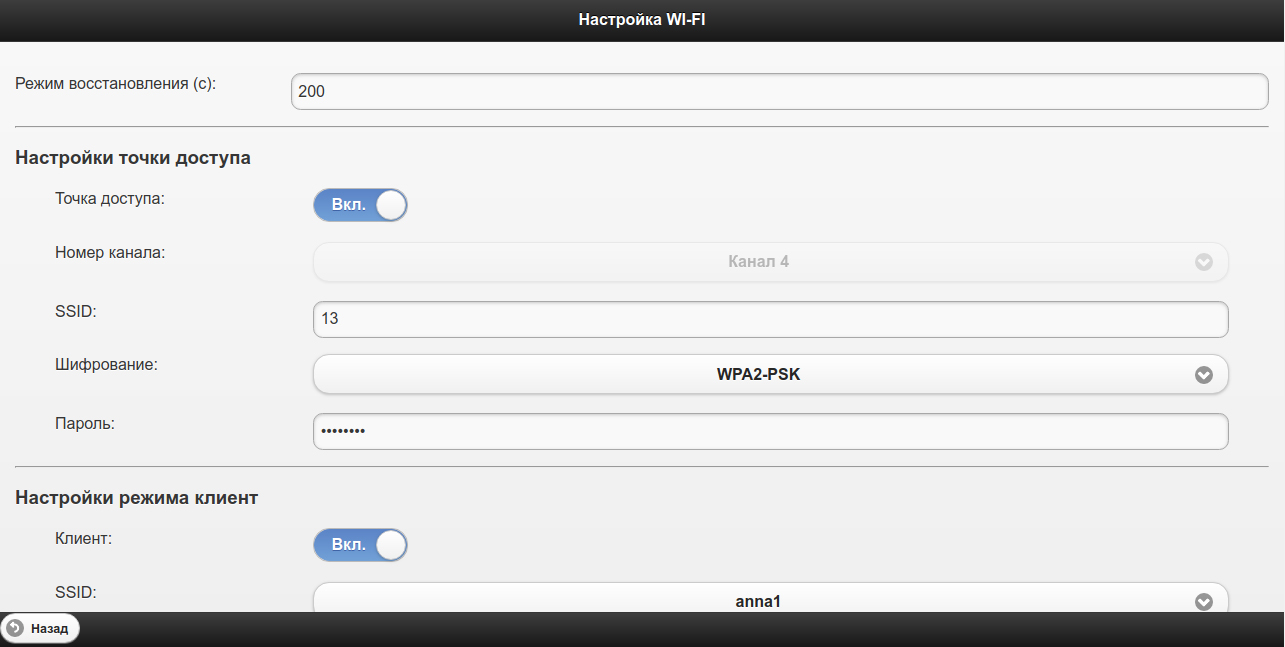
Here you can set up a wi-fi recorder. WI-FI can work in 2 modes - “client” and “access point”. In the "access point" mode, everything is clear: the channel number, SSID, encryption type, password. In the "client" mode, the recorder connects to any wi-fi access point.
Accordingly, in this mode, 3G / 4G modem is not needed. So that the user does not lose the recorder when the client connects to the access point, we physically implemented the repeater mode.
The only thing you need to pay attention to is when connecting the recorder to an access point, you need to check whether the user's mobile device “jumped” to another wi-fi access point, since wi-fi recorder access point will disappear for a short time. The “Recovery Mode” field is a guarantee that you will not “lose” the recorder. This is a guaranteed time at power up when the user can configure the device or turn on the access point. After the recovery mode expires, you will automatically go to the main menu page. This part of the functionality is still being tested and temporarily disabled.
RECORD
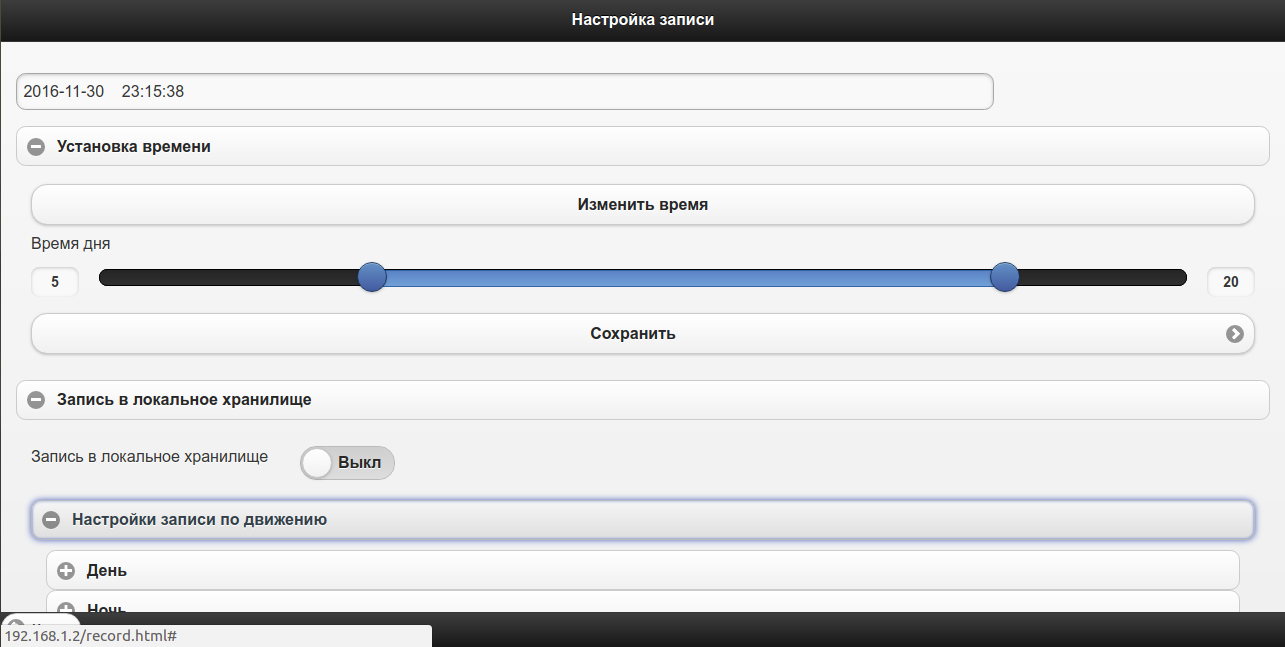
Date and time display area, menu “Time setting”, “Record to local storage” and “Record to cloud storage”.
Time setting By clicking on the "Change time" button you can change the time and date. Also using the slider to set the time of the beginning and end of the day (for all it is individual). This is done in order to optimize the operation modes of the recorder at different times of the day.
Record in local storage. Here you can enable or disable recording to external media, enable or disable motion recording and / or periodic recording with the ability to set the length of the recorded video and the recording period of the video (in the periodic recording mode).
Writing to the cloud storage.Here, similarly to the previous item, an entry to the cloud storage is configured. An item for setting up a cloud service has been added, where you can point to the cloud of which service to record (while it works only with a Yandex disk), the username and password of your Yandex account.
HELP

The points are the contents of the menu items of the interface, as well as the purpose of each of them.
CAMERA
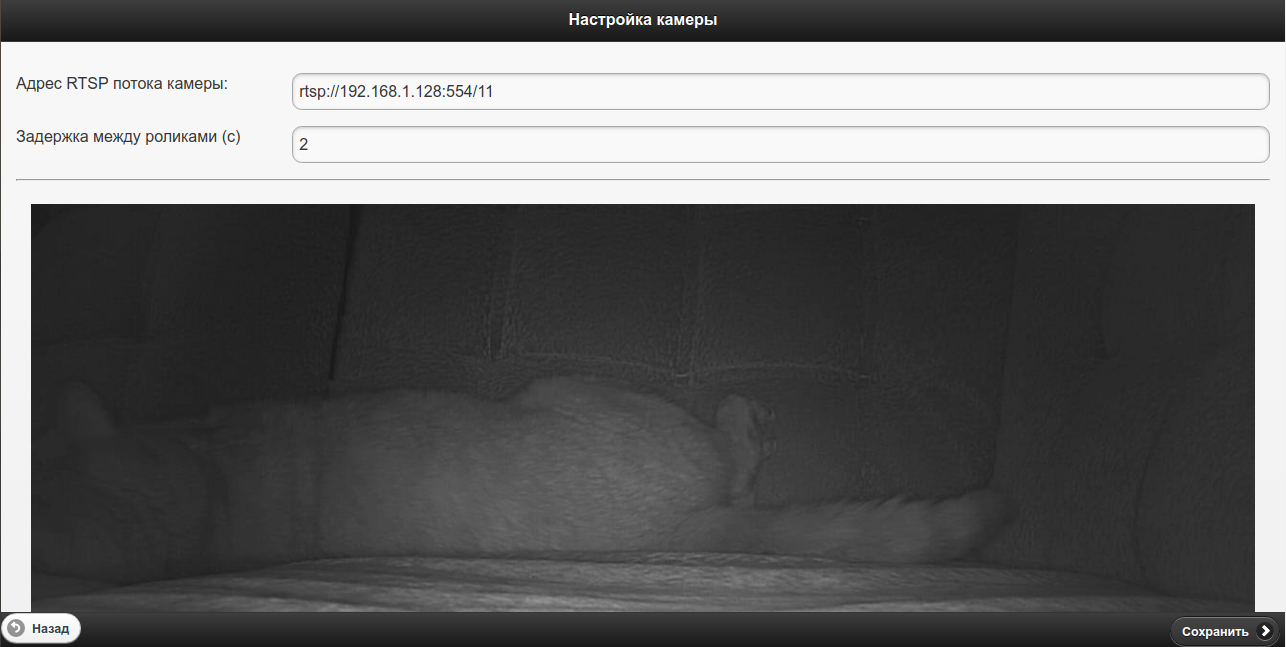
RTSP address of the camera stream. The data for this field can be found by visiting the IP camera settings page. In the future, we plan to receive this data via ONVIF and the field will be filled in automatically. So far, ONVIF stable operation on all IP cameras has only to dream.
The delay between the rollers. The parameter determines the pause in seconds when recording videos. Used in motion recording mode. Allows you to save Internet traffic with constant or frequent movement in the frame.
Video from the camera. Useful for controlling the recorded image when installing the camera.
3G / 4G
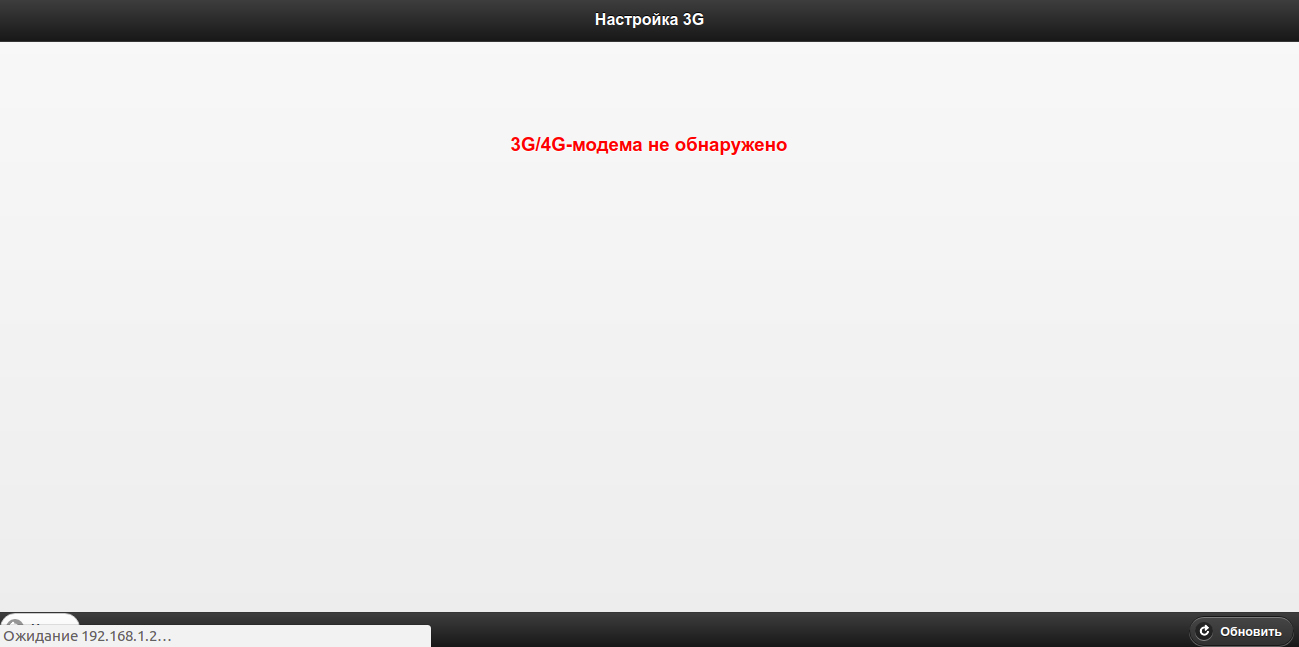
Information on the Internet connection via a 3G / 4G modem is displayed here. Data is updated every 3 seconds. Useful for monitoring the quality of communication when installing a camera.
STORAGE

There are two submenus - “Local storage” and “Yandex.Disk”. When you select the first, you are taken to the file tree of the connected external media; when you select the second, go to Yandex.Disk.
Mobile version of the interface


Recorded videos can be viewed on Yandex.Disk built-in player service. Also, the video can be downloaded and viewed locally with any video player. Storage of recorded videos is organized as follows:

CAM - folder for recording videos from the recorder;
MOTION - a folder for recording video clips recorded by motion in a frame;
TIME - a folder for recording videos recorded at a specified frequency;
YYYY-MM-DD - folder for videos recorded during the day;
DDMMYYYY-HH_MM_SS.mp4 - videos recorded in mp4 format;
Organization of file storage on Yandex.Disk


What's inside? Server side implementation
As I wrote above, TP-LINK TL-MR3020 router with OPENWRT on board became the first experimental subject. Version Barrier Breaker 14.07. At the beginning of the test it was the latest version. Now updated to LEDE. In the repository of this version there was no openRTSP, so we added the utility ourselves, at the same time removing all unnecessary from it.
After successful tests, we began to consider other routers with similar architecture. Looking for a platform that is more suitable for the registrar in both dimensions and characteristics. The idea is such that by flashing any of the routers with a modified firmware and connecting an IP camera with a 3G / 4G modem to it, you get a recorder. The list of devices on which the registrar functionality was tested:
- TP-LINK TL-MR3020;
- HAME A5;
- CARAMBOLLA2;
- UNWIREDONE;
- Skywork skw71;
- TP-LINK TL-MR10U (with battery);
- TP-LINK TL-MR3040 (with battery);
- TP-LINK TL-MR3220 V: 2.3 (4 ethernet ports);
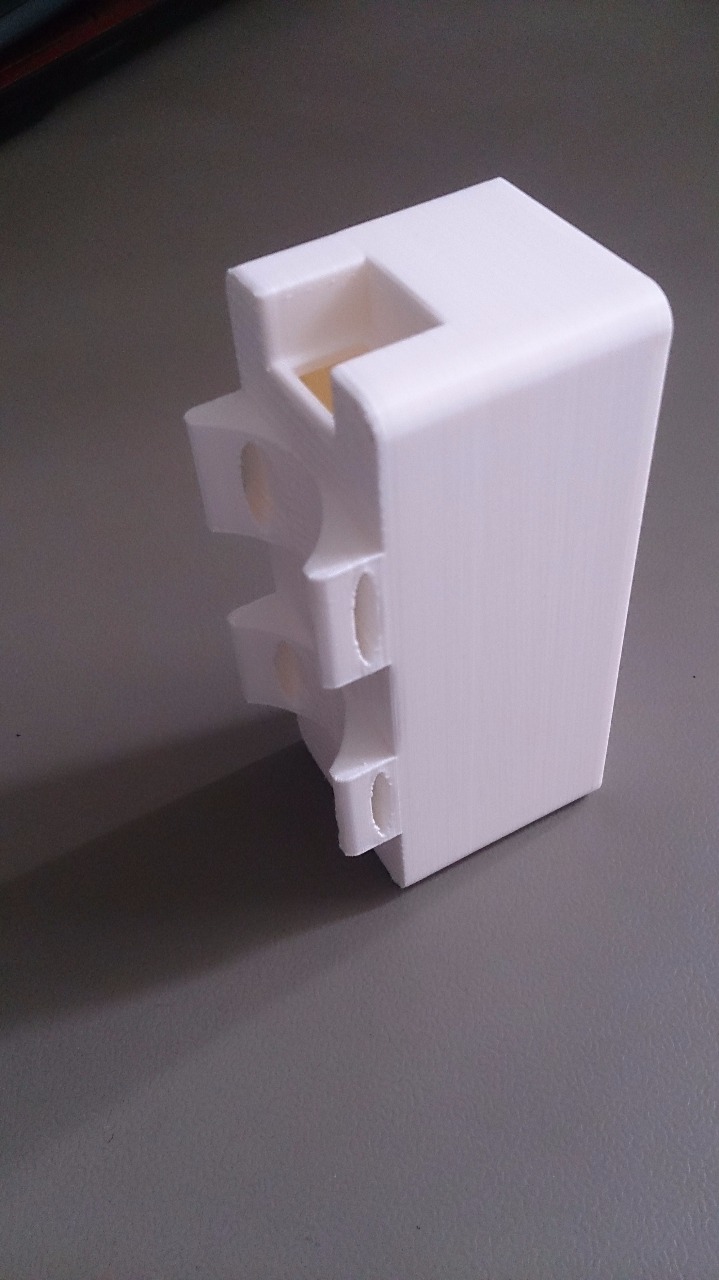
We tried to try on the boards of routers in the case. The idea was that, apart from the case, nothing stuck out and did not hang, and the case itself was of minimal size. Therefore, according to the idea of a 3G / 4G modem should be inside the case. So we have a


Of course, we preferred routers with minimal dimensions. Therefore, we decided to try the Chinese HAME A5 router, print the case for it and see what happens:
On HAME A5, our recorder firmware was unstable, the router was constantly hanging and rebooting. Most likely this was due to severe overheating. Therefore, we had to abandon it in favor of a more reliable and proven option.
We tried many options, but there is nothing better than its own. Therefore, we decided to plant our board with a CARAMBOLLA2 module and the possibility of autonomous operation.
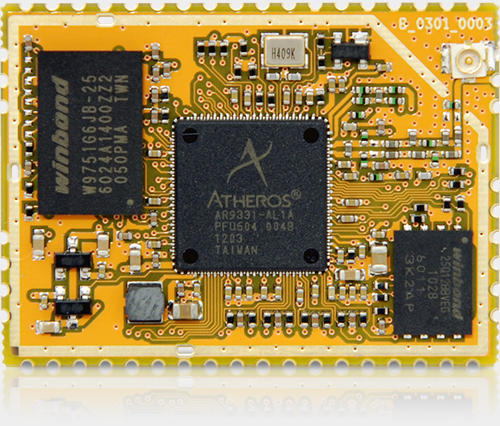
Characteristics of CARAMBOLLA2:
- AR9331 processor, 400 MHz;
- 64 MB DDR2 RAM;
- 16 MB FLASH;
- 802.11 b / g / n, 2.4 GHz, 1x1 SISO, 150MBps max data rate, 21 dB output power;
- 3.3 V supply voltage;
- Dimensions 28 x 38 mm;
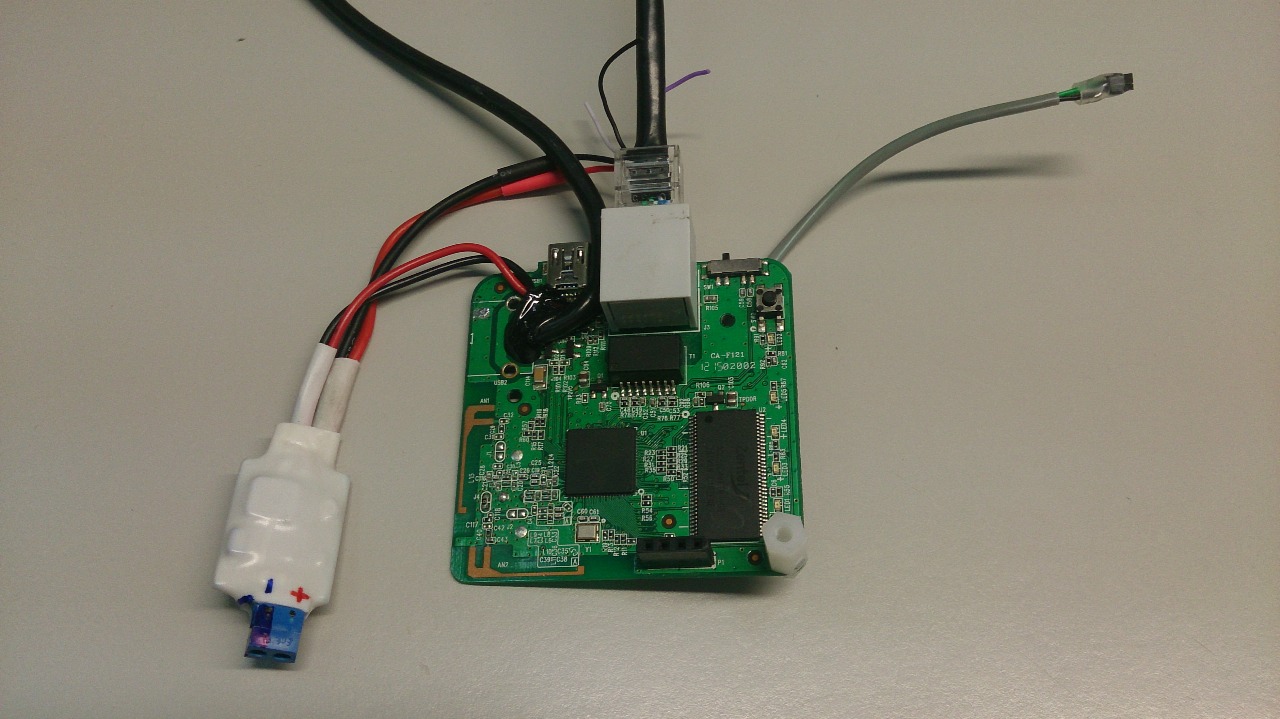
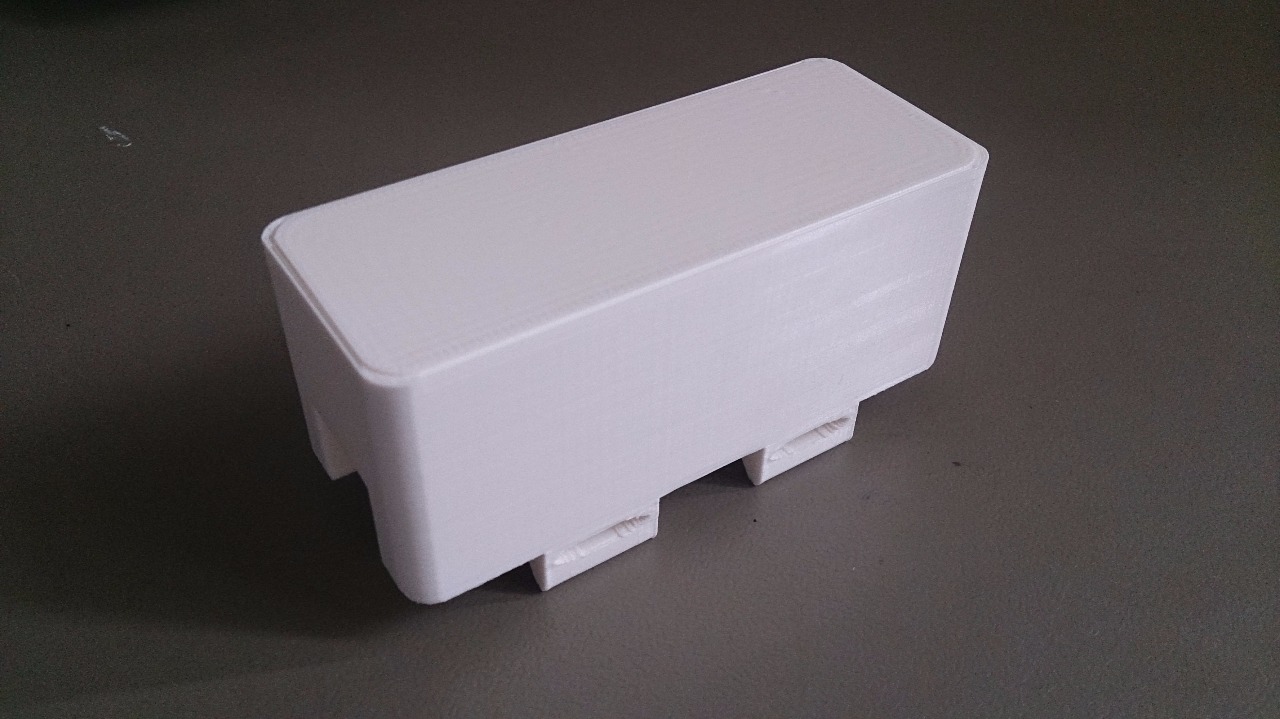
When designing the board, it became clear that it turns out quite small:


One more photo!


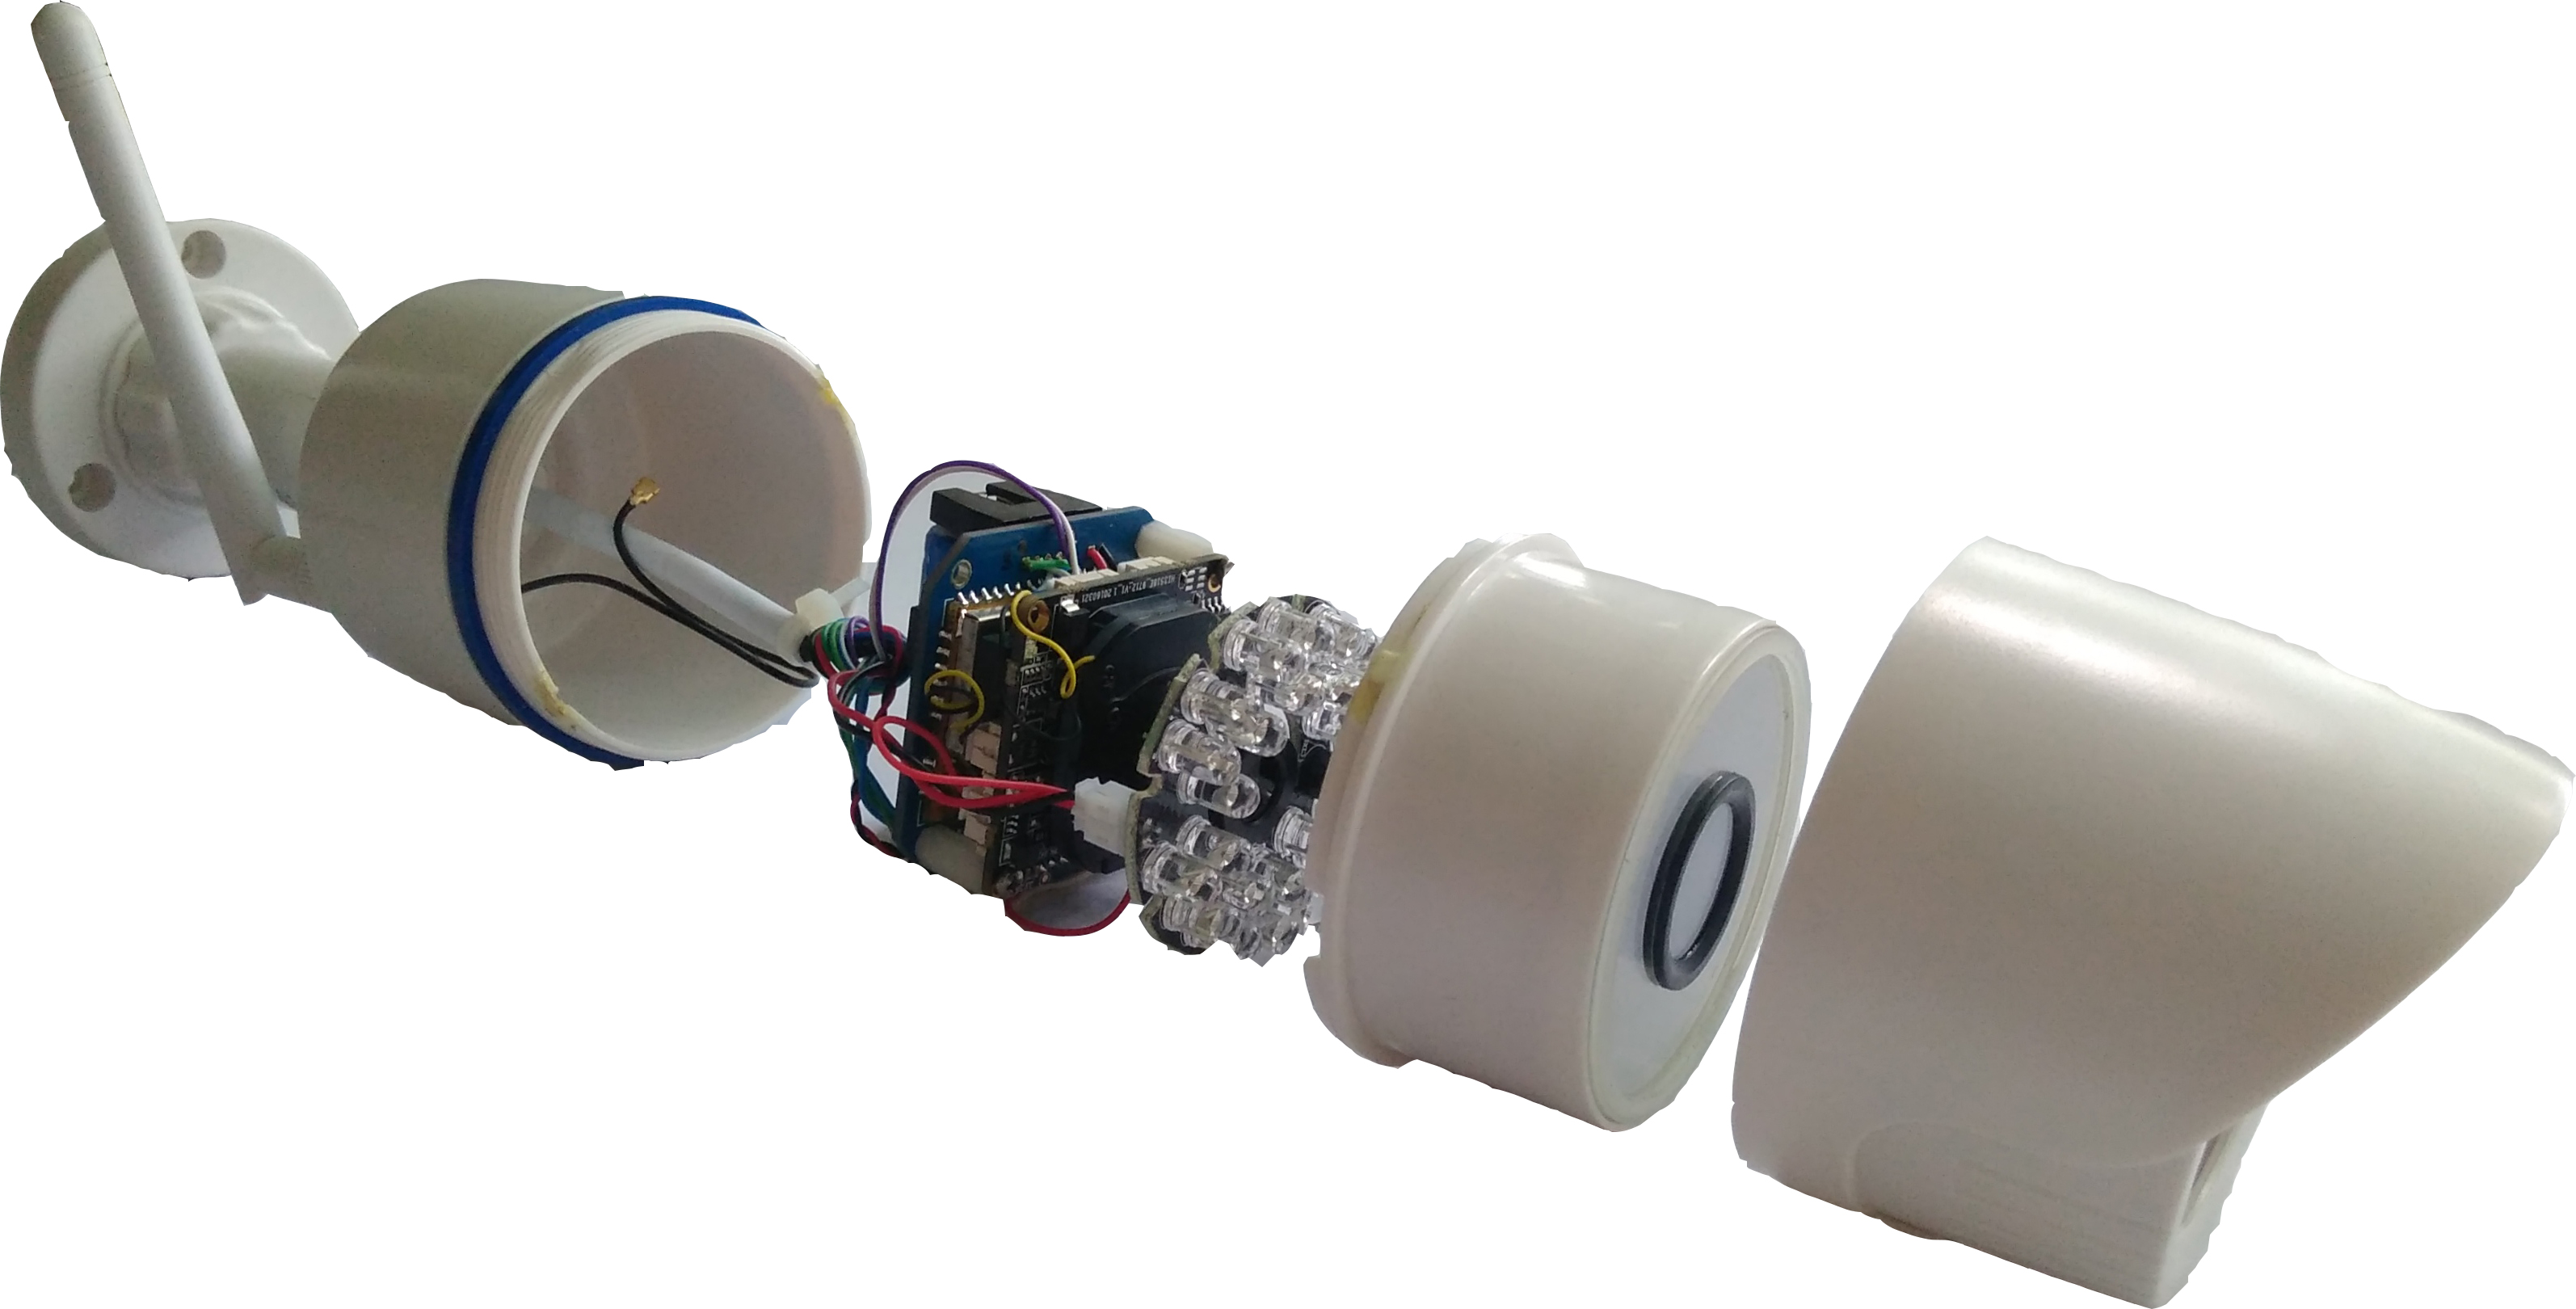
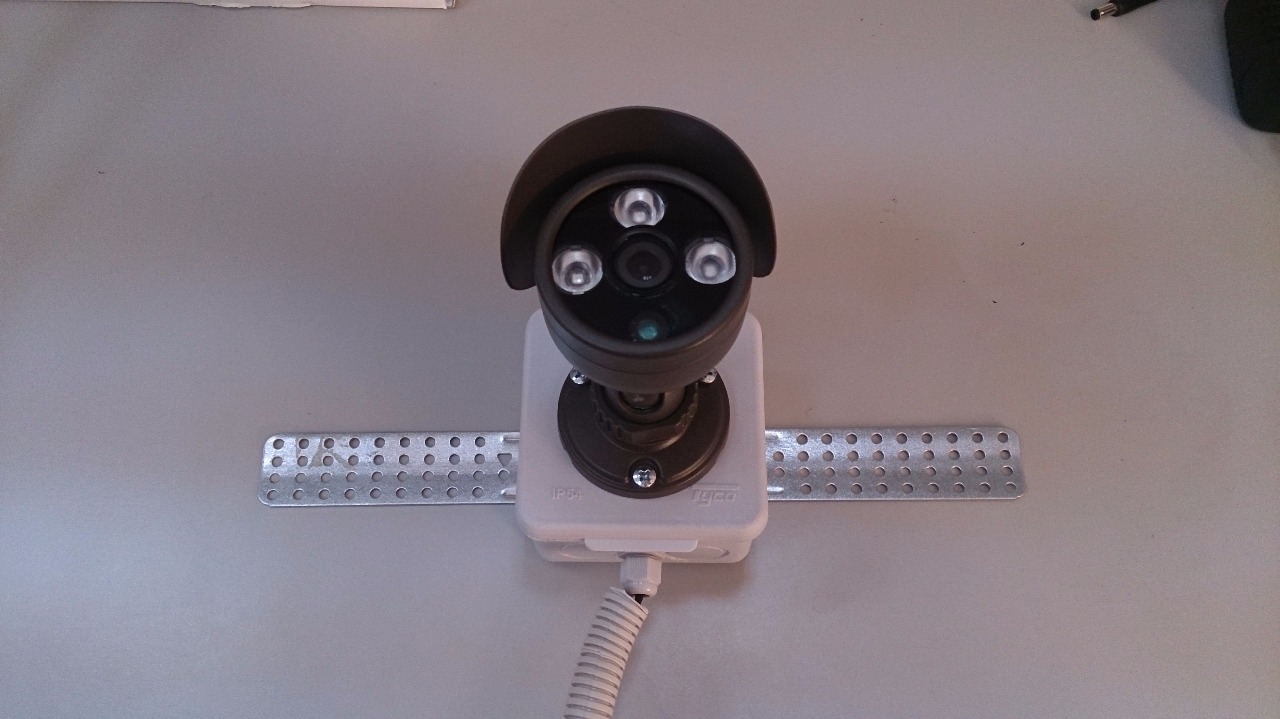
Why not install it directly into the camera? So we immediately solve the problem with the case for the registrar. So did. Here's what happened:
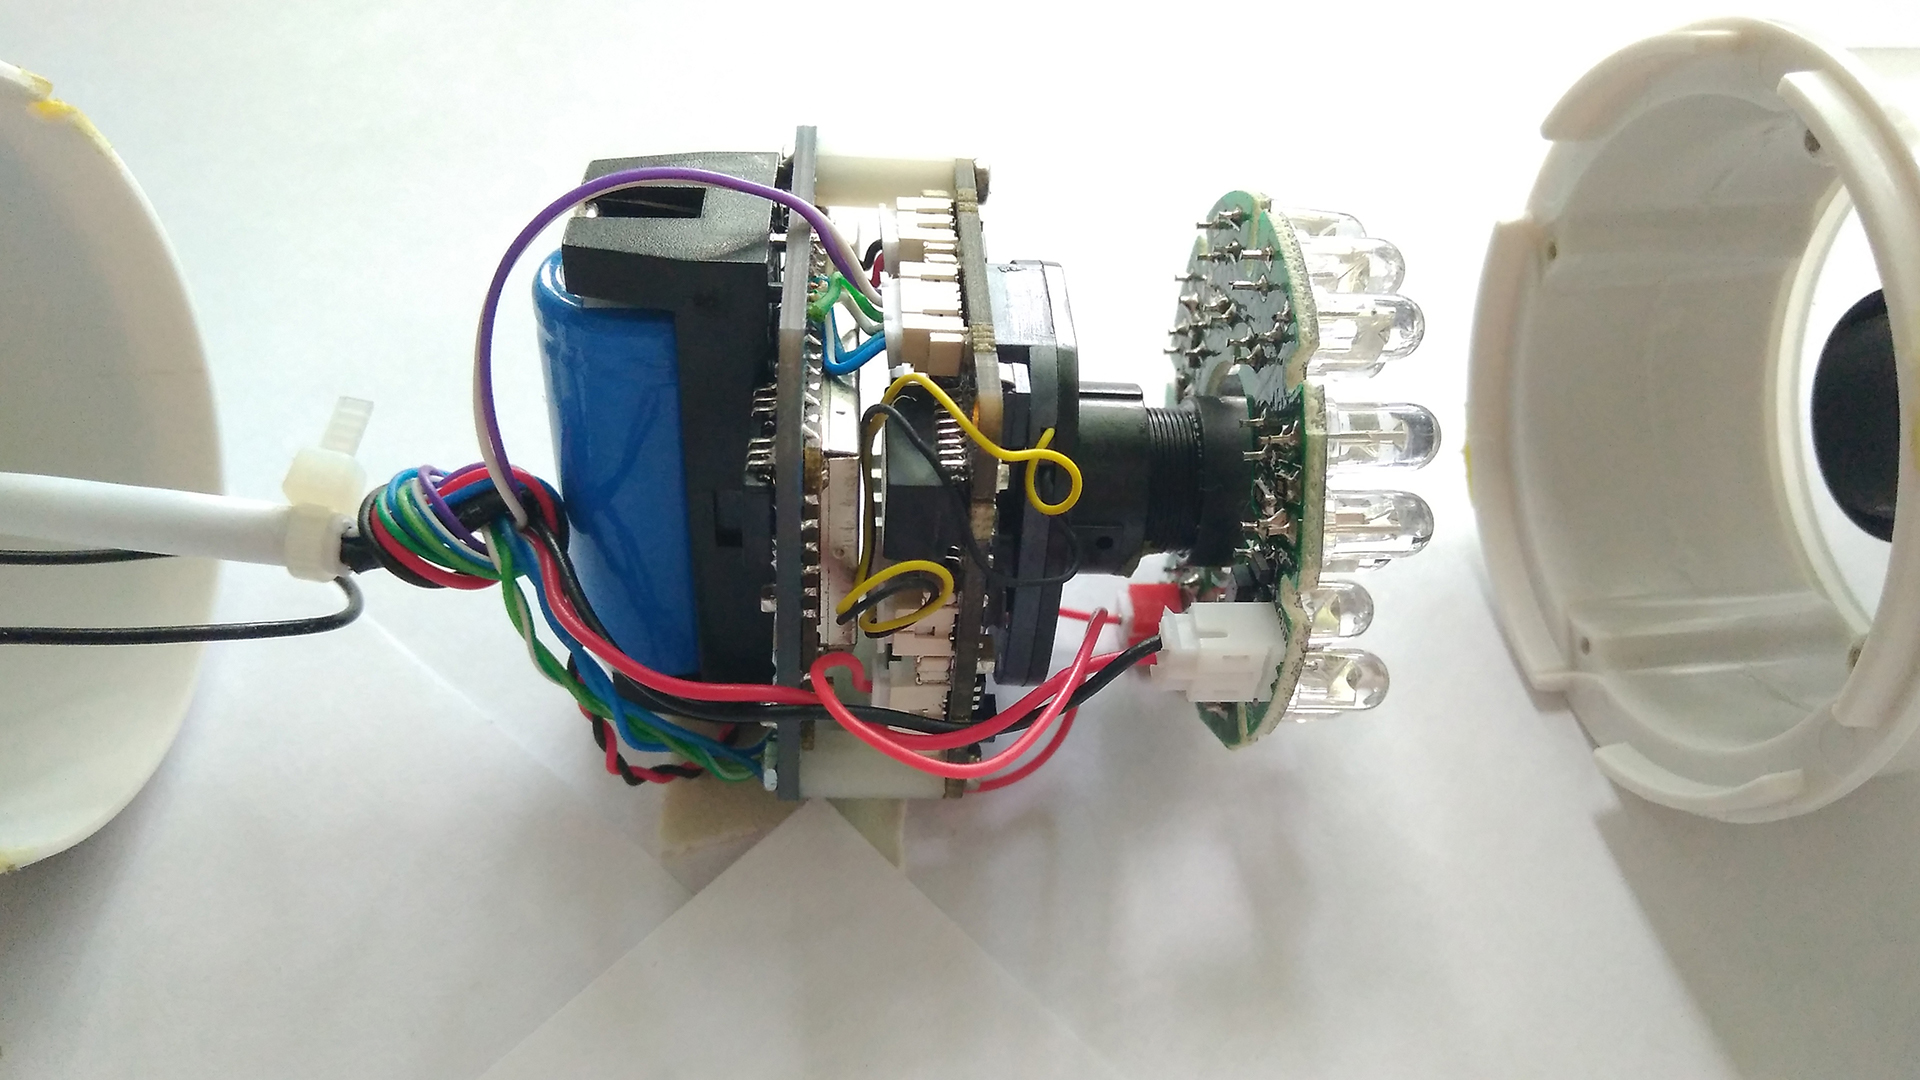
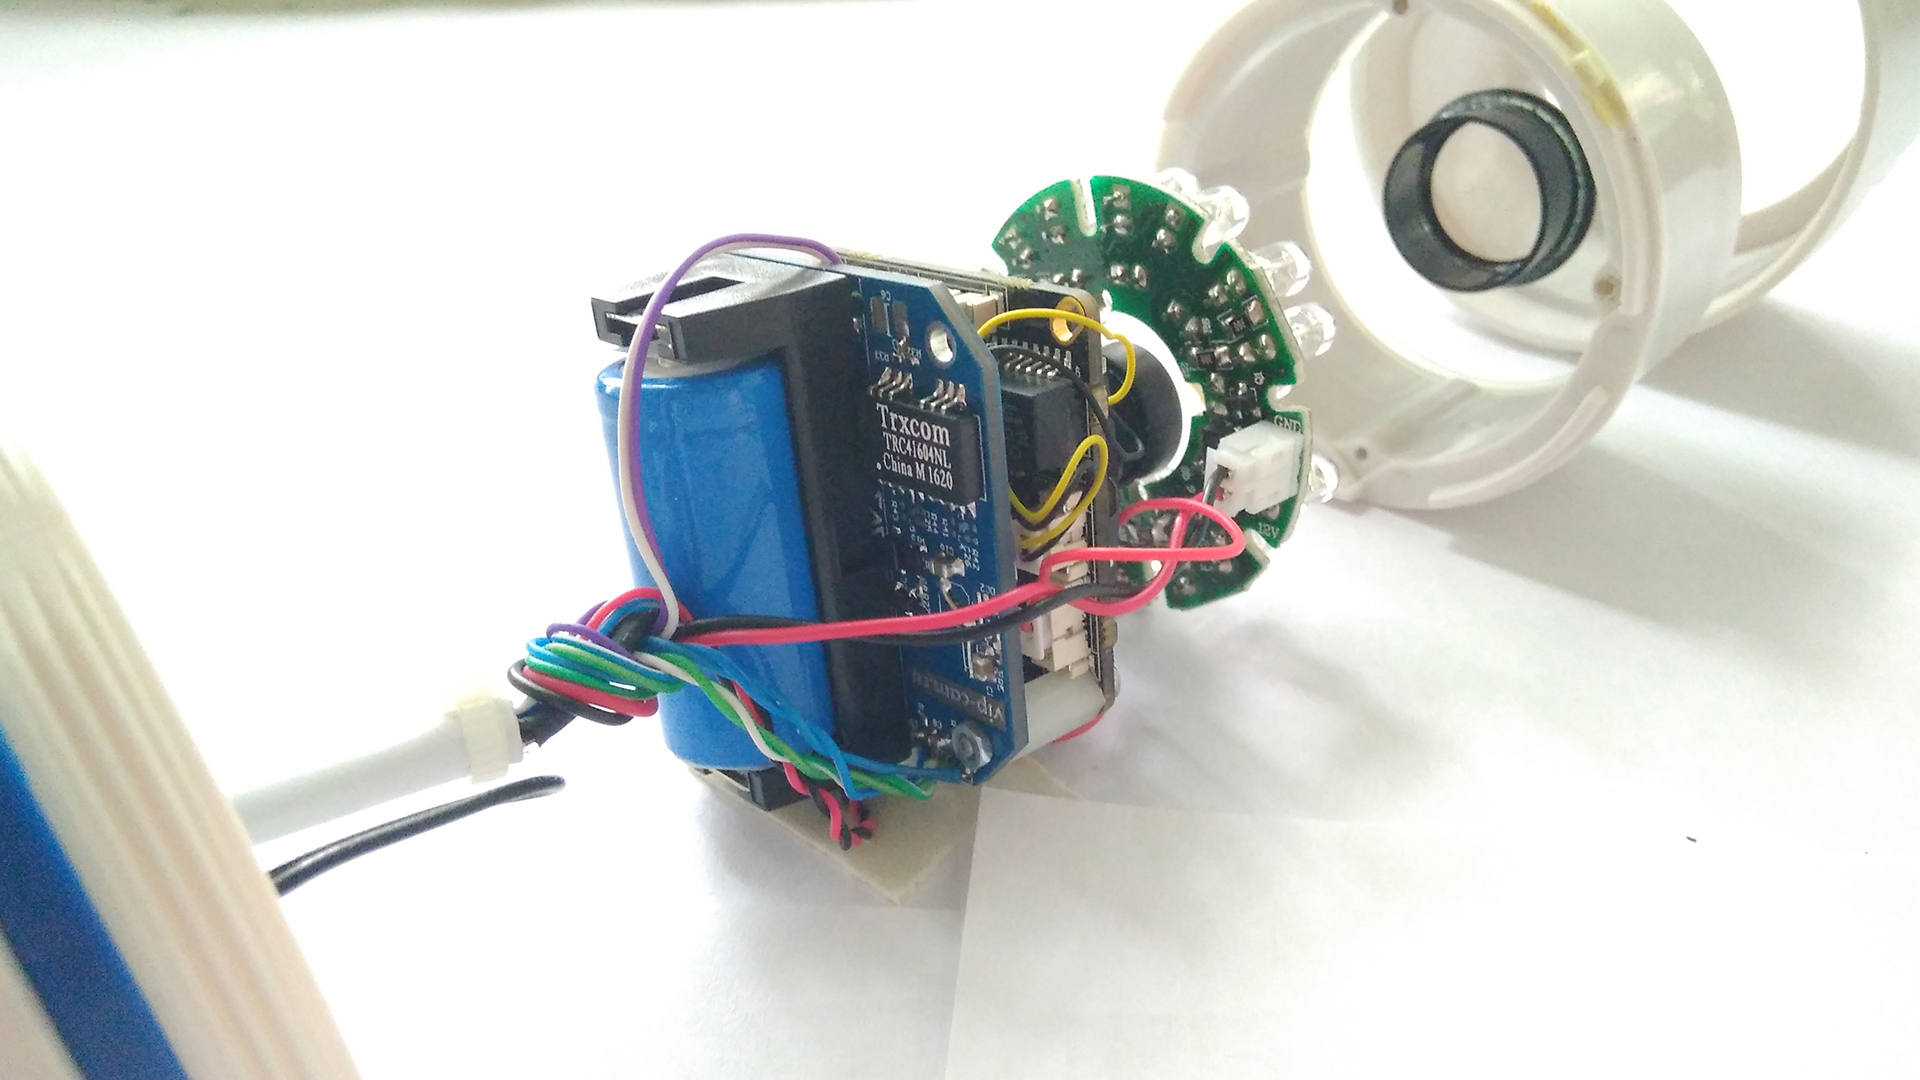
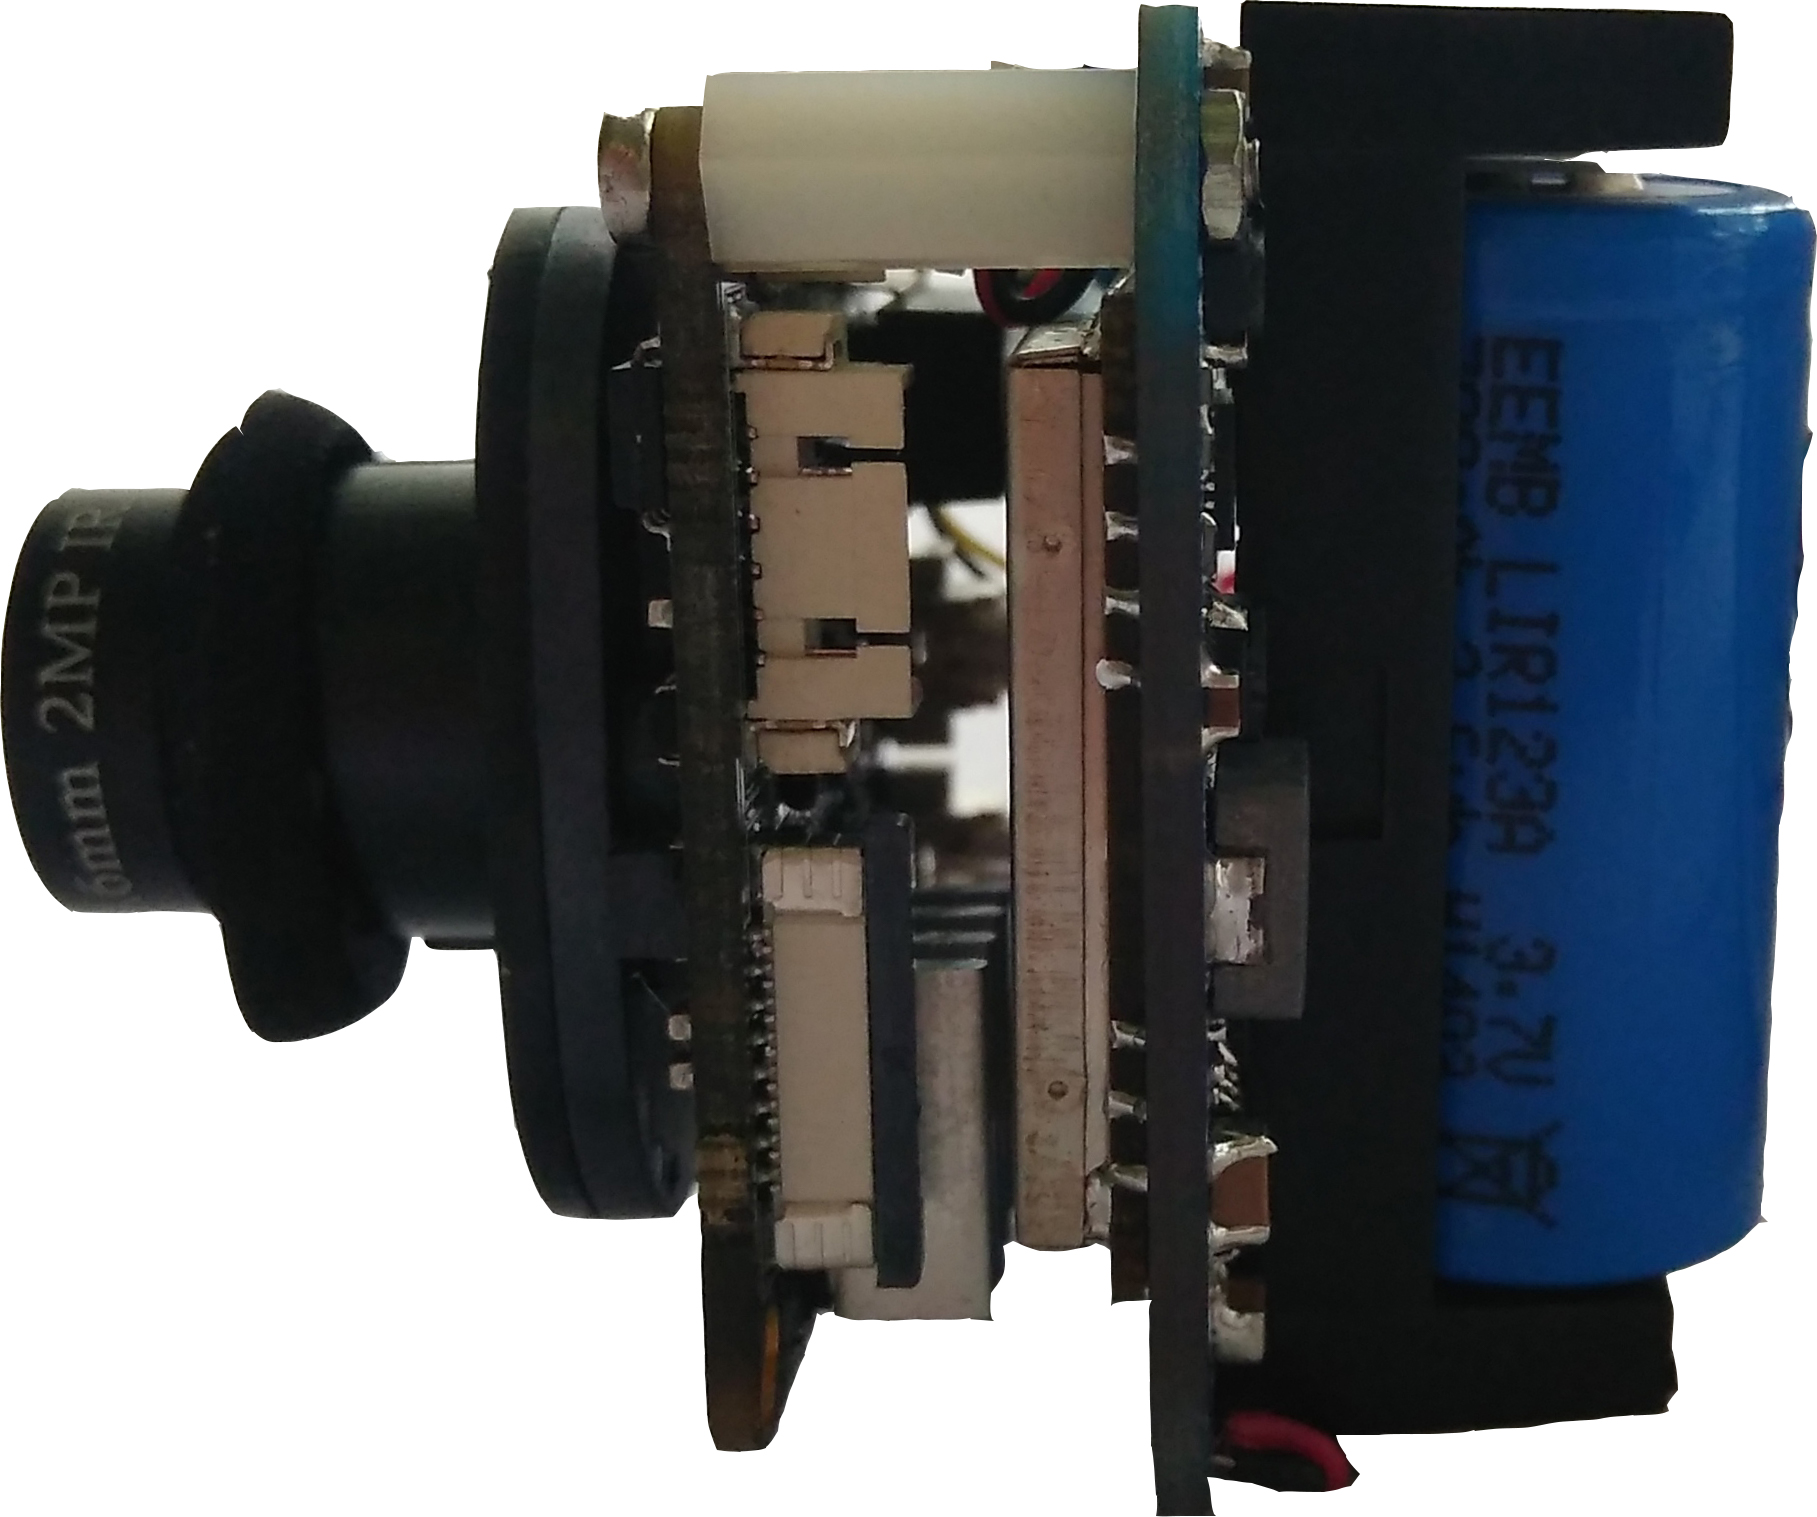
From the photo you can see that the recorder board is mounted parallel to the camera boards on the racks. For reasons of cooling the chip, it is better to use IP cameras with a metal case and make a radiator so that heat is removed to the case. A standard ethernet wire of the IP camera was used to connect a 3G / 4G modem and / or usb drive. The battery life of 700mAh 3.7V battery provides autonomy of the camera with a recorder inside. The battery life feature will be useful if you deliberately turn off the power. This battery will last for about 20 minutes of operation of the recorder with the camera.
Give more cameras!
Experiments were also conducted with recording videos from several IP cameras. Experiments have shown that recording videos from 2 IP cameras was quite stable, so we are considering the possibility of creating a recorder in a separate package with the ability to connect 2 IP cameras. Now we are testing the work of the recorder with three and four IP cameras. The results are not yet clear. The cameras will be powered from the recorder via passive PoE.

More pictures!


The functionality of this option may be useful, for example, when installing cameras with intersection of surveillance zones. To work with a large number of cameras, you can look towards the very popular now minicomputers. But you need to understand that the power consumption of such devices is much higher, and the price tag too.
How do you call a boat so it will float
You probably noticed the inscription on the board. We thought that the project would be worthless without a name. They came up with a modest name - "Vip-Cam" (Video-Ip-Camera). Well, the version with several cameras - «Vip-Box».
What's next?
Future plans:
- Optimize and test the code. Get a stable working device;
- Conduct research on the possibility of setting up an IP camera through the web application menu;
- Investigate the possibility of integrating the DVR into the “smart home” system;
- Continue testing the operation of the DVR with two or more IP cameras;
- Conduct tests on the operation of the camera with a solar battery;
- Creating a modification of the DVR with support for 2-x IP cameras;
- Adding the functionality of remote configuration of the DVR and IP camera;
- Adding the ability to remotely make a video on demand;
Project sources are here .
So, we have now implemented the idea of a cloud mini recorder. The project is implemented in his spare time, so the development time is very delayed. As a result, we have a working prototype of a compact DVR that can record videos on the cloud storage for free. There is still a lot of work, but one of the tasks has been solved - it is quite realistic to make a quality, unparalleled, recorder. Thanks for attention.