C # / WPF + Pascal + Assembler: how I restored my first game
I rummaged once in my source code for school times, and found the following there:
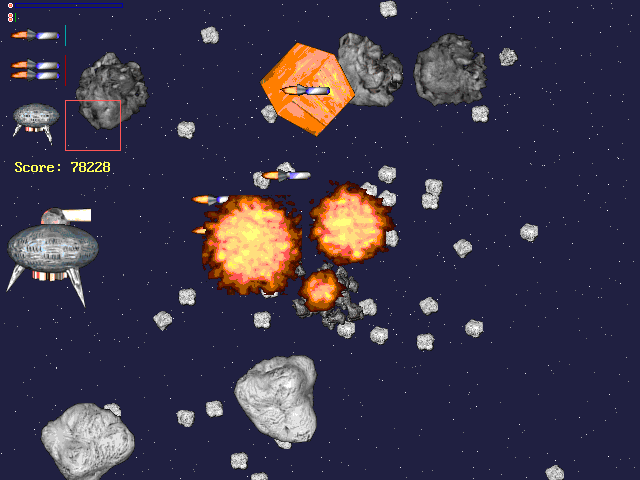
- A QBasic game about a spaceship that shoots asteroids. Creepy code under dos, but sprites are animated in 3ds Max.
- Pascal / Assembler graphics library with good speed
- Licensed TMT Pascal compiler that can compile code under Win32
Do not waste good! Next is the story of all this, a bit of nostalgia, and details of the implementation of the “modern” version of the game using old sprites and code for graphics.
A bit of history
Basic
I first came across programming at a school where we were taught Logo , then Basic, and then Pascal.
It was on Basic that I woke up an interest in development, and of course, I wanted to write my own game! A screenshot of it is posted at the beginning of the post. 640x480, 256 colors, all sprites are animated (rotate in pseudo-3D), sound. The Future library was used (you can still google on “qbasic future”). The source code is preserved - 1552 lines, 19 uses of the GOTO operator. The game was called Lander, similar to the classic game where you need to land a spaceship on the planet. But landing the ship is boring, I want to shoot and blast, so before landing you have to break through the asteroid belt with two types of weapons on board.
He painted sprites himself in 3DS Max (asteroids are spheres with Fractal Noise, the rest are combinations of simple shapes, explosions through Combustion). Unfortunately, the source max files were somehow lost, but the rendered sprites were preserved.
Pascal
The next step was Pascal and the Assembler built into it. At school, we were engaged in 386 machines, and there was felt the whole power of microoptimizations in assembler inserts. Sprite output via REP MOWSW worked much faster than Pascal cycles. Code alignment, multiplication by shifts, maximum work in registers and minimum in memory.
Protected mode
All this was terribly interesting and fun, I wrote some demos, studied the Ralf Brown's Interrupt List , experimented with SVGA graphics modes, suffered from switching banks .
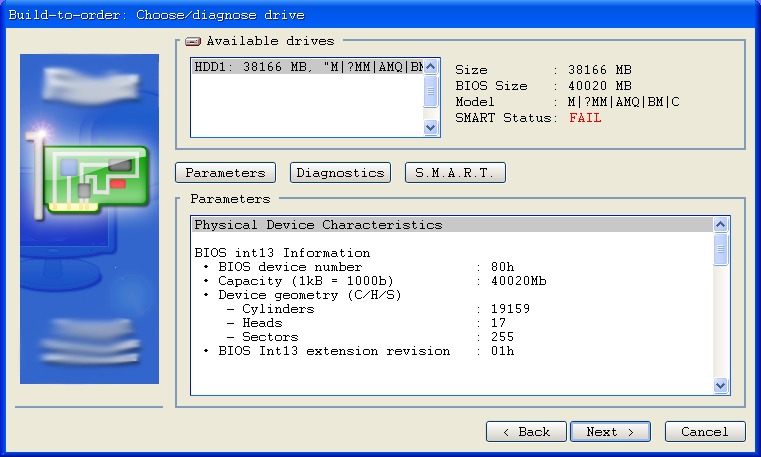
And then the computer science teacher (thank you very much), who saw all these entertainments, introduced me to his friend, who worked in the PC assembly department in a large network of computer shops in the city. He needed software for DOS with a graphical interface, preparing the hard drive of the assembled computers in a certain way. Real work as a programmer! The first task was to make window graphics with buttons, text fields, and so on. Surely such solutions already existed, but I did not even think about it and was eager to write my own bicycle.
The first step was to modify the existing module for drawing primitives, outputting sprites and text. Everything on assembly inserts. Then, having little experience picking with Visual Basic 6 under Windows, he similarly implemented windows and controls on Pascal, and after some time presented the result:
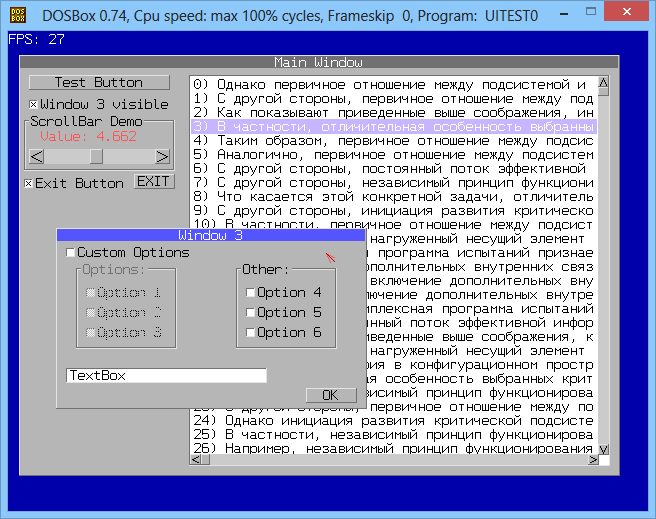
Everything works, windows drag and drop, controls respond to MouseOver. Instead of a Windows approach with drawing dirty regions, I went ahead and redrawn everything - it worked quite quickly thanks to assembler.
In response, I heard that 320x200 is not good, and you need to make all the elements look like in the new at that time Windows XP. There are problems with high resolutions in real mode , since you can linearly address no more than 64 kilobytes, to display a picture with a higher resolution, you need to switchmemory banks , and indeed not enough memory (the notorious 640 kilobytes). Therefore, the compiler from Borland was replaced by TMT Pascal , which can 32 bits out of the box and protected mode through dos4gw. This solved the problems with memory and graphics, the interface was redrawn, the business logic was filmed, and the project was completed. I do not go into details, since this is already a deviation from the topic.
Our days
Sorting backups, I came across my old code. He took DOSBox, started it, brushed away a mean tear. After many years, C # again wanted to feel "closer to iron." So the plan was drawn - take the assembler code to draw graphics in memory, then output the result to WPF. TMT Pascal can build Win32 dlls, it only took minor changes (throw out the extra, add stdcall to signatures).
For example, the sprite output code with transparency looks like this (color pixels of TransparentColor are not output):
You can’t figure it out without a glass, the comments are original
 Procedure tPut32 conv arg_stdcall (X,Y,TransparentColor:DWord;Arr:Pointer);Assembler;  {Transparent PUT}
    Var IMSX, IMSY :DWord;
   Asm
    Cmp Arr, 0
    Je @ExitSub
    {Check ON-SCREEN POS}
    Mov Eax, ScreenSY; Mov Ebx, ScreenSX
    Cmp Y, Eax; Jl @PUT1; Jmp @ExitSub; @PUT1:
    Cmp X, Ebx; Jl @PUT2; Jmp @ExitSub; @PUT2:
    {--------}
    Mov Edi, LFBMem  {Set Destination Loct}
    {Get Sizes}
    Mov Esi, Arr
    LodsD; Mov IMSX, Eax
    LodsD; Mov IMSY, Eax
    Add Esi, SizeOfSprite-8
    {Check ON-SCREEN POS}
    Mov Eax, IMSY; Neg Eax; Cmp Eax, Y; Jl @PUT3; Jmp @ExitSub; @PUT3:
    Mov Eax, IMSX; Neg Eax; Cmp Eax, X; Jl @PUT4; Jmp @ExitSub; @PUT4:
    {VERTICAL Clipping}
    Mov Eax, Y    {Clipping Bottom}
    Add Eax, IMSY
    Cmp Eax, ScreenSY
    Jl @SkipClipYB
     Sub Eax, ScreenSY
     Cmp Eax, IMSY
     Jl @DoClipYB
     Jmp @ExitSub@DoClipYB:
     Sub IMSY, Eax
    @SkipClipYB:
    Cmp Y, -1           {Clipping Top}
    Jg @SkipClipYT
     Xor Eax, Eax
     Sub Eax, Y
     Cmp Eax, IMSY
     Jl @DoClipYT
     Jmp @ExitSub@DoClipYT:
     Sub IMSY, Eax
     Add Y, Eax
     Mov Ebx, IMSX
     Mul Ebx
     Shl Eax, 2          {<>}
     Add Esi, Eax
    @SkipClipYT:
    {End Clipping}
    {Calculate Destination MemLocation}
    Mov Eax, Y; Mov Ebx, ScreenSX;
    Mul Ebx
    Add Eax, X
    Shl Eax, 2    {<>}
    Add Edi, Eax
    Mov Ecx, IMSY {Size Y}
    Mov Ebx, IMSX {Size X}
    Mov Edx, ScreenSX
    Sub Edx, Ebx
    {HORIZ.CLIPPING}
    Push Edx
    Xor Eax, Eax
    {RIGHT}
    Sub Edx, X
    Cmp Edx, 0
    Jge @NoClip1   {IF EDX>=0 THEN JUMP}
     Mov Eax, Edx; Neg Eax; Sub Ebx, Eax
    @NoClip1:
    Pop Edx
    {LEFT}
    Cmp X, 0
    Jge @NoClip2
     Sub Edi, X; Sub Esi, X      // \
     Sub Edi, X; Sub Esi, X      //  \
     Sub Edi, X; Sub Esi, X      //   32 bit!!!
     Sub Edi, X; Sub Esi, X      //  /
     Sub Eax, X; Sub Ebx, Eax
    @NoClip2:
    {bitshifts}
    Shl Eax, 2 {<>}
    Shl Edx, 2 {<>}
    ALIGN 4@PutLn:  {DRAW!!!!!}
     Push Ecx; Push Eax; Mov Ecx, Ebx
     ALIGN 4@PutDot:
      LodsD; Cmp Eax, TransparentColor //Test Al, Al
      Je @NextDot  {if Al==0}
       StosD; Sub Edi, 4   {<>}
      @NextDot: Add Edi, 4 {<>}
     Dec Ecx; Jnz @PutDot  {Looping is SLOW}
     Pop Eax; Add Esi, Eax
     Add Edi, Edx; Add Edi, Eax
     Pop Ecx
    Dec Ecx; Jnz @PutLn    {Looping is SLOW}
    @ExitSub:
   End;
The rest of the code is here: code.google.com/p/lander-net/source/browse/trunk/tmt_pascal/TG_32bit.pas
C #
Then the nostalgia ends and the implementation details go. You can skip and go directly to the gameplay video and the download link at the end of the post.
Project page on Google Code: code.google.com/p/lander-net Functions are
imported standardly via DllImport
        [DllImport("TPSGRAPH", CallingConvention = CallingConvention.StdCall)]
        publicstaticexternuinttPut32(uint x, uint y, uint transparentColor, uint spritePtr);
Memory for sprites is allocated and freed up on the unmanaged side, the same can be done through Marshal.AllocHGlobal. The sprite is the following structure (ha, the source tag on the hub does not support Pascal - we write Delphi):
Type
      TSprite = Packedrecord
       W                  : DWord;
       H                  : DWord;
       Bpp                : DWord;
       RESERVED           : Array[0..6] of DWORD;
      End;
The Unmanaged InitSprite function allocates memory and fills the header, then using FormatConvertedBitmap and memcpy we copy the pixels in the desired format (see code.google.com/p/lander-net/source/browse/trunk/csharp/TpsGraphNet/Sprite.cs ).
So, now we can draw the “scene” in the frame buffer. Here I was waiting for a plug with performance. FPS rendering of several hundred sprites in memory was measured in thousands, but quickly displaying the result on a Windows window was not so simple. I tried WriteableBitmap, I tried DirectX (via SlimDX), it turned out most quickly through InteropBitmap: Sprite.GetOrUpdateBitmapSource
publicunsafe BitmapSource GetOrUpdateBitmapSource()
        {
            if (_bitmapSourcePtr == null)
            {
                var stride = Width*4; // Size of "horizontal row"var section = NativeMethods.CreateFileMapping(NativeMethods.INVALID_HANDLE_VALUE, IntPtr.Zero, (int) NativeMethods.PAGE_READWRITE, 0, (int) _sizeInBytes, null);
                _bitmapSource = Imaging.CreateBitmapSourceFromMemorySection(section, (int) Width, (int) Height, PixelFormats.Bgr32, (int) stride, 0);
                _bitmapSourcePtr = (uint)NativeMethods.MapViewOfFile(section, NativeMethods.FILE_MAP_ALL_ACCESS, 0, 0, _sizeInBytes).ToPointer();
                NativeMethods.CloseHandle(section);
                NativeMethods.UnmapViewOfFile(section);
            }
            CopyPixelsTo((uint) _bitmapSourcePtr);
            return _bitmapSource;
        }
As you can see, the dark magic with FileMapping is called only once, and then we have a direct pointer to a piece of memory that is displayed on the window. You can update it from any thread, in the UI thread you only need to call InteropBitmap.Invalidate ().
The method from the well-known post Lincoln6Echo WPF, WinForms: we draw Bitmap c> 15000 FPS actually produces only 120 fps, if you expand the window to full screen on a full-hd monitor. InteropBitmap in the same conditions gives ~ 800 fps. The game itself on the same machine (core i5) in an expanded window gives about 300 fps, if you remove the synchronization by CompositionTarget.Rendering.
To avoid "screen tearing", excessive processor load, and attach to the standard 60 frames per second in WPF, we use the CompositionTarget.Rendering event. Rendering takes place in the background thread so as not to load the main one and let WPF do its work GameViewModel.RunGameLoop () .
On top of the game picture using WPF tools, game information (health, weapons, points) is easily and pleasantly displayed: MainWindow.xaml . In the screenshot you can also see the additive overlay of explosions implemented using MMX ( PADDUSB instruction ).
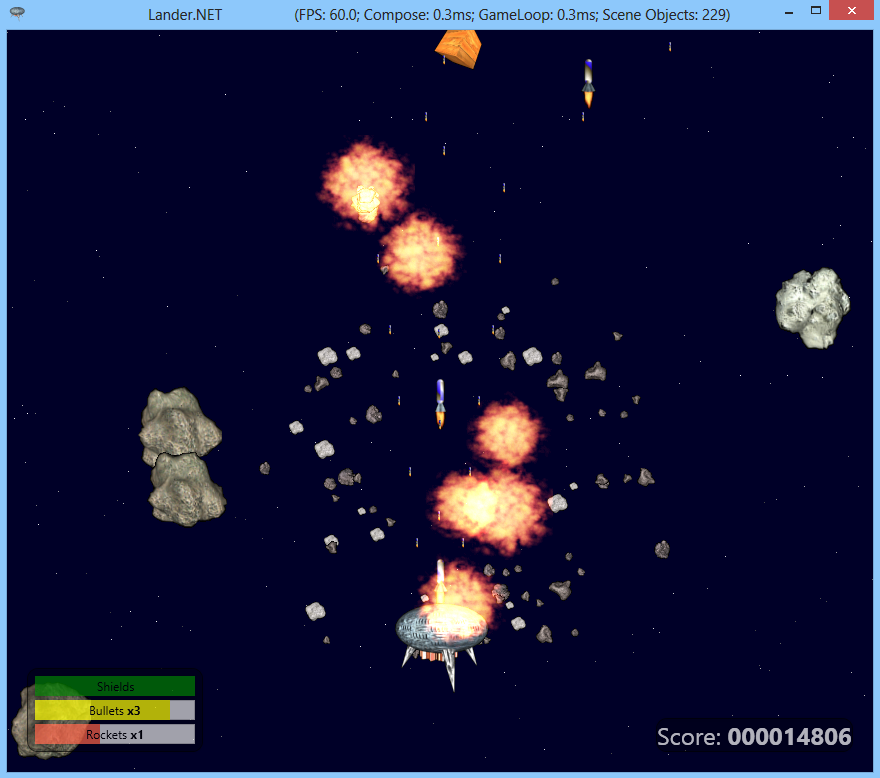
All game logic is made in C #. He left only shooting at asteroids, from a horizontal altered into a vertical scroller. SlimDX is used only for sound.
Total
I did not finish the game as such - interest was lost, trivial tasks remained, and who would play it. It was nice to breathe new life into old crafts. “Closer to the iron” - all rendering does not depend on any framework at all, it is performed in a separate thread, it mainly depends on the speed of working with memory (from the profiler: 40% of the rendering time is spent on cleaning the framebuffer and 40% on copying it to InteropBitmap) .
GitHub: github.com/kefir0/LanderNet
Google Code: code.google.com/p/lander-net
Collected binaries (win32): ge.tt/1YvTlAh1/v/0 Gameplay
video: