September 20, 2013 at 13:39
Microwave Repair Experience
One fine day, my grandmother rang and a voice in the receiver told a terrible story about a microwave fire. It turned out the following, deciding to wash the microwave oven, the grandmother got the idea to quickly dry it, for this the microwave was turned on at full power - empty.
The result is a smoked gut and panic.
At first, the idea was to simply throw out the unit and put in a new one, since simple models are not expensive, but then curiosity got the upper hand, because it wasn’t necessary to climb inside the microwave, it was interesting how it was arranged inside and whether it was possible to revive the unfortunate device.
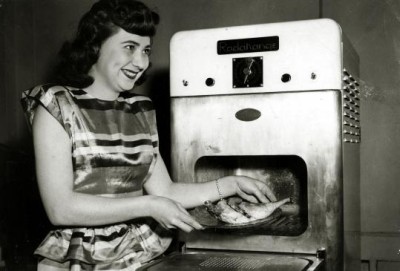
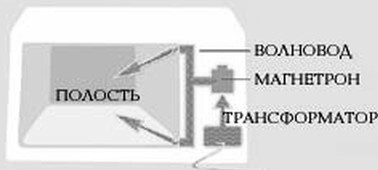
After a little study of the theory, it turned out that the microwave oven has a fairly simple device in its base. This is a cooking chamber, a magnetron, a waveguide connecting a magnetron and a chamber, a high-voltage power strapping of a magnetron, and a control unit.
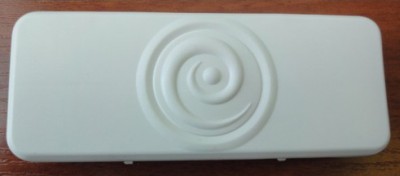
Inside, everything turned out to be smoked, there were drops of molten plastic. The culprit of this disgrace immediately became clear. The microwave field burned and melted the lid protecting the waveguide and magnetron.
Once she was like that.
It turned out to be simple to disassemble the furnace, unscrew 6 screws and here they are the insides.
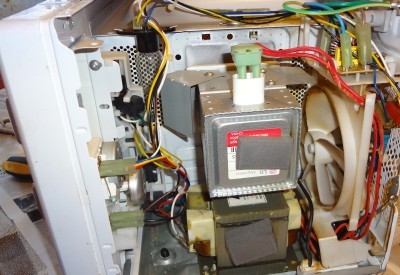
Directly in the center is the magnetron, on the right is a cooling fan, on the bottom is a high-voltage transformer, on the left is the backlight and control “twists”.
The first thing to do is to remove the magnetron and check its condition.
Remove the green terminal and unscrew the 4 screws securing the magnetron to the camera.
Here is the waveguide.
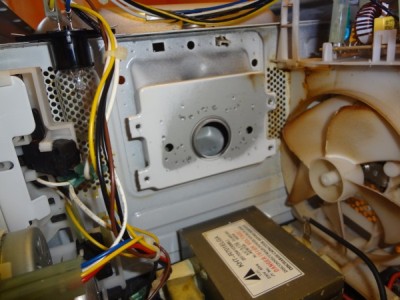
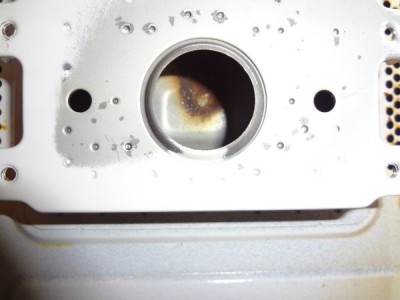
And here are the consequences of turning on the microwave without a load.
Carbonized as a result of breakdown the waveguide wall.
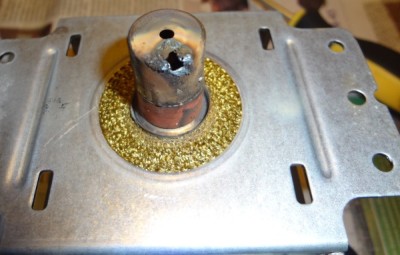
We examine the magnetron and immediately see the molten cap of the antenna
.
Now we need to understand whether the magnetron is alive and a little about what it actually is.
Quote from the wiki.
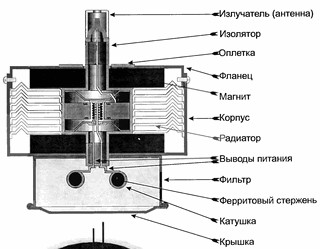
Design scheme of the magnetron
It is necessary to verify whether the vacuum in the magnetron is preserved and if the burnout is limited only to the cap. Carefully removing the cap, we must make sure the integrity of the stem.
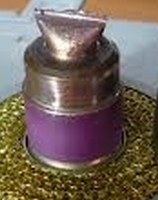
The tube should not be melted, and if this happens, the magnetron can be discarded, it has already lost the vacuum.
And indeed, often the whole idea of repair turns out to be meaningless, because a new magnetron can already be compared with the cost of the entire furnace.
But I got lucky. No damage was found. Now you need to decide what to do with the cap. It turned out that such caps are not frequent guests of parts stores for household appliances. Google search gave advice: either grind on a lathe, or make from the old from the old electrolytic capacitor. The second option seemed more affordable.
Let's get started. We take the K50 electrolyte, a suitable diameter (about 16 mm), cut off the workpiece that is necessary along the length and drill a hole. It is important to observe all sizes as accurately as possible. For the best conductivity of the microwave current, the surface is carefully equated with zero (and polishing is generally desirable).
Before finishing.
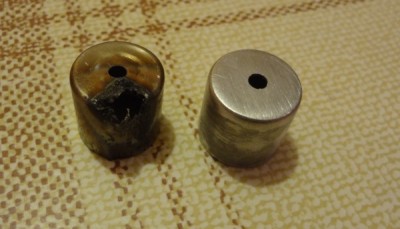
We finally wipe our new cap with a cloth with solvent and put it tightly on the magnetron.
Now it's up to the waveguide. Here I had to torment. The waveguide must be thoroughly sanded from soot, then all abrasive particles and, in general, any foreign inclusions must be removed. The situation is complicated by the complex configuration of the waveguide and it is not so easy to get to the remote burned corners. The vacuum cleaner helped me in the final cleaning, putting the hose into the hole of the waveguide, I managed to remove all the trifle. Finally, the restoration of the waveguide is completed by wiping with a cloth with solvent.
Ideally, it would also be good to paint over the cleaned areas, but in the search I gave the opinion that not all paint can be friends with the microwave, local absorption and heating can occur, so I left it that way.
Finally, it is up to the protective cover of the waveguide. The best solution would be to abandon plastic in favor of mica. Mica is radiolucent and can withstand high temperatures. If you have a grill, then this is almost the only good solution. Since there is no grill in my model, I decided to use a homemade polypropylene lid.
Quote from wiki
It is from this material that food containers for microwave ovens are usually made.
If you are not sure about the material, we are looking for such an icon.

Then we just cut out the desired shape and put it on the screws.

We assemble the whole furnace in the reverse order, put a glass of water, turn it on and check the operability.
As a result, everything worked, the water heats up, no sparking is observed, the waveguide screen is cold.
Ps. By the way, while I was studying the issue, I came across 2 links related to microwave.
1. Good neighbor and uses the "microwave gun" from the converted furnace to jam the hated music centers.
vrtp.ru/index.php?showtopic=13506
2. The effects of microwave radiation on humans.
www.radioscanner.ru/info/article30
So be careful both with your household appliances and with your neighbors through the wall.
The result is a smoked gut and panic.
At first, the idea was to simply throw out the unit and put in a new one, since simple models are not expensive, but then curiosity got the upper hand, because it wasn’t necessary to climb inside the microwave, it was interesting how it was arranged inside and whether it was possible to revive the unfortunate device.
After a little study of the theory, it turned out that the microwave oven has a fairly simple device in its base. This is a cooking chamber, a magnetron, a waveguide connecting a magnetron and a chamber, a high-voltage power strapping of a magnetron, and a control unit.
Inside, everything turned out to be smoked, there were drops of molten plastic. The culprit of this disgrace immediately became clear. The microwave field burned and melted the lid protecting the waveguide and magnetron.
Once she was like that.
It turned out to be simple to disassemble the furnace, unscrew 6 screws and here they are the insides.
Directly in the center is the magnetron, on the right is a cooling fan, on the bottom is a high-voltage transformer, on the left is the backlight and control “twists”.
The first thing to do is to remove the magnetron and check its condition.
Remove the green terminal and unscrew the 4 screws securing the magnetron to the camera.
Here is the waveguide.
And here are the consequences of turning on the microwave without a load.
Carbonized as a result of breakdown the waveguide wall.
We examine the magnetron and immediately see the molten cap of the antenna
.
Now we need to understand whether the magnetron is alive and a little about what it actually is.
Quote from the wiki.
A magnetron is a powerful electron lamp that generates microwaves in the interaction of an electron flux with a magnetic field.
Design scheme of the magnetron
It is necessary to verify whether the vacuum in the magnetron is preserved and if the burnout is limited only to the cap. Carefully removing the cap, we must make sure the integrity of the stem.
The tube should not be melted, and if this happens, the magnetron can be discarded, it has already lost the vacuum.
And indeed, often the whole idea of repair turns out to be meaningless, because a new magnetron can already be compared with the cost of the entire furnace.
But I got lucky. No damage was found. Now you need to decide what to do with the cap. It turned out that such caps are not frequent guests of parts stores for household appliances. Google search gave advice: either grind on a lathe, or make from the old from the old electrolytic capacitor. The second option seemed more affordable.
Let's get started. We take the K50 electrolyte, a suitable diameter (about 16 mm), cut off the workpiece that is necessary along the length and drill a hole. It is important to observe all sizes as accurately as possible. For the best conductivity of the microwave current, the surface is carefully equated with zero (and polishing is generally desirable).
Before finishing.
We finally wipe our new cap with a cloth with solvent and put it tightly on the magnetron.
Now it's up to the waveguide. Here I had to torment. The waveguide must be thoroughly sanded from soot, then all abrasive particles and, in general, any foreign inclusions must be removed. The situation is complicated by the complex configuration of the waveguide and it is not so easy to get to the remote burned corners. The vacuum cleaner helped me in the final cleaning, putting the hose into the hole of the waveguide, I managed to remove all the trifle. Finally, the restoration of the waveguide is completed by wiping with a cloth with solvent.
Ideally, it would also be good to paint over the cleaned areas, but in the search I gave the opinion that not all paint can be friends with the microwave, local absorption and heating can occur, so I left it that way.
Finally, it is up to the protective cover of the waveguide. The best solution would be to abandon plastic in favor of mica. Mica is radiolucent and can withstand high temperatures. If you have a grill, then this is almost the only good solution. Since there is no grill in my model, I decided to use a homemade polypropylene lid.
Quote from wiki
Polypropylene has a higher melting point than polyethylene, and therefore a higher decomposition temperature. Pure isotactic polypropylene melts at 176 ° C. The maximum operating temperature of polypropylene 120-140? C. All polypropylene products can withstand boiling and can be steam sterilized without any change in their shape or mechanical properties.
It is from this material that food containers for microwave ovens are usually made.
If you are not sure about the material, we are looking for such an icon.
Then we just cut out the desired shape and put it on the screws.
We assemble the whole furnace in the reverse order, put a glass of water, turn it on and check the operability.
As a result, everything worked, the water heats up, no sparking is observed, the waveguide screen is cold.
Ps. By the way, while I was studying the issue, I came across 2 links related to microwave.
1. Good neighbor and uses the "microwave gun" from the converted furnace to jam the hated music centers.
vrtp.ru/index.php?showtopic=13506
2. The effects of microwave radiation on humans.
www.radioscanner.ru/info/article30
So be careful both with your household appliances and with your neighbors through the wall.