 July 31, 2013 at 09:52
Django development server and HTTPS testing
- From the sandbox
- Tutorial
Hello dear community,
Choosing the Django framework for developing a corporate site, I ran into the problem of testing its work using the HTTPS protocol using the built-in web server. Despite support for working with secure connections in Django, the bundled web server does not handle HTTPS requests.
The first thing that came to mind was to raise a full-fledged web server (for example, Apache ) for development and testing, but what if you do not want to give up the convenience and ease of use of the Django built-in web server?
A search on the Internet for “django + https” returned several articles dated 2009 and 2012over the years in which stunnel has been proposed for testing HTTPS .
This article is an instruction received as a result of configuration
First you need to install
Basic settings
In our case, there is no need to make changes, since it
But what is needed is X.509 certificate.
The stunnel manual specifies the following certificate requirements:
To generate the private key and certificate, we will use OpenSSL (must be present in Ubuntu 12.04.1):
During generation, you must enter information about the owner ( country codes for convenience).
At the output, we get two files
Now create a configuration file for the tunnel.
An example configuration file
Create a configuration file in the home directory:
In our case, it has the following contents:
Let's check what happened?
We also launch the
The environment variable HTTPS = on is necessary for the correct simulation of HTTPS in Django, without it the request.is_secure () method will return False.
Check the “listening” ports:
The tunnel has been successfully created - it
To "destroy" the tunnel, the
Open any existing URL on the server in the browser using
It

was
As a result, we get the opportunity to debug the work of the Django project using HTTPS without the need to keep a full-fledged web server.
I want to note that the site
Thank you all for your attention and I hope that this information will be useful to someone.
In the end, I’ll list the advantages and disadvantages that I noted for myself, as well as a list of links.
+ no need to install a full web server;
+ the ability to build tunnels for several Django web servers;
+ use of the advantages of the built-in web server.
- This is not a full-fledged web server with support for HTTPS;
- the need to install and configure additional software;
- in fact, the Django web server processes HTTP requests (see the logs below).
Choosing the Django framework for developing a corporate site, I ran into the problem of testing its work using the HTTPS protocol using the built-in web server. Despite support for working with secure connections in Django, the bundled web server does not handle HTTPS requests.
The first thing that came to mind was to raise a full-fledged web server (for example, Apache ) for development and testing, but what if you do not want to give up the convenience and ease of use of the Django built-in web server?
A search on the Internet for “django + https” returned several articles dated 2009 and 2012over the years in which stunnel has been proposed for testing HTTPS .
This article is an instruction received as a result of configuration
stunnelfor the Django development environment on Ubuntu 12.04.1 LTS x64.Software environment
- Ubuntu 12.04.1 LTS (x64)
- OpenSSL 1.0.1 14 Mar 2012
- Python 2.7.3
- virtualenv 1.8.4
- Django 1.5.1
Install and configure stunnel
First you need to install
stunnel(version 4.x, branch 3.x is no longer supported):$ sudo apt-get install stunnel4Basic settings
stunnelare in the file /etc/default/stunnel4:# /etc/default/stunnel
# Julien LEMOINE
# September 2003
# Change to one to enable stunnel automatic startup
ENABLED=0
# Configuration file loacation mask
FILES="/etc/stunnel/*.conf"
OPTIONS=""
# Change to one to enable ppp restart scripts
PPP_RESTART=0 In our case, there is no need to make changes, since it
stunnelwill only be used in conjunction with the Django web server for the duration of development and testing. But what is needed is X.509 certificate.
Certificate Generation
The stunnel manual specifies the following certificate requirements:
... Each SSL enabled daemon needs to present a valid X.509 certificate to the peer. It also needs a private key to decrypt the incoming data. The easiest way to obtain a certificate and a key is to generate them with the free OpenSSL package ...
... The order of contents of the .pem file is important. It should contain the unencrypted private key first, then a signed certificate (not certificate request). There should be also empty lines after certificate and private key. Plaintext certificate information appended on the top of generated certificate should be discarded. So the file should look like this:
----- BEGIN RSA PRIVATE KEY -----
[encoded key]
----- END RSA PRIVATE KEY -----
[empty line]
----- BEGIN CERTIFICATE -----
[encoded certificate]
----- END CERTIFICATE -----
[empty line]
To generate the private key and certificate, we will use OpenSSL (must be present in Ubuntu 12.04.1):
$ cd ~
$ openssl genrsa -out private.key
$ openssl req -new -x509 -key private.key -out stunnel.cert -days 365
During generation, you must enter information about the owner ( country codes for convenience).
At the output, we get two files
private.keyand stunnel.cert, which need to be combined and add empty lines according to the template:$ (cat private.key ; echo ; cat stunnel.cert ; echo) > stunnel.pemNow create a configuration file for the tunnel.
configuration file
An example configuration file
stunnel.conf-sampleis located in /usr/share/doc/stunnel4/examples/, and a description of the parameters can be found in man stunel4or in the documentation . In addition, the FAQ section on the program website contains some useful tips. Create a configuration file in the home directory:
$ cd ~
$ vim stunnel.conf
In our case, it has the following contents:
; Certificate & Key
cert = ./stunnel.pem
; Use SSL version 3, which is more secure
sslVersion = SSLv3
; If next argument is empty, then no pid file will be created
pid =
; if 'yes' stay in foreground (don't fork) and log to stderr instead of via syslog
foreground = no
; Performance tweak from FAQ (https://www.stunnel.org/faq.html)
socket = l:TCP_NODELAY=1
socket = r:TCP_NODELAY=1
; Enable compression
compression = zlib
; Debugging - emerg (0), alert (1), crit (2), err (3), warning (4), notice (5), info (6), or debug (7)
debug = 7
output = /var/log/stunnel4/stunnel.log
; HTTPS service section
[https]
; Port to listen incoming client connections
accept = 8443
; Port which Django development server listens to
connect = 8000
; Tweak for MSIE (see FAQ or manual)
TIMEOUTclose = 0
Let's check what happened?
Creating a tunnel and starting a web server
We also launch the
stunnelbuilt-in Django web server for the test project (empty project, right after django-admin.py startproject):$ cd ~
$ stunnel4 stunnel.conf
$ source django/bin/activate
(django)$ cd django/projects
(django)$ django-admin.py startproject testone
(django)$ cd testone/
(djanho)$ HTTPS=on python manage.py runserverThe environment variable HTTPS = on is necessary for the correct simulation of HTTPS in Django, without it the request.is_secure () method will return False.
Check the “listening” ports:
$ netstat –anActive Internet connections (servers and established)
Proto Recv-Q Send-Q Local Address Foreign Address State
...
tcp 0 0 0.0.0.0:8443 0.0.0.0:* LISTEN
tcp 0 0 127.0.0.1:8000 0.0.0.0:* LISTEN
...The tunnel has been successfully created - it
stunnellistens on port 8443 on all external interfaces, and the web server local connections on port 8000. To "destroy" the tunnel, the
killallfollowing command is suitable :$ ps -e | grep stunnel412530 pts/1 00:00:00 stunnel4
12531 pts/1 00:00:00 stunnel4
12532 pts/1 00:00:00 stunnel4
12533 pts/1 00:00:00 stunnel4
12534 pts/1 00:00:00 stunnel4
12535 ? 00:00:00 stunnel4$ killall stunnel4Work check
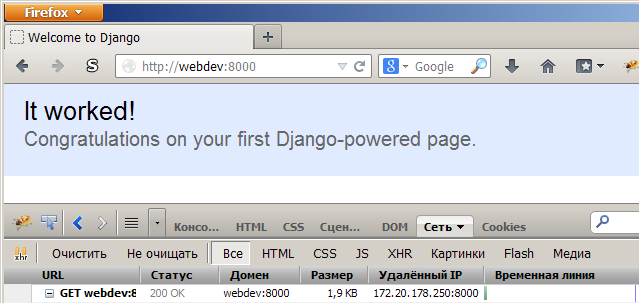
Open any existing URL on the server in the browser using
https://instead http://. At the first request, we should see warnings about an untrusted certificate, because it was signed by us personally, and not by an accredited center (Certificate Authority). After confirming the security exception, we will see the requested page received via the HTTPS protocol. It
was
Conclusion
As a result, we get the opportunity to debug the work of the Django project using HTTPS without the need to keep a full-fledged web server.
I want to note that the site
stunnelhas a version for Windows and Android , so you can try to assemble a similar scheme on these operating systems. Thank you all for your attention and I hope that this information will be useful to someone.
In the end, I’ll list the advantages and disadvantages that I noted for myself, as well as a list of links.
Benefits
+ no need to install a full web server;
+ the ability to build tunnels for several Django web servers;
+ use of the advantages of the built-in web server.
disadvantages
- This is not a full-fledged web server with support for HTTPS;
- the need to install and configure additional software;
- in fact, the Django web server processes HTTP requests (see the logs below).
Web server logs
Validating models ...
0 errors found
July 26, 2013 - 10:06:33
Django version 1.5.1, using settings 'testone.settings'
Development server is running at 127.0.0.1 : 8000 /
Quit the server with CONTROL-C.
...
[26 / Jul / 2013 10:07:25] GET / HTTP / 1.1 200 1955
[26 / Jul / 2013 10:07:30] GET / HTTP / 1.1 200 1955
...
0 errors found
July 26, 2013 - 10:06:33
Django version 1.5.1, using settings 'testone.settings'
Development server is running at 127.0.0.1 : 8000 /
Quit the server with CONTROL-C.
...
[26 / Jul / 2013 10:07:25] GET / HTTP / 1.1 200 1955
[26 / Jul / 2013 10:07:30] GET / HTTP / 1.1 200 1955
...









