Using CMAK to automate client connection to VPN
There are not so few instructions on the Internet for automating VPN connections through CMAK, however, everything somehow contained unclear points, which took some time to resolve, so I decided to write my instructions and make it available to others, in the hope of that it will help save valuable time, or clarify any incomprehensible moment.

So, suppose that we are tired of writing and updating instructions for creating connections to our VPN server for Windows users and would like to automate this process by providing the user with a ready-made program that creates a connection with parameters predefined by us and ready to work in our network environment. To accomplish this, the “Connection Manager Administration Kit” component built into Windows Server 2008 and Windows Server 2008 R2 will help us (in the Russian version of the “Connection Manager Administration Pack”). So, in order to install CMAK, you need to run “Server Manager” and install the new component “Connection Manager Administration Pack”. The entire current example is based on Windows Server 2008 R2 SP1, Russian version.
Installing the component in the server manager:

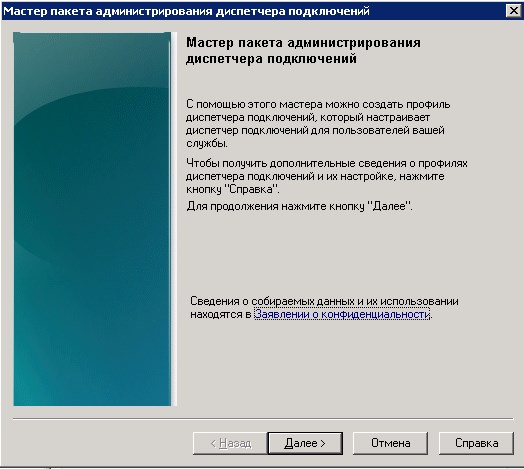
After installation, the administration package is available from the "start" menu, or the "administration" applet in the control panel. After starting CMAK, we will be greeted by the administration package wizard.
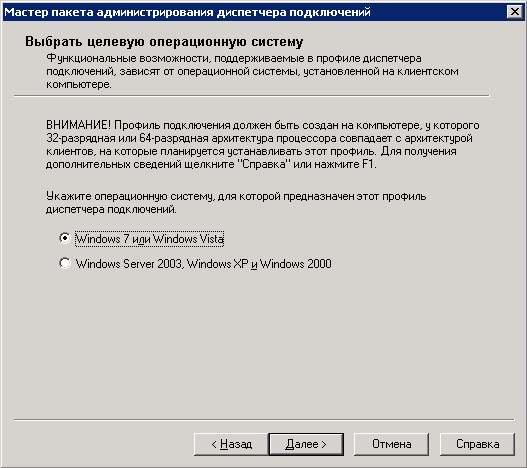
Without hesitation, click "next." In the next window, the wizard will offer you to choose a family of operating systems for which we are creating a connection. Under Windows Server 2008 R2, it is “Windows 7, Vista,” or “Windows Server 2003, Windows XP, and Windows 2000”. However, if we select the item with Windows 7 and Vista, the connection is also suitable for Windows 8.
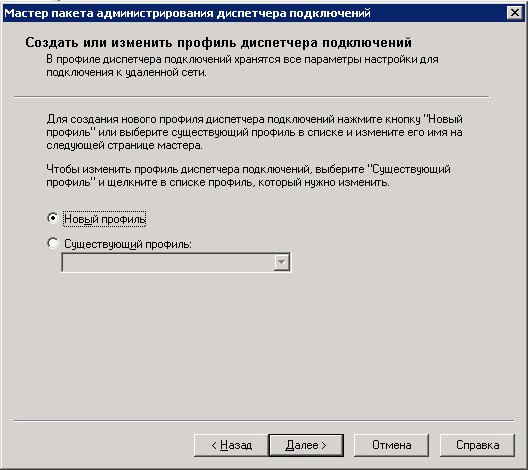
After choosing the operating systems, we must create a new profile, or edit the existing one if there is one (in our example, we create a new one).
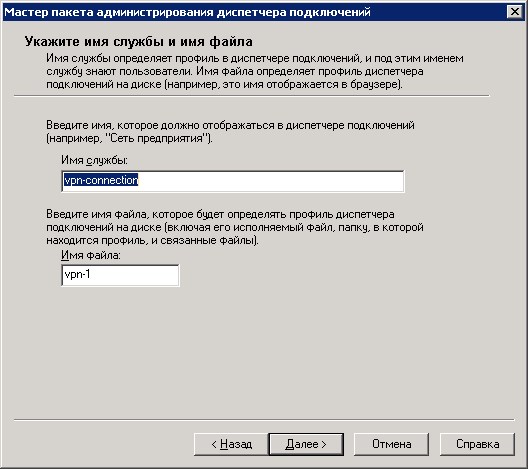
Next, you need to enter the name of the connection to be created (so the connection will be displayed in Windows network connections) and the name of the file that the user will run. The file name must not exceed eight characters and have an extension.
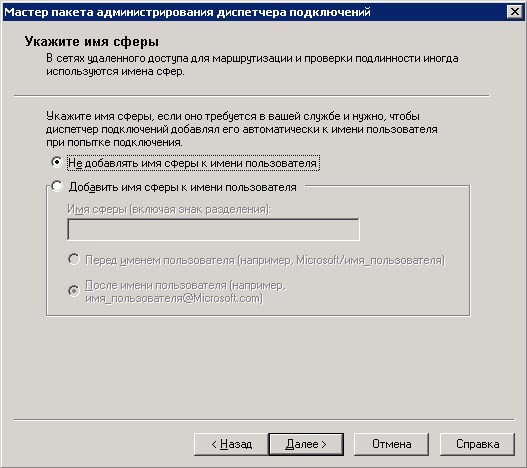
After naming our connection, the wizard will enable you to add the name of the sphere. If we do not plan to use our provider as an authentication gateway on our VPN server, then we skip this point.
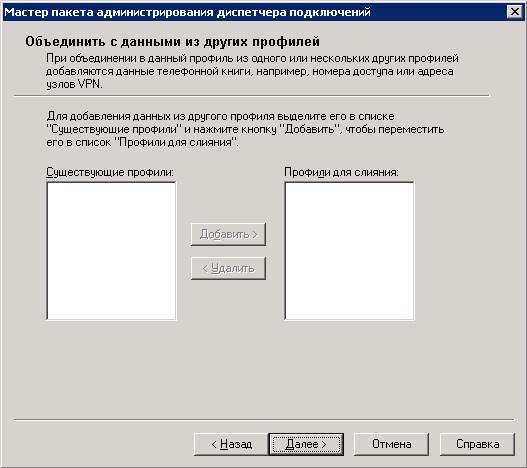
At the next stage, we are invited to add data from the phone book of other existing profiles, so as not to enter them on a new one. Because we have no other profiles created - move on.
Next, we need to specify the IP address of the VPN server to connect.
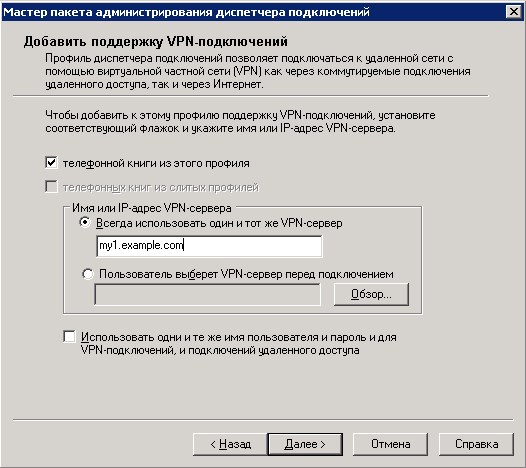
We can specify a single permanent address, or a text file containing a set of addresses for connection, which will be provided to the user to choose from. The file has the following format:
[Settings]
default = The name of the VPN server to be used by default (any of the following, for example, “My VPN Server1”).
UpdateURL = Link to a text file with a list of the server (each time you connect, this file will be updated from the specified URL).
Message = Message to the user, for example, "please select a server to connect to."
[VPN Servers]
My VPN Server1 = my1.example.com
My VPN Server2 = my2.example.com
My VPN Server3 = my3.example.com
In our example, we restrict ourselves to a single server. By the way, on the same page we can check the box to use the same credentials for authentication both on the VPN server and on the dial-up connection (if we, of course, want to use it before creating a VPN connection). All this is clearly visible in the screenshot above.
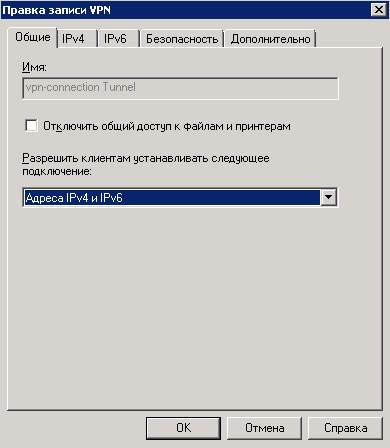
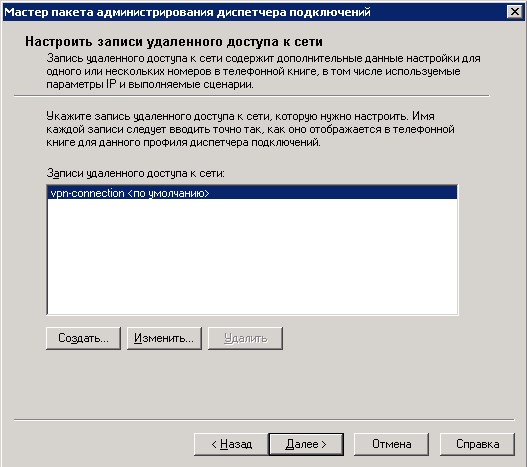
The next window allows you to go to the settings of our tunnel.

By clicking “change”, we can configure the basic parameters of our VPN connection. On the “general” tab, you can choose the types of addresses that we want to use “IPv4”, “IPv6”, or both, and also disable “file and printer sharing” if we do not need it.
The IPv4 tab allows you to configure settings for the protocol of the same name. Among the settings: DNS, WINS, use the connection as the default gateway and compression. In some instructions, in case we needed not to use the VPN connection as the default gateway, it was suggested to leave this setting enabled here, and then use the REMOVE_GATEWAY directive in the file with static routes. It was experimentally established that this instruction works crookedly and leads to a bug when the host, after connecting, generally ceases to use its default default gateway. But this setting worked out quite correctly, i.e. if we do not need to use the VPN server as the default gateway, then we simply uncheck this box and add later static routes for the networks that we need to go through the VPN to.

Almost the same settings for IPv6.

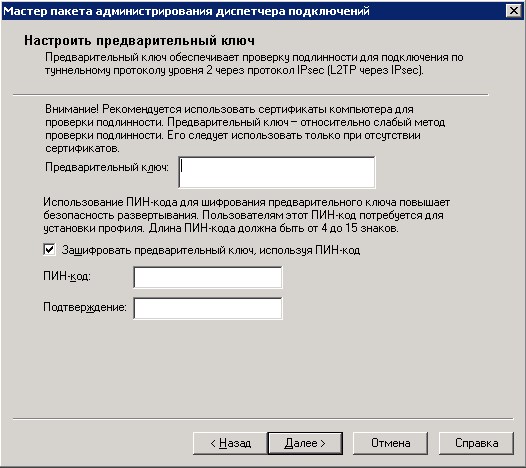
On the “security” tab, you can select the tunnel protocol we need (PPTP, L2TP, SSTP), and we can choose the only one, but we can choose the sequence of connection attempts. For example, if we choose to use L2TP first, then after L2TP, PPTP will be used, and then SSTP, etc. Various encryption options are also available here. For L2TP, for example, you can specify a shared key. In this case, after setting up the VPN connection, the wizard will offer to encrypt our key with a PIN code, which the user will have to enter when establishing the connection. In the same window, you can configure authentication methods - more secure in the general case of EAP, or MS-CHAP 2, for example. For this article, L2TP priority with shared key was selected.

On the “advanced” tab - you can specify the DNS suffix that will be used by the client connection.

A window for entering a shared key and PIN code to encrypt it.
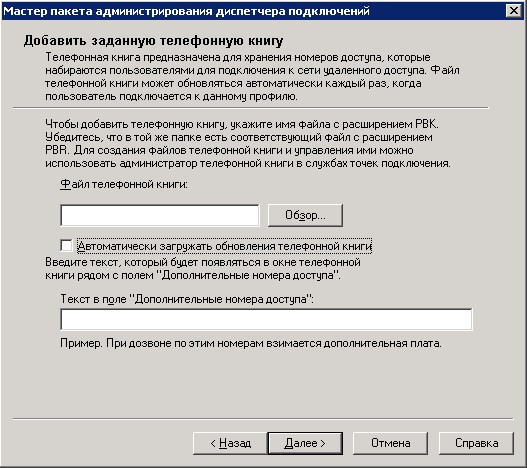
Next, the wizard prompts you to enter a phone book for dialing to a dial-up server. Currently, I think this is not relevant, therefore, uncheck the option “automatically download phone book updates” and click “next”.
If dial-up is not relevant for us, then skip the next window in the same way.
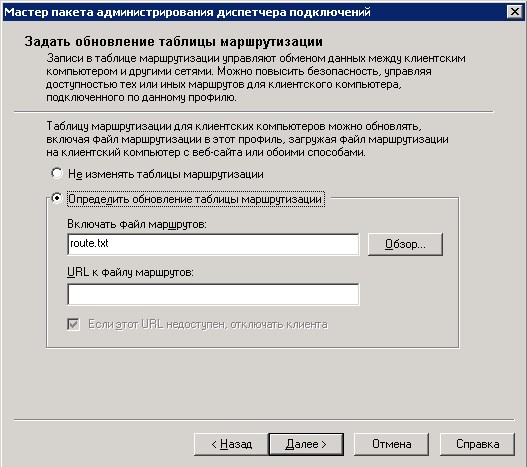
Next, we are offered the opportunity to make an update for the routing table. If this is relevant, add the route file. I will give an example of a route file. Suppose we want the client to go to the 192.168.0.0/24 network through our VPN connection (the VPN network has an excellent addressing from the 192.168.0.0/24 network), while the default gateway should remain with it. Then we must add a text file with a route of this content:
"ADD 192.168.0.0 MASK 255.255.255.0 default METRIC default IF default".
Attention! The file must be in ANSI encoding, and not UTF-8, for example. If we unchecked “Make this connection the main gateway of the client”, no REMOVE_GATEWAY directives should be written here.
You can also specify the URL to the file containing the routing table, in which case it will be updated every time it connects.
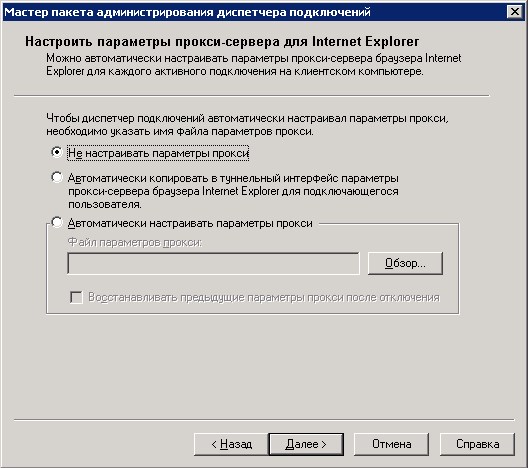
In the next wizard window, you can specify proxy settings for Internet Explorer during a VPN connection. The following options are possible - do not configure proxy settings at all (first point), use parameters already configured by the user (second point), or use a pre-configured file containing proxy settings (third option).
In the next window, we can configure additional actions. For example, we may need to run some program or script every time we start the connection. In this case, click "create" and go to the settings.

Here, in addition to our program or script, you can select various events upon the occurrence of which an action will be performed. For example, after connecting, or when an error occurs. If the item “include the specified user action program in this service profile” is checked, the program will be copied to the connection profile (useful in case we run something non-standard, which is not available on other computers). If the interaction of the program with the user is assumed, then at this stage it is necessary to check the corresponding box.

Next, you can define a picture different from the picture displayed in the connection by default.

And also for the phone book:

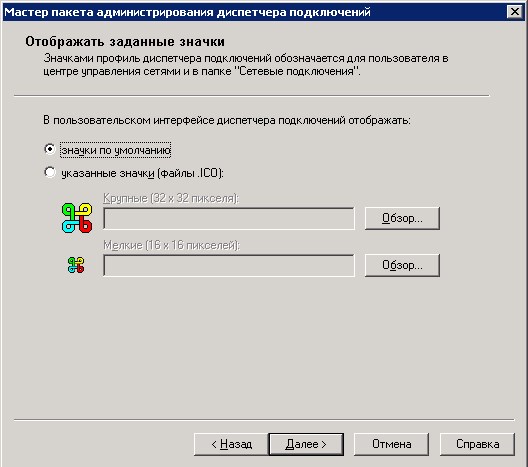
You can change the connection icon:
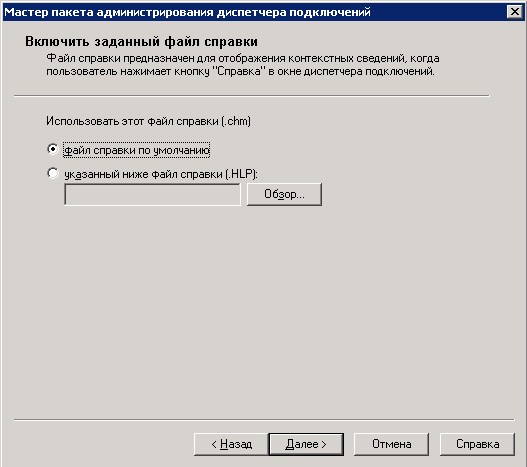
On the next screen, you can install your .hlp help file, or leave the help information offered by default.
You can then enter information about technical support (for example, 24-hour telephone numbers, etc.).

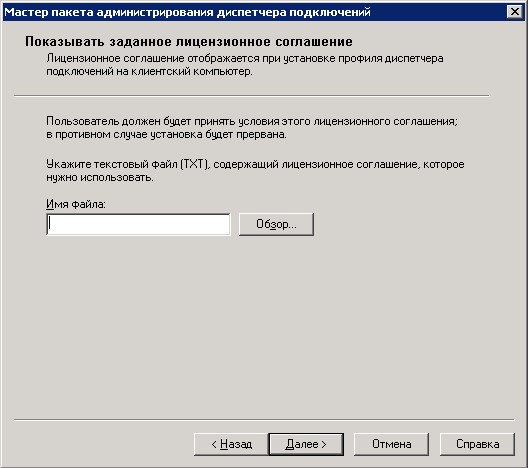
And where without license agreement? In general, if confirmation of the user's consent to something is required, this can also be set by selecting a text file.
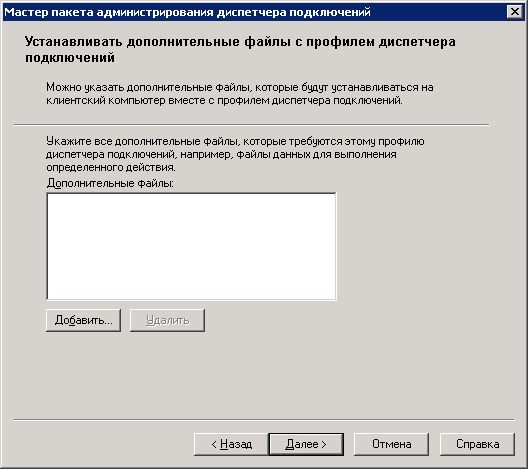
If we need to include additional files in our created profile (for example, they can be used by our program, or by a script that we could select above), then we should select them on the next screen.
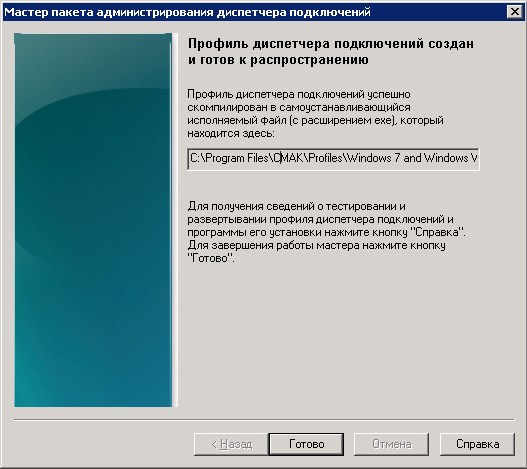
On this, the setup is finished and it remains to click "next" in the next window and "ready" in the final one. We will see the path along which the profile for the connection was created.
Before copying this profile to the client, in my opinion, it is worth mentioning one more thing: if you leave everything as it is, then in the case of PPTP, the connection will persistently offer to specify the regional settings of the phone, which we do not need at all. The case is fixed by editing the file with the cms extension, which lies in the profile of our created connection. So, in this file, in the "[Connection Manager]" section, add the parameter "connectiontype = 1" and save the file. This should be done after creating the connection, because after the creation or editing of the profile is completed, the files are overwritten and the parameter is most likely to be lost.
That, in fact, is all. The folder with our profile can be copied to the client and establish a connection in two clicks. Run the exe file with the name of our connection:

After an affirmative answer, a window appears where you can choose whether the connection is established only for this user, or for all, and also indicate to create a connection shortcut on the desktop.

The user only needs to enter the data for the connection and, possibly, confirm to the UAC mechanism his desire to provide system privileges to our connection (in case you need to make a route, or run a program that requires system privileges).

That's all. I hope that this instruction will be useful to someone.
So, suppose that we are tired of writing and updating instructions for creating connections to our VPN server for Windows users and would like to automate this process by providing the user with a ready-made program that creates a connection with parameters predefined by us and ready to work in our network environment. To accomplish this, the “Connection Manager Administration Kit” component built into Windows Server 2008 and Windows Server 2008 R2 will help us (in the Russian version of the “Connection Manager Administration Pack”). So, in order to install CMAK, you need to run “Server Manager” and install the new component “Connection Manager Administration Pack”. The entire current example is based on Windows Server 2008 R2 SP1, Russian version.
Installing the component in the server manager:
After installation, the administration package is available from the "start" menu, or the "administration" applet in the control panel. After starting CMAK, we will be greeted by the administration package wizard.
Without hesitation, click "next." In the next window, the wizard will offer you to choose a family of operating systems for which we are creating a connection. Under Windows Server 2008 R2, it is “Windows 7, Vista,” or “Windows Server 2003, Windows XP, and Windows 2000”. However, if we select the item with Windows 7 and Vista, the connection is also suitable for Windows 8.
After choosing the operating systems, we must create a new profile, or edit the existing one if there is one (in our example, we create a new one).
Next, you need to enter the name of the connection to be created (so the connection will be displayed in Windows network connections) and the name of the file that the user will run. The file name must not exceed eight characters and have an extension.
After naming our connection, the wizard will enable you to add the name of the sphere. If we do not plan to use our provider as an authentication gateway on our VPN server, then we skip this point.
At the next stage, we are invited to add data from the phone book of other existing profiles, so as not to enter them on a new one. Because we have no other profiles created - move on.
Next, we need to specify the IP address of the VPN server to connect.
We can specify a single permanent address, or a text file containing a set of addresses for connection, which will be provided to the user to choose from. The file has the following format:
[Settings]
default = The name of the VPN server to be used by default (any of the following, for example, “My VPN Server1”).
UpdateURL = Link to a text file with a list of the server (each time you connect, this file will be updated from the specified URL).
Message = Message to the user, for example, "please select a server to connect to."
[VPN Servers]
My VPN Server1 = my1.example.com
My VPN Server2 = my2.example.com
My VPN Server3 = my3.example.com
In our example, we restrict ourselves to a single server. By the way, on the same page we can check the box to use the same credentials for authentication both on the VPN server and on the dial-up connection (if we, of course, want to use it before creating a VPN connection). All this is clearly visible in the screenshot above.
The next window allows you to go to the settings of our tunnel.
By clicking “change”, we can configure the basic parameters of our VPN connection. On the “general” tab, you can choose the types of addresses that we want to use “IPv4”, “IPv6”, or both, and also disable “file and printer sharing” if we do not need it.
The IPv4 tab allows you to configure settings for the protocol of the same name. Among the settings: DNS, WINS, use the connection as the default gateway and compression. In some instructions, in case we needed not to use the VPN connection as the default gateway, it was suggested to leave this setting enabled here, and then use the REMOVE_GATEWAY directive in the file with static routes. It was experimentally established that this instruction works crookedly and leads to a bug when the host, after connecting, generally ceases to use its default default gateway. But this setting worked out quite correctly, i.e. if we do not need to use the VPN server as the default gateway, then we simply uncheck this box and add later static routes for the networks that we need to go through the VPN to.
Almost the same settings for IPv6.
On the “security” tab, you can select the tunnel protocol we need (PPTP, L2TP, SSTP), and we can choose the only one, but we can choose the sequence of connection attempts. For example, if we choose to use L2TP first, then after L2TP, PPTP will be used, and then SSTP, etc. Various encryption options are also available here. For L2TP, for example, you can specify a shared key. In this case, after setting up the VPN connection, the wizard will offer to encrypt our key with a PIN code, which the user will have to enter when establishing the connection. In the same window, you can configure authentication methods - more secure in the general case of EAP, or MS-CHAP 2, for example. For this article, L2TP priority with shared key was selected.
On the “advanced” tab - you can specify the DNS suffix that will be used by the client connection.
A window for entering a shared key and PIN code to encrypt it.
Next, the wizard prompts you to enter a phone book for dialing to a dial-up server. Currently, I think this is not relevant, therefore, uncheck the option “automatically download phone book updates” and click “next”.
If dial-up is not relevant for us, then skip the next window in the same way.
Next, we are offered the opportunity to make an update for the routing table. If this is relevant, add the route file. I will give an example of a route file. Suppose we want the client to go to the 192.168.0.0/24 network through our VPN connection (the VPN network has an excellent addressing from the 192.168.0.0/24 network), while the default gateway should remain with it. Then we must add a text file with a route of this content:
"ADD 192.168.0.0 MASK 255.255.255.0 default METRIC default IF default".
Attention! The file must be in ANSI encoding, and not UTF-8, for example. If we unchecked “Make this connection the main gateway of the client”, no REMOVE_GATEWAY directives should be written here.
You can also specify the URL to the file containing the routing table, in which case it will be updated every time it connects.
In the next wizard window, you can specify proxy settings for Internet Explorer during a VPN connection. The following options are possible - do not configure proxy settings at all (first point), use parameters already configured by the user (second point), or use a pre-configured file containing proxy settings (third option).
In the next window, we can configure additional actions. For example, we may need to run some program or script every time we start the connection. In this case, click "create" and go to the settings.
Here, in addition to our program or script, you can select various events upon the occurrence of which an action will be performed. For example, after connecting, or when an error occurs. If the item “include the specified user action program in this service profile” is checked, the program will be copied to the connection profile (useful in case we run something non-standard, which is not available on other computers). If the interaction of the program with the user is assumed, then at this stage it is necessary to check the corresponding box.
Next, you can define a picture different from the picture displayed in the connection by default.
And also for the phone book:
You can change the connection icon:
On the next screen, you can install your .hlp help file, or leave the help information offered by default.
You can then enter information about technical support (for example, 24-hour telephone numbers, etc.).
And where without license agreement? In general, if confirmation of the user's consent to something is required, this can also be set by selecting a text file.
If we need to include additional files in our created profile (for example, they can be used by our program, or by a script that we could select above), then we should select them on the next screen.
On this, the setup is finished and it remains to click "next" in the next window and "ready" in the final one. We will see the path along which the profile for the connection was created.
Before copying this profile to the client, in my opinion, it is worth mentioning one more thing: if you leave everything as it is, then in the case of PPTP, the connection will persistently offer to specify the regional settings of the phone, which we do not need at all. The case is fixed by editing the file with the cms extension, which lies in the profile of our created connection. So, in this file, in the "[Connection Manager]" section, add the parameter "connectiontype = 1" and save the file. This should be done after creating the connection, because after the creation or editing of the profile is completed, the files are overwritten and the parameter is most likely to be lost.
That, in fact, is all. The folder with our profile can be copied to the client and establish a connection in two clicks. Run the exe file with the name of our connection:
After an affirmative answer, a window appears where you can choose whether the connection is established only for this user, or for all, and also indicate to create a connection shortcut on the desktop.
The user only needs to enter the data for the connection and, possibly, confirm to the UAC mechanism his desire to provide system privileges to our connection (in case you need to make a route, or run a program that requires system privileges).
That's all. I hope that this instruction will be useful to someone.