Drupal 7 Search with Apache Solr Part 2 - Learning to tune the index
- Tutorial
 In the first article, I talked about how to install and configure the Apache Solr search server to work with Drupal 7. Now we will talk about how to configure the index.
 For those who have not read the first part, I recommend reading it for a better understanding of the material.
- Drupal 7 Search with Apache Solr Part 1 - Basic Setup
- Drupal 7 Search with Apache Solr Part 2 - Learning to tune the index
- Drupal 7 Search with Apache Solr Part 3 - Learn to add custom fields and options to the index
- Search Drupal 7 with Apache Solr Part 4 - Facet Filters
- Drupal 7 Search with Apache Solr Part 5 - Facet Filter Widgets
- Search on Drupal 7 using Apache Solr Part 6 - configure apache solr + tomcat
- Drupal 7 Search with Apache Solr Part 7 - Full-Text Search in Russian
Let me remind you that in the settings of the search_api_solr module there are two main entities: server and index.
In the index settings, you can specify the fields and conditions by which Apache Solr will index the content on your site. Let's analyze the index settings in order.
Fields
First of all, you should pay attention to the fields. You can specify in the index settings those fields by which Apache Solr will index the content. To do this, select your index and go to the “Fields” tab. Here you can select the indexable fields in the list available on this page. Sometimes not all fields are available at once and can be added using the “related fields” element. It is at the very bottom of the page.
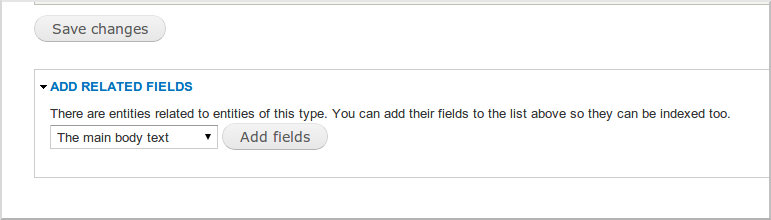
Add the “The main body text” field and make it indexable.
If your entity (in my example, it is a node) has a reference to other entities, for example, to the term of taxonomy, then you can search for nodes including the fields of the term of taxonomy. Thus, you can add fields from several levels of related entities to the index.
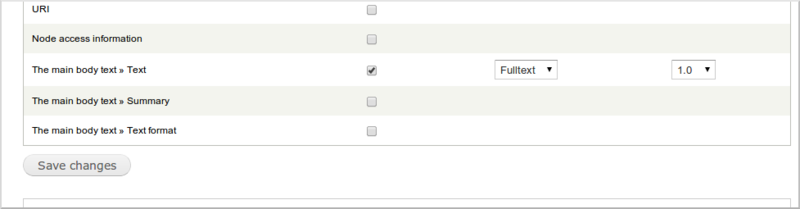
You can specify the type of indexing for the selected fields. From the name of the types it is clear what they are for. I can only say that fulltext means full-text search and Apache Solr will search not only by integer value, but also by its part. And string is used to search by integer value. For example, for headings it makes sense to choose fulltext, and for the genre of a book (adventure, science fiction, classic ...) it is better to choose string.
In addition to the type of indexing, there is also a “field weight”. Using weight, you can control the priority of search results for each field. In this case, the higher the weight, the higher the priority of the field.
Having selected the necessary fields, save the form. I chose the title and body of the article.
If you added groups of fields through “related fields”, but did not select anything in these groups, then the fields from these groups will disappear and you will need to add them again.
Content
Now go to the workflow tab. Here you can configure content indexing rules. The first section of the settings is called “Data alterations”. In it, you can add a filter by the type of nodes (Bundle filter) or exclude unpublished nodes from the index (Exclude unpublished nodes). In the case of the bundle filter, please note that by default it excludes selected content types. Therefore, do not forget to select the mode you need (exclude the listed ones or vice versa index the listed ones).
The second section is the processors. They allow you to perform additional data processing. For example, the Ignore case processor allows you to search case-insensitively in an index. For most processors, you can select the fields to which they should be applied.
Select the settings you need and save the form. Now you need to return to the Status tab and reindex the content.
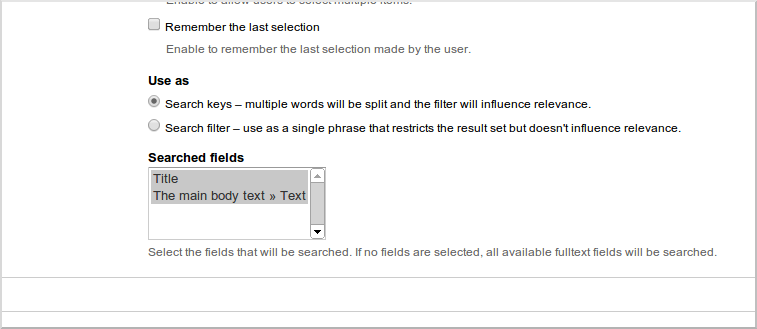
Another important point - you must enable filtering by the necessary fields in the settings of the view, which we used to display the search results. To do this, in the view itself, go to the settings of the Search: Fulltext search filter and select the fields on which this filter will act.
After that, go to the / search-results page (we set up the presentation for this page in the first article) and admire the results of the search.

In the next article I will tell you how to add your own fields and indexing settings, if the standard ones are not enough.