March 19, 2013 at 16:25
Cacti: SMART Monitoring

Data recovery as a result of “physical death” of the information carrier is not the most pleasant pastime in the life of any system administrator. Therefore, than correcting the situation for long hours, and we have a lot of data, it is better to prevent it by organizing monitoring.
Hard and solid-state drives have a built-in technology that allows for self-diagnosis - SMART, which we will work with.
SMART is a technology for assessing the state of a hard disk with built-in self-diagnostic equipment, as well as a mechanism for predicting the time of its failure.
SMART is not a panacea for all ills, but certain information and some planning, using the data obtained, can be done on time, thereby making life a little easier.
The source server is Linux CentOS 6, which works as a file storage.
Linux contains a group of packages called Smartmontools , which are a set of utilities for checking the health of disks. Directly configuring the smartd daemon for regular SMART testing and monitoring is beyond the scope of this article; those who are interested can find configuration examples on the Internet themselves.
We are interested in the graphic display of key parameters, the anomalous change of which can sometimes be seen only visually. And Cacti will help us with this .
1) To begin, we put the smartmontools package:
yum provides "smartctl*"
#
1:smartmontools-5.43-1.el6.x86_64 : Tools for monitoring SMART capable hard disks
#
yum install smartmontools
After installation, you can check the disk settings:
smartctl -a DEVICE
As a rule, instead of “DEVICE” there will be something like / dev / sda (first drive), / dev / sdb (second).
Sometimes it is necessary to force SMART on the drive:
smartctl -s on DEVICE
Currently, SMART technology is not available for USB drives, despite the fact that the drive inside the box can give the necessary information.
Getting SMART requires certain privileges, as a rule, they do not have SNMPd daemon, so the main work on collecting intermediate data will occur through the CRON script :
cat /etc/snmp/smart-cronjob
# where to keep the files
STORE=/tmp/snmp
# update smart parameters
for devfull in /dev/sd?; do
    dev=`basename $devfull`
    /usr/sbin/smartctl -n idle -a $devfull >$STORE/smart-$dev.TMP
    mv $STORE/smart-$dev.TMP $STORE/smart-$dev
done
Do not forget to create the directory / tmp / snmp and put the launch in CRON
cat /etc/crontab |grep smart
*/5 * * * * root /etc/snmp/smart-cronjob
This code is looking for devices "/ dev / sd?" (/ dev / sda, / dev / sdb, etc.) and tries to write their SMART data to a file.
#ll /dev/sd?
brw-rw---- 1 root disk 8,  0 Oct 25 14:42 /dev/sda
brw-rw---- 1 root disk 8, 16 Oct 25 14:42 /dev/sdb
brw-rw---- 1 root disk 8, 32 Oct 25 14:42 /dev/sdc
brw-rw---- 1 root disk 8, 48 Oct 25 14:42 /dev/sdd
brw-rw---- 1 root disk 8, 64 Oct 25 14:42 /dev/sde
brw-rw---- 1 root disk 8, 80 Oct 25 14:42 /dev/sdf
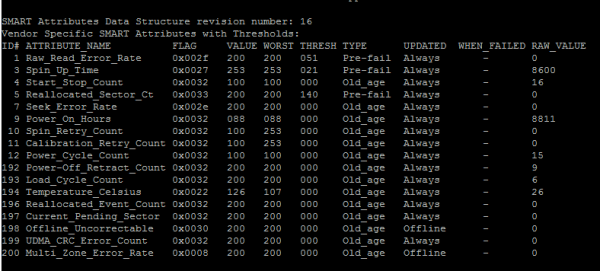
All SMART parameters have a serial number. Appropriate numbering will be used in the PERL script, instead of looking at each parameter on its own.
Perl script for extracting SMART parameters for SNMP (smart-generic) We set the
script the right to execute:
chmod + х /etc/snmp/smart-generic
This script accepts the SMART parameter number and displays the difference between the current value and the threshhold (threshold) for this parameter.
It is worth noting that depending on the manufacturer, model or firmware version, the trashholds may be different. Therefore, the value itself is not of great interest, but unusual fluctuations or declining trends should be taken into account. For temperature, it is usually necessary to obtain an instantaneous value.
We add snmpd.conf lines (or others if you want to control “your” indicators. You can get a general idea of the parameters on Wikipedia ):
extend smartdevices /etc/snmp/smart-generic devices
extend smartdescriptions /etc/snmp/smart-generic description
extend smart1 /etc/snmp/smart-generic 1
extend smart3 /etc/snmp/smart-generic 3
extend smart4 /etc/snmp/smart-generic 4
extend smart5 /etc/snmp/smart-generic 5
extend smart7 /etc/snmp/smart-generic 7
extend smart9 /etc/snmp/smart-generic 9
extend smart10 /etc/snmp/smart-generic 10
extend smart12 /etc/snmp/smart-generic 12
extend smart170 /etc/snmp/smart-generic 170
extend smart171 /etc/snmp/smart-generic 171
extend smart172 /etc/snmp/smart-generic 172
extend smart177 /etc/snmp/smart-generic 177
extend smart178 /etc/snmp/smart-generic 178
extend smart179 /etc/snmp/smart-generic 179
extend smart180 /etc/snmp/smart-generic 180
extend smart181 /etc/snmp/smart-generic 181
extend smart182 /etc/snmp/smart-generic 182
extend smart183 /etc/snmp/smart-generic 183
extend smart184 /etc/snmp/smart-generic 184
extend smart187 /etc/snmp/smart-generic 187
extend smart189 /etc/snmp/smart-generic 189
extend smartR190 /etc/snmp/smart-generic R190
extend smartR194 /etc/snmp/smart-generic R194
extend smart195 /etc/snmp/smart-generic 195
extend smart196 /etc/snmp/smart-generic 196
extend smart199 /etc/snmp/smart-generic 199
extend smart203 /etc/snmp/smart-generic 203
extend smart226 /etc/snmp/smart-generic 226
extend smart230 /etc/snmp/smart-generic 230
extend smart231 /etc/snmp/smart-generic 231
extend smart232 /etc/snmp/smart-generic 232
extend smart233 /etc/snmp/smart-generic 233
extend smart235 /etc/snmp/smart-generic 235
extend smart241 /etc/snmp/smart-generic 241
We restart the daemon and check the output (you need to substitute your “SNMP_Community” and “host_name”):
snmpwalk -v2c -c SNMP_Community host_name NET-SNMP-EXTEND-MIB::nsExtendOutLine
NET-SNMP-EXTEND-MIB::nsExtendOutLine."smart1".1 = STRING: 101
NET-SNMP-EXTEND-MIB::nsExtendOutLine."smart1".2 = STRING: 101
...
NET-SNMP-EXTEND-MIB::nsExtendOutLine."smartdevices".1 = STRING: sda
NET-SNMP-EXTEND-MIB::nsExtendOutLine."smartdevices".2 = STRING: sdb
NET-SNMP-EXTEND-MIB::nsExtendOutLine."smartdescriptions".1 = STRING: WDC WD2003FYYS-... [01.01D01] 2 TB
NET-SNMP-EXTEND-MIB::nsExtendOutLine."smartdescriptions".2 = STRING: WDC WD2003FYYS-... [01.01D01] 2 TB
2. Cacti Templates
In the archive, the main template containing all the parameters on one chart. The temperature is displayed in a separate graph.
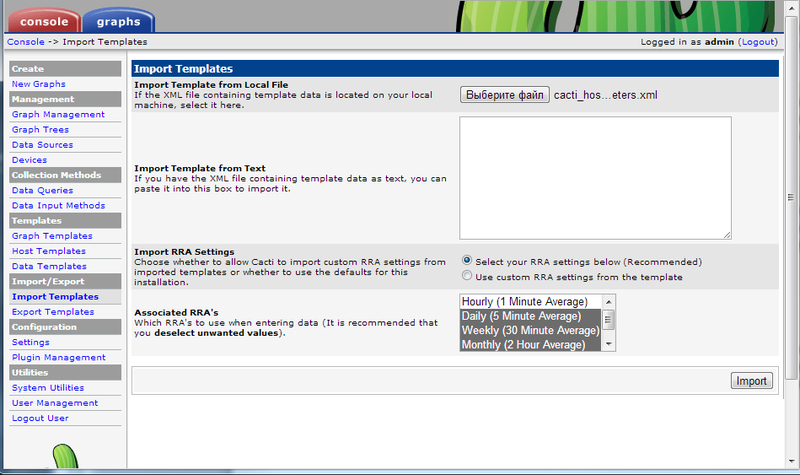
To work, you need to move the mapping file disk_smart.xml to / resource / snmp_queries /
and import cacti_host_template_smart_parameters.xml into the cactus.

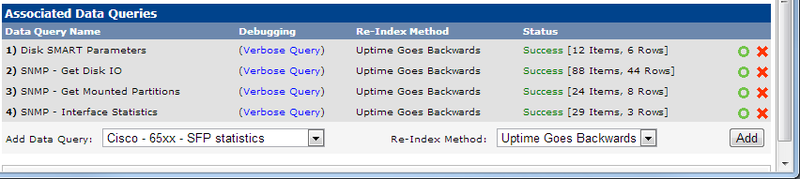
If everything is configured correctly, then when adding “Disk SMART Parameters” to the Associated Data Queries of the device, the status of the polled objects should appear.
Do not forget to choose the right template when creating graphs directly. By default, graphics are built for SSD drives (AGILITY3), which is not entirely correct.

3. Examples of graphs: This

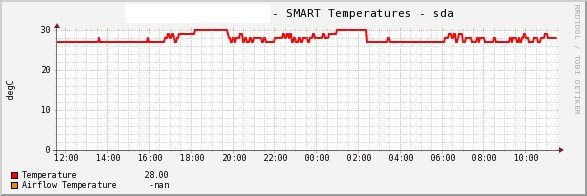
article is based on SMART stats on Cacti (via SNMP)