Practical use of a thermistor with an Arduino

Hello, Habrasociety. After reading several articles on the Arduino hub, I fired up to get this toy. And recently I received a package with a board. Then he indulged with LEDs and wanted something more serious. I decided to make a simple thermometer using just a thermistor, a 10 kΩ resistor and an LCD display. Who cares what happened - I ask for a cat.
Start
A thermistor is a variable resistor that changes its resistance depending on the ambient temperature.
We need the following details:
the Arduino Uno - 1 pc
Thermistor - 1 piece
Resistor c resistance of 10 k - 1 piece
LCD display HJ1602A - 1 pc
connecting bridges - several pieces
All that I had, so I soon began designing on breadboard.
I soldered the legs to the screen on the day of purchase.

Then we connect the screen to the Arduino outputs. My screen has this pinout.
1 (GND) GND - Earth
2 (VDD) 5v - Power (+)
3 (VO / Contrast) - Contrast control (here I connected a variable resistor)
4 (RS) - 12 - Data channel
5 (RW) - 11 - Data channel
6 (E) - 10 - Data channel
11 (DB4) - 5 - Data channel
12 (DB5) - 4 - Data channel
13 (DB6) - 3 - Data channel
14 (DB7) - 2 - Data channel
15 (BL1 / Backlight1) - 13 - Power supply for the backlight (+)
16 (BL2 / Backlight2) - GND - Earth (-) The
result is such a picture.
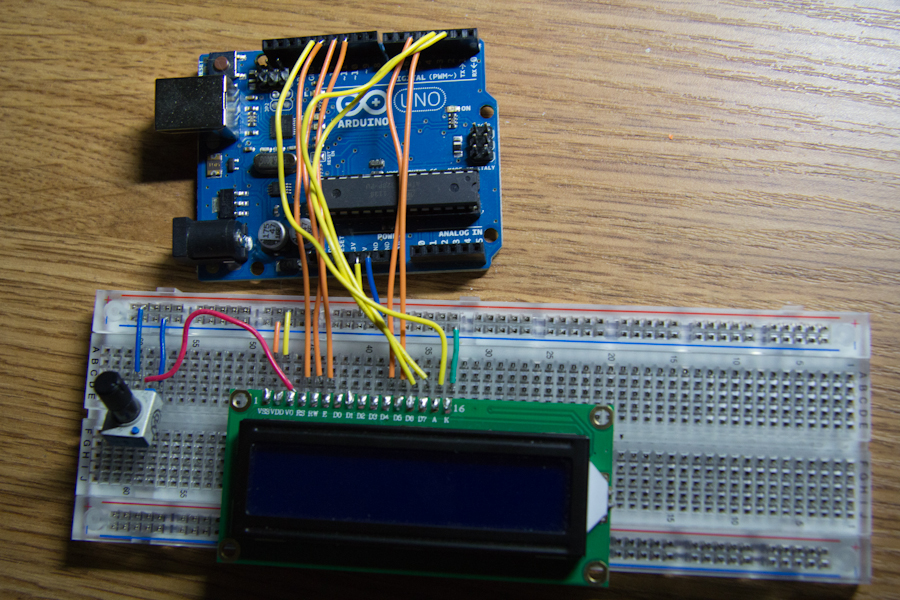
Next, we connect one leg of the thermistor to the analog input A4 and a resistor of 10 kOhm to the ground, and the second leg of the thermistor to 5V.

In general, that’s all. The hardware is ready. Here is a diagram.

Programming
With programming, everything is clear here. Sketch source code:
// подключаем две библиотеки для работы с LCD и математических вычислений
#include
#include
LiquidCrystal lcd(12, 11, 10, 5, 4, 3, 2); // инициализируем LCD
int backLight = 13;
void setup(void) {
  pinMode(backLight, OUTPUT);
  digitalWrite(backLight, HIGH);
  lcd.begin(16, 2);
  lcd.clear();
  lcd.setCursor(0,0);
}
 // создаем метод для перевода показаний сенсора в градусы Цельсия
double Getterm(int RawADC) {
  double temp;
  temp = log(((10240000/RawADC) - 10000));
  temp = 1 / (0.001129148 + (0.000234125 * temp) + (0.0000000876741 * temp * temp * temp));
  temp = temp - 273.15;
  return temp;
}
// создаем метод для вывода на экран показаний сенсора
void printTemp(void) {
  double temp = Getterm(analogRead(4));  // считываем показания с сенсора
  lcd.clear();
  lcd.setCursor(0,0);
  lcd.print("Temperature is:");
  lcd.setCursor(0,1);
  lcd.print(temp);
  lcd.print(" C");
  }
void loop(void) {
  printTemp(); // вызываем метод, созданный ранее
  delay(1000);
}
The result of the program.
