Development of cartographic mobile applications in C ++ / Qt, using Qt Mobility
This post participates in the competition " Smart Phones for Smart Posts "
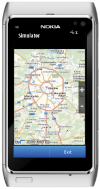
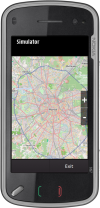
 In the previous article, we learned how to write a mapping application in QML, and today we will consider developing an application based on the Qt Graphics View architecture using the QtLocation API module . The article can be divided into two parts: theoretical and practical. The theoretical part discusses the architecture of Graphics View and the main points of using the QtLocation module . In the practical part, I will not describe the creation of the project from scratch, but I will provide the code of the most interesting functionality from the project, such as inertial movement of the map, animated transition to a given coordinate, GPS positioning, elements for scaling and displaying textual information.
 If you collected additional plugins from the previous article, you can use them in this project.
Table of contents
- Graphics View Architecture
- Introduction to Graphic Elements
- QtLocation Module
- Maps and Services
- Getting GPS coordinates
- Project analysis
- Tips & Tricks
- Conclusion
- References
Graphics View Architecture
The architecture of graphical representations is similar to the architecture of the model / representation in the sense that it has a class for storing QGraphicsScene data and a class for visualizing this data QGraphicsView . The same scene can be visualized with different views, if necessary. The graphic scene contains elements - objects of classes derived from the abstract class QGraphicsItem .
From the very beginning, a lot of effort was put into the development of the architecture of graphic representations aimed at increasing speed and expanding capabilities. Scenes can be scaled, rotated and printed, and to display them, use both the built-in Qt engine and the OpenGL library. The architecture also supports animation and drag and drop. Graphic scenes are suitable for presenting from units to tens of thousands of elements; an example of 40,000 chips can serve as a good illustration . Widgets derived from QWidget can also be placed on the stage , for this you need to pass the widget to the constructor of the QGraphicsProxyWidget class and place the proxy widget on the stage. Proxy widget (or QWidget objects themselves) work slowly, but whether this slowdown will be noticeable depends on the application (more on this is written in QtLabs [En]).
Introduction to Graphic Elements
The QGraphicsItem class is the base class for all graphic elements. You cannot create instances of it, since it has two purely virtual methods: boundingRect () and paint () . The paint () method corresponds to the QWidget :: paintEvent () method , its implementation should draw an element. BoundingRect () methodtells the infrastructure about the bounding box of the element - it is used to detect collisions and in order not to redraw the element that is out of sight. This class provides support for mouse and keyboard events, drag & drop, grouping of elements. Event processing works as follows, the view receives mouse and keyboard events, then it translates them into events for the scene, changing the coordinates in accordance with the coordinates of the scene and then the event is passed to the desired element.
QtLocation Module


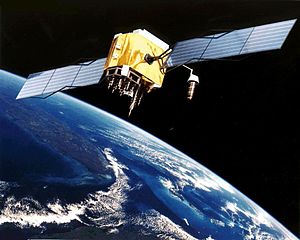
The QtLocation module provides the developer with a convenient interface for accessing positional information. The API allows you to abstract from the source of information, which may be a list of satellites or data from other sources.
QtLocation comes with a set of classes related to various aspects of navigation. It includes hardware-related classes, such as QGeoPositionInfoSource , which provides information about the user's position using a global positioning system (GPS) or other location sources, and QGeoSatelliteInfoSource , which is used to obtain satellite positioning information.
The module also includes a number of classes whose main purpose is to describe location information, for example QGeoCoordinate , which contains latitude, longitude, and altitude. QtLocation also provides a way to represent geographic areas, either in an abstract form, like QGeoBoundingArea or more precisely, as in QGeoBoundingBox and QGeoBoundingCircle .
Maps and Services

Before we can start working with maps, scenes, and views, we must first access the source of geographic data. A general way to do this is to use a QGeoServiceProvider . To find out what services are available, you can use QGeoServiceProvider :: availableServiceProviders () , which will return an empty QStringList if there are no services available, so the developer should check this option:
   QStringList services = QGeoServiceProvider::availableServiceProviders();
    if (services.isEmpty()) {
        //Доложить о ситуации и обработать ее
    }
Once the service provider has been received, we can get the QGeoMappingManager , which will allow us to get the map image.
QGeoMappingManager *manager = service.mappingManager();
To draw a map for the user, QtLocation provides us with the QGraphicsGeoMap class to display data from the QGeoMappingManager . All we need to do is create a view and a scene in the usual way, and add a map to the scene:
    QGraphicsScene scene;
    QGraphicsView view;
    view.setScene(&scene);
    QGraphicsGeoMap *geoMap = new QGraphicsGeoMap(manager);
    scene.addItem(geoMap);
Getting GPS coordinates
To obtain GPS coordinates, you need to create a QGeoPositionInfoSource by calling QGeoPositionInfoSource :: createDefaultSource () , which gives you access to various information about the coordinates of QGeoPositionInfo . Clients who require location data can connect to the positionUpdated () signal so that QGeoPositionInfoSource starts sending this signal by calling startUpdates () or requestUpdate () .
An example of a client who receives location data:
    class MyClass : public QObject
    {
        Q_OBJECT
    public:
        MyClass(QObject *parent = 0)
            : QObject(parent)
        {
            QGeoPositionInfoSource *source = QGeoPositionInfoSource::createDefaultSource(this);
            if (source) {
                connect(source, SIGNAL(positionUpdated(QGeoPositionInfo)),
                        this, SLOT(positionUpdated(QGeoPositionInfo)));
                source->startUpdates();
            }
        }
    private slots:
        void positionUpdated(const QGeoPositionInfo &info)
        {
            qDebug() << "Position updated:" << info;
        }
    };
If regular position updates are required, setUpdateInterval () can be used to determine how often these updates should occur. If no interval is specified, updates arrive when they are available. For example, if the client application requires updating every 30 seconds:
    // Emit updates every 30 seconds if available
    QGeoPositionInfoSource *source = QGeoPositionInfoSource::createDefaultSource(someParent);
    if (source)
       source->setUpdateInterval(30000);
Animated transition to a given coordinate
So, we got a general idea of how everything works, now we can go to the code. To create a smooth movement of the map to a given coordinate, we need to expand the functionality provided by the QGraphicsGeoMap class :
class GeoMap : public QGraphicsGeoMap
{
	Q_OBJECT
	Q_PROPERTY(double centerLatitude READ centerLatitude WRITE setCenterLatitude)
	Q_PROPERTY(double centerLongitude READ centerLongitude WRITE setCenterLongitude)
public:
	GeoMap(QGeoMappingManager *manager, QGraphicsItem *parent = 0);
	void animatedPanTo(const QGeoCoordinate& center);
	double centerLatitude() const { return center().latitude(); }
	void setCenterLatitude(double lat);
	double centerLongitude() const { return center().longitude(); }
	void setCenterLongitude(double lon);
        //...
and implementation:
void GeoMap::animatedPanTo(const QtMobility::QGeoCoordinate ¢er)
{
	QGeoCoordinate curStart(this->center());
	if (curStart == center)
		return;
	//здесь можно выводить что двигаемся на заданную координату
	setStatusBarText(QString("Panning to %1").arg(center.toString(QGeoCoordinate::Degrees)));
	QPropertyAnimation *latAnim = new QPropertyAnimation(this, "centerLatitude");
	latAnim->setEndValue(center.latitude());
	latAnim->setDuration(300);
	QPropertyAnimation *lonAnim = new QPropertyAnimation(this, "centerLongitude");
	lonAnim->setEndValue(center.longitude());
	lonAnim->setDuration(300);
	QParallelAnimationGroup *group = new QParallelAnimationGroup;
	group->addAnimation(latAnim);
	group->addAnimation(lonAnim);
	group->start(QAbstractAnimation::DeleteWhenStopped);
}
void GeoMap::setCenterLatitude(double lat)
{
	QGeoCoordinate c = center();
	c.setLatitude(lat);
	setCenter( c);
}
void GeoMap::setCenterLongitude(double lon)
{
	QGeoCoordinate c = center();
	c.setLongitude(lon);
	setCenter( c);
}
Pinch gesture

Qt includes a gesture programming framework that generates them from a series of events, regardless of the input method. A gesture may be a mouse movement, a touch on the touch screen, or a series of events from other sources. In Qt, gesture processing is represented by the following classes: QPanGesture , QPinchGesture, and QSwipeGesture . "Sliver" is used to increase or decrease the image, in our case it will change the scale of the map. To implement it in the class, you need to enable processing of this gesture by calling the grabGesture (Qt :: PinchGesture) method and process it in sceneEvent () of our map:
bool GeoMap::sceneEvent(QEvent *event)
{
  switch (event->type()) {
  case QEvent::Gesture:
  {
     if (QGestureEvent *gesture = static_cast(event)) {
      if (QPinchGesture *pinch = static_cast(gesture->gesture(Qt::PinchGesture))) {
        qreal scale = qLn(pinch->scaleFactor())/qLn(2);
        qreal zoom = 0;
        zoom = scale > 0 ? 1 : -1;
        setZoomLevel(zoomLevel() + zoom);
        return true;
      }
    }
  }
  default:
    break;
  }
  return QGraphicsGeoMap::sceneEvent(event);
}
Qt allows you to handle, along with gestures , touch events on the screen. To accept them for the widget, you need to set the Qt :: WA_AcceptTouchEvents attribute , and for graphic elements, call acceptTouchEvents (true) .
Kinetic scroll
Kinetic Scroll is an inertial movement of the map, not knowing how to more accurately convey this functionality in words, I posted a video, it’s better to see it once than read it a hundred times. We are implementing this functionality. So the rest of our header file:
protected:
	void mousePressEvent(QGraphicsSceneMouseEvent *event);
	void mouseMoveEvent(QGraphicsSceneMouseEvent *event);
	void mouseReleaseEvent(QGraphicsSceneMouseEvent *event);
	void mouseDoubleClickEvent(QGraphicsSceneMouseEvent *event);
	void wheelEvent(QGraphicsSceneWheelEvent *event);
	void keyPressEvent(QKeyEvent * event);
	void keyReleaseEvent(QKeyEvent * event);
	bool sceneEvent(QEvent *event);
private slots:
    void kineticTimerEvent();
private:
	void panFloatWrapper(const QPointF & delta);
	void applyPan(const Qt::KeyboardModifiers & modifiers);
	void setStatusBarText(const QString &text);
private:
	bool panActive;
	bool panDecellerate;
	// Fractional pan, used by panFloatWrapper
	QPointF remainingPan;
	// current kinetic panning speed, in pixel/msec
	QPointF kineticPanSpeed;
	QPoint panDir;
	QTimer kineticTimer;
	QTime lastMoveTime;
	// An entry in the mouse history. first=speed, second=time
	typedef QPair MouseHistoryEntry;
	// A history of the last (currently 5) mouse move events is stored in order to smooth out
        // movement detection for kinetic panning
	QList mouseHistory;
	StatusBarItem *m_statusBar;
};
The most interesting thing, of course, in the implementation, first we will consider the settings for controlling the movement:
////////////////////////////////////////////////////////////////////////////////
// TODO: Some of these could be exposed in a GUI and should probably be put elsewhere in that case
// (and made non-const)
// Kinect annimation properties
static const bool enableKineticPanning = true;
// time until kinetic panning speed slows down to 50%, in msec
static const qreal kineticPanningHalflife = 160.0;
// keyboard panning speed without modifiers, in pixels/msec
static const qreal panSpeedNormal = 0.3;
// keyboard panning speed with shift, in pixels/msec
static const qreal panSpeedFast = 1.0;
// minimum panning speed, in pixels/msec
static const qreal kineticPanSpeedThreshold = 0.005;
 // temporal resolution. Smaller values take more CPU but improve visual quality
static const int kineticPanningResolution = 20;
// maximum time between last mouse move and mouse release for kinetic panning to kick in
static const int holdTimeThreshold = 100;
////////////////////////////////////////////////////////////////////////////////
The rest of the implementation:
void GeoMap::mousePressEvent(QGraphicsSceneMouseEvent *event)
{
	setFocus();
	if (event->button() == Qt::LeftButton) {
		panActive = true;
		// When pressing, stop the timer and stop all current kinetic panning
		kineticTimer.stop();
		kineticPanSpeed = QPointF();
		lastMoveTime = QTime::currentTime();
	}
	event->accept();
}
void GeoMap::mouseMoveEvent(QGraphicsSceneMouseEvent *event)
{
	if (panActive) {
		setCursor(Qt::ClosedHandCursor);
		// Calculate time delta
		QTime currentTime = QTime::currentTime();
		int deltaTime = lastMoveTime.msecsTo(currentTime);
		lastMoveTime = currentTime;
		// Calculate position delta
		QPointF delta = event->lastPos() - event->pos();
		// Calculate and set speed
		if (deltaTime > 0) {
			kineticPanSpeed = delta / deltaTime;
			mouseHistory.push_back(MouseHistoryEntry(kineticPanSpeed, currentTime));
			mouseHistory.pop_front();
		}
		// Pan map
		panFloatWrapper(delta);
	}
	event->accept();
}
void GeoMap::mouseReleaseEvent(QGraphicsSceneMouseEvent * event)
{
	if (event->button() == Qt::LeftButton && panActive) {
		panActive = false;
		setCursor(Qt::OpenHandCursor);
		if (!enableKineticPanning ||
                      lastMoveTime.msecsTo(QTime::currentTime()) > holdTimeThreshold) {
			return;
		}
		kineticPanSpeed = QPointF();
		int entries_considered = 0;
		QTime currentTime = QTime::currentTime();
		foreach(MouseHistoryEntry entry, mouseHistory) {
			// first=speed, second=time
			int deltaTime = entry.second.msecsTo(currentTime);
			if (deltaTime < holdTimeThreshold) {
				kineticPanSpeed += entry.first;
				entries_considered++;
			}
		}
		if (entries_considered > 0) kineticPanSpeed /= entries_considered;
		lastMoveTime = currentTime;
		// When releasing the mouse button/finger while moving,
                // start the kinetic panning timer
		kineticTimer.start();
		panDecellerate = true;
	}
	event->accept();
}
void GeoMap::mouseDoubleClickEvent(QGraphicsSceneMouseEvent * event)
{
	setFocus();
	animatedPanTo(screenPositionToCoordinate(event->pos()));
	event->accept();
}
// ...
void GeoMap::kineticTimerEvent()
{
	QTime currentTime = QTime::currentTime();
	int deltaTime = lastMoveTime.msecsTo(currentTime);
	lastMoveTime = currentTime;
	if (panDecellerate)
		kineticPanSpeed *= qPow(qreal(0.5), qreal(deltaTime / kineticPanningHalflife));
	QPointF scaledSpeed = kineticPanSpeed * deltaTime;
	if (kineticPanSpeed.manhattanLength() < kineticPanSpeedThreshold) {
		// Kinetic panning is almost halted -> stop it.
		kineticTimer.stop();
		return;
	}
	panFloatWrapper(scaledSpeed);
}
// Wraps the pan(int, int) method to achieve floating point accuracy,
// which is needed to scroll smoothly.
void GeoMap::panFloatWrapper(const QPointF & delta)
{
	// Add to previously stored panning distance
	remainingPan += delta;
	// Convert to integers
	QPoint move = remainingPan.toPoint();
	// Commit mouse movement
	pan(move.x(), move.y());
	// Store committed mouse movement
	remainingPan -= move;
}
Item for status bar
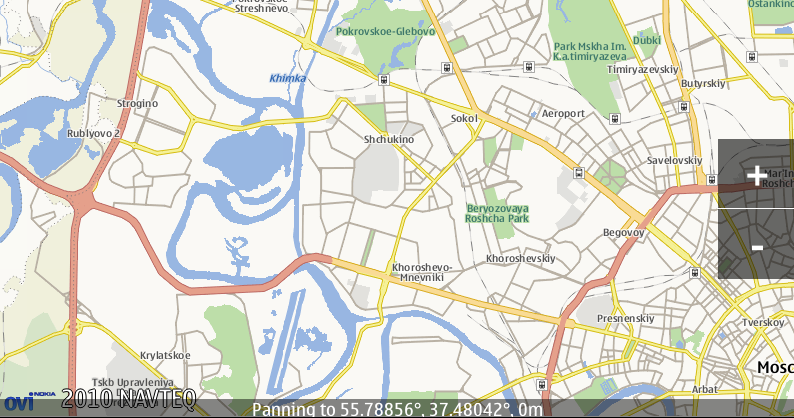
Now let's look at an element for displaying various text information in the status line.
When displaying text, the element first appears smoothly, is delayed by the set time and gradually hides. So, let's start with the announcement:
// An animated status bar item that appears at the bottom
// of the map
class StatusBarItem : public QObject, public QGraphicsRectItem
{
	Q_OBJECT
	Q_PROPERTY(int offset READ offset WRITE setOffset)
public:
	explicit StatusBarItem();
	~StatusBarItem();
	int offset() const;
	void setRect(qreal x, qreal y, qreal w, qreal h);
public slots:
	void setText(QString text);
	void showText(QString text, quint32 timeout=3000);
	void show();
	void hide();
	void setOffset(int offset);
private:
	int m_offset;
	QGraphicsSimpleTextItem *m_textItem;
};
StatusBarItem::StatusBarItem()
{
	m_offset = 0;
	setPen(QPen(QBrush(), 0));
	setBrush(QBrush(QColor(0,0,0,120)));
	m_textItem = new QGraphicsSimpleTextItem(this);
	m_textItem->setBrush(QBrush(Qt::white));
	setText("");
}
StatusBarItem::~StatusBarItem()
{
}
void StatusBarItem::setText(QString text)
{
	m_textItem->setText(text);
	QRectF rect = m_textItem->boundingRect();
	QPointF delta = this->rect().center() - rect.center();
	m_textItem->setPos(delta.x(), delta.y());
}
int StatusBarItem::offset() const
{
	return m_offset;
}
void StatusBarItem::setRect(qreal x, qreal y, qreal w, qreal h)
{
	QGraphicsRectItem::setRect(x, y + m_offset, w, h);
	QFont f;
	f.setFixedPitch(true);
	f.setPixelSize(h/1.1);
	m_textItem->setFont(f);
	setText(m_textItem->text());
}
void StatusBarItem::setOffset(int offset)
{
	this->setY(this->y() - m_offset + offset);
	m_offset = offset;
}
void StatusBarItem::showText(QString text, quint32 timeout)
{
	setText(text);
	show();
	QTimer::singleShot(timeout, this, SLOT(hide()));
}
void StatusBarItem::show()
{
	QPropertyAnimation *anim = new QPropertyAnimation(this, "offset");
	anim->setStartValue(0);
	anim->setEndValue(-1 * rect().height());
	anim->setDuration(500);
	anim->start(QAbstractAnimation::DeleteWhenStopped);
}
void StatusBarItem::hide()
{
	QPropertyAnimation *anim = new QPropertyAnimation(this, "offset");
	anim->setStartValue(m_offset);
	anim->setEndValue(0);
	anim->setDuration(500);
	anim->start(QAbstractAnimation::DeleteWhenStopped);
}
Scale Element
Here I wanted to consider the implementation of buttons for scaling, but at the last moment I changed my mind (seeing the volume of the resulting article) and only describe the basic principle of its operation. So, this is a regular QGraphicsRectItem , which contains two text elements , for displaying + and - , and QGraphicsLineItem for visual separation. The element responds to user actions and, when pressed, it either increases or decreases the scale of the map:
    //в зависимости куда нажал пользователь масштаб  увеличивается
    //либо на один, либо на минус один и 0 если ни то ни се
    m_geoMap->setZoomLevel(m_geoMap->zoomLevel() + zoomLevel(event->pos()));
In principle, an element could be implemented with a single inheritance from QGraphicsItem and just draw the information we needed, but I thought that working with various graphic elements was more visual. Whoever wants to can change this class, after which it will consume a little less memory.
Tips & Tricks
In order for QGraphicsView to use OpenGL for rendering, you just need to set QGLWidget this way:
#ifndef QT_NO_OPENGL
	setViewport(new QGLWidget(QGLFormat(QGL::SampleBuffers)));
	viewport()->setMouseTracking(true);
	setRenderHint(QPainter::HighQualityAntialiasing, true);
#endif
graphicsView->setViewportUpdateMode(QGraphicsView::FullViewportUpdate);
graphicsScene->setItemIndexMethod(QGraphicsScene::NoIndex);
Conclusion
The article turned out to be large, and it seems to me that it can be expanded indefinitely. We did not consider the API for finding objects, laying out a route and working with the Landmark API (if anyone is interested, see Example 1 and 2 ). In this article we got acquainted with the Graphics View Framework , the main points when using the QtLocation API , I hope, learned to work with the Animation Frameworkand considered the implementation of the inertial movement of the map, various elements for managing the map and displaying text information. In general, it turned out to be a good component for displaying a map, which can be expanded to a full-fledged navigator. To try the application in action, you need to install the Qt SDK and copy the project for the Qt emulator. Finally, some useful links.
References
- Qt Videos
- Scene Graph: A Different Approach to Graphics in Qt
- Performance: Do Graphics the Right Way
- Qt GraphicsView in Depth
- Training Materials - Graphics View
- The whole project at gitorius
PS Comments on the article are welcome, it will be very useful for such an inexperienced author as me. Thanks in advance.