Integrate maps into your Android app
There are many different ideas that may require maps on mobile devices.
The capabilities of such devices allow you to pretty quickly get location information, graphic data and graphic transformations to display the volume of the landscape.
In this article I will tell you how to integrate the ability to view maps for mobile devices based on Android, using the example of Yandex Maps and Google Maps.
The functional libraries of these companies allows you to:
Let's start with a domestic manufacturer.
Library Yandex MapKit can be downloaded from GitHub'a , there is also a version for iOS.
But before we start using it, we need to get an API key, for this we go to the mail and write a letter to support@mobmaps.yandex.ru , indicating the request for an API key in the heading “Map Kit”. In response, you will receive a letter indicating additional links to the documentation, to the rules of use and actually with the key itself in the body of the letter (or they may not be sent, by the way).
While we wait for the letter, we take the library and attach it to the project.
After a long wait with a coffee mug, we get acquainted with the contents of the letter and information on the links, take the key and write the following code in your application layout:
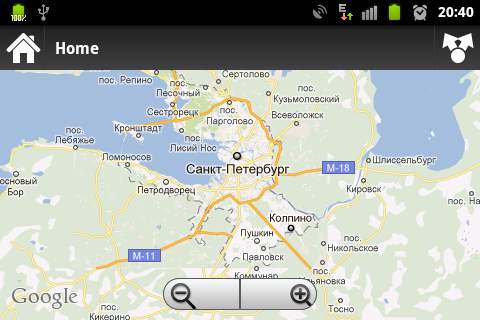
where instead of “you are key” we insert the received key. That's it, there is a map.
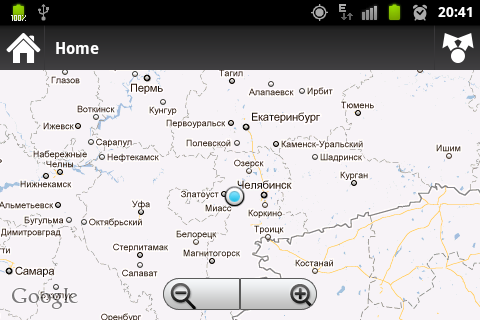
The code below shows how to move the map to a given coordinate and use the zoom:
Google
To use Google Maps, you need to perform much more sophisticated actions. I’ll tell you how to get a debug-key for using cards, but the process of getting the release version seems a bit confused, but I haven’t received release yet.
To get the debug-key, you need to find your keystore for debugging.
By default, the path will look something like this:
Then open the command line, go to the directory where Java is installed:
Then we write:
where keystore_path is your path to debug.keystore (caution, there may be problems with spaces in the path).
Then, in the same window, the md5 key will be displayed after "Certificate fingerprint (MD5)" .
We follow the link and register the code.
After that, Google will generate with the necessary code for the layout and embedded code, take it and paste it into our layout.
Next, we need to present our Activity in approximately the following form:
I note that the Activity should be inherited from MapActivity stored in com.google.android.maps.MapActivity.
And in the manifest register between the tags
And do not forget about the permission to access the Internet for the application:
Otherwise, the functionality of GoogleMaps and YandexMapKit is very similar:
As you can see, the process of integrating cards into applications is quite simple, and the range of use is quite wide.
More details can be found below.
To expand the example a bit, I’ll attach a piece of code:
But to use this code, the following permission should be specified in the manifest:
List of material used:
Hello, MapView (developers.android.com)
Google Maps receiving Api (temporary)
Getting the Google Maps API Key
Maps in your Android application
We are writing a simple application using GoogleMap and pumped SimpleCursorAdapter
Yandex Map Kit service conditions
Yandex Map Kit for Android OS in the examples (Maxim Khromtsov)
Maxim Khromtsov. Yandex MapKit for Android OS in examples (Video)
The capabilities of such devices allow you to pretty quickly get location information, graphic data and graphic transformations to display the volume of the landscape.
In this article I will tell you how to integrate the ability to view maps for mobile devices based on Android, using the example of Yandex Maps and Google Maps.
The functional libraries of these companies allows you to:
- Move map
- Zoom out
- Change map views
- Receive events from the card
Let's start with a domestic manufacturer.
Yandex
Library Yandex MapKit can be downloaded from GitHub'a , there is also a version for iOS.
But before we start using it, we need to get an API key, for this we go to the mail and write a letter to support@mobmaps.yandex.ru , indicating the request for an API key in the heading “Map Kit”. In response, you will receive a letter indicating additional links to the documentation, to the rules of use and actually with the key itself in the body of the letter (or they may not be sent, by the way).
While we wait for the letter, we take the library and attach it to the project.
After a long wait with a coffee mug, we get acquainted with the contents of the letter and information on the links, take the key and write the following code in your application layout:
where instead of “you are key” we insert the received key. That's it, there is a map.
The code below shows how to move the map to a given coordinate and use the zoom:
final MapView mMapView = (MapView) findViewById(R.id.map);
// Получаем MapController
MapController mMapController = mMapView.getMapController();
// Перемещаем карту на заданные координаты
mMapController.setPositionAnimationTo(new GeoPoint(60.113337, 55.151317));
mMapController.setZoomCurrent(15);
To use Google Maps, you need to perform much more sophisticated actions. I’ll tell you how to get a debug-key for using cards, but the process of getting the release version seems a bit confused, but I haven’t received release yet.
To get the debug-key, you need to find your keystore for debugging.
By default, the path will look something like this:
C:\Documents and Settings\\.android\debug.keystore Then open the command line, go to the directory where Java is installed:
cd C:\Program Files\Java\jre6\binThen we write:
keytool -list -alias androiddebugkey
 -keystore <путь_до_хранилища_ключей>.keystore
 -storepass android
 -keypass android
where keystore_path is your path to debug.keystore (caution, there may be problems with spaces in the path).
Then, in the same window, the md5 key will be displayed after "Certificate fingerprint (MD5)" .
We follow the link and register the code.
After that, Google will generate with the necessary code for the layout and embedded code, take it and paste it into our layout.
Next, we need to present our Activity in approximately the following form:
package com.fewpeople.geoplanner;
import android.os.Bundle;
import com.google.android.maps.MapActivity;
public class GeoMapActivity extends MapActivity {
    @Override
    public void onCreate(Bundle savedInstanceData) {
        super.onCreate(savedInstanceData);
        setContentView(R.layout.geomap);
    }
    @Override
    protected boolean isRouteDisplayed() {
        return false;
    }
}
I note that the Activity should be inherited from MapActivity stored in com.google.android.maps.MapActivity.
And in the manifest register between the tags
And do not forget about the permission to access the Internet for the application:
Otherwise, the functionality of GoogleMaps and YandexMapKit is very similar:
final MapView mMapView = (MapView) findViewById(R.id.mapview);
// Получаем MapController
MapController mMapController = mMapView.getController();
// Перемещаем карту на заданные координаты
mMapController.animateTo(new GeoPoint(60.113337, 55.151317));
mMapController.setZoom(15);
As you can see, the process of integrating cards into applications is quite simple, and the range of use is quite wide.
More details can be found below.
Defining your own position
To expand the example a bit, I’ll attach a piece of code:
final MapView cMapView = (MapView) findViewById(R.id.map);
// Получаем MapController
MapController cMapController = cMapView.getMapController();
// Включаем элементы интерфейса, контролирующие зум
cMapView.setBuiltInZoomControls(true);
// Создаём менеджер местоположения и "слушателя"
final LocationManager locationManager = (LocationManager) this.getSystemService(Context.LOCATION_SERVICE);
final LocationListener locationListener = new LocationListener() {
	@Override
	public void onStatusChanged(String provider, int status, Bundle extras) {}
	@Override
	public void onProviderEnabled(String provider) {}
	@Override
	public void onProviderDisabled(String provider) {}
	@Override
	public void onLocationChanged(Location location) {}
};
locationManager.requestLocationUpdates(LocationManager.NETWORK_PROVIDER, 0, 0, locationListener);
// создаём overlay для отображения своей позиции
cMyLocationOverlay = new MyLocationOverlay(this, cMapView);
cMyLocationOverlay.disableCompass();
cMyLocationOverlay.enableMyLocation();
cMapView.getOverlays().add(cMyLocationOverlay);
// зум
cMapController.setZoomCurrent(15);
// Получаем свои координаты (можно использовать LocationManager.NETWORK_PROVIDER, для иного способа определения позиции)
Location location = locationManager.getLastKnownLocation(LocationManager.GPS_PROVIDER);
// Перемещаем карту на заданные координаты
cMapController.animateTo(new GeoPoint((int) location.getLatitude() * 1000000, (int) location.getLongitude() * 1000000));
But to use this code, the following permission should be specified in the manifest:
List of material used:
Hello, MapView (developers.android.com)
Google Maps receiving Api (temporary)
Getting the Google Maps API Key
Maps in your Android application
We are writing a simple application using GoogleMap and pumped SimpleCursorAdapter
Yandex Map Kit service conditions
Yandex Map Kit for Android OS in the examples (Maxim Khromtsov)
Maxim Khromtsov. Yandex MapKit for Android OS in examples (Video)