How to insert a seal in a document so that the gods do not kill the kitten
Was with users of Elbathe dream is to embed images of seals and signatures in accounts, acts, invoices and other serious documents. Why not please the dreamers, we thought. Looking around, we realized that usually in such cases all the dirty work is blamed on the user (well, you know: “the picture should be 300 x 400 pixels, with high contrast, good resolution and a perfectly white background”). But judging by the experience of our team, which happens in a call center, even a simple download of the image from the camera plunges users into a deep depression, and they have to be rescued in godly ways, a la “insert a picture into the Word”. Of course, there can be no question of forcing users to clean prints in Photoshop - let them take pictures as they can, and Elba will do the rest for them!

If you are interested in knowing what needs to be done with a photograph taken with a telephone or a soap box to get a clear print and signature with a transparent background, read on.
Actually, we did not one, but three whole ways of processing stamps and signatures. This is not from a good life - some images are better cleaned in one way, some in another. We use all three in parallel, and then let the user select:
Any picture can be considered as a collection of points, each of which has a certain color. Based on this, our task looks very simple - take only those points that are part of the print or signature.
The idea is this: in some way we turn the original image into a black and white image (the background is black, the print is white), then we cross the set of all white dots (mask) with the original image. Those parts of the original image that coincide in coordinates with white dots are considered print. In more detail:
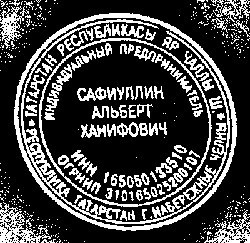
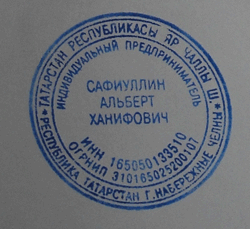
Here's what happens if you apply this as a mask to the original print:

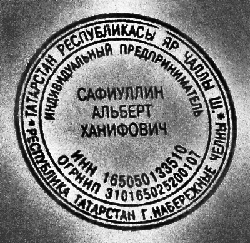
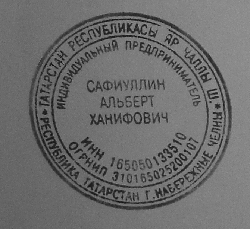
We threw away everything that is far enough from the image elements, and this, of course, is a success. But we did not remove the background details near the print. This happened because the background color near the image did not differ enough from the picture itself (low-quality photo, unevenly lit, etc.) and during our coarsening these areas were not assigned to the background. A very simple step immediately suggests itself - as much as possible, we will increase the difference between printing and background sections near the print. It is very simple to do this: increase the contrast. To do this, let's run the original photo through anti-aliasing and HistogramEqualization:
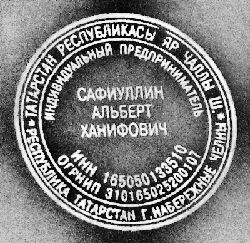
As a result, the background far from printing has become the same color as printing, but we don’t give a damn, we learned how to discard it and work only with areas of the background close to the picture. Then it’s a matter of technology, there will be no new ideas: gray, invert, coarsen.
So, we know how to clean everything except garbage near the seal, and have already seen what happens as a result. We just learned how to clean garbage near the print well, now we apply what we got to our first result:

Already not bad. It is clear that you need to slightly blur, raise the contrast, make the background transparent, etc.
It seemed that the goal was achieved, but when we started to take examples of stamps and signatures from the Internet, we were faced with a new problem. If our algorithm worked quite tolerably for most seals, then with signatures everything was much worse: the level of contrast in photos was sometimes such that searching for edges simply lost half the lines, and lowering the bar for searching is also dangerous - we risk getting a bunch of “garbage” in addition.
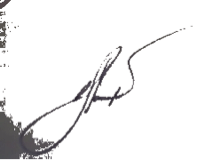
We decided, why do we need this search for the edges and other bells and whistles? In the end, a signature is a very simple thing: a few lines drawn with a dark pen on light paper.
At first glance, to separate the dark from the light is a small science. To begin with, the algorithm, code-named “who is not with us is against us” looked very simple: we sort through all the points in which the brightness is higher than gray, write them to the “background” and destroy them. All that is darker is left, for the "pen".
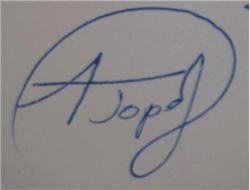
They drove out on the first signature that came across - cheers, it’s cool!

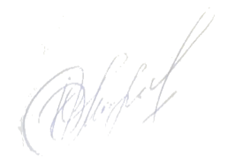
They drove to the second - a complete file.


For some reason, the interface designers did not approve the first thought - to write on the upload form “take photos more contrast, boys” and to score. I had to turn on the brain. We figured it out, since it works on some photos, but not on others, you just need to normalize the photos yourself. We took a photo, walked through all the points, built a simple histogram: for each of 256 possible brightnesses, the number of points of this brightness was trite. We found the minimum brightness, then the maximum, chose the point "somewhere in the middle" and cut out the background.
Hooray, we said, and started to look for joy with examples of trash signatures. Well, to find as much evidence as possible, what good fellows we are. Life, as always, turned out to be more interesting: literally in the second photo we were again waiting for a hard file! No matter how we choose the very point “somewhere in the middle”, either the background remained in the corner, or part of the signature disappeared.
Resignedly looking at the result, they opened the original and began to think.
There wasn’t any puzzle, just the light went out so that the background on one edge of the photo was darker than the pen on the other (as it turned out later, this happens quite often in real life). Obviously, in this situation, the desired point simply does not exist.
We realized that further twisting the parameters is pointless. They began to reason logically: “Here we look at the photo and we see the signature perfectly. So the contrast is sufficient. At least local contrast. ”
When the word “local” sharply revived and decided: since for the whole picture you cannot select a point like “the pen is darker, the background is brighter”, then we will try to do this on part of the image!
They were divided into rectangles (experimentally we were satisfied with a 10x10 grid) and applied the algorithm to each cell separately. Everything would be fine, but part of the cells turned out to be filled exclusively with the background. Here it’s easier - since there is nothing besides the background, then the local contrast is extremely low. This means that the brightest point and the darkest point in the histogram is very close.
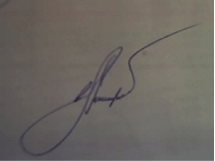
It seems to work out.

We take a separate cell, build a histogram from it, look at the left edge (minimum brightness) and the right edge (maximum brightness). Then we take the delta, which is the contrast. If the contrast is less than a certain value (at least, it is calculated on the basis of the overall contrast of the picture), then we consider the whole cell as the background and throw out the excess. If the contrast is greater, we determine the point of "section" and cut off everything that is brighter.
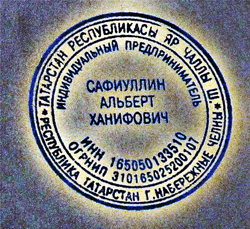
Two options seemed a little to us, we decided to add a third - a simple processing of “almost perfect” photos in which the entire background is white (well, or almost white). To do this, they knocked out all the pixels lighter than 95% of the maximum brightness and cut off the fields.
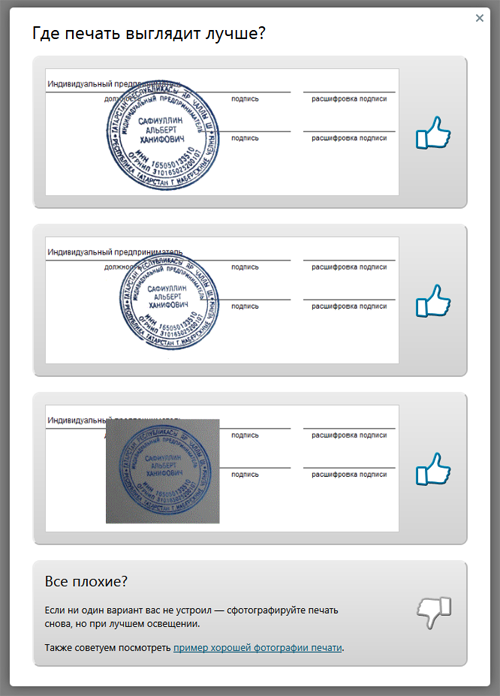
As a result, as we said at the beginning, the user selects one of three options. In case none of the options came up (which is extremely rare), we show instructions on how to press the “masterpiece” button on the camera correctly.
You can try it yourself , even if you don’t have a print, then you probably know how to sign it;)
If you are interested in knowing what needs to be done with a photograph taken with a telephone or a soap box to get a clear print and signature with a transparent background, read on.
Actually, we did not one, but three whole ways of processing stamps and signatures. This is not from a good life - some images are better cleaned in one way, some in another. We use all three in parallel, and then let the user select:
Method One: The Scientific Approach
Any picture can be considered as a collection of points, each of which has a certain color. Based on this, our task looks very simple - take only those points that are part of the print or signature.
The idea is this: in some way we turn the original image into a black and white image (the background is black, the print is white), then we cross the set of all white dots (mask) with the original image. Those parts of the original image that coincide in coordinates with white dots are considered print. In more detail:
- Take a picture
- Translate to gray
- We start the search for edges.
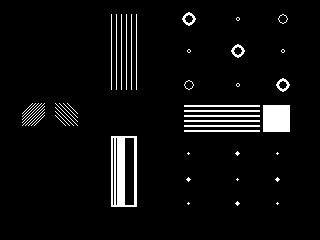
Here we need to explain what the edges are and how we look for them. In our picture there are areas of uniform color (inscriptions and circles) and the edges themselves are the boundaries of these areas. In many graphics packages and libraries, there is a standard “Sobel” filter that selects horizontal and vertical edges separately (more specifically in the gray image). Here is a good example of selecting edges according to Sobel: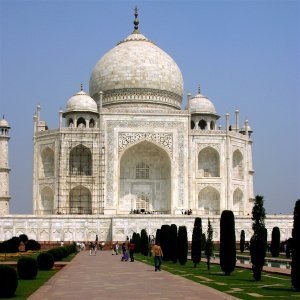
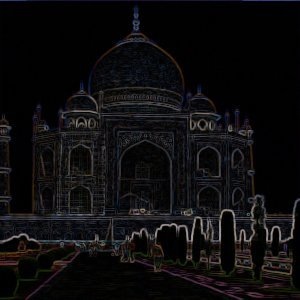
And here is how the edges were found in our image: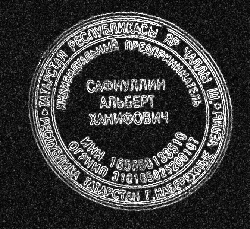
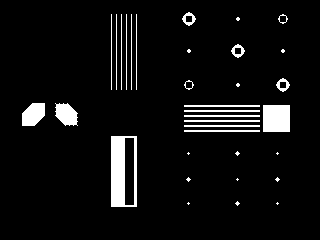
- So, we got the print outline, but it is heterogeneous: in addition to black and white areas (background and print), there are quite a few dots that are close in color to the background or print. By announcing such points as a background or image, we will immediately improve the quality of recognition. We coarsen our picture:
- After all these transformations, we pretty well selected the print area. But throughout the picture there is garbage - “lonely” white dots. Lonely is a keyword, there is always a lot of black around. Now we will reduce the resolution of our image, instead of each square of 20 × 20 points we will make one big point. Its color is defined as the average of the colors of all the points that entered this square. White lonely dots inevitably turn black. And after that, we will again coarsen the picture:


- As a result, all the trash in the form of single points disappeared, we well identified the area in which the seal is guaranteed to be. In addition, we have edges (remember, we found “according to Sobel”). Just cross the edges with what you just received.

Here's what happens if you apply this as a mask to the original print:
We threw away everything that is far enough from the image elements, and this, of course, is a success. But we did not remove the background details near the print. This happened because the background color near the image did not differ enough from the picture itself (low-quality photo, unevenly lit, etc.) and during our coarsening these areas were not assigned to the background. A very simple step immediately suggests itself - as much as possible, we will increase the difference between printing and background sections near the print. It is very simple to do this: increase the contrast. To do this, let's run the original photo through anti-aliasing and HistogramEqualization:
As a result, the background far from printing has become the same color as printing, but we don’t give a damn, we learned how to discard it and work only with areas of the background close to the picture. Then it’s a matter of technology, there will be no new ideas: gray, invert, coarsen.
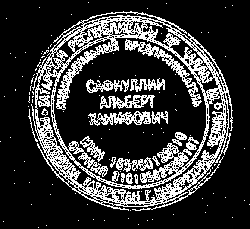
So, we know how to clean everything except garbage near the seal, and have already seen what happens as a result. We just learned how to clean garbage near the print well, now we apply what we got to our first result:
Already not bad. It is clear that you need to slightly blur, raise the contrast, make the background transparent, etc.
True, we found a problem with high-resolution photographs (the race for camera megapixels, unfortunately, did not spare the owners of the phones either) - wide (10, and sometimes 100 pixels) print lines began to break up as a result of searching the edges into two separate lines.
To eliminate such minor troubles, you can use closing. In our case, the closure will lead to the fact that all sections of the background between the paired strokes will be smeared, but only if the distance between the strokes is not too large. Here is an example of the closure operation from the documentation for the AForge.Closing filter:
It can be seen that the cavity cannot smear the closure for more than several pixels in a row. And the size of the cavity with us depends on the resolution with which the seal was photographed.
It would seem - well, we will bring the resolution in accordance with the one we need (a specific value will be stupidly experimentally set). However, the problem is that people can (and love) take pictures of prints with huge white margins.
After compressing the image to the “optimal size”, we will get a tiny print in the corner of the photo.
As a result, we decided not to bother and run the algorithm 2 times. The first time we will remove large garbage (and, possibly, small parts of the seal), and also understand where the print is in the picture. After that, we again take the original image, cut out the place we already knew with print, scale it to the desired size, and again run the algorithm for cleaning the background.
It seemed that the goal was achieved, but when we started to take examples of stamps and signatures from the Internet, we were faced with a new problem. If our algorithm worked quite tolerably for most seals, then with signatures everything was much worse: the level of contrast in photos was sometimes such that searching for edges simply lost half the lines, and lowering the bar for searching is also dangerous - we risk getting a bunch of “garbage” in addition.
Method Two: The Great Bicycle Invention
We decided, why do we need this search for the edges and other bells and whistles? In the end, a signature is a very simple thing: a few lines drawn with a dark pen on light paper.
At first glance, to separate the dark from the light is a small science. To begin with, the algorithm, code-named “who is not with us is against us” looked very simple: we sort through all the points in which the brightness is higher than gray, write them to the “background” and destroy them. All that is darker is left, for the "pen".
They drove out on the first signature that came across - cheers, it’s cool!
They drove to the second - a complete file.
For some reason, the interface designers did not approve the first thought - to write on the upload form “take photos more contrast, boys” and to score. I had to turn on the brain. We figured it out, since it works on some photos, but not on others, you just need to normalize the photos yourself. We took a photo, walked through all the points, built a simple histogram: for each of 256 possible brightnesses, the number of points of this brightness was trite. We found the minimum brightness, then the maximum, chose the point "somewhere in the middle" and cut out the background.
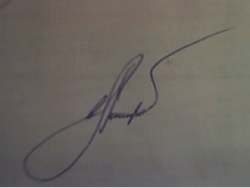
Hooray, we said, and started to look for joy with examples of trash signatures. Well, to find as much evidence as possible, what good fellows we are. Life, as always, turned out to be more interesting: literally in the second photo we were again waiting for a hard file! No matter how we choose the very point “somewhere in the middle”, either the background remained in the corner, or part of the signature disappeared.
Resignedly looking at the result, they opened the original and began to think.
There wasn’t any puzzle, just the light went out so that the background on one edge of the photo was darker than the pen on the other (as it turned out later, this happens quite often in real life). Obviously, in this situation, the desired point simply does not exist.
We realized that further twisting the parameters is pointless. They began to reason logically: “Here we look at the photo and we see the signature perfectly. So the contrast is sufficient. At least local contrast. ”
When the word “local” sharply revived and decided: since for the whole picture you cannot select a point like “the pen is darker, the background is brighter”, then we will try to do this on part of the image!
They were divided into rectangles (experimentally we were satisfied with a 10x10 grid) and applied the algorithm to each cell separately. Everything would be fine, but part of the cells turned out to be filled exclusively with the background. Here it’s easier - since there is nothing besides the background, then the local contrast is extremely low. This means that the brightest point and the darkest point in the histogram is very close.
It seems to work out.
We take a separate cell, build a histogram from it, look at the left edge (minimum brightness) and the right edge (maximum brightness). Then we take the delta, which is the contrast. If the contrast is less than a certain value (at least, it is calculated on the basis of the overall contrast of the picture), then we consider the whole cell as the background and throw out the excess. If the contrast is greater, we determine the point of "section" and cut off everything that is brighter.
The third way, the final
Two options seemed a little to us, we decided to add a third - a simple processing of “almost perfect” photos in which the entire background is white (well, or almost white). To do this, they knocked out all the pixels lighter than 95% of the maximum brightness and cut off the fields.
As a result, as we said at the beginning, the user selects one of three options. In case none of the options came up (which is extremely rare), we show instructions on how to press the “masterpiece” button on the camera correctly.
You can try it yourself , even if you don’t have a print, then you probably know how to sign it;)