We make the Kinect power adapter from improvised means
I got a Kinect sensor in my hands, and I wanted to work with it on a PC. What could be simpler: insert USB into the computer port, install drivers and begin to understand this wonderful technique?
There it was. The previously unprecedented orange connector flatly refused to climb anywhere without a hammer, and a power adapter with a USB adapter was not provided in the kit (this copy of the sensor came in a bundle with a console).
It was not so easy to get the original adapter: separately it is sold only in the USA for $ 35, not including delivery, in addition, the PSU is designed only for 110V. Those who bought a full sensor kit also did not find an unclaimed adapter: they turned out to be an order of magnitude more willing to buy it.
There was only one way out: make the adapter yourself.
First of all, I found the pinout of the connector:

It's not difficult to make out that + 5V, D-, D +, Gnd - belong to USB, and the other four, + 12V and Gnd - to power. It was decided to use a computer PSU as a power source, which, by a strange combination of circumstances, was able to produce + 12V and had a reserve of 1A, so necessary for the kinekt.
The last question remains: how to connect all this to the Kinect connector without cutting it off?
The first thing that came to mind was to use polymer clay to create the mating part of the connector of the desired shape. Taking a closer look, I noticed the similarity of the four contacts on each side with the USB contacts, it was decided to use them as a basis.
List of necessary:
USB-A plug, 2 pcs.
any resistor 0.5-1 watts
USB connector of any type, for connecting to a PC
MOLEX connector (or FDD, PW11-4M)
wires (cable for 6-8 conductors)
file
soldering iron and related accessories
superglue
I apologize for the low quality of the photo, it’s better to take a mobile phone very difficult.
We open two connectors: We


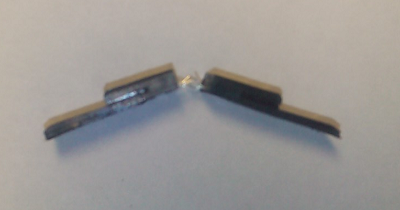
reduce the thickness of the plastic with a file until both parts fit back into the kinekt connector:

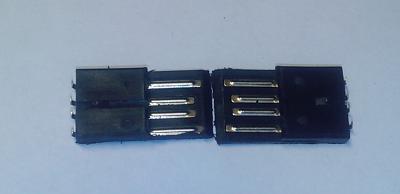
We file one edge of the connector so that the contact pads 6-9 coincide:
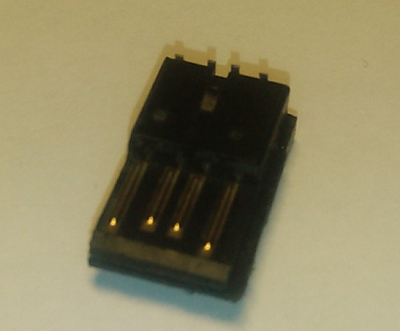
Glue the two halves, aligning along the sawed edge: It
remains to add a pin for pin 5, we take a leg from the resistor and fuse it to the appropriate place: The
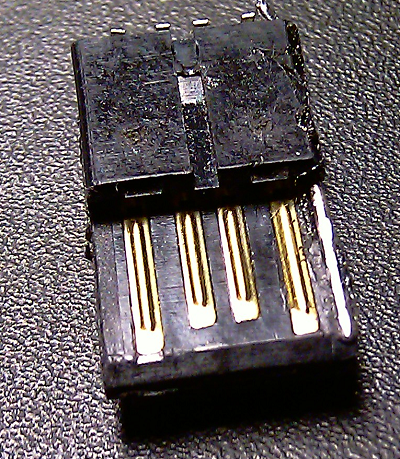
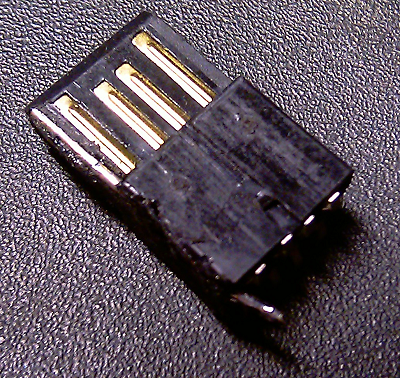
connector is ready. If it turns out that it hangs freely and there is no reliable contact, you can solder tin on the contact pads to the desired thickness.
We wire the appropriate contacts of the freshly created connector, power connector and USB :
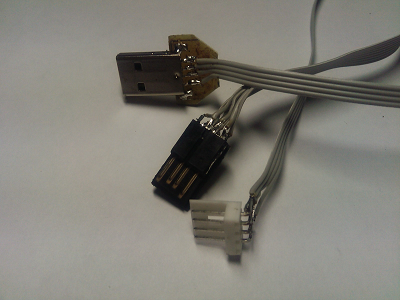
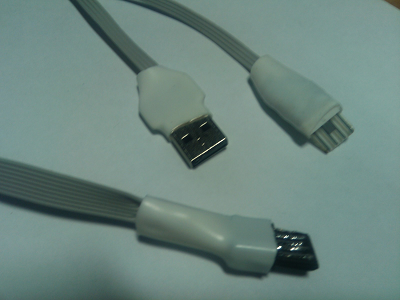
Check again that everything is connected correctly. Add a little insulating tape and heat shrink:
Connect the power connector instead of the long-unused floppy, connect the adapter to the kinekt, insert the USB into the PC ...
The system happily announces the connection of new devices. You can work!
For the test, I downloaded the set for Windows , the drivers were installed, the demo starts. The picture is transmitted, the data is processed.

What can be added?
This adapter can also be used to connect the sensor to older versions of the Xbox 360. In order not to constantly rearrange usb from the computer to the console and vice versa, you can set the switch.
There it was. The previously unprecedented orange connector flatly refused to climb anywhere without a hammer, and a power adapter with a USB adapter was not provided in the kit (this copy of the sensor came in a bundle with a console).
It was not so easy to get the original adapter: separately it is sold only in the USA for $ 35, not including delivery, in addition, the PSU is designed only for 110V. Those who bought a full sensor kit also did not find an unclaimed adapter: they turned out to be an order of magnitude more willing to buy it.
There was only one way out: make the adapter yourself.
What is required
First of all, I found the pinout of the connector:
It's not difficult to make out that + 5V, D-, D +, Gnd - belong to USB, and the other four, + 12V and Gnd - to power. It was decided to use a computer PSU as a power source, which, by a strange combination of circumstances, was able to produce + 12V and had a reserve of 1A, so necessary for the kinekt.
The last question remains: how to connect all this to the Kinect connector without cutting it off?
The first thing that came to mind was to use polymer clay to create the mating part of the connector of the desired shape. Taking a closer look, I noticed the similarity of the four contacts on each side with the USB contacts, it was decided to use them as a basis.
List of necessary:
USB-A plug, 2 pcs.
any resistor 0.5-1 watts
USB connector of any type, for connecting to a PC
MOLEX connector (or FDD, PW11-4M)
wires (cable for 6-8 conductors)
file
soldering iron and related accessories
superglue
We collect
I apologize for the low quality of the photo, it’s better to take a mobile phone very difficult.
We open two connectors: We
reduce the thickness of the plastic with a file until both parts fit back into the kinekt connector:
We file one edge of the connector so that the contact pads 6-9 coincide:
Glue the two halves, aligning along the sawed edge: It
remains to add a pin for pin 5, we take a leg from the resistor and fuse it to the appropriate place: The
connector is ready. If it turns out that it hangs freely and there is no reliable contact, you can solder tin on the contact pads to the desired thickness.
We wire the appropriate contacts of the freshly created connector, power connector and USB :
Check again that everything is connected correctly. Add a little insulating tape and heat shrink:
Connect the power connector instead of the long-unused floppy, connect the adapter to the kinekt, insert the USB into the PC ...
Works!
The system happily announces the connection of new devices. You can work!
For the test, I downloaded the set for Windows , the drivers were installed, the demo starts. The picture is transmitted, the data is processed.
What can be added?
This adapter can also be used to connect the sensor to older versions of the Xbox 360. In order not to constantly rearrange usb from the computer to the console and vice versa, you can set the switch.