Install Windows 7 beta on Virtual PC 2007
i. I want to immediately warn that installation in a virtual environment takes significantly longer than installing in a physical environment - on real hardware.
ii. It is also worth noting that everything works much slower. The faster the processor and the more available physical and dedicated memory for the guest system, the faster, but still not as fast as we would like.
iii. However, for those who do not want to install Win7 (beta after all) directly on the train, fearing that something will go wrong during the upgrade or as a result of installing parallel to the main OS, the decision to use virtualization may be the most suitable for “see, to try. ” In the end, to tear down a system, just delete a couple of files.
iv. Aero under Virtual PC does not work. Although you can find recommendations on the network how to fix this (through editing the registry or using RDC from Windows Vista with Aero enabled) and even screenshots with Aero running, I still couldn’t achieve the desired result.
0. If you do not have Virtual PC yet, download the latest version - Virtual PC 2007 SP1 .
1. If you have an outdated version, see above :) The latest version is 6.0.192.0, the installed version number can be found here Help -> About Virtual PC ... -> About 2. We find the image with Windows 7 beta , we need 32-bit version. 3. Create a new virtual machine. From the Virtual PC console -> New ... -> Next -> Create a Virtual Machine -> Next -> Set the name (usually in the same folder where the image with the disk will be) -> Next


We select the type of operating system Windows Vista -> Next -> Next (If necessary, the amount of memory can be increased. It is important that this amount of memory be free at the time the program starts. It is usually recommended to set no more than 50% of the size of the installed physical memory.) 4. Create new virtual disk Choose the creation of a new virtual disk (A new virtual hard disk) -> Next. The name for the disk will be substituted automatically, the disk size can be changed (it changes dynamically, only the maximum size is set), 16 GB should be enough. Next Finish 5. Our system appeared in the console. Select it, click Start.


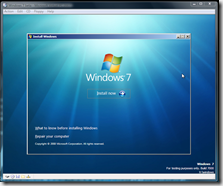
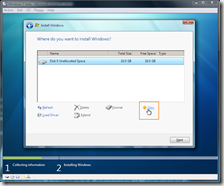
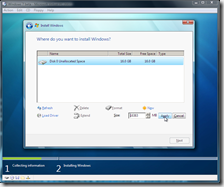
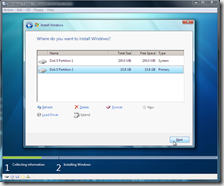
6. Connect the image with Windows 7 beta. CD -> Capture ISO Image ... Reboot the virtual machine Actions -> Ctrl + Alt + Del or Right Alt + Del from the virtual machine. 7. The standard installation begins 8. Select Custom (Advanced) installation. The disk has not yet been marked up, select Drive options (advanced). Select New, Apply. A window appears with a proposal to create an additional section (200 MB) for system files, we agree. We get two partitions on the disk. Next 9. Next, the installation continues in automatic mode ... I, unlike about an hour-long installation on real hardware, in a virtual environment, it took 3-4 hours, if not more ... so stock up on popcorn :)





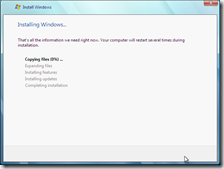

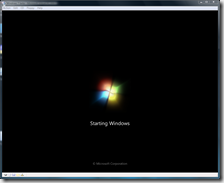
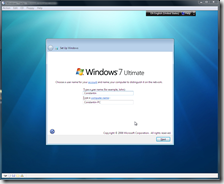
10. Installation of the post is over :) The default setting remains: user, clock, personal settings ... and we will get Windows 7 on Virtual PC 2007. 11. The virtual disk with Win 7 takes 5.37 GB. 12. Next, it is recommended to install Virtual Machine Additions , this will not only allow you to freely move the mouse between the guest system and the main one, but it will also somewhat speed up the system by improving integration. Actions -> Install or Update Virtual Machine Additions Virtual PC will offer to insert a CD image with the necessary additions. If the installation does not start automatically, you must start it manually. I hope that finding the right file to run the big work does not amount to;)

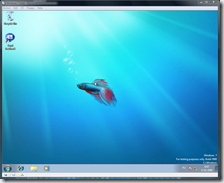
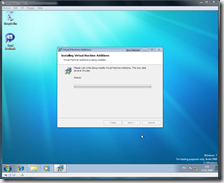
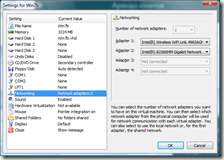
After installation, it remains to reboot the virtualized system - and you can begin to enjoy life. ps To connect to the Internet, I had to manually register the necessary ip. Do not forget to make sure that the necessary network card is added in the Settings: In the next series : how to start the resulting image in a real environment.


ii. It is also worth noting that everything works much slower. The faster the processor and the more available physical and dedicated memory for the guest system, the faster, but still not as fast as we would like.
iii. However, for those who do not want to install Win7 (beta after all) directly on the train, fearing that something will go wrong during the upgrade or as a result of installing parallel to the main OS, the decision to use virtualization may be the most suitable for “see, to try. ” In the end, to tear down a system, just delete a couple of files.
iv. Aero under Virtual PC does not work. Although you can find recommendations on the network how to fix this (through editing the registry or using RDC from Windows Vista with Aero enabled) and even screenshots with Aero running, I still couldn’t achieve the desired result.
0. If you do not have Virtual PC yet, download the latest version - Virtual PC 2007 SP1 .
1. If you have an outdated version, see above :) The latest version is 6.0.192.0, the installed version number can be found here Help -> About Virtual PC ... -> About 2. We find the image with Windows 7 beta , we need 32-bit version. 3. Create a new virtual machine. From the Virtual PC console -> New ... -> Next -> Create a Virtual Machine -> Next -> Set the name (usually in the same folder where the image with the disk will be) -> Next


We select the type of operating system Windows Vista -> Next -> Next (If necessary, the amount of memory can be increased. It is important that this amount of memory be free at the time the program starts. It is usually recommended to set no more than 50% of the size of the installed physical memory.) 4. Create new virtual disk Choose the creation of a new virtual disk (A new virtual hard disk) -> Next. The name for the disk will be substituted automatically, the disk size can be changed (it changes dynamically, only the maximum size is set), 16 GB should be enough. Next Finish 5. Our system appeared in the console. Select it, click Start.


6. Connect the image with Windows 7 beta. CD -> Capture ISO Image ... Reboot the virtual machine Actions -> Ctrl + Alt + Del or Right Alt + Del from the virtual machine. 7. The standard installation begins 8. Select Custom (Advanced) installation. The disk has not yet been marked up, select Drive options (advanced). Select New, Apply. A window appears with a proposal to create an additional section (200 MB) for system files, we agree. We get two partitions on the disk. Next 9. Next, the installation continues in automatic mode ... I, unlike about an hour-long installation on real hardware, in a virtual environment, it took 3-4 hours, if not more ... so stock up on popcorn :)


10. Installation of the post is over :) The default setting remains: user, clock, personal settings ... and we will get Windows 7 on Virtual PC 2007. 11. The virtual disk with Win 7 takes 5.37 GB. 12. Next, it is recommended to install Virtual Machine Additions , this will not only allow you to freely move the mouse between the guest system and the main one, but it will also somewhat speed up the system by improving integration. Actions -> Install or Update Virtual Machine Additions Virtual PC will offer to insert a CD image with the necessary additions. If the installation does not start automatically, you must start it manually. I hope that finding the right file to run the big work does not amount to;)


After installation, it remains to reboot the virtualized system - and you can begin to enjoy life. ps To connect to the Internet, I had to manually register the necessary ip. Do not forget to make sure that the necessary network card is added in the Settings: In the next series : how to start the resulting image in a real environment.


