Braille keyboard
- Transfer
- Tutorial

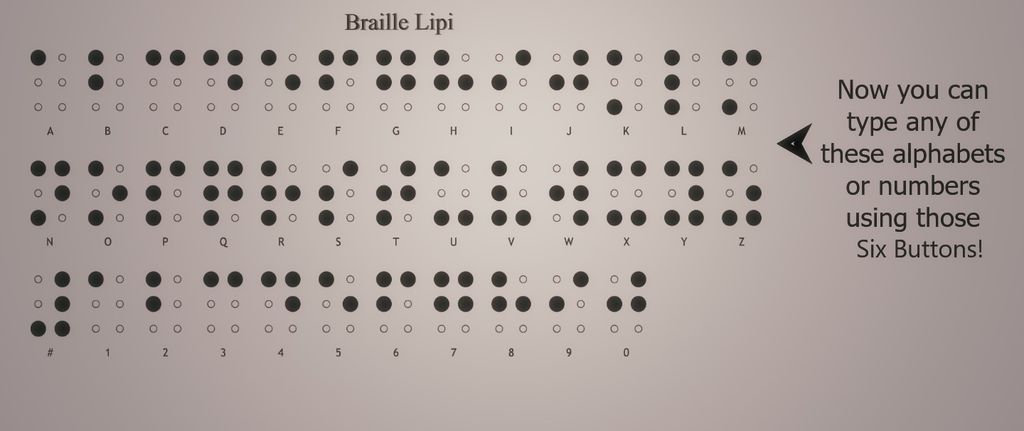
Braille can not only display, but also enter information. In the classic 6-bit version of this font, the character consists of two columns of three bits each. In the Braille keyboard, both columns are expanded in one row, three bits per hand. The proposed homemade keyboard of this type voices the entered characters and simultaneously sends them to the serial monitor, from where the text can then be copied to another application for subsequent editing.
Forgive me everyone who considered this a bad manners, but the author performed the scheme in something Fritzing. In addition, he forgot to add capacitors to 7805 to prevent self-excitation - they must be supplied. But the way the image of the circuit did not affect the performance of the design, perfectly coping with its functions.

The numbers in the braille are similar to the codes for letters A - J, each number must be preceded by a special sign “numbers will come now”:
But for the keyboard to sound and transmit numbers instead of letters to the serial monitor, it must be switched to the appropriate mode by a switch connected to one of the inputs Arduino is similar to buttons. Both the buttons and the switch are equipped with pull-up resistors (1 kOhm).
Files for voicing characters are stored on a memory card, it must be formatted in FAT32:
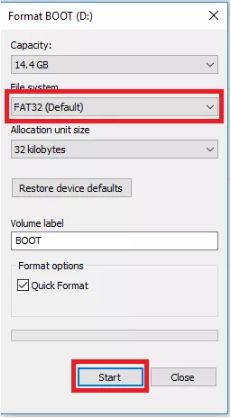
In Linux, it is .
Then put the files downloaded from here on it . And in Arduino, fill in the sketch , after changing the file extension from TXT to INO.
To receive dialed characters, you can use both the Arduino IDE serial monitor and any terminal emulator. The author prefers CoolTerm for the ability to immediately write the entered characters in a text file, but not only this program can. Parameters: 9600 baud, 8 bits, no parity, one stop bit, DTR and RTS included. When everything works, you can try typing some text:

A brief video instruction and checking the keyboard:
In order to be able to immediately type text on such a keyboard in any program, the firmware must be modified by adding the function of the HID device. But not all Arduino-compatible boards support this mode.