Splunk Universal Forwarder in the Docker as a system logs gatherer
- Tutorial

Splunk is the most known commercial product to gather and analyze logs. Even now, when Splunk has stopped sales in the Russian Federation. And that's not a reason not to write the how-to articles about this product.
Goal: gather system's logs from the Docker nodes without changing the host's machine configuration
Let's start with the official way which seems weird with the Docker using.
Docker hub link
Configuration steps:
1. Pull image
$ docker pull splunk/universalforwarder:latest2. Run container with parameters you need
$ docker run -d -p 9997:9997 -e 'SPLUNK_START_ARGS=--accept-license' -e 'SPLUNK_PASSWORD=' splunk/universalforwarder:latest 3. Log into container
docker exec -it /bin/bash Then we should visit Docs page.
And configure container after it starts:
./splunk add forward-server :
./splunk add monitor /var/log
./splunk restart
Wait. What?
But this is not the last surprise. If you run official container in the interactive mode, you will:
Some disappointment
$ docker run -it -p 9997:9997 -e 'SPLUNK_START_ARGS=--accept-license' -e 'SPLUNK_PASSWORD=password' splunk/universalforwarder:latest
PLAY [Run default Splunk provisioning] *******************************************************************************************************************************************************************************************************
Tuesday 09 April 2019  13:40:38 +0000 (0:00:00.096)       0:00:00.096 *********
TASK [Gathering Facts] ***********************************************************************************************************************************************************************************************************************
ok: [localhost]
Tuesday 09 April 2019  13:40:39 +0000 (0:00:01.520)       0:00:01.616 *********
TASK [Get actual hostname] *******************************************************************************************************************************************************************************************************************
changed: [localhost]
Tuesday 09 April 2019  13:40:40 +0000 (0:00:00.599)       0:00:02.215 *********
Tuesday 09 April 2019  13:40:40 +0000 (0:00:00.054)       0:00:02.270 *********
TASK [set_fact] ******************************************************************************************************************************************************************************************************************************
ok: [localhost]
Tuesday 09 April 2019  13:40:40 +0000 (0:00:00.075)       0:00:02.346 *********
Tuesday 09 April 2019  13:40:40 +0000 (0:00:00.067)       0:00:02.413 *********
Tuesday 09 April 2019  13:40:40 +0000 (0:00:00.060)       0:00:02.473 *********
Tuesday 09 April 2019  13:40:40 +0000 (0:00:00.051)       0:00:02.525 *********
Tuesday 09 April 2019  13:40:40 +0000 (0:00:00.056)       0:00:02.582 *********
Tuesday 09 April 2019  13:40:41 +0000 (0:00:00.216)       0:00:02.798 *********
included: /opt/ansible/roles/splunk_common/tasks/change_splunk_directory_owner.yml for localhost
Tuesday 09 April 2019  13:40:41 +0000 (0:00:00.087)       0:00:02.886 *********
TASK [splunk_common : Update Splunk directory owner] *****************************************************************************************************************************************************************************************
ok: [localhost]
Tuesday 09 April 2019  13:40:41 +0000 (0:00:00.324)       0:00:03.210 *********
included: /opt/ansible/roles/splunk_common/tasks/get_facts.yml for localhost
Tuesday 09 April 2019  13:40:41 +0000 (0:00:00.094)       0:00:03.305 *********
etc...
Great. Docker image doesn't contain artifact. Thus, every time you run the container, you will download binaries, unpack it, configure it.
What about docker-way? Where is it?
No, thanks. We will choose the right way. What if we execute all the commands during build stage? Let's go on!
To skip the boring part, there is a final image:
Dockerfile
# Depends on your preferences
FROM centos:7
# Define env variables only once and don't define it any more
ENV SPLUNK_HOME /splunkforwarder
ENV SPLUNK_ROLE splunk_heavy_forwarder
ENV SPLUNK_PASSWORD changeme
ENV SPLUNK_START_ARGS --accept-license
# Install required packages
# wget - to download artifacts
# expect - for the first run step of Splunk for build stage
# jq - using in the shell scripts
RUN yum install -y epel-release \
    && yum install -y wget expect jq
# Download, unpack, remove
RUN wget -O splunkforwarder-7.2.4-8a94541dcfac-Linux-x86_64.tgz 'https://www.splunk.com/bin/splunk/DownloadActivityServlet?architecture=x86_64&platform=linux&version=7.2.4&product=universalforwarder&filename=splunkforwarder-7.2.4-8a94541dcfac-Linux-x86_64.tgz&wget=true' \
    && wget -O docker-18.09.3.tgz 'https://download.docker.com/linux/static/stable/x86_64/docker-18.09.3.tgz' \
    && tar -xvf splunkforwarder-7.2.4-8a94541dcfac-Linux-x86_64.tgz \
    && tar -xvf docker-18.09.3.tgz  \
    && rm -f splunkforwarder-7.2.4-8a94541dcfac-Linux-x86_64.tgz \
    && rm -f docker-18.09.3.tgz
# Everything is simple with shell scripts, but inputs.conf, splunkclouduf.spl and first_start.sh should have an explanation. I'll tell more about it below.
COPY [ "inputs.conf", "docker-stats/props.conf", "/splunkforwarder/etc/system/local/" ]
COPY [ "docker-stats/docker_events.sh", "docker-stats/docker_inspect.sh", "docker-stats/docker_stats.sh", "docker-stats/docker_top.sh", "/splunkforwarder/bin/scripts/" ]
COPY splunkclouduf.spl /splunkclouduf.spl
COPY first_start.sh /splunkforwarder/bin/
#  Grant execute permissions, add user, execute pre-configuration
RUN chmod +x /splunkforwarder/bin/scripts/*.sh \
    && groupadd -r splunk \
    && useradd -r -m -g splunk splunk \
    && echo "%sudo ALL=NOPASSWD:ALL" >> /etc/sudoers \
    && chown -R splunk:splunk $SPLUNK_HOME \
    && /splunkforwarder/bin/first_start.sh \
    && /splunkforwarder/bin/splunk install app /splunkclouduf.spl -auth admin:changeme \
    && /splunkforwarder/bin/splunk restart
# Copy init scripts
COPY [ "init/entrypoint.sh", "init/checkstate.sh", "/sbin/" ]
# It depends. If you need it locally - go on.
VOLUME [ "/splunkforwarder/etc", "/splunkforwarder/var" ]
HEALTHCHECK --interval=30s --timeout=30s --start-period=3m --retries=5 CMD /sbin/checkstate.sh || exit 1
ENTRYPOINT [ "/sbin/entrypoint.sh" ]
CMD [ "start-service" ]
So, the content of
first_start.sh
#!/usr/bin/expect -f
set timeout -1
spawn /splunkforwarder/bin/splunk start --accept-license
expect "Please enter an administrator username: "
send -- "admin\r"
expect "Please enter a new password: "
send -- "changeme\r"
expect "Please confirm new password: "
send -- "changeme\r"
expect eof
During the first start Splunk will ask for login/password, BUT credentials can be used only for admin's commands execution in this particular installation, inside the container. In our case, we want just run the container and everything should work without any actions. It might look like «hardcode», but I haven't found any other solutions.
Next step of build is
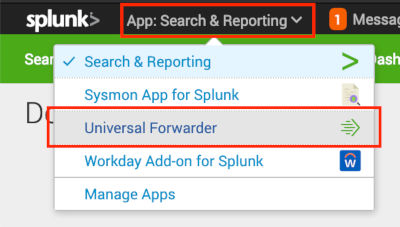
/splunkforwarder/bin/splunk install app /splunkclouduf.spl -auth admin:changemesplunkclouduf.spl — This is Splunk Universal Forwarder credentials file, which you can download via UI.
Which buttons should I press (pictures)


It is a simple archive which you can easily unpack. It contains — certificates and password to connect to our SplunkCloud; outputs.conf with the list of input nodes. This file will be actual unless you re-install Splunk installation or add new input nodes if it is on-premise. Anyway, nothing serious will happen if you put it to the image.
The last step — restart. Yes, to apply the configuration, it needs to be restarted.
Add the logs into inputs.conf which we want to send to Splunk. If you deliver configuration via Puppet, you don't need to add this config to the image. Just keep in mind that the config file should be mounted.
What are the docker stat scripts? You could find the solution on the Github from outcoldman, I picked scripts from there and updated it to let it work with actual versions of Docker (ce-17.*) and Splunk (7.*).
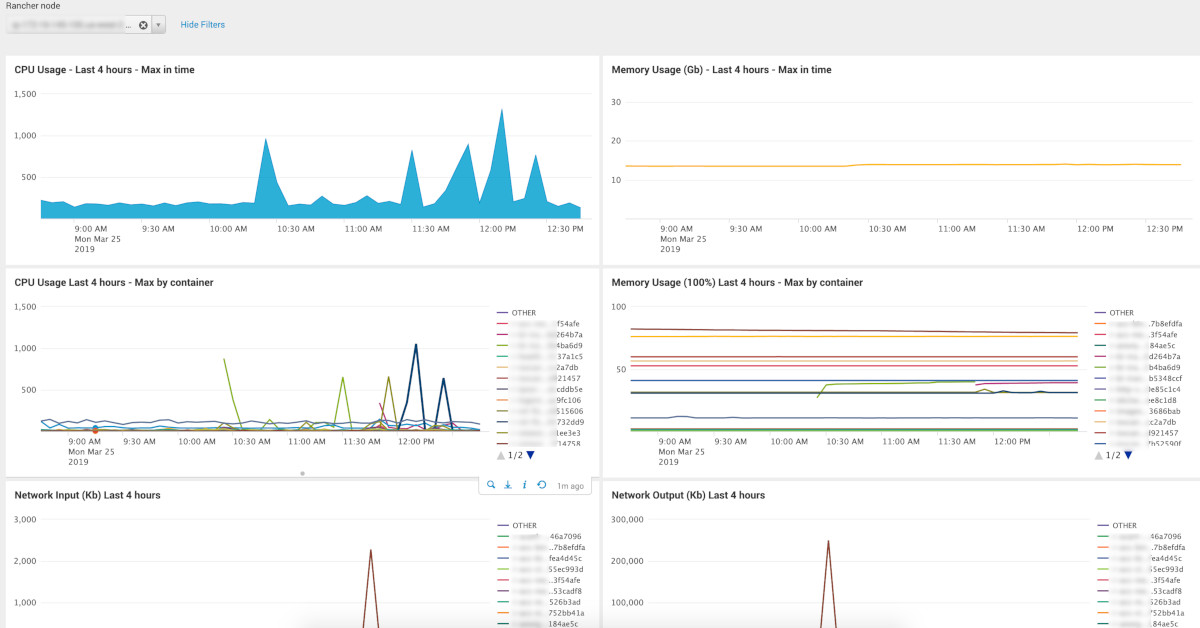
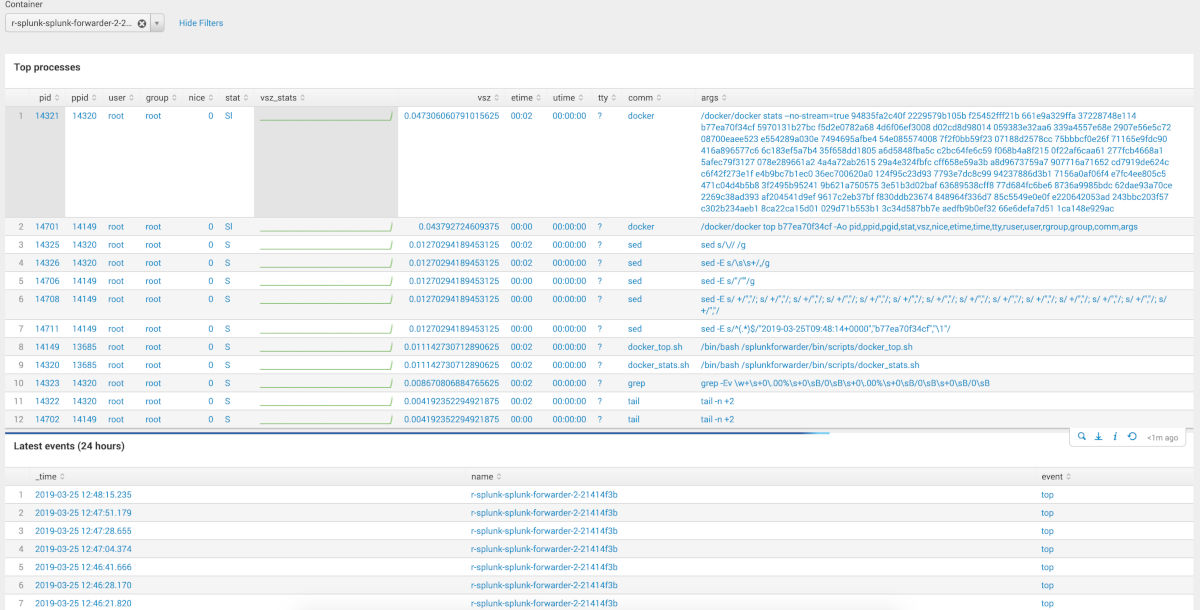
You can build fancy dashboards with gathered data:
Dashboards: (pictures)


You can find dashboard source code in the repo, which I mentioned at the end of the article. Pay attention to the 1st select field: choose index (search by the mask). You would have to update the mask. It depends on index names which you have.
At the end, I want to pay attention on the start() function inside
entrypoint.sh
start() {
    trap teardown EXIT
	if [ -z $SPLUNK_INDEX ]; then
	echo "'SPLUNK_INDEX' env variable is empty or not defined. Should be 'dev' or 'prd'." >&2
	exit 1
	else
	sed -e "s/@index@/$SPLUNK_INDEX/" -i ${SPLUNK_HOME}/etc/system/local/inputs.conf
	fi
	sed -e "s/@hostname@/$(cat /etc/hostname)/" -i ${SPLUNK_HOME}/etc/system/local/inputs.conf
    sh -c "echo 'starting' > /tmp/splunk-container.state"
	${SPLUNK_HOME}/bin/splunk start
    watch_for_failure
}
In my case, for each environment, and for each service, doesn't matter host machine or docker application, we create a separate index. It prevents search speed reducing by the high amount of data is in the index. We use simple naming conversion rule:
Also, I want to point that by some reason Splunk doesn't use docker parameter hostname as the host field in logs. It will continue send logs with host=
docker-compose.yml example
version: '2'
services:
  splunk-forwarder:
    image: "${IMAGE_REPO}/docker-stats-splunk-forwarder:${IMAGE_VERSION}"
    environment:
      SPLUNK_INDEX: ${ENVIRONMENT}
    volumes:
    - /etc/hostname:/etc/hostname:ro
    - /var/log:/var/log
    - /var/run/docker.sock:/var/run/docker.sock:ro
Summary.
Yes, perhaps, my solution might be not ideal and it is exactly not the universal for everyone because it contains «hardcode». But it might be helpful for someone who can build his own image and place it in the private registry. Especially if you need Splunk Forwarder in the Docker.
Links:
This solution
Solution from outcoldman which gave me inspiration to re-use some functionality
Official documentation page. Universal Forwarder configuration
