 February 24, 2019 at 15:19
Bulk printing in Windows
- Tutorial
 Sometimes you need to quickly print a lot of
 We analyze the situation and collect data
The topic of batch printing has been repeatedly covered in the
 We will begin by figuring out what functionality end users need. As a result of communication with colleagues, we got the following list:
- Only XML files need to be printed.
- formatting for XML is not required;
- on paper, in addition to the contents, the name of the file to be printed should also be indicated;
- files should be sorted by name, so that it is convenient to file paper sheets in the archive.
Perhaps the simplest and most obvious is printing from the Explorer context menu, which can be read about here and here . The second link provides information on the removal of the "Print" item for certain types of files, but the smart reader will easily understand from it how, on the contrary, you can add the missing one.
But this method has at least two drawbacks:
- You cannot print more than 15 files at a time;
- files are printed in random order (perhaps there is still logic, but I did not find it), and not in the way they are sorted in Explorer.
The first drawback is easily fixed by the tweak registry. To solve the second there are recommendations in the form of dances with a tambourine, but in our midst the gods are severe and these rites did not help.
There are ready-made third-party solutions (links to articles with information about them are given above). But for commercial use, you will have to pay for these products, and it’s always nice
We select a tool and develop a solution
 Note. In order not to translate the paper, it is convenient to use a virtual printer during the preparation and testing of the script. I was satisfied with the regular Microsoft XPS Document Writer, but there is also PDF24 Creator , doPDF , CutePDF Writer - as they say, taste and color ...
 PowerShell was chosen as the language. In the basic configuration, the script looks like this:
Option 0
$FolderToPrint = "\\server\share\Folder"
$FileMask = "*.xml"
$FolderToPrint | Get-ChildItem -File -Filter $FileMask | Sort-Object Name | ForEach-Object {
    Write-Output ("Печать файла `"" + $_.FullName + "`"")
    Start-Process -FilePath notepad -ArgumentList ("/P `"" + $_.FullName + "`"") -Wait
}
Printing is carried out by means of a regular Windows notepad (so as not to stand idle).
As can be seen from the 3rd line, the sorting in the example occurs by the name of the file ( Name ). Instead, you can take as a basis the size ( Length ) or the date of the change ( LastWriteTime ). If you need something more exotic, you can go here .
For sorting in the reverse order, the Sort-Object cmdlet has the -Descending switch .
In this option, printing goes to the printer by default, and we are satisfied with this behavior. If you need to print to a printer other than the default one, the notepad has the / PT option .
Accordingly, the code will take the following form:
<...>
$PrinterName = "\\server2\Network Printer"
<...>
    Start-Process -FilePath notepad -ArgumentList ("/PT  `"$PrinterName`"  `"" + $_.FullName + "`"") -Wait
<...>
Similarly, instead of notepad, you can use any other program, depending on what file format you want to print. The main thing is that it supports printing through the command line interface.
Note. If you will tame Adobe Reader, keep in mind this old bug. In our environment, it is still manifesting, perhaps you are more lucky. There's also a good article about printing PDFs from PowerShell.
If at the output you only need “bare” text from a regular text engine, then the 5th line of option 0 will take this form:
Get-Content $_.FullName | Out-Printer -Name $PrinterName
To print to the default printer, the -Name parameter must be omitted.
Our task required printing files from several locations. Slightly adding option 0, we get
Option 1
$FolderToPrint = @(
    "\\server1\share\Folder1",
    "\\server1\share\Folder2",
    "\\server1\share\Folder3"
)
$FileMask = "*.xml"
$ErrorActionPreference = "Stop"
Try {
    $FolderToPrint | Get-ChildItem -File -Filter $FileMask | Sort-Object Name | ForEach-Object {
        Write-Output ("Печать файла `"" + $_.FullName + "`"")
        Start-Process -FilePath notepad -ArgumentList ("/P `"" + $_.FullName + "`"") -Wait
    }
}
Catch {
    Write-Host "При выполнении операции возникла ошибка:"
    Write-Host $Error[0] -ForegroundColor Red
    Read-Host "Нажмите ENTER для завершения"
}
For decency, an exception handling function has been added. And if, for example, the folder from which the files are printed has become inaccessible, then printing will be interrupted and the user will be notified accordingly. By the way, it is noticed that the notebook returns 0 in the exit code even when trying to print a nonexistent / inaccessible file, but swears in the GUI.
After trying option 1, users were asked to give the option to select a folder and specific files in it, so a little interactivity was added as a file selection dialog box. So it appeared
Option 2
Add-Type -AssemblyName System.Windows.Forms | Out-Null
$OpenFileDialog = New-Object System.Windows.Forms.OpenFileDialog
$OpenFileDialog.InitialDirectory = "\\server\share"
$OpenFileDialog.Multiselect = $True
$OpenFileDialog.Filter = "XML-файлы (*.xml)|*.xml|Все файлы (*.*)|*.*"
$OpenFileDialog.ShowHelp = $true
$OpenFileDialog.ShowDialog() | Out-Null
$FilesToPrint = $OpenFileDialog.FileNames | Sort-Object
ForEach ($FullFileName in $FilesToPrint) {
    Write-Output "Печать файла `"$FullFileName`""
    Start-Process -FilePath notepad -ArgumentList ("/P `"$FullFileName`"") -Wait
}
Now, at startup, we get the familiar Windows Explorer window with a convenient selection of the necessary files:
cry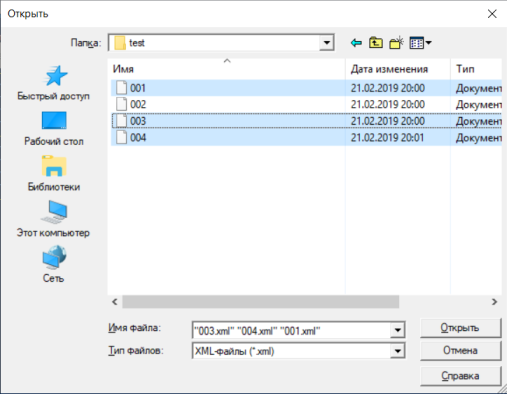
You can read more about working with the file open dialog in the official documentation , and anyone who wants to learn more about the PowerShell GUI can easily find a lot of material on the network, there is even an online form designer .
Exception handling in the second option has been removed since interactive user information was left to the conductor and notepad.
When you run the code from ISE, the file selection dialog box is displayed in the background ( Ctrl + Tab to help), but from the command line everything works as expected. Also note that the ShowHelp property must be $ true to get around this bug.
I would also like to draw attention to the propertyInitialDirectory . The cap prompts that it determines the path to the folder, which will be selected by default when the script starts. But, given that the explorer "remembers" the last selected location that was specified by the user in the file selection dialog, InitialDirectory can be useful only when you run the script for the first time.
Option 2 is completely suitable for our users, so we stopped on it. But if you need an option with
Option 3
Add-Type -AssemblyName System.Windows.Forms | Out-Null
$OpenFileDialog = New-Object System.Windows.Forms.OpenFileDialog
$OpenFileDialog.InitialDirectory = "\\server\share"
$OpenFileDialog.Multiselect = $True
$OpenFileDialog.Filter = "XML-файлы (*.xml)|*.xml|Все файлы (*.*)|*.*"
$OpenFileDialog.ShowHelp = $true
$OpenFileDialog.ShowDialog() | Out-Null
$SelectedFiles = $OpenFileDialog.FileNames
#Если ничего не выбрано, завершаем работу
If (!($SelectedFiles)) {
    Break
}
#На основании полного имени выбранного файла определяем выбранную папку
$SelectedDir = (Split-Path -Parent $OpenFileDialog.FileName)
#Получаем список всех файлов в выбранной папке
$FilesToPrint = Get-ChildItem -Path $SelectedDir -Force |
    #отбираем только те из них, которые были выбраны в диалоговом окне
    Where-Object {$_.FullName -in $OpenFileDialog.FileNames} |
    #и сортируем
    Sort-Object -Property LastWriteTime
ForEach ($File in $FilesToPrint) {
    $FullFileName = $File.FullName
    Write-Output "Печать файла `"$FullFileName`""
    Start-Process -FilePath notepad -ArgumentList ("/P `"$FullFileName`"") -Wait
}
Because parameters such as file size or creation date cannot be directly extracted from the $ OpenFileDialog object , then we use the Get-ChildItem cmdlet to get a list of all the files in the folder selected by the user, and then leave only those that were selected by the user and sort them in the form we need.
We give in production
 After making sure that everything works as it should, put the script in a network folder and display a shortcut to the desktop for users.
 And so that our small defenseless script is not offended by the evil Execution Policies , we hide it in such a shell:
powershell.exe -NoLogo -ExecutionPolicy Bypass -File "\\server\share\Scripts\BulkPrint.ps1"cry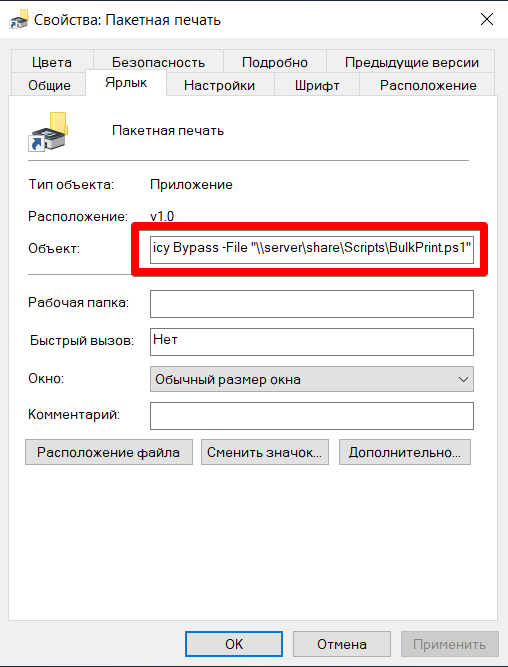
Or you can wrap it in a warm tube batch file.
Among other things, in a corporate environment, harsh Software Restriction Policies and ruthless AppLocker , as well as other security software, can interfere with script launch , but this is beyond the scope of this article.
You can add gloss by setting a beautiful icon for the shortcut. I chose this:
cry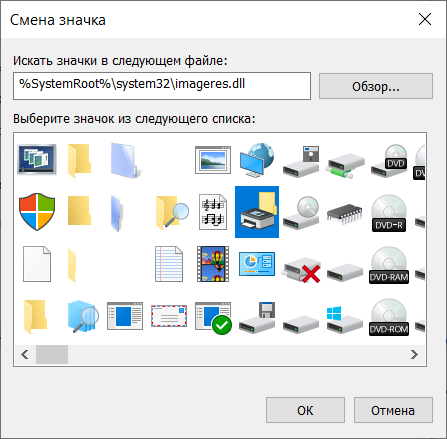
If there are many users of our script, you can massively distribute the shortcut using Group Policy Preferences .
Total

This happens if rolled out without prior testing.
And we will have like this:

And finally, seditious thought: what if you think in a different direction and instead of everything described above communicate with your bosses and rebuild the workflow?










