Smallest computer
Game.
But it is not exactly
Of course, he does not pretend to be “himself,” but is clearly more compact than his brothers.
I present you a step-by-step instruction + notes for assembling a completely compact gaming PC. I must say right away that the concept of “gaming” is wide, and I'm not rich, so there will be no Core i9 and GTX 1080Ti here, I put together a rather modest system, however, it is more powerful, quieter and less than the old 10 times.
Instead of joining
I had a mediocre 7-year-old computer, and at some point I stopped liking it, then I decided to build a new one. I was surprised to find that new stones came out from both manufacturers and decided: “finally I will assemble mini-ITX.” And assembled. A little confused with the power (relatively, of course, but by the standards of the PC assembly, where I “bought and installed”, I got confused) I got a very compact PC. Judge for yourself: 210 * 170 * 95 mm .
Part one. Negation
Break a bunch of various options, I came to the conclusion that I can not make a computer that is not much larger than the motherboard format mini-ITX. Everything rested on the power supply. The whole system eats no more than 200W, and the power supplies are huge all the time, and even with a humming fan. As a result, the world saw the assembly of 300W PicoPSU and a power supply for 250W LEDs (with a margin, you never mind). The scheme had one remarkable property: it was possible to separate its parts and hiccup the unnecessary away. Well, then everything went like clockwork.
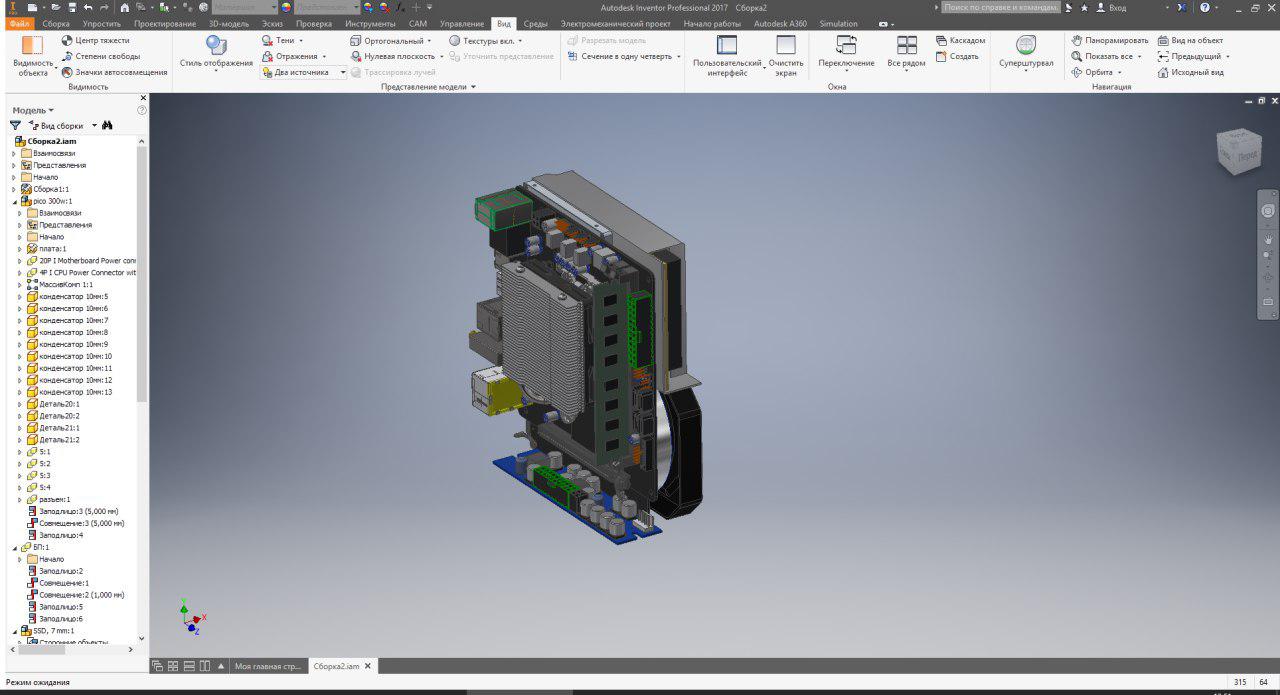
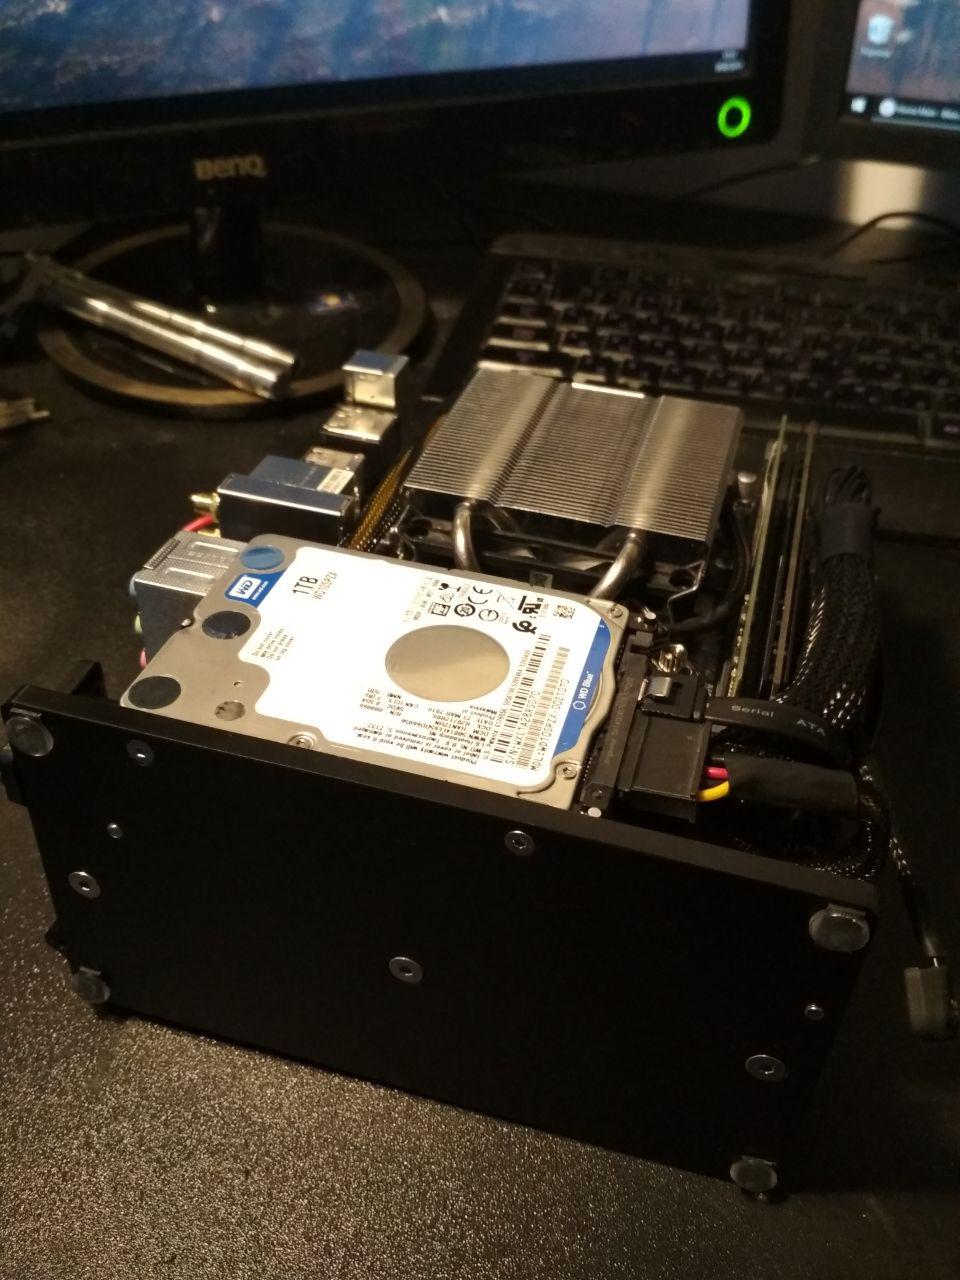
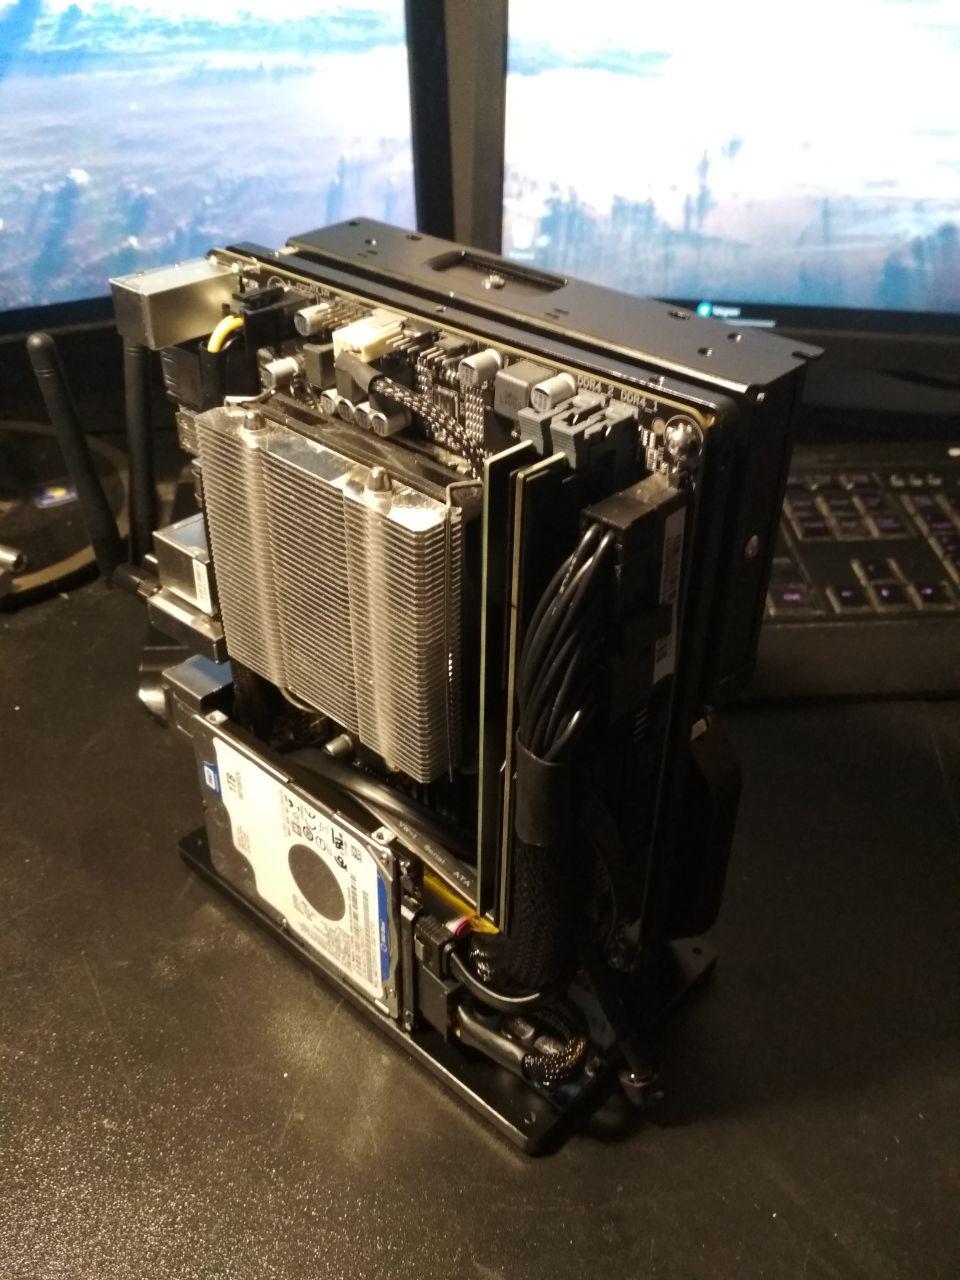
The layout is simple: the mother is upright, pico underneath, followed by the video and power supply. As a result: the height of the computer is only 40mm larger than the width of the motherboard.
Part two. Anger
For a long time I could not find a suitable power supply, because, starting from 200W, they begin to be equipped with fans and because of this they add in size. After several weeks of searching, a suitable specimen was found, perfect in length, width and height. The name of the hero is CPS250-H1V12 .
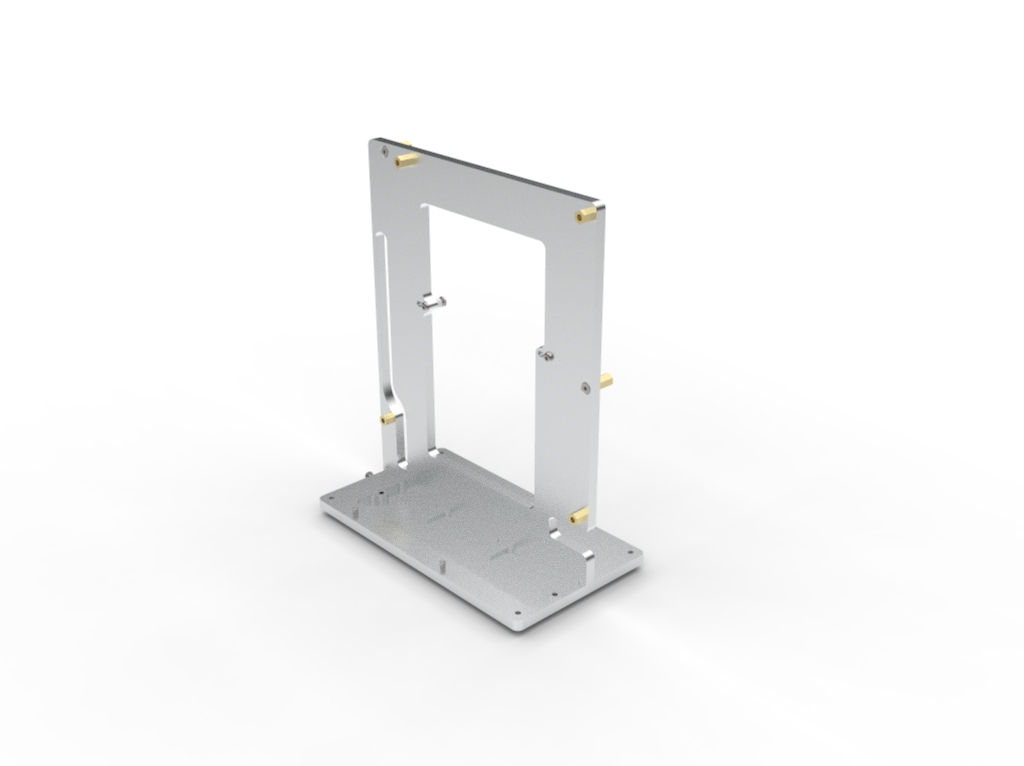
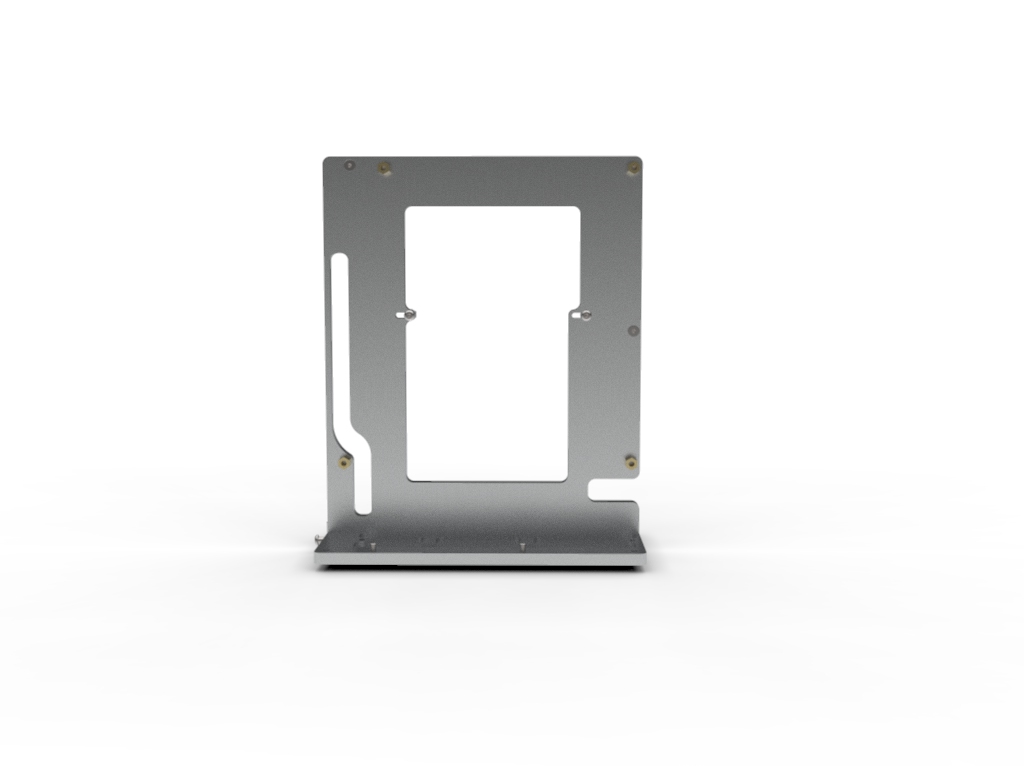
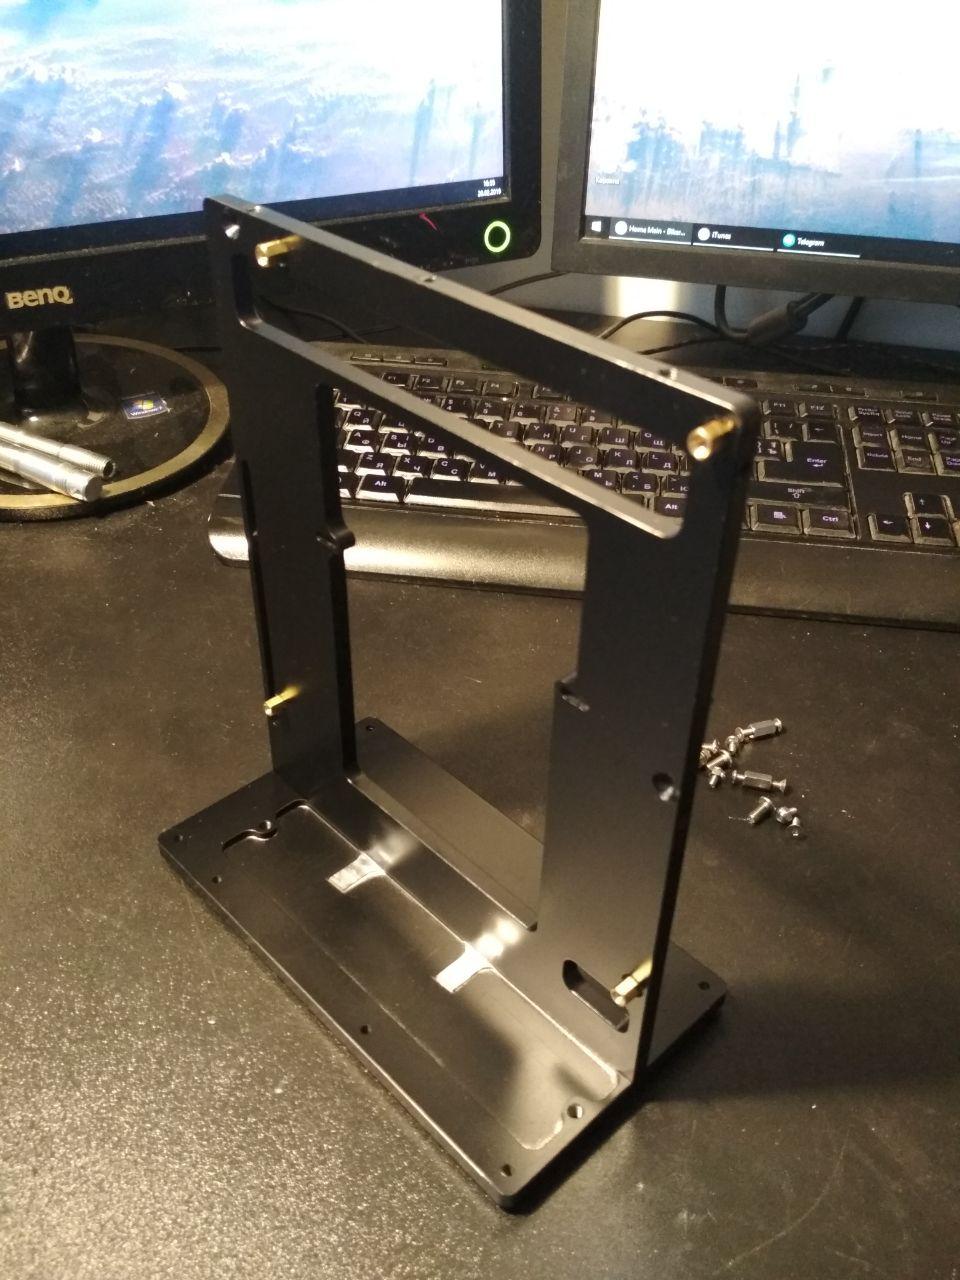
All components are defined, it is time to draw and make a frame. It is very simple, two plates, one base, the second holds everything. Made from what was at hand: 6mm aluminum, but any material of the same thickness will do.
Part three. Bargain
Having a little bargained with myself on the subject of “intel or amd?” I made a choice in favor of Intel, simply because, in terms of power and price, the difference was miserable, almost invisible. The choice fell on the very bottom of the processor industry, but the bottom of 2018.
Final configuration
Intel Core i3 8100
Gigabyte B360N WiFi
WD green ssd m.2 (WDS120G1G0B)
WD blue 1Tb 2.5 "(wd10spzx)
Palit Geforce 1050Ti
Patriot 8Gb DDR4 (psd48g240082h)
Scythe Kodati Rev. B
Pico PSU 300W (or 250W)
Power 250W 12V ( CPS250-H1V12)
PCI Riser (aka Extender)
Part Four Depression
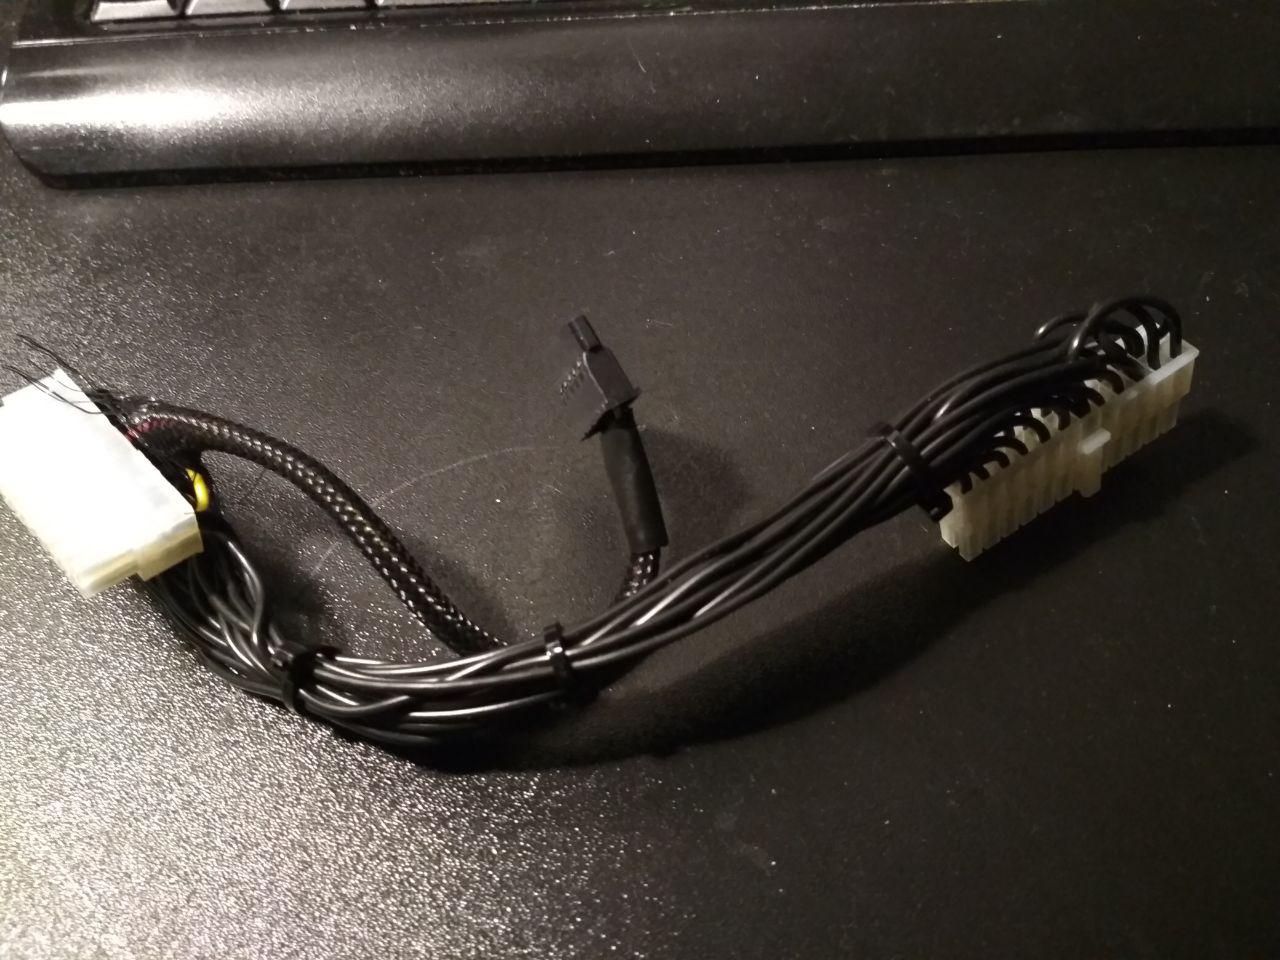
The only time I went about it was the length of the cables for PicoPSU, they are really short there, 10-12 centimeters, not more. So, for all purchases, you must add either an extension cord or another wire. but note the pico connector is 20-pin. Here is the sausage that came out to me, about 15 cm long:
Part Five Adoption
And here the most interesting begins: I collect a comp.
The frame is made, the screws are bought, the screwdrivers are sharpened. For style and originality, for the sake of the frame and the casing of the power supply, I painted.

After assembling the frame (insert one into the other), we fasten the racks for the motherboard and power supply.
Next, screw through the riser spacers. Check that the screws do not abut against the motherboard.
For positioning accuracy, you can insert a video card. By the way, I have the cheapest riser, 20cm. I highly recommend checking the soldering of the wire from him. I found 6 places where the solder immediately hit two wires.

You can immediately bend it for convenience.

Now fasten Pico. It is better to stick an electrical tape from below, suddenly the solder sticks out or the contacts are long.

We throw wires to it and to the power supply through the slots. Wires to Pico go over the riser and video card.

In general, you can hang the motherboard, first check if there is enough a riser, I bent it with a rather small radius in the end, but not a pull.

It's time to connect and screw the hard drive.
It remains only to hang the power supply and connect.

Done.
Recheck the correct connection of the wires to the power supply and can be turned on.
Summary
As a result, I got what I wanted: a super-compact PC for undemanding games and work. Although the computer is not very powerful, the whole system has a margin for upgrades. The cooler will cope with any processor with TPD up to 65W, for example, Core i5, while at the same time it is quite quiet under load. And the dimensions of my video card are not very different from some 1060 models. The
frame allows me to hang the panels on it to hide from dirt / dust / hands / eyes. And the size and weight allow him to drag back and forth without tension.
Link to the entire assembly, there are models of all components, as well as a model of the frame and a list of fasteners.