Introducing HealthKit
- Transfer
- Tutorial
In this HealthKit article, you'll learn how to request permission to access HealthKit data, as well as read and write data to the central HealthKit repository. The article uses Swift 4, iOS 11, Xcode 9 version.
HealthKit is an API that was introduced in iOS 8. HealthKit serves as the central repository for all health-related data, allowing users to create a biological profile and store workout data.
As you read the HealthKit article, you will create the simplest training tracking application and learn:
Ready to get started with HealthKit? Read on!
Note: To work on this tutorial, you will need an active iOS developer account. Without this, you cannot enable HealthKit Capability and gain access to the HealthKit repository.
The starter app tracks calorie burning during a workout program. For Hollywood insiders and socialites, it should be obvious that I'm talking about Prancercise .

Download the starter project and open it in Xcode .
Compile and run the application. You will see the “skeleton” of the user interface. Over the next two articles, you will gradually add functionality for this application.

HealthKit is a special framework. The application will not be able to use it if you do not have an active developer account. After you have a developer account, you can assign your team.
Select PrancerciseTracker in the Project Navigator, and then select the PrancerciseTracker target . Go to the General tab and click on the Team field .
Select the command associated with your developer account:

HealthKit also has its own set of rights, and you will need to enable them in order to create applications that use the framework.
Open the Capabilities tab in the target editor and enable HealthKit as shown in the screenshot below:

Wait for Xcode to configure HealthKit for you. As a rule, there are no problems here, but you can still encounter some if you forget to specify the Team and Bundle Identifier correctly.
Now everything is ready. You just need to ask the user for permission to use HealthKit.
HealthKit works with confidential and sensitive data. Not everyone feels so comfortable as to allow installed applications to access this information.
That's why HealthKit has a strong privacy system. HealthKit has access only to the data that users agree to share. To create a profile for users of your Prancercise Tracker, you must first obtain permission to access each type of data.
First, you need to describe why you are requesting health indicators from your users. Xcode gives you the ability to specify this in your application's Info.plist file .
Open Info.plist . Then add the following keys:
Privacy - Health Share Usage Description
Privacy - Health Update Usage Description
These keys store the text that will be displayed when the HeathKit login screen appears. Health Share Usage Description refers to the section of data that should be read from HealthKit. Health Update Usage Description corresponds to the data that is written to HealthKit.
You can “add” everything you want there. This is usually a description: “We will use your health information to better track your workouts.”
Keep in mind that if these keys are not installed, the application will crash when you try to log in to HealthKit.
Open the HealthKitSetupAssistant.swift file inside which is the class method that you will use to authorize in HealthKit.
The authorizeHealthKit (completion :) method does not accept any parameters, and has a complition that returns a boolean ( success or failure ) and an optional error in case something goes wrong. If errors are returned, you will pass them to complition in two cases:
Let's break this process. To authorize HealthKit, the authorizeHealthKit (completion :) method must complete the following four steps:
First of all, you need to check the availability of HealthKit on the device.
Paste the following code at the beginning of the authorizeHealthKit (completion :) method :
You will interact with HKHealthStore very often . It is a central repository that stores user health data. The isHealthDataAvailable () method will help you understand if the current user device supports Heathkit data.
The guard statement prevents the application from executing the rest of the authorizeHealthKit (completion :) method if HealthKit is not available on the device. When this happens, the completion block is called with the notAvailableOnDevice error . You can simply output this to the console or in the main controller to process further steps in case of such an error.
Once you know that HealthKit is available on the user's device, it's time to prepare the types of data that will be read and written to HealthKit.
HealthKit works with the HKObjectType type . Each type that enters or returns to the central HealthKit repository is a kind of HKObjectType . You will also see HKSampleType and HKWorkoutType . Both of them inherit from HKObjectType , so basically this is the same thing.
Paste the following code snippet immediately after the first code snippet:
Wow, this is a big guard ! This is also a great example of using a single guard to retrieve multiple options.
To create an HKObjectType for these characteristics, you need to use either HKObjectType.characteristicType (forIdentifier :) or HKObjectType.quantityType (forIdentifier :)
Characteristic types and quantity types are enumerations defined by the framework. HealthKit boots with them.
You will also notice that if one characteristic or selection type is not available, the method will fail. This is intentional. Your application should always know exactly what types of HealthKit it can work with, if any.
Now it's time to prepare a list of data types for reading and writing.
Paste this third code into the authorizeHealthKit (completion :) method immediately after the second part:
HealthKit expects a set of HKSampleType objects that represent the types of data your user can write, and also expects a set of HKObjectType objects to be displayed for your application.
HKObjectType.workoutType () is a special type of HKObjectType . It is any workout.
The last part is the easiest. You just need to request authorization from HealthKit. Paste this last piece of code:
This code requests authorization from HealthKit, and then calls completion. They use variables for successful operations and errors passed from HKHealthStore's requestAuthorization (toShare: read: completion :) method .
You can think of it as a redirect. Instead of handling the completion inside the HealthKitSetupAssistant, you pass the packet to the main controller, which may display a warning or take some other action.
The project already has an Authorize HealthKit button, and it calls the authorizeHealthKit () method in MasterViewController. This is the perfect place to call the authorization method we just wrote.
Open MasterViewController.swift , find the methodauthorizeHealthKit ( ) and paste this code:
This code uses the authorizeHealthKit (completion :) method that you just implemented. When it is completed, it will display a message in the console to indicate whether the authorization was successful in HealthKit.
Launch the app. Click Authorize HealthKit in the main window and you will see a pop-up authorization screen:

Turn on all the switches, scroll to see all of them, and press Allow . In the console you should see a message like this:
Sumptuously! The application has access to the central repository of HealthKit. Now it's time to start tracking items.
In this section you will learn:
Biological characteristics, as a rule, are types of elements that do not change, just like your blood type. Samples are elements that change frequently, such as weight.
In order to properly track the effectiveness of the Prancercise workout mode , the Prancercise Tracker app must receive a sample of the user's weight and height. Together, these samples can be used to calculate body mass index (BMI).
Note: Body Mass Index (BMI) is a widely used indicator of body fat and is calculated based on a person’s weight and height. Find out more about it here .
Prancercise Tracker does not record biological characteristics. He gets them from HealthKit. This means that these characteristics must first be stored in the central HeathKit repository.
If you haven't done it yet, it's time to tell HeathKit a little more about yourself.
Open the Health app on your device or simulator. Select the Health Data tab. Then click the profile icon in the upper right corner to view your health profile. Click Edit and enter the information date of birth, gender, blood type:

Now that HealthKit knows your date of birth, gender, and blood type, it's time to read these features in Prancercise Tracker .
Return to Xcode and open ProfileDataStore.swift . The ProfileDataStore class represents your access point to all health-related data for your users.
Paste the following method into ProfileDataStore :
The getAgeSexAndBloodType () method calls on HKHealthStore , asking for the user's date of birth, gender and blood type. It also calculates the user's age using the date of birth.
If you now compile and run the application, you will not see any changes in the user interface, because you have not connected this logic to it yet.
Open ProfileViewController.swif t and find the loadAndDisplayAgeSexAndBloodType ( )
method. This method will use your ProfileDataStore to load biological characteristics into the user interface.
Paste the following code into the loadAndDisplayAgeSexAndBloodType () method :
This code block loads the age, gender, and blood type as a tuple. He then sets these fields in the local instance of the UserHealthProfile model. Finally, it updates the user interface with the new fields in UserHealthProfile by calling the updateLabels () method .
Since the ProfileDataStore getAgeSexAndBloodType () method may throw an error, ProfileViewController must handle it. In this case, you just take the error and present it as a warning.
All this is great, but there is one catch. The updateLabels () method does nothing yet. This is just a blank ad. This time, let's move on to the user interface.
Find a methodupdateLabels () and paste this code into it:
The code is pretty simple. If the user has set the age, it will be formatted into a label. The same goes for biological sex and blood type. The variable stringRepresentation converts the enumeration into a string for display purposes.
Compile and run the application. Go to the Profile & BMI screen. Click the Read HealthKit Data button.
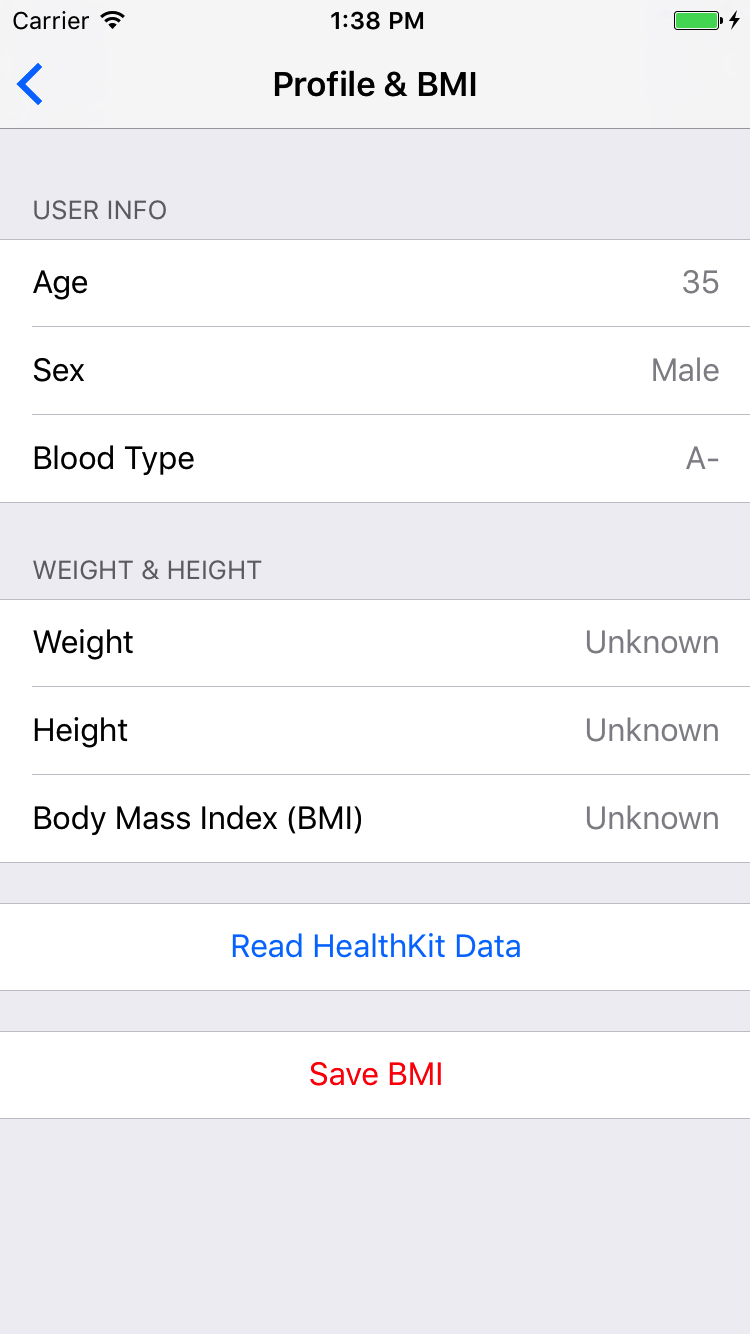
If you have previously entered your information in the application, it should appear in the shortcuts on this screen. If you have not done so, an error message will appear.
Wow! You read and display data directly from HealthKit .
Now it's time to read the weight and height of the user. They will be used to calculate and display the BMI in the profile view.
Biological characteristics are readily available because they almost never change. Samples require a much more complex approach. They use HKQuery , more precisely HKSampleQuery .
To request samples from HealthKit, you will need:
Note: If you are familiar with CoreData, you probably noticed some similarities. HKSampleQuery is very similar to NSFetchedRequest for an object type, where you specify the predicate and sort descriptors, and then specify the context of the object to execute the query to get the results.
Once your query is set up, you simply call the HKHealthStore ExecuteQuery () method to get the results.
For Prancercise Tracker, you will create a single, universal function that downloads the latest samples of any type. Thus, you can use it for both weight and height.
Open ProfileDataStore.swiftand paste the following method into the class, just below the getAgeSexAndBloodType () method :
This method uses the type of sample (height, weight, BMI, etc.). He then creates a query to retrieve the last sample for this type. If you go through the type of sample for growth, you will return to your last growth record.
A lot is going on here. I will stop to explain a few things.
If all goes well, your request will be executed and you will get a neat sample returned on the main thread, where the ProfileViewController can put its contents in the label. Let's do this part now.
In the previous section, you downloaded data from HealthKit . Save them as a model in ProfileViewController , and then update the contents in rows using the ProfileViewController updateLabels () method
All you need to do is extend this process by adding a function that loads the samples, processes them for the user interface, and then calls updateLabels () to fill labels with text.
Open the ProfileViewController.swift file , find the loadAndDisplayMostRecentHeight ( ) method and paste the following code:
Note: Usually you want to convert a quantity sample to a standard unit. To do this, the above code uses the doubleValue (for :) method , which allows you to pass the relevant data that you need (in this case, meters) to HKUnit .
You can create various types of HKUnits using some of the common class methods available through HealthKit . To get counters, you can simply use the meter () method in HKUnit , and that will be what you need.
With growth sorted out. How about the weight? Everything is pretty similar, but you will need to populate the loadAndDisplayMostRecentWeight () method inProfileViewController .
Paste the following code into the loadAndDisplayMostRecentWeight () method :
You create the type of sample that you want to receive, request HealthKit for it , do some unit conversions, save it in your model and update the user interface.
At the moment, it can show that the job is done, but there is something else. The updateLabels () function is not aware of the new data that you have made available to it.
Let's fix it.
Add the following lines to the updateLabels () function , just below the part where you expand the blood group to display it on the user interface:
Following the original template in the updateLabels () function , it expands the height, weight, and body mass index in your UserHealthProfile model . If available, they generate the appropriate lines and assigns them to labels on the user's screen.
MassFormatter and LengthFormatter do the work of converting your values into strings.
Body mass index is not actually stored in the UserHealthProfile model . This is a computed property that does the calculation for you.
Click on the bodyMassIndex property and you will see what I mean:
Body mass index is an optional property, that is, it can return nil if you did not specify either height or weight (or if they are set to some number that makes no sense). The actual calculation is simply the weight divided by the height squared.
Note: Soon you will immerse yourself in all of this if you have not added data to HealthKit for reading by the application. If you have not already done so, you need to create height and weight samples, at least.
Open the Health app and go to the Health Data tab. There, select the Body Measurements parameter, then select Weight and then Add Data Point to add a new weight sample. Repeat the process for growth.
At this point, Prancercise Trackershould be able to read a recent sample of your user's weight and height and then display it in the text.
Compile and run the applications. Go to Profile & BMI . Then click the Read HealthKit Data button .

Awesome! You just read your first samples from the HealthKit repository and used them to calculate BMI.
In Prancercise Tracker already have a handy calculator body mass index. Let's use it to record your user's BMI sample.
Open ProfileDataStore.swift and add the following method:
As with other sample types, you must first ensure that the sample type is available in HealthKit .
Almost ready. To summarize the user interface.
Open ProfileViewController.swif , find the saveBodyMassIndexToHealthKit ( ) method . This method is called when the user clicks on the Save BMI button in the table.
Paste the following code into the method:
You remember that body mass index is a computed property that returns a value when height and weight samples are loaded from HealthKit . This code is trying to compute this property, and if possible, it will be passed to the savedBodyMassIndexSample (bodyMassIndex: date :) method you just wrote.
It also shows a convenient alert if the body mass index cannot be calculated for any reason.
Compile and run the application. Go to the Profile & BMI screen . Download data from HeathKit , then click the Save BMI button.
Look at the console. Do you see it?
If so, congratulations! Your BMI sample is now stored in the HealthKit central repository . Let's see if we can find him.
Open the Health app, tap the Health Data tab, click Body Measurements in the table view, and then click Body Mass Index.

HealthKit is an API that was introduced in iOS 8. HealthKit serves as the central repository for all health-related data, allowing users to create a biological profile and store workout data.
As you read the HealthKit article, you will create the simplest training tracking application and learn:
- How to request permission and access HealthKit data
- How to read HealthKit data and display it in a UITableView
- How to write data to the central HealthKit repository
Ready to get started with HealthKit? Read on!
Note: To work on this tutorial, you will need an active iOS developer account. Without this, you cannot enable HealthKit Capability and gain access to the HealthKit repository.
Start
The starter app tracks calorie burning during a workout program. For Hollywood insiders and socialites, it should be obvious that I'm talking about Prancercise .
Download the starter project and open it in Xcode .
Compile and run the application. You will see the “skeleton” of the user interface. Over the next two articles, you will gradually add functionality for this application.
Assigning a Team
HealthKit is a special framework. The application will not be able to use it if you do not have an active developer account. After you have a developer account, you can assign your team.
Select PrancerciseTracker in the Project Navigator, and then select the PrancerciseTracker target . Go to the General tab and click on the Team field .
Select the command associated with your developer account:
Permissions / Entitlements
HealthKit also has its own set of rights, and you will need to enable them in order to create applications that use the framework.
Open the Capabilities tab in the target editor and enable HealthKit as shown in the screenshot below:
Wait for Xcode to configure HealthKit for you. As a rule, there are no problems here, but you can still encounter some if you forget to specify the Team and Bundle Identifier correctly.
Now everything is ready. You just need to ask the user for permission to use HealthKit.
Permissions
HealthKit works with confidential and sensitive data. Not everyone feels so comfortable as to allow installed applications to access this information.
That's why HealthKit has a strong privacy system. HealthKit has access only to the data that users agree to share. To create a profile for users of your Prancercise Tracker, you must first obtain permission to access each type of data.
Usage Description Update
First, you need to describe why you are requesting health indicators from your users. Xcode gives you the ability to specify this in your application's Info.plist file .
Open Info.plist . Then add the following keys:
Privacy - Health Share Usage Description
Privacy - Health Update Usage Description
These keys store the text that will be displayed when the HeathKit login screen appears. Health Share Usage Description refers to the section of data that should be read from HealthKit. Health Update Usage Description corresponds to the data that is written to HealthKit.
You can “add” everything you want there. This is usually a description: “We will use your health information to better track your workouts.”
Keep in mind that if these keys are not installed, the application will crash when you try to log in to HealthKit.
HealthKit Authorization
Open the HealthKitSetupAssistant.swift file inside which is the class method that you will use to authorize in HealthKit.
class func authorizeHealthKit(completion: @escaping (Bool, Error?) -> Swift.Void) {
}
The authorizeHealthKit (completion :) method does not accept any parameters, and has a complition that returns a boolean ( success or failure ) and an optional error in case something goes wrong. If errors are returned, you will pass them to complition in two cases:
- HealthKit may not be available on your device. For example, if the application is running on an iPad.
- Some data types may not be available in the current version of HealthKit.
Let's break this process. To authorize HealthKit, the authorizeHealthKit (completion :) method must complete the following four steps:
- Check if Healthkit is available on this device. If this is not the case, return a failure and error to complition.
- Prepare health data types. Prancercise Tracker will read and write to HealthKit.
- Organize this data into a list of types to read and types to write.
- Request authorization. If this action is successful, then all the activities were correct and completed properly.
HealthKit Availability Check
First of all, you need to check the availability of HealthKit on the device.
Paste the following code at the beginning of the authorizeHealthKit (completion :) method :
//1. Проверьте, доступен ли на этом устройстве HealthKit
guard HKHealthStore.isHealthDataAvailable() else {
  completion(false, HealthkitSetupError.notAvailableOnDevice)
  return
}
You will interact with HKHealthStore very often . It is a central repository that stores user health data. The isHealthDataAvailable () method will help you understand if the current user device supports Heathkit data.
The guard statement prevents the application from executing the rest of the authorizeHealthKit (completion :) method if HealthKit is not available on the device. When this happens, the completion block is called with the notAvailableOnDevice error . You can simply output this to the console or in the main controller to process further steps in case of such an error.
Data preparation
Once you know that HealthKit is available on the user's device, it's time to prepare the types of data that will be read and written to HealthKit.
HealthKit works with the HKObjectType type . Each type that enters or returns to the central HealthKit repository is a kind of HKObjectType . You will also see HKSampleType and HKWorkoutType . Both of them inherit from HKObjectType , so basically this is the same thing.
Paste the following code snippet immediately after the first code snippet:
//2. Подготовка типы данных, которые будут взаимодействовать с HealthKit
guard let dateOfBirth = HKObjectType.characteristicType(forIdentifier: .dateOfBirth),
        let bloodType = HKObjectType.characteristicType(forIdentifier: .bloodType),
        let biologicalSex = HKObjectType.characteristicType(forIdentifier: .biologicalSex),
        let bodyMassIndex = HKObjectType.quantityType(forIdentifier: .bodyMassIndex),
        let height = HKObjectType.quantityType(forIdentifier: .height),
        let bodyMass = HKObjectType.quantityType(forIdentifier: .bodyMass),
        let activeEnergy = HKObjectType.quantityType(forIdentifier: .activeEnergyBurned) else {
        completion(false, HealthkitSetupError.dataTypeNotAvailable)
        return
}
Wow, this is a big guard ! This is also a great example of using a single guard to retrieve multiple options.
To create an HKObjectType for these characteristics, you need to use either HKObjectType.characteristicType (forIdentifier :) or HKObjectType.quantityType (forIdentifier :)
Characteristic types and quantity types are enumerations defined by the framework. HealthKit boots with them.
You will also notice that if one characteristic or selection type is not available, the method will fail. This is intentional. Your application should always know exactly what types of HealthKit it can work with, if any.
Preparing a list of data types for reading and writing
Now it's time to prepare a list of data types for reading and writing.
Paste this third code into the authorizeHealthKit (completion :) method immediately after the second part:
//3. Подготовьте список типов, которые HealthKit должен считывать и записывать
let healthKitTypesToWrite: Set = [bodyMassIndex, activeEnergy, HKObjectType.workoutType()]
let healthKitTypesToRead: Set = [dateOfBirth,
                                                                         bloodType,
                                                                         biologicalSex,
                                                                         bodyMassIndex,
                                                                         height,
                                                                         bodyMass,
                                                                         HKObjectType.workoutType()]
HealthKit expects a set of HKSampleType objects that represent the types of data your user can write, and also expects a set of HKObjectType objects to be displayed for your application.
HKObjectType.workoutType () is a special type of HKObjectType . It is any workout.
HealthKit Authorization
The last part is the easiest. You just need to request authorization from HealthKit. Paste this last piece of code:
//4. Запрос на авторизацию
HKHealthStore().requestAuthorization(toShare: healthKitTypesToWrite,
                                     read: healthKitTypesToRead) { (success, error) in
  completion(success, error)
}
This code requests authorization from HealthKit, and then calls completion. They use variables for successful operations and errors passed from HKHealthStore's requestAuthorization (toShare: read: completion :) method .
You can think of it as a redirect. Instead of handling the completion inside the HealthKitSetupAssistant, you pass the packet to the main controller, which may display a warning or take some other action.
The project already has an Authorize HealthKit button, and it calls the authorizeHealthKit () method in MasterViewController. This is the perfect place to call the authorization method we just wrote.
Open MasterViewController.swift , find the methodauthorizeHealthKit ( ) and paste this code:
HealthKitSetupAssistant.authorizeHealthKit { (authorized, error) in
  guard authorized else {
    let baseMessage = "HealthKit Authorization Failed"
    if let error = error {
      print("\(baseMessage). Reason: \(error.localizedDescription)")
    } else {
      print(baseMessage)
    }
    return
  }
  print("HealthKit Successfully Authorized.")
}
This code uses the authorizeHealthKit (completion :) method that you just implemented. When it is completed, it will display a message in the console to indicate whether the authorization was successful in HealthKit.
Launch the app. Click Authorize HealthKit in the main window and you will see a pop-up authorization screen:
Turn on all the switches, scroll to see all of them, and press Allow . In the console you should see a message like this:
HealthKit Successfully Authorized.
Sumptuously! The application has access to the central repository of HealthKit. Now it's time to start tracking items.
Characteristics and Samples
In this section you will learn:
- How to read the biological characteristics of your user.
- How to read and write different types of samples (weight, height, etc.)
Biological characteristics, as a rule, are types of elements that do not change, just like your blood type. Samples are elements that change frequently, such as weight.
In order to properly track the effectiveness of the Prancercise workout mode , the Prancercise Tracker app must receive a sample of the user's weight and height. Together, these samples can be used to calculate body mass index (BMI).
Note: Body Mass Index (BMI) is a widely used indicator of body fat and is calculated based on a person’s weight and height. Find out more about it here .
Reading specifications
Prancercise Tracker does not record biological characteristics. He gets them from HealthKit. This means that these characteristics must first be stored in the central HeathKit repository.
If you haven't done it yet, it's time to tell HeathKit a little more about yourself.
Open the Health app on your device or simulator. Select the Health Data tab. Then click the profile icon in the upper right corner to view your health profile. Click Edit and enter the information date of birth, gender, blood type:
Now that HealthKit knows your date of birth, gender, and blood type, it's time to read these features in Prancercise Tracker .
Return to Xcode and open ProfileDataStore.swift . The ProfileDataStore class represents your access point to all health-related data for your users.
Paste the following method into ProfileDataStore :
class func getAgeSexAndBloodType() throws -> (age: Int,
                                              biologicalSex: HKBiologicalSex,
                                              bloodType: HKBloodType) {
  let healthKitStore = HKHealthStore()
  do {
    //1. This method throws an error if these data are not available.
    let birthdayComponents =  try healthKitStore.dateOfBirthComponents()
    let biologicalSex =       try healthKitStore.biologicalSex()
    let bloodType =           try healthKitStore.bloodType()
    //2. Use Calendar to calculate age.
    let today = Date()
    let calendar = Calendar.current
    let todayDateComponents = calendar.dateComponents([.year], from: today)
    let thisYear = todayDateComponents.year!
    let age = thisYear - birthdayComponents.year!
    //3. Unwrap the wrappers to get the underlying enum values.
    let unwrappedBiologicalSex = biologicalSex.biologicalSex
    let unwrappedBloodType = bloodType.bloodType
    return (age, unwrappedBiologicalSex, unwrappedBloodType)
  }
}
The getAgeSexAndBloodType () method calls on HKHealthStore , asking for the user's date of birth, gender and blood type. It also calculates the user's age using the date of birth.
- You may have noticed that this method may cause an error. This happens whenever a birth date, gender or blood type has not been stored in the HealthKit central repository. Since you have just entered this information in your application, you should not cause errors.
- Using the Calendar class , you can convert any date to a set of Date Components . This is really convenient when you want to get a year for a date. This code just gets your year of birth, current year, and then calculates the difference.
- The “expanded” variables are named in such a way that it is clear that you need to access the base enumeration from the wrapper class ( HKBiologicalSexObject and HKBloodTypeObject ).
UI update
If you now compile and run the application, you will not see any changes in the user interface, because you have not connected this logic to it yet.
Open ProfileViewController.swif t and find the loadAndDisplayAgeSexAndBloodType ( )
method. This method will use your ProfileDataStore to load biological characteristics into the user interface.
Paste the following code into the loadAndDisplayAgeSexAndBloodType () method :
do {
  let userAgeSexAndBloodType = try ProfileDataStore.getAgeSexAndBloodType()
  userHealthProfile.age = userAgeSexAndBloodType.age
  userHealthProfile.biologicalSex = userAgeSexAndBloodType.biologicalSex
  userHealthProfile.bloodType = userAgeSexAndBloodType.bloodType
  updateLabels()
} catch let error {
  self.displayAlert(for: error)
}
This code block loads the age, gender, and blood type as a tuple. He then sets these fields in the local instance of the UserHealthProfile model. Finally, it updates the user interface with the new fields in UserHealthProfile by calling the updateLabels () method .
Since the ProfileDataStore getAgeSexAndBloodType () method may throw an error, ProfileViewController must handle it. In this case, you just take the error and present it as a warning.
All this is great, but there is one catch. The updateLabels () method does nothing yet. This is just a blank ad. This time, let's move on to the user interface.
Find a methodupdateLabels () and paste this code into it:
if let age = userHealthProfile.age {
  ageLabel.text = "\(age)"
}
if let biologicalSex = userHealthProfile.biologicalSex {
  biologicalSexLabel.text = biologicalSex.stringRepresentation
}
if let bloodType = userHealthProfile.bloodType {
  bloodTypeLabel.text = bloodType.stringRepresentation
}
The code is pretty simple. If the user has set the age, it will be formatted into a label. The same goes for biological sex and blood type. The variable stringRepresentation converts the enumeration into a string for display purposes.
Compile and run the application. Go to the Profile & BMI screen. Click the Read HealthKit Data button.
If you have previously entered your information in the application, it should appear in the shortcuts on this screen. If you have not done so, an error message will appear.
Wow! You read and display data directly from HealthKit .
Query Samples
Now it's time to read the weight and height of the user. They will be used to calculate and display the BMI in the profile view.
Biological characteristics are readily available because they almost never change. Samples require a much more complex approach. They use HKQuery , more precisely HKSampleQuery .
To request samples from HealthKit, you will need:
- Specify the type of sample you want to request (weight, height, etc.),
- Some additional options that help filter and sort data. To do this, you can pass an optional NSPredicate or an array of NSSortDescriptors .
Note: If you are familiar with CoreData, you probably noticed some similarities. HKSampleQuery is very similar to NSFetchedRequest for an object type, where you specify the predicate and sort descriptors, and then specify the context of the object to execute the query to get the results.
Once your query is set up, you simply call the HKHealthStore ExecuteQuery () method to get the results.
For Prancercise Tracker, you will create a single, universal function that downloads the latest samples of any type. Thus, you can use it for both weight and height.
Open ProfileDataStore.swiftand paste the following method into the class, just below the getAgeSexAndBloodType () method :
class func getMostRecentSample(for sampleType: HKSampleType,
                               completion: @escaping (HKQuantitySample?, Error?) -> Swift.Void) {
//1. Используйте HKQuery для загрузки последних образцов.
let mostRecentPredicate = HKQuery.predicateForSamples(withStart: Date.distantPast,
                                                      end: Date(),
                                                      options: .strictEndDate)
let sortDescriptor = NSSortDescriptor(key: HKSampleSortIdentifierStartDate, ascending: false)
let limit = 1
let sampleQuery = HKSampleQuery(sampleType: sampleType,
                                predicate: mostRecentPredicate,
                                limit: limit,
                                sortDescriptors: [sortDescriptor]) { (query, samples, error) in
    //2. Всегда отправляйте в основной поток по завершении.
    DispatchQueue.main.async {
      guard let samples = samples,
            let mostRecentSample = samples.first as? HKQuantitySample else {
            completion(nil, error)
            return
      }
      completion(mostRecentSample, nil)
    }
  }
HKHealthStore().execute(sampleQuery)
}
This method uses the type of sample (height, weight, BMI, etc.). He then creates a query to retrieve the last sample for this type. If you go through the type of sample for growth, you will return to your last growth record.
A lot is going on here. I will stop to explain a few things.
- There are several methods in HKQuery that can help you filter out your HealthKit query examples. In this case, we use the built-in date predicate.
- Requesting samples from HealthKit is an asynchronous process. This is why the code in the completion handler is found inside the Dispatch block. Compliance is required on the main thread. If you do not, the application will fail.
If all goes well, your request will be executed and you will get a neat sample returned on the main thread, where the ProfileViewController can put its contents in the label. Let's do this part now.
Displaying samples in the user interface
In the previous section, you downloaded data from HealthKit . Save them as a model in ProfileViewController , and then update the contents in rows using the ProfileViewController updateLabels () method
All you need to do is extend this process by adding a function that loads the samples, processes them for the user interface, and then calls updateLabels () to fill labels with text.
Open the ProfileViewController.swift file , find the loadAndDisplayMostRecentHeight ( ) method and paste the following code:
//1. Используйте HealthKit для создания типа сэмпла высоты
guard let heightSampleType = HKSampleType.quantityType(forIdentifier: .height) else {
  print("Height Sample Type is no longer available in HealthKit")
  return
}
ProfileDataStore.getMostRecentSample(for: heightSampleType) { (sample, error) in
  guard let sample = sample else {
    if let error = error {
      self.displayAlert(for: error)
    }
    return
  }
   //2. Преобразуйте сэмпл высоты в метры, сохраните модель профиля,
  // и обновите пользовательский интерфейс.
  let heightInMeters = sample.quantity.doubleValue(for: HKUnit.meter())
  self.userHealthProfile.heightInMeters = heightInMeters
  self.updateLabels()
}
- Этот метод начинается с создания типа сэмпла роста. Затем он передает этот тип сэмпла методу, который вы только что написали, который вернет самый последний сэмпл роста пользователя, записанный в HealthKit.
- Как только сэмпл возвращается, рост преобразуется в метры и сохраняется в модель UserHealthProfile. Затем UI обновится.
Note: Usually you want to convert a quantity sample to a standard unit. To do this, the above code uses the doubleValue (for :) method , which allows you to pass the relevant data that you need (in this case, meters) to HKUnit .
You can create various types of HKUnits using some of the common class methods available through HealthKit . To get counters, you can simply use the meter () method in HKUnit , and that will be what you need.
With growth sorted out. How about the weight? Everything is pretty similar, but you will need to populate the loadAndDisplayMostRecentWeight () method inProfileViewController .
Paste the following code into the loadAndDisplayMostRecentWeight () method :
guard let weightSampleType = HKSampleType.quantityType(forIdentifier: .bodyMass) else {
  print("Body Mass Sample Type is no longer available in HealthKit")
  return
}
ProfileDataStore.getMostRecentSample(for: weightSampleType) { (sample, error) in
  guard let sample = sample else {
    if let error = error {
      self.displayAlert(for: error)
    }
    return
  }
  let weightInKilograms = sample.quantity.doubleValue(for: HKUnit.gramUnit(with: .kilo))
  self.userHealthProfile.weightInKilograms = weightInKilograms
  self.updateLabels()
}
You create the type of sample that you want to receive, request HealthKit for it , do some unit conversions, save it in your model and update the user interface.
At the moment, it can show that the job is done, but there is something else. The updateLabels () function is not aware of the new data that you have made available to it.
Let's fix it.
Add the following lines to the updateLabels () function , just below the part where you expand the blood group to display it on the user interface:
if let weight = userHealthProfile.weightInKilograms {
  let weightFormatter = MassFormatter()
  weightFormatter.isForPersonMassUse = true
  weightLabel.text = weightFormatter.string(fromKilograms: weight)
}
if let height = userHealthProfile.heightInMeters {
  let heightFormatter = LengthFormatter()
  heightFormatter.isForPersonHeightUse = true
  heightLabel.text = heightFormatter.string(fromMeters: height)
}
if let bodyMassIndex = userHealthProfile.bodyMassIndex {
  bodyMassIndexLabel.text = String(format: "%.02f", bodyMassIndex)
}
Following the original template in the updateLabels () function , it expands the height, weight, and body mass index in your UserHealthProfile model . If available, they generate the appropriate lines and assigns them to labels on the user's screen.
MassFormatter and LengthFormatter do the work of converting your values into strings.
Body mass index is not actually stored in the UserHealthProfile model . This is a computed property that does the calculation for you.
Click on the bodyMassIndex property and you will see what I mean:
var bodyMassIndex: Double? {
  guard let weightInKilograms = weightInKilograms,
    let heightInMeters = heightInMeters,
    heightInMeters > 0 else {
    return nil
  }
  return (weightInKilograms/(heightInMeters*heightInMeters))
}
Body mass index is an optional property, that is, it can return nil if you did not specify either height or weight (or if they are set to some number that makes no sense). The actual calculation is simply the weight divided by the height squared.
Note: Soon you will immerse yourself in all of this if you have not added data to HealthKit for reading by the application. If you have not already done so, you need to create height and weight samples, at least.
Open the Health app and go to the Health Data tab. There, select the Body Measurements parameter, then select Weight and then Add Data Point to add a new weight sample. Repeat the process for growth.
At this point, Prancercise Trackershould be able to read a recent sample of your user's weight and height and then display it in the text.
Compile and run the applications. Go to Profile & BMI . Then click the Read HealthKit Data button .
Awesome! You just read your first samples from the HealthKit repository and used them to calculate BMI.
Saving Samples
In Prancercise Tracker already have a handy calculator body mass index. Let's use it to record your user's BMI sample.
Open ProfileDataStore.swift and add the following method:
class func saveBodyMassIndexSample(bodyMassIndex: Double, date: Date) {
  //1.  Убедитесь, что тип массы тела существует
  guard let bodyMassIndexType = HKQuantityType.quantityType(forIdentifier: .bodyMassIndex) else {
    fatalError("Body Mass Index Type is no longer available in HealthKit")
  }
  //2.  Используйте граф HKUnit для создания массы тела
  let bodyMassQuantity = HKQuantity(unit: HKUnit.count(), doubleValue: bodyMassIndex)
  let bodyMassIndexSample = HKQuantitySample(type: bodyMassIndexType,
                                             quantity: bodyMassQuantity,
                                             start: date,
                                             end: date)
   //3.  Сохраните то же самое в HealthKit
  HKHealthStore().save(bodyMassIndexSample) { (success, error) in
    if let error = error {
      print("Error Saving BMI Sample: \(error.localizedDescription)")
    } else {
      print("Successfully saved BMI Sample")
    }
  }
}
As with other sample types, you must first ensure that the sample type is available in HealthKit .
- In this case, the code checks if a quantity type exists for the body mass index. If so, then it is used to create a quantity sample. If not, the application stops working.
- The count () method in HKUnit is for the special case when there is no clear block for the type of sample that you are storing. At some point in the future, the unit assigned to the body mass index may appear, but at the moment this more general unit works very well.
- HKHealthStore saves the sample and lets you know if the process was successful from the subsequent closed expression. You can do more with this, but now the application simply displays information on the console.
Almost ready. To summarize the user interface.
Open ProfileViewController.swif , find the saveBodyMassIndexToHealthKit ( ) method . This method is called when the user clicks on the Save BMI button in the table.
Paste the following code into the method:
guard let bodyMassIndex = userHealthProfile.bodyMassIndex else {
  displayAlert(for: ProfileDataError.missingBodyMassIndex)
  return
}
ProfileDataStore.saveBodyMassIndexSample(bodyMassIndex: bodyMassIndex, date: Date())
You remember that body mass index is a computed property that returns a value when height and weight samples are loaded from HealthKit . This code is trying to compute this property, and if possible, it will be passed to the savedBodyMassIndexSample (bodyMassIndex: date :) method you just wrote.
It also shows a convenient alert if the body mass index cannot be calculated for any reason.
Compile and run the application. Go to the Profile & BMI screen . Download data from HeathKit , then click the Save BMI button.
Look at the console. Do you see it?
Успешно сохраненный сэмпл BMI
If so, congratulations! Your BMI sample is now stored in the HealthKit central repository . Let's see if we can find him.
Open the Health app, tap the Health Data tab, click Body Measurements in the table view, and then click Body Mass Index.