Making the Dlink DIR320 Router Portable
The Dlink DIR320 router of revision D1 was lying on my shelf. There are no third-party firmware, the standard is scarce. At first glance, it’s an ordinary soulless box from Dlink, but not everything is as sad as it seemed earlier, because a new firmware was released for him with a significant increase in functionality and a new interface. What do we have in the end? Of the significant ones - the interface and Transmisson. And since this router was bought from me for entertainment, let's give it a little “upgrade”. Add him a battery!

What do we need?
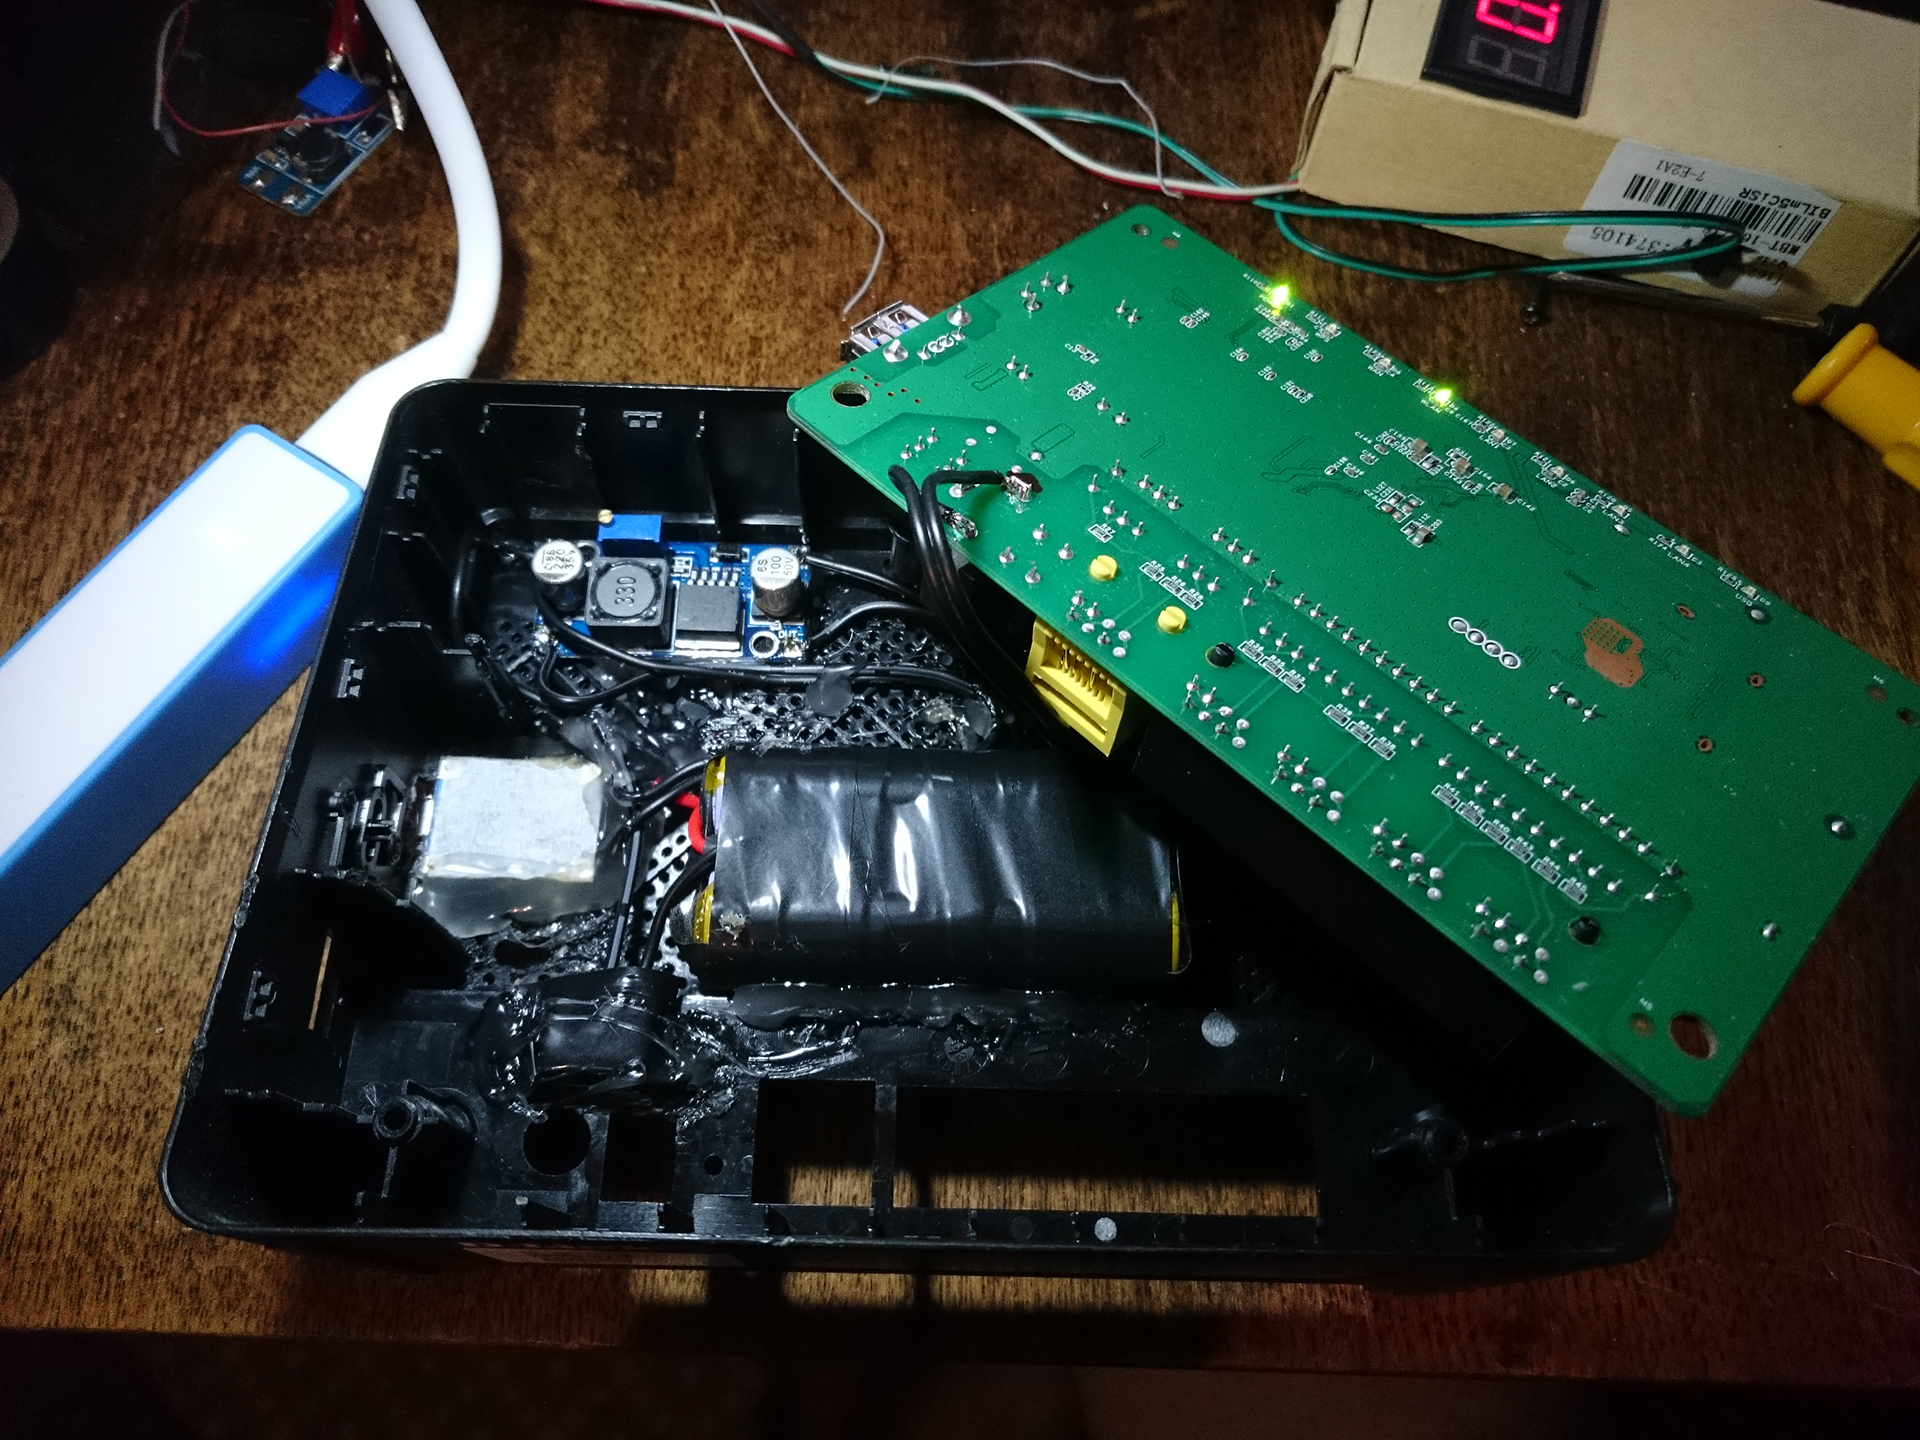
We unscrew the two bolts on the rear wall of the router, then turn it over, take a flat screwdriver and begin to snap off its “face”. Happened? If so, then we see a green board, it is not attached to anything, just take it and remove it. As you can see, the place in the router is full:
Yes, I attached a photo of the finished router. I want to admit my guilt right away - everything looks awful, stained with hot silicone and connected by terrible soldering. As for silicone, it is one of the most convenient and fastest fastening methods, it holds very tightly, nothing falls off from heating. I mentioned the first version of the mod, and so, to tear off the battery, I had to carefully (so as not to overheat the jar) to heat this whole thing and only then it could hardly come off. By the way, it can be seen in the next photo.
With the board installed, it looks like this:

These are actually a bit old photos. The fact is that the next day I added a protection board and re-soldered the TP4056 board, since it was not soldered directly to the battery, but through a switch (yes, pretty stupid).
The router worked for 1.5 hours with the stuck modem Huawei E171, all this time I surfed the Internet and listened to music online. I hoped that the protection board would disconnect the battery from DC-DC earlier, but, contrary to my expectations, this did not happen. After 1.5 hours, the router simply rebooted endlessly until I recharged it.
When assembled, the router is practically no different from the stock form. From the visible differences:

On charging it looks like this:

In the end, I want to ask experienced habrausers for advice - is it possible to put a diode on the battery, and bring power to the DC-DC from TP4056 input? So that when charging to DC-DC, 5 volts from the power source, and 4.2 volts from TP4056 to the battery, go. A diode is needed so that 5 volts do not get on the battery in any case:

What do we need?
- Any lithium battery, whether it is Li-Po, or Li-Ion. I took two noname Li-Ion 18650, their capacity, unfortunately, I do not know
- Charging board TP4056, or any other board for charging lithium batteries. If you have a large capacity, then you can take two TP4056 and parallelize them. One is enough for me.
- The raising board, I chose on the XL6009 chip, or any other. We need one that can give out more than 1 ampere. Personally, my router consumes exactly 1 ampere.
- Switch
- Battery protection board (optional, more likely for paranoid because DC-DC will not be able to drastically discharge the battery)
- Glue gun, good wires, electrical tape (blue)
Let's get started!
Speaking frankly, this is the second modification of the router
The first modification was on a cheap DC-DC scarf with an MT3608 chip. She gave out only 500 mA, the router worked, but not stable. There was only one noname 18650 battery, the capacity is unknown. How much is enough, I don’t remember, like about 30 minutes from strength.
We unscrew the two bolts on the rear wall of the router, then turn it over, take a flat screwdriver and begin to snap off its “face”. Happened? If so, then we see a green board, it is not attached to anything, just take it and remove it. As you can see, the place in the router is full:
Yes, I attached a photo of the finished router. I want to admit my guilt right away - everything looks awful, stained with hot silicone and connected by terrible soldering. As for silicone, it is one of the most convenient and fastest fastening methods, it holds very tightly, nothing falls off from heating. I mentioned the first version of the mod, and so, to tear off the battery, I had to carefully (so as not to overheat the jar) to heat this whole thing and only then it could hardly come off. By the way, it can be seen in the next photo.
With the board installed, it looks like this:
These are actually a bit old photos. The fact is that the next day I added a protection board and re-soldered the TP4056 board, since it was not soldered directly to the battery, but through a switch (yes, pretty stupid).
The router worked for 1.5 hours with the stuck modem Huawei E171, all this time I surfed the Internet and listened to music online. I hoped that the protection board would disconnect the battery from DC-DC earlier, but, contrary to my expectations, this did not happen. After 1.5 hours, the router simply rebooted endlessly until I recharged it.
When assembled, the router is practically no different from the stock form. From the visible differences:
On charging it looks like this:
In the end, I want to ask experienced habrausers for advice - is it possible to put a diode on the battery, and bring power to the DC-DC from TP4056 input? So that when charging to DC-DC, 5 volts from the power source, and 4.2 volts from TP4056 to the battery, go. A diode is needed so that 5 volts do not get on the battery in any case: