Build and run applications in Kubernetes using dapp and GitLab CI
- Tutorial
In previous articles about dapp, we talked about building applications and launching in Minikube. In this case, dapp was launched locally on the developer's machine. However, the tool was conceived to support continuous integration (CI) processes and we ourselves use it mainly in conjunction with GitLab. How does dapp help in CI / CD processes?
First, of course, is the assembly. Dapp allows you to speed up the incremental build of applications by linking build commands to changes between commits in the Git repository (for more details about this and other optimizations at the build stage, see the report “Putting Docker Images for CI / CD Quickly and Conveniently with Dapp”: article , video ).
Secondly, dapp helps roll out the application to the Kubernetes cluster using Helm. In addition to simplifying some work with secrets and checking Helm templates, dapp helps to wait for the rollout
Deploymentsspecified in the templates. Thirdly, dapp implements the logic of clearing the cache in both local and remote Registry with Docker images. Cleaning has been improved in recent versions: now dapp deletes images created on Git branches if these branches are removed from the Git repository. With images by tags, it’s a little more complicated: no more than 10 images are left no older than 30 days. In future versions, it is planned to make custom cleaning policies.
All of the above is more critical for the build server, so with the help of the simple GitLab + Minikube stand I will show an example of dapp implementation in continuous integration and delivery (CI / CD) processes.
Updated August 13, 2019: the dapp project has now been renamed werf , its code has been rewritten to Go, and the documentation has been greatly improved.
Stand GitLab + Minikube + dapp
The stand consists of the installed GitLab, GitLab Runner, Registry and the Kubernetes cluster:

The scheme is close to the option that we use in real projects. In short, everything works like this:
- The developer pushes its changes to the Git repository.
- GitLab launches the build task, GitLab Runner runs the dapp, which collects the image and push the image into the Registry.
- To roll out the application to the cluster, the deployment task is launched: GitLab Runner (with access to kubectl and Helm) executes
dapp kube deploy. - When receiving updated resources, the Kubernetes cluster checks to see if there is a new image in the Registry, downloads it, and launches the pods with the new image.
The stand is a demo, so in order not to produce virtual machines, together with GitLab you need to install Registry, GitLab Runner, dapp, Docker, kubectl and Helm. Minikube is used as the Kubernetes cluster as the easiest way to run K8s on the local machine.
Again, symfony-demo is used as the application . The assembly of this project in the local version was described in the article “ Practice with dapp. Part 1: Building simple applications ", and an example of rolling out an application in Minikube was described in the article" Practice with dapp. Part 2. Deploying Docker images in Kubernetes with Helm . " The difference from the second article will be that the Registry for Minikube becomes external (located in a virtual machine with GitLab) and a command is
dapp kube minikube setupnot required.Host system preparation
Before creating virtual machines, it is better to add host names in advance, for example, in
/etc/hosts:192.168.33.20 gitlab.example.com # доступ к интерфейсу gitlab
192.168.33.20 registry.gitlab.example.com # доступ к registry
192.168.33.100 cluster.example.com # доступ к приложению и к api k8sGitLab in a virtual machine
Installing GitLab using the off-the-shelf
Vagrantfile( https://github.com/rgl/gitlab-vagrant ) was mentioned in the second part of "Practice with dapp" , but now I will describe in more detail. To start the virtual machine, you will need to edit Vagrantfile, change the base image to xenial64and increase the memory from 2048 to 4096. After that,
vagrant upyou need to install GitLab Runner according to the project instructions . You will also need to install Docker and dapp. And for deployment - download the kubectl and Helm binaries. To start the Registry, you need to edit it by
/etc/gitlab/gitlab.rbuncommenting the lines there:gitlab_rails['registry_enabled'] = true
gitlab_rails['registry_host'] = "registry.gitlab.example.com"
gitlab_rails['registry_port'] = "5000"
gitlab_rails['registry_path'] = "/var/opt/gitlab/gitlab-rails/shared/registry"
gitlab_rails['registry_api_url'] = "http://localhost:5000"
gitlab_rails['registry_key_path'] = "/var/opt/gitlab/gitlab-rails/certificate.key"
gitlab_rails['registry_issuer'] = "omnibus-gitlab-issuer"
registry['registry_http_addr'] = "0.0.0.0:5000"After saving - run
gitlab-ctl reconfigure. Omnibus will reconfigure and restart GitLab. All of the above is already in the gitlab-vagrant fork - just clone and execute it
vagrant up.Minikube
Time to start and configure Minikube. The instruction is quite simple: download the project binary and call the command:
minikube start --insecure-registry registry.gitlab.example.com:5000 --host-only-cidr 192.168.33.1/24Unfortunately, to serve on the bench have to stop the cluster (
minikube stop) and manually edited ~/.minikube/machines/minikube/config.jsonto include HostDNSResolverthe virtual machine perceived the /etc/hostshost. Also, if Minikube was installed after reading the second part , check the key InsecureRegistry.{
"Driver": {
…
"HostDNSResolver": true,
…
“HostOptions”: {
"EngineOptions": {
"InsecureRegistry": [
"registry.gitlab.example.com:5000"
],
…To check the availability of the cluster after startup
minikube start, you can run the command kubectl get all.Configure GitLab Runner
The cluster is running - you need to configure communication with the cluster for gitlab-runner. To do this, the local config from
.kubeand certificates for accessing the Kubernetes API are copied to the virtual machine :$ cd ~
$ tar zcf kube-config.tar.gz .kube/config .minikube/ca.crt .minikube/apiserver.*
$ cp kube-config.tar.gz $GITLAB_VM_DIR
$ cd $GITLAB_VM_DIR
$ vagrant ssh
ubuntu@gitlab:~$ sudo su - gitlab-runner
gitlab-runner@gitlab:~$ tar zxf /vagrant/kube-config.tar.gzThe next step is to edit
.kube/configso that the correct file path is:- certificate-authority:
/home/gitlab-runner/.minikube/ca.crt - client-certificate:
/home/gitlab-runner/.minikube/apiserver.crt - client-key:
/home/gitlab-runner/.minikube/apiserver.key
Next, you can check the connection and configure Helm:
gitlab-runner@gitlab:~$ kubectl get allIf Minikube was already installed earlier in the second part , then tiller already has enough commands:
gitlab-runner@gitlab:~$ helm init --client-onlyIf minikube has not been previously installed, then you need to install tiller:
gitlab-runner@gitlab:~$ helm initFor dapp, add plugin
template:gitlab-runner@gitlab:~$ helm plugin install https://github.com/technosophos/helm-templateImport project and pipeline
You can now import the symfony-demo repository into GitLab. In the list of projects, click New Project , select Import , then Repo by URL , enter the URL, group and name of the new project.

The project already has a branch with
Dappfileand templates in .helm, created when working on previous articles, - dapp_deploy_minikube. To demonstrate how CI / CD works, you need to add the CI - configuration
.gitlab-ci.yml. This will be a simple pipeline of two tasks: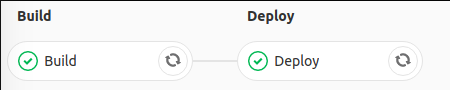
Build Quest
Build:
  stage: build
  script:
    - dapp --version
    - dapp dimg build --build-dir ~/dapp_build/${CI_PROJECT_NAME}
    - dapp dimg push --build-dir ~/dapp_build/${CI_PROJECT_NAME} ${CI_REGISTRY_IMAGE} --tag-ci
  tags:
    - build
Task 3 times starts dapp. The first time is informative to see the dapp version. The second launch is the assembly of the images described in
Dappfile. The third is the push of the collected images in the Registry, and the images will be tagged based on the variables CI_*( Updated August 13, 2019: documentation on werf tagging options ).Deploy job
Deploy:
  stage: deploy
  script:
  - dapp --version
  - dapp kube deploy
    --tag-ci
    --namespace ${CI_PROJECT_NAME}-stage
    --set "global.env=stage"
    --set "global.git_rev=${CI_COMMIT_SHA}"
    $CI_REGISTRY_IMAGE
  tags:
    - build
Here, too, the first launch displays the version of dapp. The second launch is rolling out the application to the cluster.
You may notice that a suffix
stageis used in the namespace - this is done to show that any namespace can be specified. In the full version of the pipeline, you will need to create several tasks for the necessary environments.Helm Templates
The registry installed in GitLab, in contrast to the Registry installed by the team
dapp kube minukube setup, has a differentiation of rights and therefore it is necessary to add Helm templates registrysecretwith a username and password for the Registry. You can create a secret manually using a command base64, or you can use a hint . As a result, the
.helm/values.yamlfollowing values will be added:imageCredentials:
registry: registry.gitlab.example.com:5000
username: root
password: passwordAnd in
backend.yaml- such a resource:apiVersion: v1
kind: Secret
type: kubernetes.io/dockercfg
metadata:
name: registrysecret
data:
.dockercfg: {{ printf "{\"%s\": {\"auth\": \"%s\"}}" .Values.imageCredentials.registry (printf "%s:%s" .Values.imageCredentials.username .Values.imageCredentials.password | b64enc) | b64enc }}... and
imagePullSecretsin spec of container templates:spec:
template:
...
spec:
imagePullSecrets:
- name: registrysecret
containers:
- command: [ '/demo/start.sh' ]
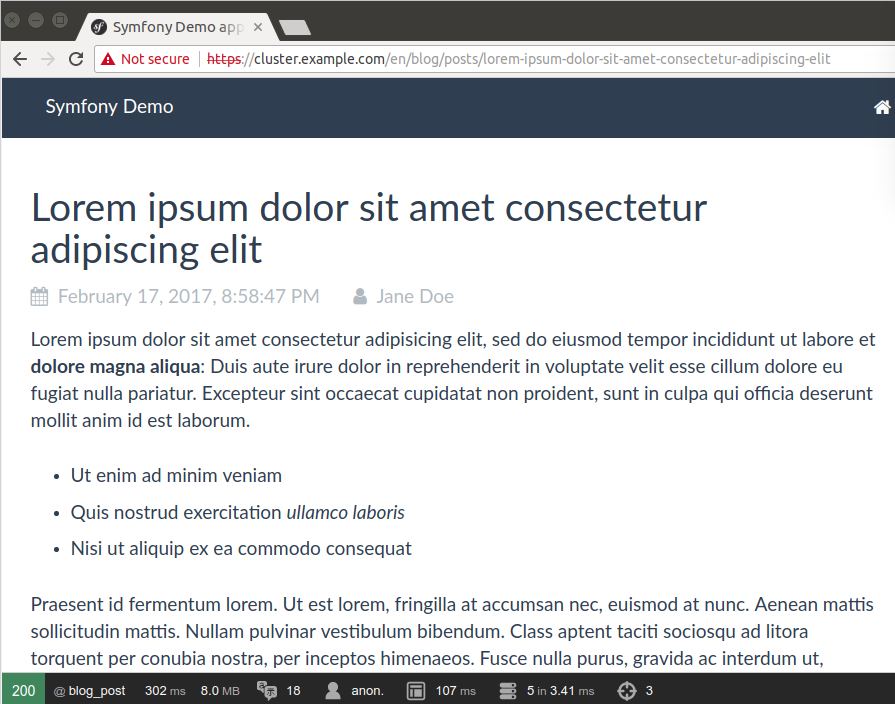
image: {{ tuple "symfony-demo-app" . | include "dimg" }}Rollout for such Helm templates should already be successful - the result can be observed in the browser at
http://cluster.example.com/symfony-demo: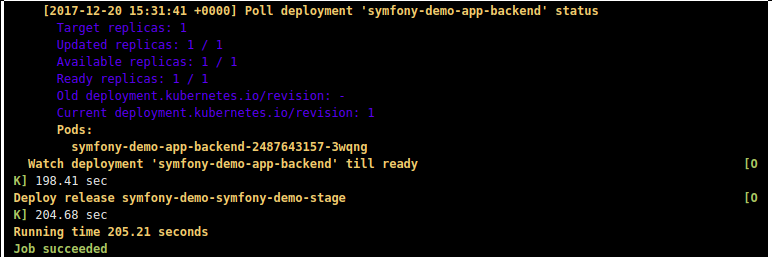
Summarizing
In general, we can assume that the stand has been deployed with the CI / CD process, very close to what works for our customers. The next steps will be to complicate the pipeline (see “ GitLab CI for continuous integration and delivery into production. Part 1: our pipeline ” and “ Part 2: overcoming difficulties ”), the introduction of dynamic environments ( peer review article ), the addition of scheduled registry cleanup, adding launch integration tests. Questions about the described stand and about dapp can be asked in the comments and in our Telegram chat .
PS
Read also in our blog:
- “ Werf is our CI / CD tool in Kubernetes (review and video report) ” (Dmitry Stolyarov; May 27, 2019 at DevOpsConf) ;
- “ Practice with dapp. Part 1: Building simple applications ";
- “ Practice with dapp. Part 2. Deployment of Docker images in Kubernetes using Helm ";
- “ Best CI / CD practices with Kubernetes and GitLab (review and video report) ”;
- “ Infrastructure with Kubernetes as an affordable service .”









