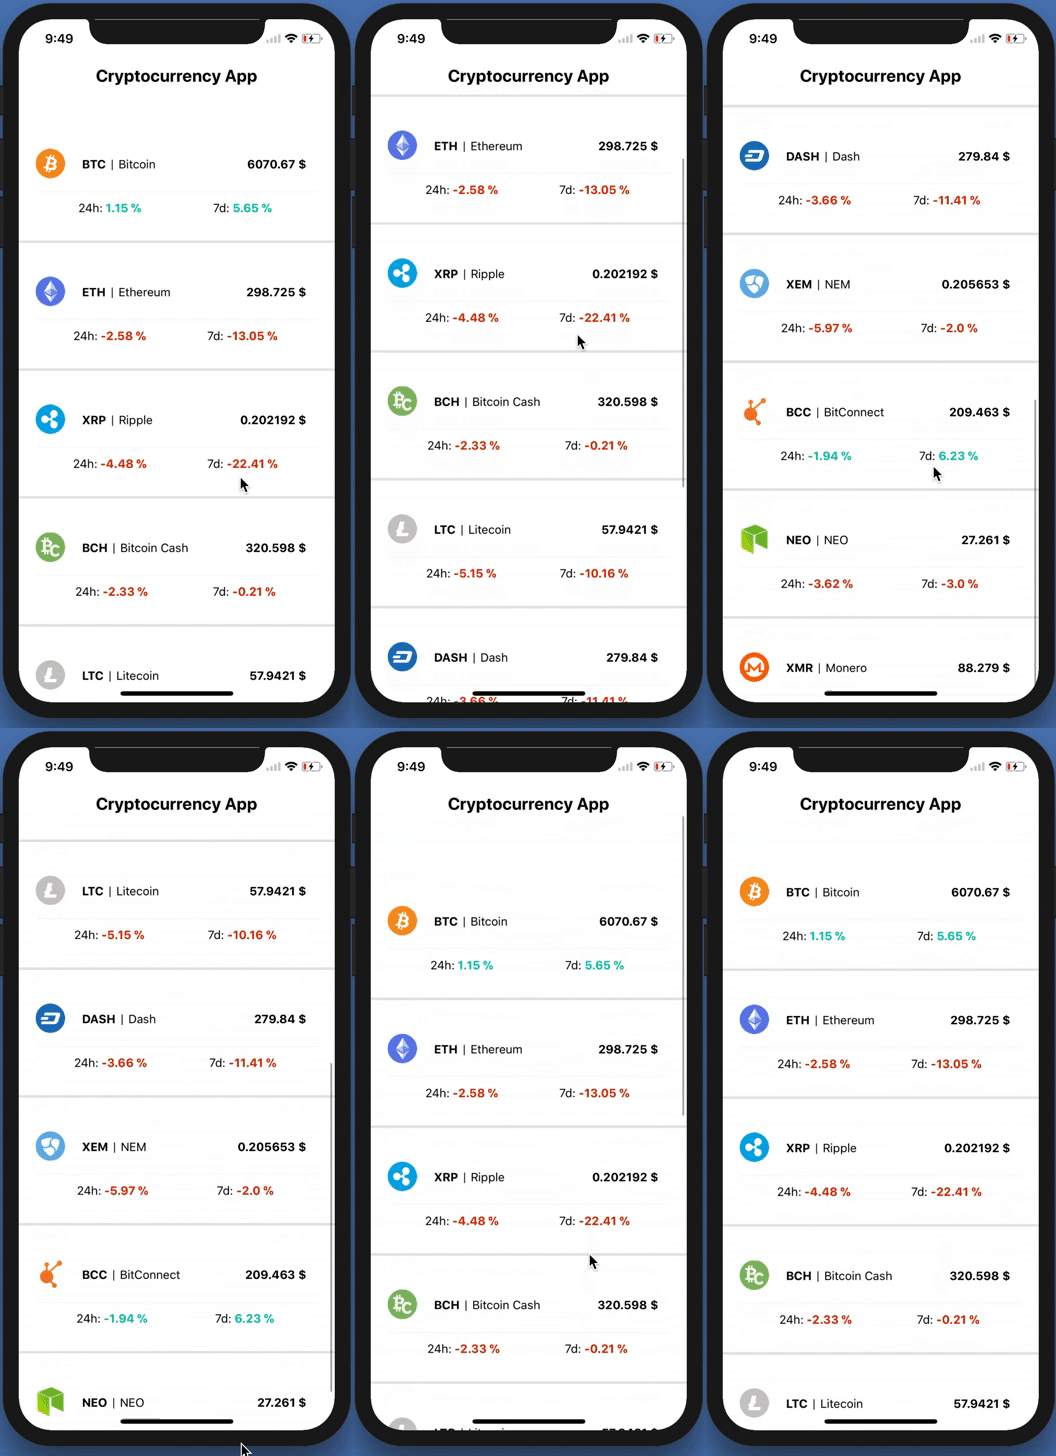
Tutorial on creating a cryptocurrency tracker for android on Kotlin
- Tutorial

Not long ago, there was an article on the hub that suggested making 8 training projects . I liked the cryptocurrency tracker there, so that it was at least somehow more interesting than just a Get request, it was decided to make it on Kotlin. So, in this tutorial you will learn the following:
- How to do Get requests with Retrofit
- Retrofit and Rx
- RecyclerView with Kotlin
- Extract data from api
Introduction
Let’s miss how to enable Kotlin’s support and other obvious and understandable things, like creating a project. We will use this api
Manifest Setup
In order to make requests, you must have permission to use the network:
Adding Libraries to Gradle
We will need Retrofit and RxAndroid.
 //Retrofit
    compile "com.squareup.retrofit2:retrofit:2.3.0"
    compile "com.squareup.retrofit2:adapter-rxjava2:2.3.0"
    compile "com.squareup.retrofit2:converter-gson:2.3.0"
    //RxAndroid
    compile "io.reactivex.rxjava2:rxandroid:2.0.1"
Create layouts
activity_main.xml
RecyclerView needs to know what its elements look like. For this, we need to create item.xml.
item.xml
Making a model for parsing a response
For such purposes, some pojo generator is a good fit.
ResponseItrem
data class ResponseItem(@SerializedName("id")
                        @Expose var id: String?,
                        @SerializedName("name")
                        @Expose var name: String?,
                        @SerializedName("symbol")
                        @Expose var symbol: String?,
                        @SerializedName("rank")
                        @Expose var rank: String?,
                        @SerializedName("price_usd")
                        @Expose var priceUsd: String?,
                        @SerializedName("price_btc")
                        @Expose var priceBtc: String?,
                        @SerializedName("24h_volume_usd")
                        @Expose var _24hVolumeUsd: String?,
                        @SerializedName("market_cap_usd")
                        @Expose var marketCapUsd: String?,
                        @SerializedName("available_supply")
                        @Expose var availableSupply: String?,
                        @SerializedName("total_supply")
                        @Expose var totalSupply: String?,
                        @SerializedName("max_supply")
                        @Expose var maxSupply: String?,
                        @SerializedName("percent_change_1h")
                        @Expose var percentChange1h: String?,
                        @SerializedName("percent_change_24h")
                        @Expose var percentChange24h: String?,
                        @SerializedName("percent_change_7d")
                        @Expose var percentChange7d: String?,
                        @SerializedName("last_updated")
                        @Expose var lastUpdated: String?) {
Create a simple Get request
We will use Rx so our Get function should return an Observable. Also, right here we create a Factory, from it we will receive a Retrofit object.
GetInterface
interface RetrofitGetInterface {
    @GET("v1/ticker/")
    fun getCryptocurrency(): Observable>
    companion object Factory {
        fun create(): RetrofitGetInterface {
            val retrofit = Retrofit.Builder()
                    .addCallAdapterFactory(RxJava2CallAdapterFactory.create())
                    .addConverterFactory(GsonConverterFactory.create()) // говорим чем парсим
                    .baseUrl("https://api.coinmarketcap.com/") // базовая часть ссылки
                    .build()
            return retrofit.create(RetrofitGetInterface::class.java)
        }
    }
}
We make a request
For queries, we will use Rx. If you are not familiar with reactive programming, you do not know what you are losing.
Request Code
val apiService = RetrofitGetInterface.create()
        apiService.getCryptocurrency()
                .observeOn(AndroidSchedulers.mainThread())// Говорим в какой поток вернуть
                .subscribeOn(Schedulers.io()) // Выбераем io - для работы с данными и интернетом
                .subscribe({
                    result -> arrayListInit(result) // Здесь у нас калбек
                }, { error ->
                    error.printStackTrace()
                })
Making an adapter for a list
class RecyclerViewAdapter(private val result: List,
val resources: Resources):RecyclerView.Adapter()
The data that we received from our request needs to be thrust into some array (List) ResponseItem. It must be transferred to the adapter so that it fills our list.
In GetItemCount we must return the size of the array so that the adapter knows how many elements will be in our list.
override fun getItemCount() = result.size //Возвращаем размер масива данныхIn OnCreateViewHolder, we need to inflate the layout of our item.
override fun onCreateViewHolder(parent: ViewGroup?, viewType: Int): CardViewHolder {
        return CardViewHolder(LayoutInflater.from(parent?.context)
                .inflate(R.layout.item, parent, false)) //Говорим RecyclerView как должен выглядеть item
}
All the time, some CardViewHolder is lit in the code. It must populate the views of each item with data from the array.
 class CardViewHolder(itemView: View?) : RecyclerView.ViewHolder(itemView) {
        fun bind(result: List, position: Int, resources: Resources) {
            val responseItem: ResponseItem = result.get(position)
            itemView.symbol.text = responseItem.symbol
            itemView.name.text = responseItem.name
            ...
        }
}
The bind function takes all the necessary data and fills them with the views. We refer to this function in onBindViewHolder. And thanks to the syntax of the language, we do it pretty nicely.
override fun onBindViewHolder(holder: CardViewHolder, position: Int)
 = holder.bind(result, position, resources)
Last step: attach our adapter
To do this, you just need to register in the callback:
recyclerView.adapter = RecyclerViewAdapter(result, resources)
recyclerView.layoutManager = LinearLayoutManager(this)
Sources are here . The tutorial came out quite short and simple, so there were few explanations, but if something is not clear I can answer, and yet we have a ready-made cryptocurrency tracker.
