November 30, 2017 at 13:45
Fall Creators Update: important for the programmer
Classic Donnet applications are good in that they are practically unlimited in rights and, for example, can work in the tray. But universal applications (UWP) are more secure, and they can be installed and removed countless times without clogging the system and registry. The UWP platform is constantly evolving, and while users are updated to the Fall Creators Update, which was released in October this year, we developers can look at its new and interesting features.

Are you ready? Download the latest SDK from the official page and start our orientation tour.
Note: we continue the series of publications of full versions of articles from the Hacker magazine. Spelling and punctuation of the author saved.
First of all, I would like to note about the numerous improvements in the XAML designer. One of the most anticipated improvements for me is to increase the speed of work. Compare the download speed in the Fall Creators Update (left) with the simple Creators Update:

At Build 2017, Microsoft announced a new UI design system called Fluent .
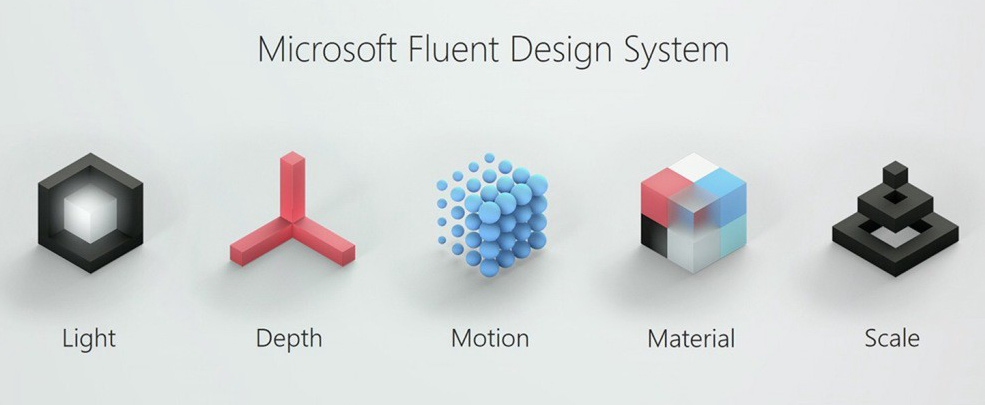
And now, starting with this update, new controls based on this system will begin to appear in UWP.
This is out of box control for displaying the menu.

The menu drops out on the left side. In addition, the bar on top refers to the menu - Header. On this strip, you can make some heading text or some additional buttons.
The menu can be used in 3 different variations. The option displayed at the top is Minimal. In this mode, the Header cannot be hidden, since there is a hamburger button on it. There is also a Compact mode in which menu icons are displayed on the right.

In Expanded mode, the menu appears expanded.
By resizing the window of your application, you can change the Navigation View mode. After all, the system automatically selects a mode based on the size of the application window. You can influence this choice by specifying different pixel values for the OpenPaneLength, CompactModeThresholdWidth, and ExpandedModeThresholdWidth attributes.
Sample navigation bar code:

Please note that it is possible to add some arbitrary controls down. In the example, a picture is added there (a cube above the Settings menu item). The Settings menu item itself is turned on and off using the IsSettingsVisible attribute.
In the C # code, in the NavView_ItemInvoked event, you can check if the Settings button was pressed.
Or you can check the contents of args.InvokedItem, which contains the text of the pressed menu item. For example, like this:
See the official documentation page for more information .
A control that displays the avatar and user name / initials. Pretty simple control.

You can add it to the page using the following tag:
It is recommended to use it to display the profile picture of the current user or any contact.
Read more about it here .
With this control, too, everything should be clear.

You can add to the page with the following tag:
The official documentation is here .
The long-awaited control for choosing colors.

In the following example, when the color changes in the control, the background color automatically changes (using a simple binding or in other words, binding).
Official documentation
Uneven movement of objects during scrolling allows you to create a parallax effect.
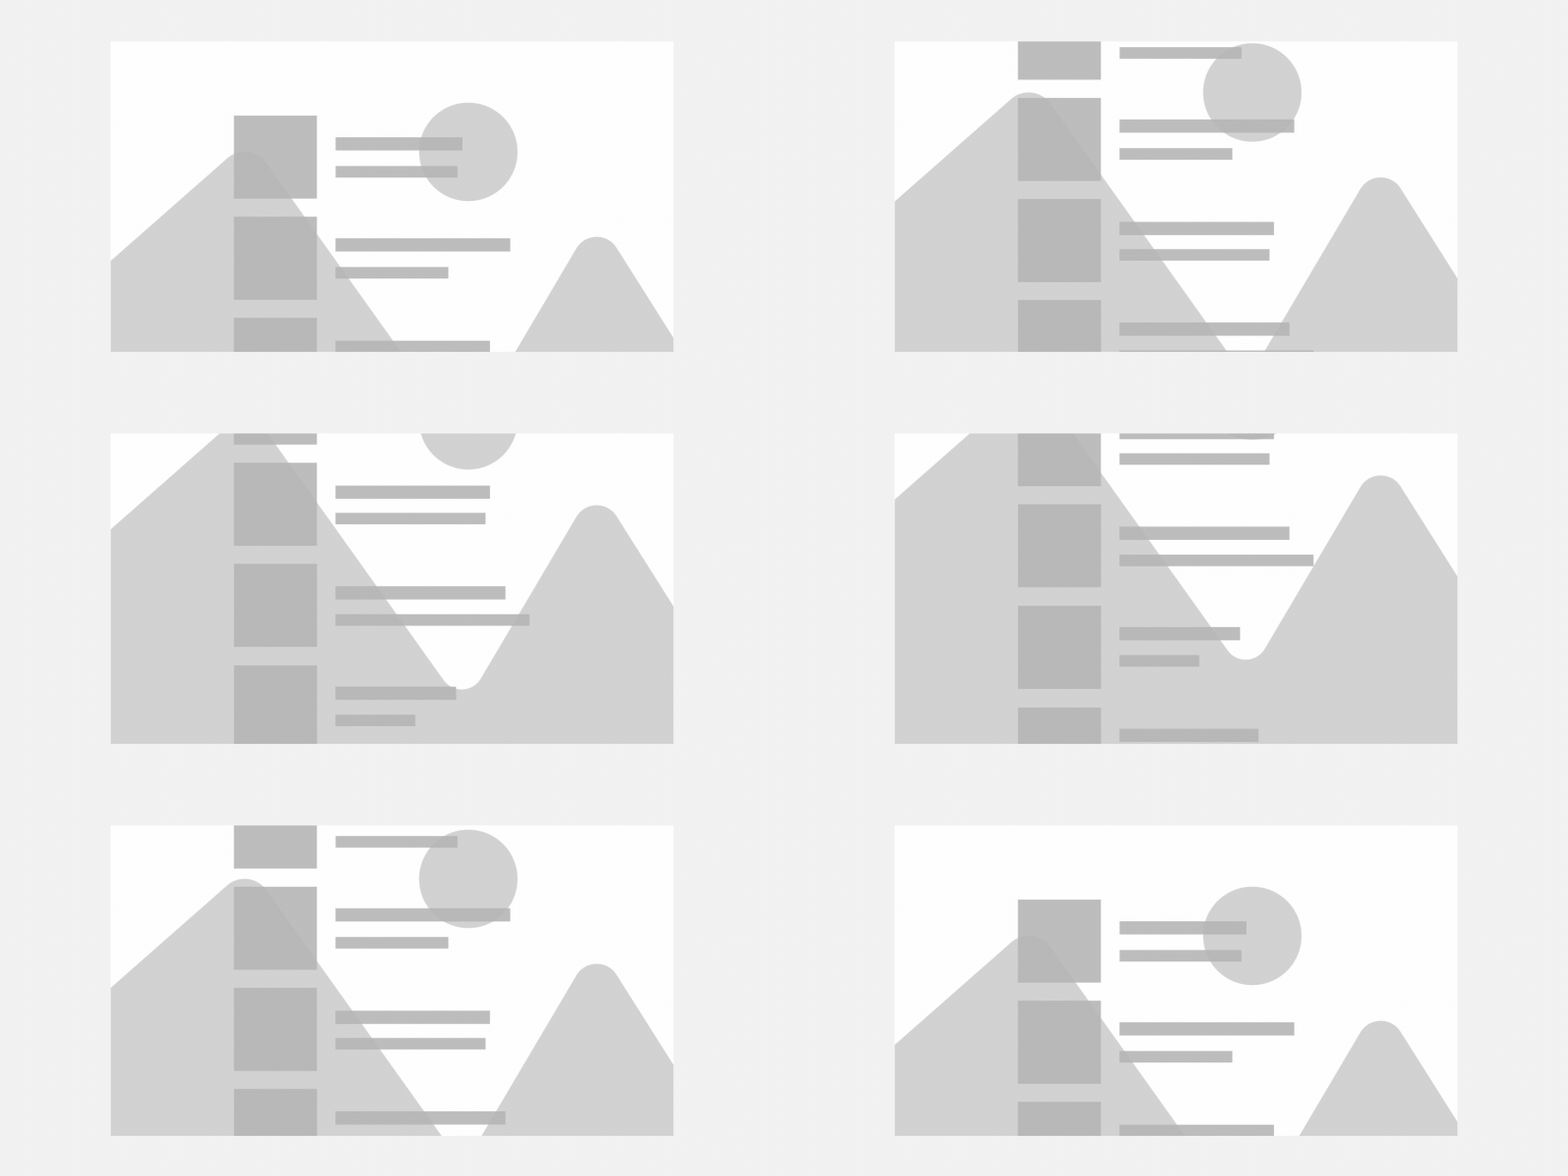
Suppose you have a Grid inside which some element is placed whose contents do not fit on one page. And the background in the Grid added some kind of image. In order for the parallax effect to appear, you need to wrap the image in the Parallax tag, specifying the Source binding to a very, very long content.
In the following example, a ListView named ForegroundElement does not fit on the screen. The background is set to an image and when scrolling there will be a beautiful effect.
Read the Microsoft documentation for more details .
Another interesting control is SwipeControl. It is possible that you have met him before in any applications. It allows using the gesture of the same name to open a menu item. A gesture is the movement of a finger from left to right or vice versa. Look at the following screenshot and you will understand what it is about.

Reveal mode means that after the gesture the hidden menu item will be displayed. Alternatively, you can set the Execute mode, which immediately not only displays, but also performs the menu action.
The screenshot shows a ListView, by dragging an element through which you can open the menu with your finger.
Let's look at the code for this example. In order for it to work in the page resources, you need to add the following code:
In it we create an icon with the symbol of the basket and the key "DeleteIcon". Next, create the Swipe menu item with the key “ExecuteDelete” and the icon just created. By clicking on this menu item, the SwipeDeleteItem_Invoked event will be raised.
Now consider the XAML list code:
As you can see, 3 items with the names “Demo item ..” are added to the ListView. For simplicity, they are added directly to the list, but you can bind ListView to any collection using binders.
The list itself is assigned a template that uses SwipeControl with the ExecuteDelete resource. The control will be displayed with a gesture from right to left as the RightItems attribute is used.
You can do without ListView. For example, like this:
This way you can add a hidden menu, displayed by a gesture, to some element of your page.
The official documentation is here .
It is not even a control at all. This is a brush that is often used in interfaces. The Start menu in Fall Creators Update is made from acrylic. This is what the standard Calculator application looks like with an acrylic background: the
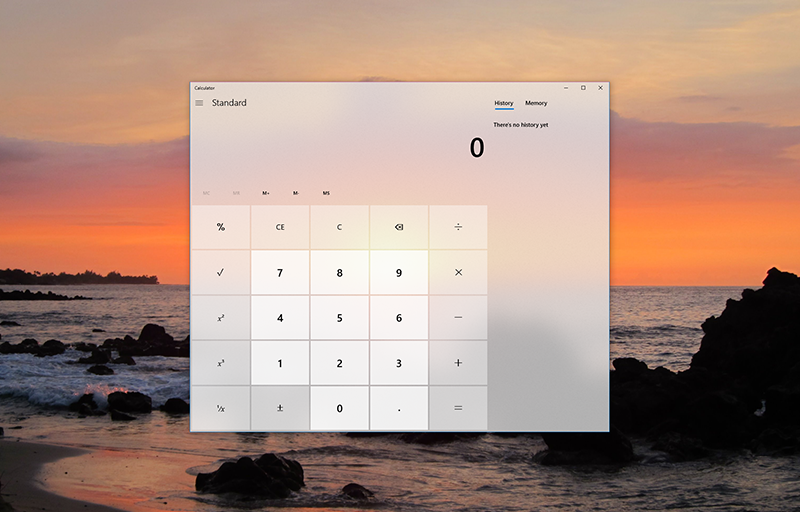
XAML code for this brush might look something like this:
Find more information on microsoft.com .
Again, not a control, but a certain lighting effect, which allows you to draw the user's attention to those objects that are in the focus of the cursor.

Some controls support reveal by default. These are ListView, GridView, TreeView, NavigationView, AutosuggestBox, MediaTransportControl, CommandBar, ComboBox.
And on some controls, this effect can be turned on by specifying a special style. For example, you can specify this button:
Documentation .
Of course, the Visual Studio designer allows you to display these controls and is optimized to display them. In the following image, you can see how the AcrylicBrush resource is displayed in the designer (Fall Creators Update again on the left).

You can read about the XAML designer improvements in English with a bunch of technical details and refinements here: A significant update to the XAML Designer .
A big step forward is support for .NET Standard 2.0. But for him it is necessary that your project has a minimum build version higher than 1627 installed. But now it will be much easier to port the .NET Framework application code to UWP.
One of the most interesting features is the ability to run the application when the operating system starts. Previously, Desktop Bridge had this feature, but UWP did not have it.
Set up the manifest. The application must use the namespace contract of the 5th version:
And you need to register the windows.startupTask extension.
The manifest hierarchy is as follows: You can register the autorun application using a similar code:
This code requires the addition of the following namespace:
By default, after installing the application, autorun is turned off.
If your application supports autorun, then you can overload the OnActivated method and get some parameters. In approximately this way:
You can read about this functionality in English here: Configure your app to start at log-in
Another, as they say, “from the same series” functionality is the ability to restart the application. It is suggested that this may be necessary to restart the game / application after updating the license or installing some additional content.
A restart is done with one line:
And by adding a namespace:
The return value of the result variable can be one of the values of APPRestartFailureReason :
The restarted application should be visible at the time of the restart.
There is still the option to restart the application in the context of another user using RequestRestartForUserAsync.
An example of a restarting application can be found at the following Request Restart Sample link .
English article here: How to Restart your App Programmatically .
As a result of the fact that I tried everything in practice, I got a simple and funny application that uses the functionality listed in this article. You can see its code at the link: GitHub repository FallCreatorsApp .
In conclusion, I would like to note that not so long ago UWP-shy WinDbg was published .
Regular debuggers only allow you to move forward in code execution time. And this one has a feature called Time Travel Debugging (TTD), with which you can go back to the code execution process. Interestingly, the code can be executed on a specific machine (namely, the one on which the bug occurs) and recorded the process of code execution. A trace file with the extension .RUN will be created. This file can be played many times and analyzed.
I remind you that UWP applications are better than old school .NET ones in that they are more secure and they can be installed / removed countless times without clogging the system / registry with various garbage. Although the classic pre-Donet applications also have their own advantages. They are almost unlimited in rights. Or, for example, they can work in the tray. But soon these advantages may appear in UWP.
We remind you that this is the full version of an article from the Hacker magazine . Its author is Alexey Sommer .
Are you ready? Download the latest SDK from the official page and start our orientation tour.
Note: we continue the series of publications of full versions of articles from the Hacker magazine. Spelling and punctuation of the author saved.
First of all, I would like to note about the numerous improvements in the XAML designer. One of the most anticipated improvements for me is to increase the speed of work. Compare the download speed in the Fall Creators Update (left) with the simple Creators Update:
At Build 2017, Microsoft announced a new UI design system called Fluent .
And now, starting with this update, new controls based on this system will begin to appear in UWP.
Navigation view
This is out of box control for displaying the menu.
The menu drops out on the left side. In addition, the bar on top refers to the menu - Header. On this strip, you can make some heading text or some additional buttons.
The menu can be used in 3 different variations. The option displayed at the top is Minimal. In this mode, the Header cannot be hidden, since there is a hamburger button on it. There is also a Compact mode in which menu icons are displayed on the right.
In Expanded mode, the menu appears expanded.
By resizing the window of your application, you can change the Navigation View mode. After all, the system automatically selects a mode based on the size of the application window. You can influence this choice by specifying different pixel values for the OpenPaneLength, CompactModeThresholdWidth, and ExpandedModeThresholdWidth attributes.
Sample navigation bar code:
![]()
Please note that it is possible to add some arbitrary controls down. In the example, a picture is added there (a cube above the Settings menu item). The Settings menu item itself is turned on and off using the IsSettingsVisible attribute.
In the C # code, in the NavView_ItemInvoked event, you can check if the Settings button was pressed.
if (args.IsSettingsInvoked)
     {
         ContentFrame.Navigate(typeof(SettingsPage));
     }
Or you can check the contents of args.InvokedItem, which contains the text of the pressed menu item. For example, like this:
  if (args.InvokedItem==”Начальная страница”)
     {
         ContentFrame.Navigate(typeof(HomePage));
     }
See the official documentation page for more information .
Person Picture Control
A control that displays the avatar and user name / initials. Pretty simple control.
You can add it to the page using the following tag:
It is recommended to use it to display the profile picture of the current user or any contact.
Read more about it here .
Rating Control
With this control, too, everything should be clear.
You can add to the page with the following tag:
The official documentation is here .
Color picker
The long-awaited control for choosing colors.
In the following example, when the color changes in the control, the background color automatically changes (using a simple binding or in other words, binding).
Official documentation
Parallax
Uneven movement of objects during scrolling allows you to create a parallax effect.
Suppose you have a Grid inside which some element is placed whose contents do not fit on one page. And the background in the Grid added some kind of image. In order for the parallax effect to appear, you need to wrap the image in the Parallax tag, specifying the Source binding to a very, very long content.
In the following example, a ListView named ForegroundElement does not fit on the screen. The background is set to an image and when scrolling there will be a beautiful effect.
![]()
Item 1 Item 2 Item 3 Item 4 Item 5 Item 6 Item 7 Item 8 Item 9 Item 10 Item 11 Item 13 Item 14 Item 15 Item 16 Item 17 Item 18 Item 19 Item 20 Item 21 Read the Microsoft documentation for more details .
Swipe
Another interesting control is SwipeControl. It is possible that you have met him before in any applications. It allows using the gesture of the same name to open a menu item. A gesture is the movement of a finger from left to right or vice versa. Look at the following screenshot and you will understand what it is about.
INFO
Reveal mode means that after the gesture the hidden menu item will be displayed. Alternatively, you can set the Execute mode, which immediately not only displays, but also performs the menu action.
The screenshot shows a ListView, by dragging an element through which you can open the menu with your finger.
Let's look at the code for this example. In order for it to work in the page resources, you need to add the following code:
In it we create an icon with the symbol of the basket and the key "DeleteIcon". Next, create the Swipe menu item with the key “ExecuteDelete” and the icon just created. By clicking on this menu item, the SwipeDeleteItem_Invoked event will be raised.
Now consider the XAML list code:
Demo item 1 Demo item 2 Demo item 3 As you can see, 3 items with the names “Demo item ..” are added to the ListView. For simplicity, they are added directly to the list, but you can bind ListView to any collection using binders.
The list itself is assigned a template that uses SwipeControl with the ExecuteDelete resource. The control will be displayed with a gesture from right to left as the RightItems attribute is used.
You can do without ListView. For example, like this:
This way you can add a hidden menu, displayed by a gesture, to some element of your page.
The official documentation is here .
Acrylic material
It is not even a control at all. This is a brush that is often used in interfaces. The Start menu in Fall Creators Update is made from acrylic. This is what the standard Calculator application looks like with an acrylic background: the
XAML code for this brush might look something like this:
Find more information on microsoft.com .
Reveal
Again, not a control, but a certain lighting effect, which allows you to draw the user's attention to those objects that are in the focus of the cursor.
Some controls support reveal by default. These are ListView, GridView, TreeView, NavigationView, AutosuggestBox, MediaTransportControl, CommandBar, ComboBox.
And on some controls, this effect can be turned on by specifying a special style. For example, you can specify this button:
Documentation .
Another improvement in the XAML designer
Of course, the Visual Studio designer allows you to display these controls and is optimized to display them. In the following image, you can see how the AcrylicBrush resource is displayed in the designer (Fall Creators Update again on the left).
You can read about the XAML designer improvements in English with a bunch of technical details and refinements here: A significant update to the XAML Designer .
.NET Standard 2.0
A big step forward is support for .NET Standard 2.0. But for him it is necessary that your project has a minimum build version higher than 1627 installed. But now it will be much easier to port the .NET Framework application code to UWP.
Autostart application
One of the most interesting features is the ability to run the application when the operating system starts. Previously, Desktop Bridge had this feature, but UWP did not have it.
Set up the manifest. The application must use the namespace contract of the 5th version:
xmlns:uap5="http://schemas.microsoft.com/appx/manifest/uap/windows10/5"And you need to register the windows.startupTask extension.
The manifest hierarchy is as follows: You can register the autorun application using a similar code:
Package Applications Application Extensions // Сначала проверяем состояние автозапуска. Получаем его в переменную startupTask
StartupTask startupTask = await StartupTask.GetAsync("SomeIdThatIUseWithThisApp");
switch (startupTask.State)
{
case StartupTaskState.Disabled:
// В случае если автозапуск просто выключен пробуем его включить
StartupTaskState newState = await startupTask.RequestEnableAsync();
// в переменной newState будет получен результат того было ли включение автозапуска благополучным
break;
case StartupTaskState.DisabledByUser:
// Здесь автоматически включить автозапуск не получится. Раз выключено пользователем, то значит он автоматически его не хочет включать…
break;
case StartupTaskState.DisabledByPolicy:
// автозапуск выключен групповыми политиками или не поддерживается устройством
break;
case StartupTaskState.Enabled:
// все уже включено :)
break;
}
This code requires the addition of the following namespace:
using Windows.ApplicationModel;INFO
By default, after installing the application, autorun is turned off.
If your application supports autorun, then you can overload the OnActivated method and get some parameters. In approximately this way:
    protected override void OnActivated(IActivatedEventArgs args)
    {
    Frame rootFrame = Window.Current.Content as Frame;
    if (rootFrame == null)
    {
        rootFrame = new Frame();
        Window.Current.Content = rootFrame;
    }
    if (args.Kind == ActivationKind.StartupTask)
    {
      // здесь вы можете получить аргументы автозапуска
        var startupArgs = args as StartupTaskActivatedEventArgs;
    }
    rootFrame.Navigate(typeof(MainPage));
    Window.Current.Activate();
    }
You can read about this functionality in English here: Configure your app to start at log-in
Application restart
Another, as they say, “from the same series” functionality is the ability to restart the application. It is suggested that this may be necessary to restart the game / application after updating the license or installing some additional content.
A restart is done with one line:
AppRestartFailureReason result = await CoreApplication.RequestRestartAsync("строка с какими-нибудь параметрами, которые можно считать при активации приложения");And by adding a namespace:
using Windows.ApplicationModel.Core;The return value of the result variable can be one of the values of APPRestartFailureReason :
NotInForeground, RestartPending, Other WARNING
The restarted application should be visible at the time of the restart.
There is still the option to restart the application in the context of another user using RequestRestartForUserAsync.
An example of a restarting application can be found at the following Request Restart Sample link .
English article here: How to Restart your App Programmatically .
WWW
As a result of the fact that I tried everything in practice, I got a simple and funny application that uses the functionality listed in this article. You can see its code at the link: GitHub repository FallCreatorsApp .
In conclusion, I would like to note that not so long ago UWP-shy WinDbg was published .
Regular debuggers only allow you to move forward in code execution time. And this one has a feature called Time Travel Debugging (TTD), with which you can go back to the code execution process. Interestingly, the code can be executed on a specific machine (namely, the one on which the bug occurs) and recorded the process of code execution. A trace file with the extension .RUN will be created. This file can be played many times and analyzed.
Conclusion
I remind you that UWP applications are better than old school .NET ones in that they are more secure and they can be installed / removed countless times without clogging the system / registry with various garbage. Although the classic pre-Donet applications also have their own advantages. They are almost unlimited in rights. Or, for example, they can work in the tray. But soon these advantages may appear in UWP.
We remind you that this is the full version of an article from the Hacker magazine . Its author is Alexey Sommer .