 October 18, 2017 at 12:53
Writing an Arcsight FlexConnector. Log file
Currently, solutions for collecting and analyzing information security events, SIEM class systems are at the peak of their popularity, modern companies set themselves the task of connecting as many of their key systems to SIEM as possible to consolidate data from these systems, analyze events and analyze information security incidents based on the data received and analyzed. SIEM collects events from virtually any source: network devices, databases, various business applications, information security systems and information technologies, leading them to a uniform view suitable for further analysis and work with the information received.
Taking into account how many different information systems can be discussed, you involuntarily think about possible options and approaches for connecting possible information systems to SIEM and my desire to share this knowledge with colleagues who are closely connected and work with systems of this class. As an example, take the most popular Arcsight system and consider possible options for connecting to company information systems using FlexConnector.

In this article I want to present a step-by-step instruction for FlexСonnector interaction on the LOG-FILE connection option in three possible ways.
In the beginning, let's imagine that there is an internal application that writes all events to a separate file called “mytest_log.txt”. These events must be sent to Arcsight ESM for further correlation, but the problem is that there is no necessary SmartConnector connector out of the box. In this matter, a FlexConnector type connector can always help out, which allows you to correctly send events to Arcsight ESM / Logger.
Here is a good example of incoming events from the source in our file “mytest_log.txt”: The next step is to install the Arcsight SmartConnector and write FlexConnector to the current log file.
There are 3 ways to write FlexConnector under LOG File:
Bottom line: The article indicated the basic skills for writing FlexConnector, but if you are interested in such features as categorization, submessage, mapping, etc., I will be ready to describe them in the following articles.
Taking into account how many different information systems can be discussed, you involuntarily think about possible options and approaches for connecting possible information systems to SIEM and my desire to share this knowledge with colleagues who are closely connected and work with systems of this class. As an example, take the most popular Arcsight system and consider possible options for connecting to company information systems using FlexConnector.
In this article I want to present a step-by-step instruction for FlexСonnector interaction on the LOG-FILE connection option in three possible ways.
In the beginning, let's imagine that there is an internal application that writes all events to a separate file called “mytest_log.txt”. These events must be sent to Arcsight ESM for further correlation, but the problem is that there is no necessary SmartConnector connector out of the box. In this matter, a FlexConnector type connector can always help out, which allows you to correctly send events to Arcsight ESM / Logger.
Here is a good example of incoming events from the source in our file “mytest_log.txt”: The next step is to install the Arcsight SmartConnector and write FlexConnector to the current log file.
2017-08-01 01:18:00.579 INFO AUTH: LOGIN SUCCESS. USER: Ivanov. IP: 192.168.0.1

2017-08-01 01:19:13.246 INFO AUTH: LOGIN FAILED. USER: Petrov. IP: 192.168.3.13

2017-08-01 01:20:17.589 INFO AUTH: LOGIN FAILED. USER: Petrov. IP: 192.168.3.13

2017-08-01 01:21:14.646 INFO AUTH: LOGIN FAILED. USER: Petrov. IP: 192.168.3.13

2017-08-01 01:22:09.179 INFO AUTH: LOGIN SUCCESS. USER: Ivanov. IP: 192.168.0.1

2017-08-01 01:23:02.116 INFO AUTH: LOGIN SUCCESS. USER: Petrov. IP: 192.168.3.13
Install and configure Arcsight SmartConnector
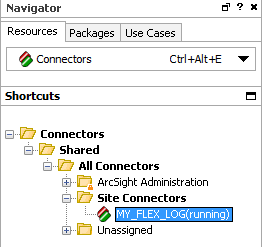
Make sure that our connector has been successfully added to Arcsight ESM.
After writing the FlexConnector, you must specify the path to the configuration file.
- After starting, specify the path to install the connector.
Recommendation: change the name of the standard catalog to the connector type.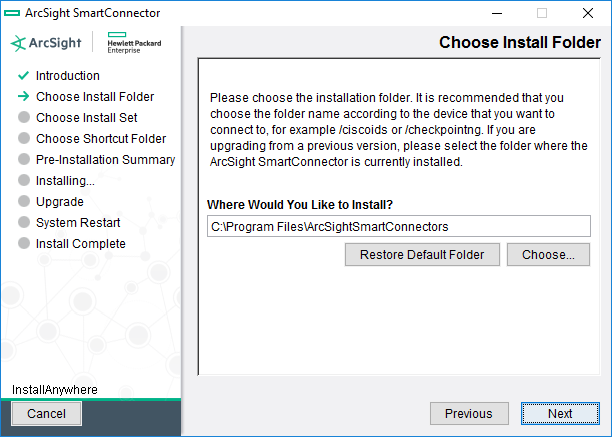
- Choose where to save the icons and click Next.
- We check the installation parameters and click Install.
- During the installation, select "Add a Connector", click Next.
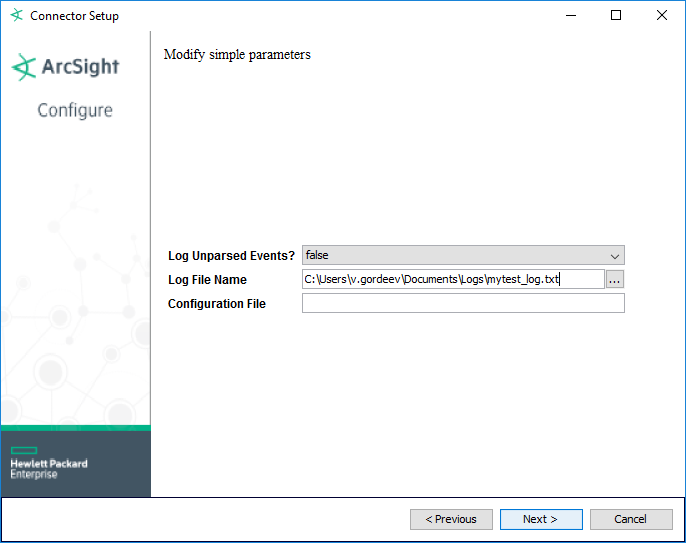
- Select the connector type “Arcsight FlexConnector Regex File”, click Next.
- At this stage, we only specify the path to the log file, click Next.
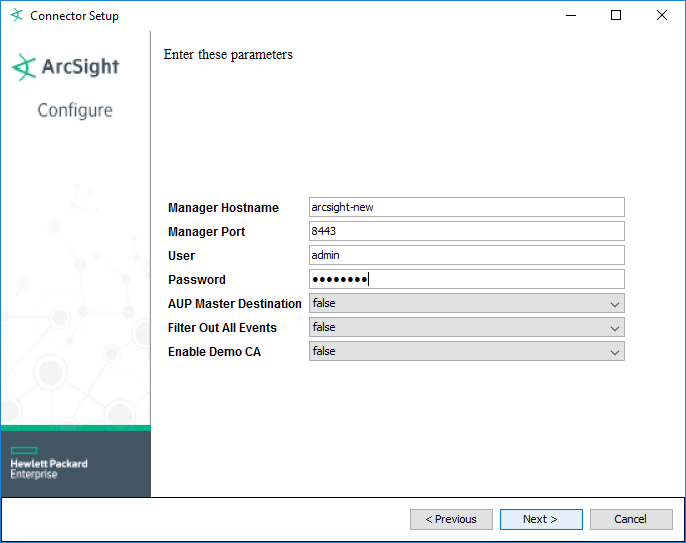
- Specify the type of recipient. In my case, this is “Arcsight Manager (encrypted),” click Next.
- Specify the necessary recipient parameters, click Next.
- Specify information about our connector, click Next.
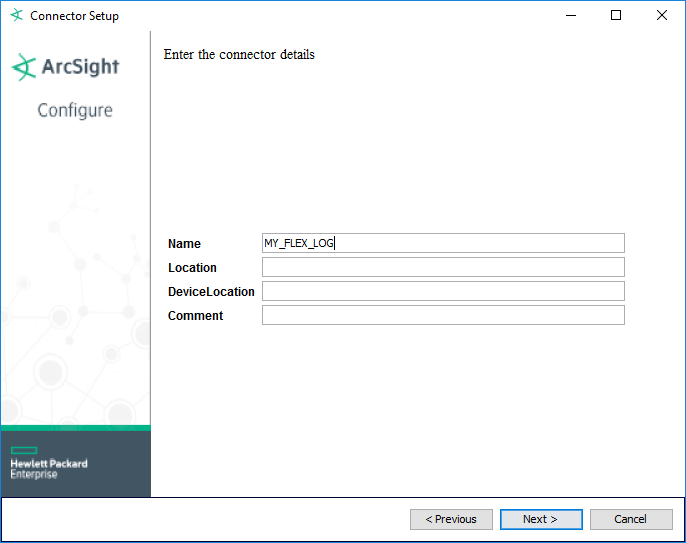
- Import the certificate from Arcsight ESM, click Next.
- Check the connector parameters, click Next.
- Now you need to choose a way to start the connector. During development, I choose to manually launch “Leave as a standalone application”, it’s more convenient to catch errors when starting the connector. Click Next.
- Connector setup is complete. We confirm the completion of the installation.
Make sure that our connector has been successfully added to Arcsight ESM.
After writing the FlexConnector, you must specify the path to the configuration file.
- Launch
C:\$ARCSIGHT_HOME\current\bin> .\runagentsetup.bat
Select “Modify Connector”, click Next.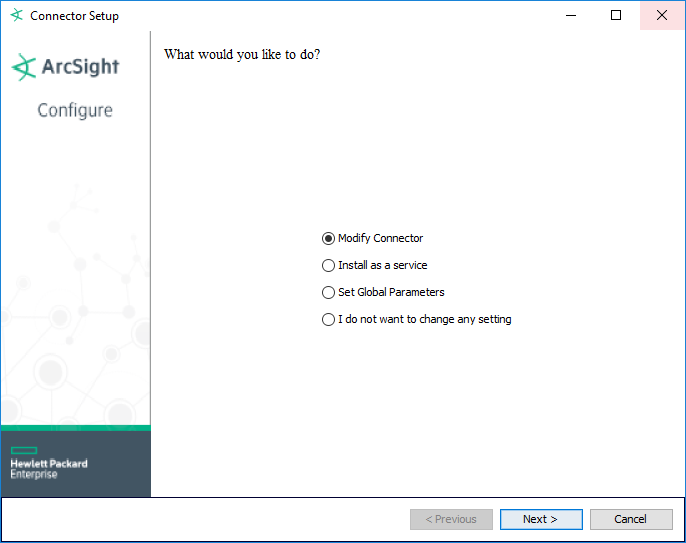
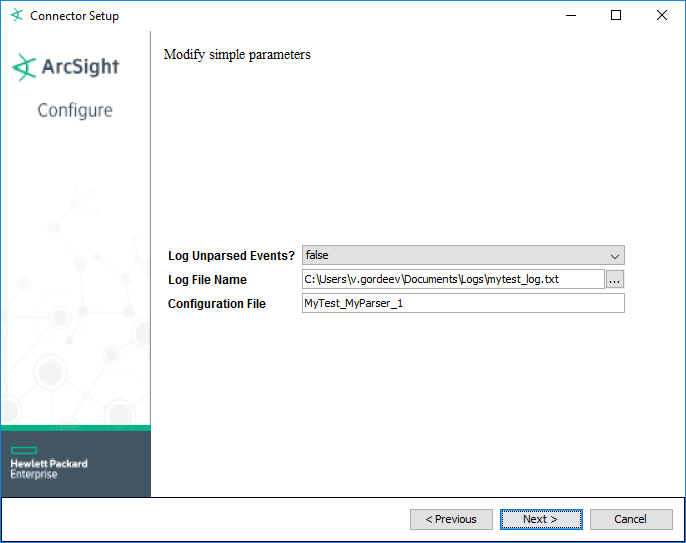
- Select “Modify connector parameters”, click Next.

- In the “Configuration File” field, specify only the name of the configuration file.
There are 3 ways to write FlexConnector under LOG File:
- Writing a configuration file in a text editorThe most popular way now is to write connectors using a text editor.
In the directory$ARCSIGHT_HOME\current\user\agent\flexagentwe create a configuration fileMyTest_MyParser_1.sdkrfilereader.properties.
Sample finished file: The file structure is very simple.#MyTest MyParser Configuration File
replace.defaults=true
trim.tokens=true
comments.start.with=#
#2017-08-01 01:18:00.579 INFO AUTH: LOGIN SUCCESS. USER: Ivanov. IP: 192.168.0.1
regex=(.*)\\sINFO\\sAUTH\\D\\s(.*)\\D\\sUSER\\D\\s(.*)\\D\\sIP\\D\\s(.*)
token.count=4
token[0].name=Date
token[0].type=TimeStamp
token[0].format=yyyy-MM-dd HH:mm:ss.SSS
token[1].name=Name1
token[1].type=String
token[2].name=Username
token[2].type=String
token[3].name=UserAddress
token[3].type=IPAddress
additionaldata.enabled=false
event.deviceVendor=__stringConstant(MyTest)
event.deviceProduct=__stringConstant(MyParser)
event.endTime=Date
event.name=Name1
event.sourceUserName=Username
event.sourceAddress=UserAddress- We write input parameters for the connector
#MyTest MyParser Configuration File

replace.defaults=true

trim.tokens=true

comments.start.with=# - Writing a regular expression for our log
#2017-08-01 01:18:00.579 INFO AUTH: LOGIN SUCCESS. USER: Ivanov. IP: 192.168.0.1

regex=(.*)\\sINFO\\sAUTH\\D\\s(.*)\\D\\sUSER\\D\\s(.*)\\D\\sIP\\D\\s(.*) - Specify the number of keys (counting starts with “0”)
token.count=4 - We describe the keys (name, type, format)
token[0].name=Date

token[0].type=TimeStamp

token[0].format=yyyy-MM-dd HH:mm:ss.SSS

token[1].name=Name1

token[1].type=String

token[2].name=Username

token[2].type=String

token[3].name=UserAddress

token[3].type=IPAddress - Specify maping fields and submessage
event.deviceVendor=__stringConstant(MyTest)

event.deviceProduct=__stringConstant(MyParser)

event.endTime=Date

event.name=Name1

event.sourceUserName=Username

event.sourceAddress=UserAddress
This method is easy to write and the most popular for use among Arcsight specialists.
Of the minuses, I can only note the search for errors, but this problem is solved by running the connector in the “Leave as a standalone application” state where we will see all the technical information. - We write input parameters for the connector
- Using the REGEX Embedded UtilityArcsight SmartConnector has a built-in regex utility that launches a graphical shell to create or verify FlexConnector.
- We launch the console as administrator and go to the installation directory of our FlexConnector.
Run the regex utility:C:\$ARCSIGHT_HOME\current\bin> .\arcsight.bat regex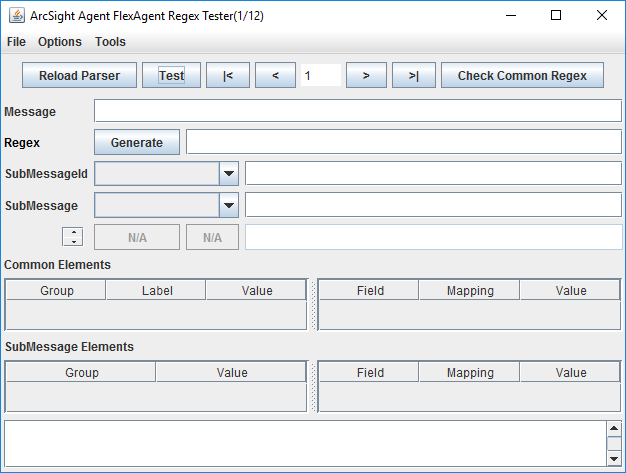
This utility allows you to create a configuration file for our connector. - Create a new file: File - New FlexAgent Regex File. The configuration file must be stored in a directory
$ARCSIGHT_HOME\current\user\agent\flexagentwith the file extension FILE_NAME.sdkrfilereader.properties. - We connect our event source: File - Load Log File. You can specify the path to real logs or test logs.
- It is necessary to write a regular expression for our log. You can do this in the Regex field (for convenience, there is a Generate button).
My regular:(.*)\sINFO\sAUTH\D\s(.*)\D\sUSER\D\s(.*)\D\sIP\D\s(.*)
Click Test. - It is necessary to give names to our groups.
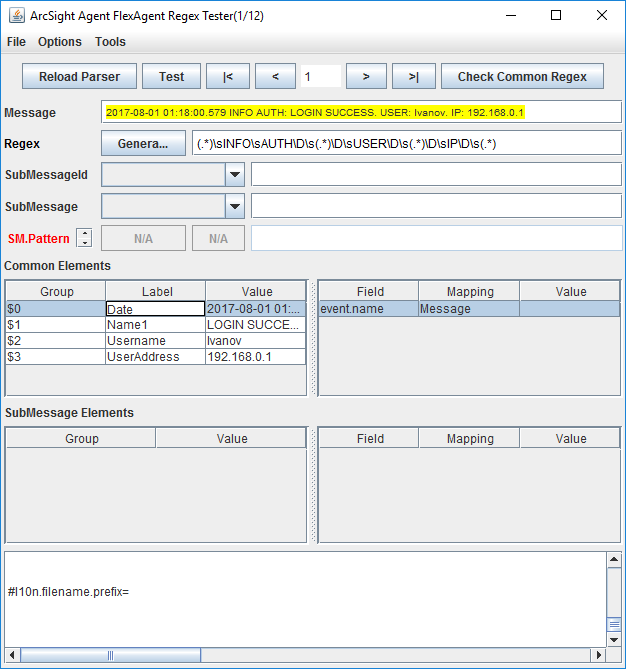
- All groups are of type String by default, so for the Date and UserAddress groups, you must specify the type TimeStamp and IPAddress.
We also describe the time format for the Date group (detailed information in the FlexConnector Guide).
- Next, we map the fields by dragging and dropping groups and selecting the fields to display in Arcsight ESM.

The regex utility does not allow you to select the event.sourceAddress field for the IPAddress format, so you must add it by hand:event.sourceAddress=UserAddress
Also, the required fields are Device Product and Device Vendor. Add the following lines to the configuration file:event.deviceVendor=__stringConstant(MyTest)
event.deviceProduct=__stringConstant(MyParser) - Click Test and check that all events are parsed. Save our configuration: File - Save FlexAgent Regex File.
We launch the connector, generate new events in the log file and check the arrival of events in the Arcsight ESM.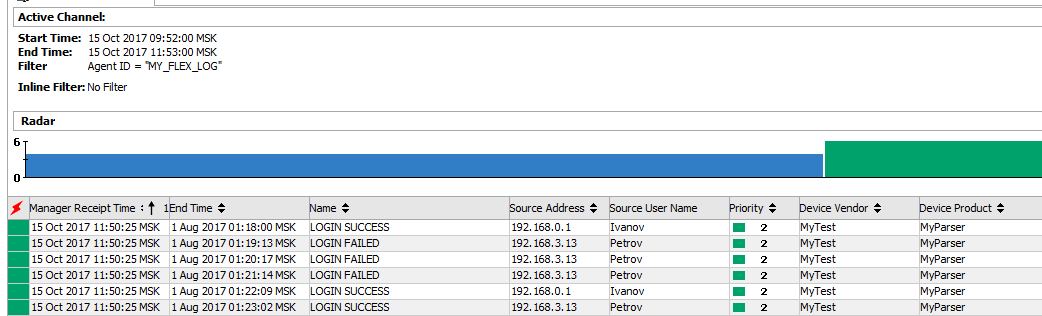
- We launch the console as administrator and go to the installation directory of our FlexConnector.
- Using Arcsight Quick FlexWhile writing this article, I first used Arcsight Quick Flex and was pleasantly surprised. This software allows you to write quickly and error-free configuration file, and writing submessage turns into a pleasure.
- Let's create a new project:
Vendor: MyTest
Product: MyParser
Version: 1
Log File Path: specify the directory with the
Project Logs: specify the project directory (not the configuration file !!!)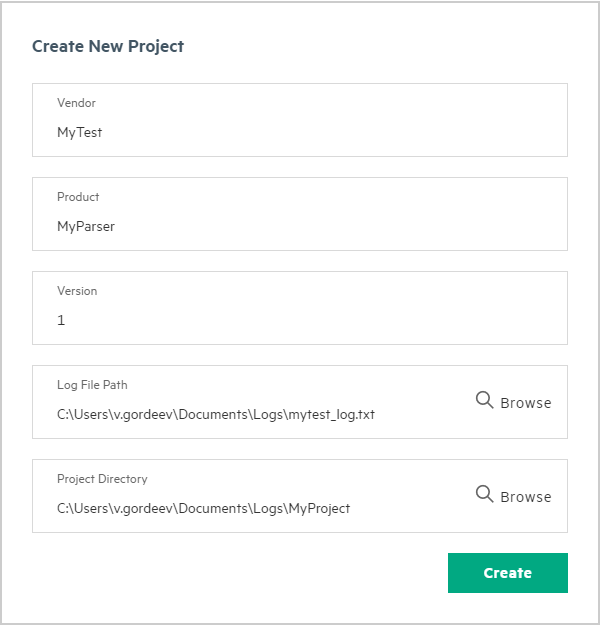
- After loading the logs, the events have the status “Base Unparsed”. Launch the “Base Regex Editor” tab.
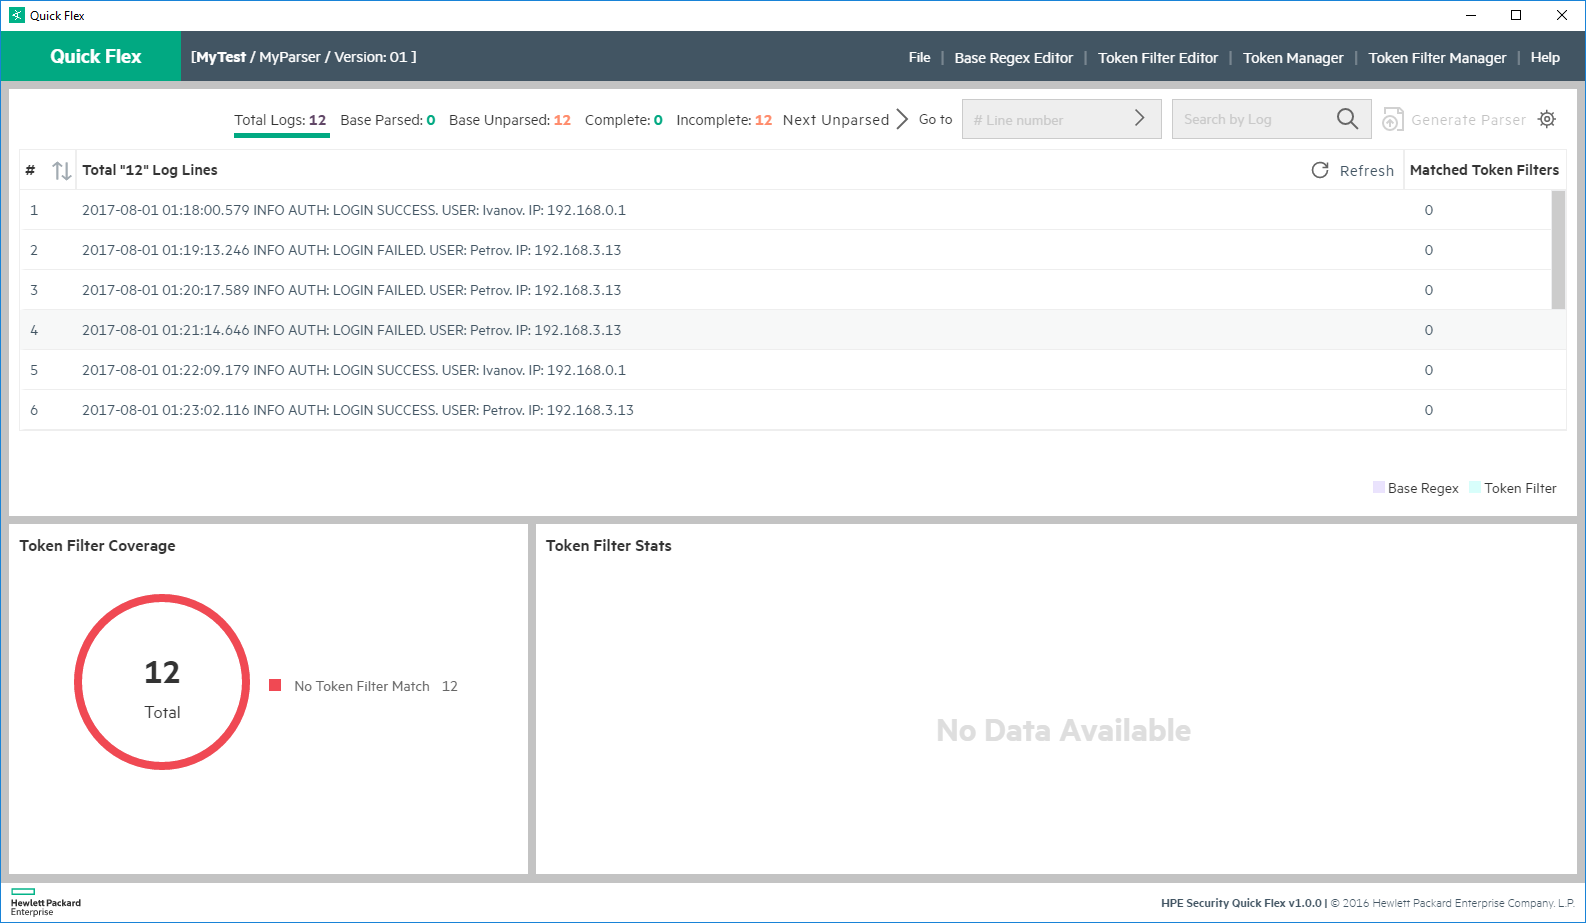
- In the field “Base Regex” indicate our regular expression.
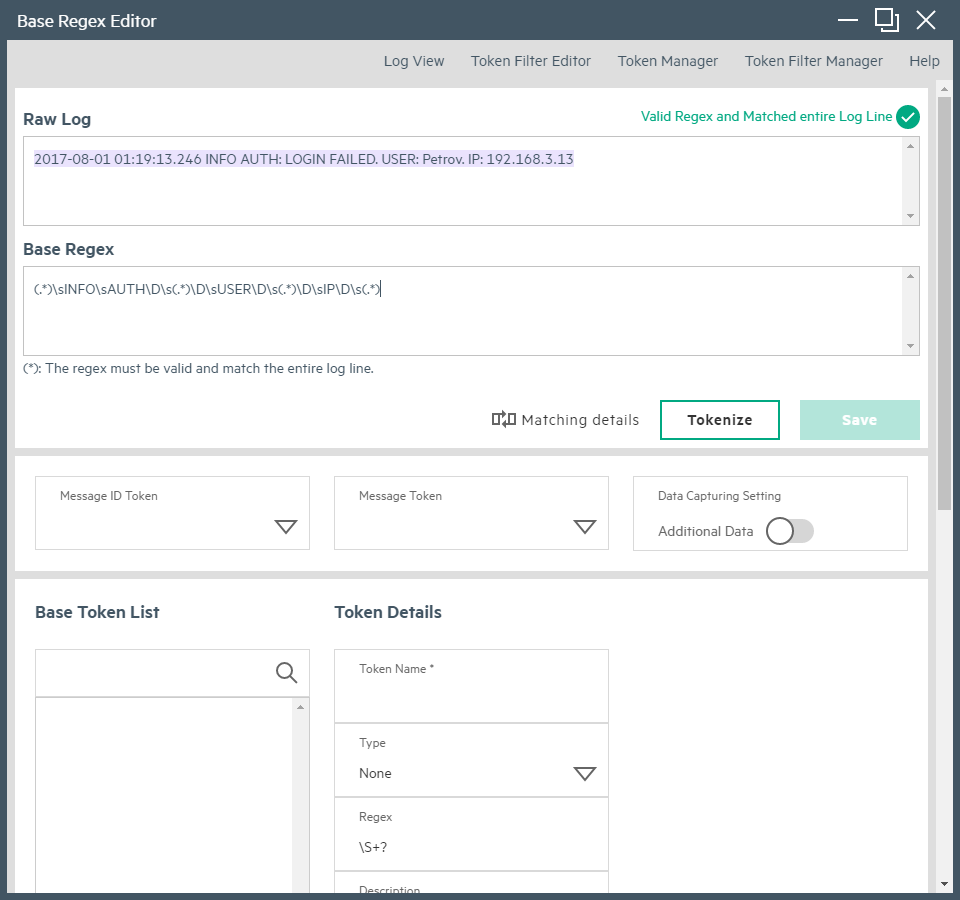
You can check the correctness of the regular expression by clicking the “Matching details” button.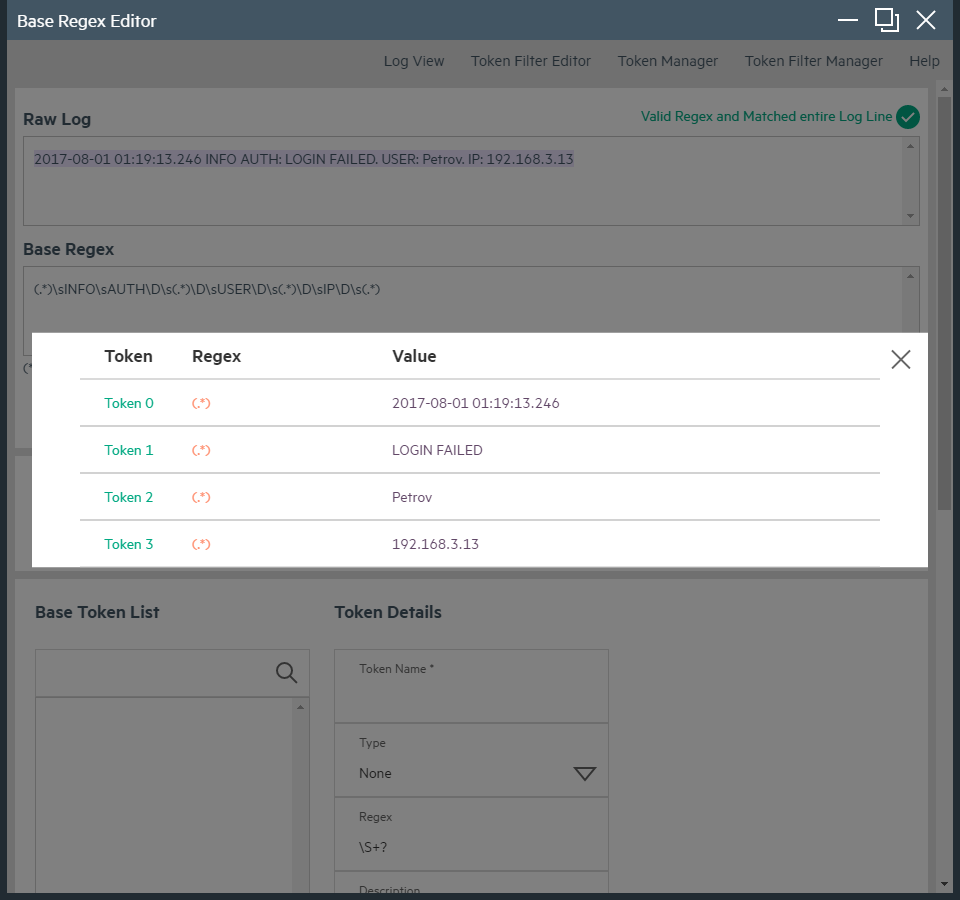
- Click Tokenize and save the settings.
Next, for each key, specify the type, format, description and field for mapping
- Save and return to the main page by clicking Log View. Next, click Refresh and all our events go into the status of “Base Parsed”

- Now click Generate Parser and get a ready-made configuration file for FlexConnector. Export the file to the folder with the connector:
$ARCSIGHT_HOME\current\user\agent\flexagent
We start the connector, generate new events in the log-file and check the arrival of events in the Arcsight ESM.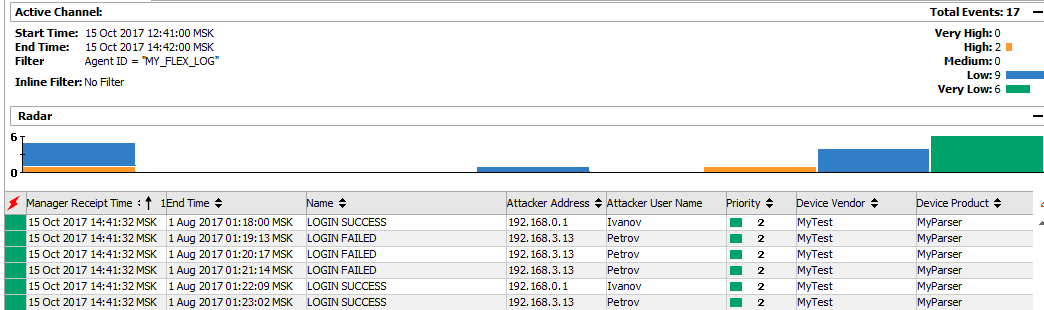
- Let's create a new project:
Bottom line: The article indicated the basic skills for writing FlexConnector, but if you are interested in such features as categorization, submessage, mapping, etc., I will be ready to describe them in the following articles.









