How to scan a castle (almost) for free
- Transfer
Introduction
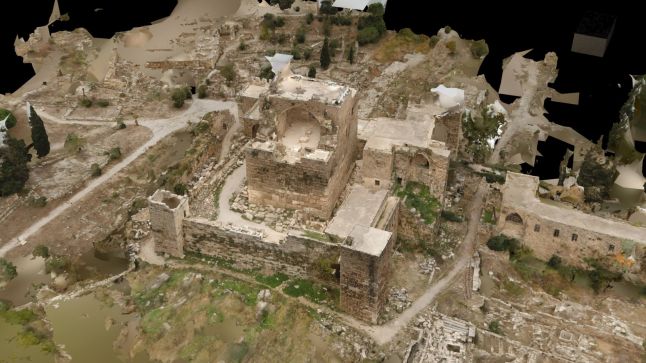
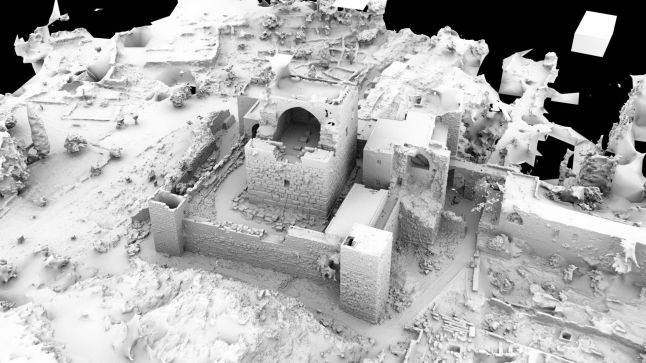
To play World Void, we needed to port a historical monument to Unreal Engine 4. My task was to scan the castle. I was expecting financing, which was all delayed, so I finally decided to just take it and do it all myself, without money, and I succeeded - I scanned the lock! It has been several months, and I'm still thrilled! In this article I will tell you how I did it. But first, I want to thank Milos Lukacs, Jeffrey Ian Wilson and the 3D Scanning User Group, without which this would be impossible.
What is photogrammetry?
In short, photogrammetry is the process of creating 3D models from several photographs of one object taken at different angles.
I will not consider three-dimensional scanning of objects, this topic has already been sufficiently covered.
If you want to start learning photogrammetry, I recommend this short James Candy video from YouTube. Although Agisoft Photoscan is mentioned in it, the concepts discussed will work in any other photogrammetry software. You can also study the Photogrammetry Guide for the Poor .
A lot of artists use photogrammetry in their workflow; they used it for the Epic games Kite demo, Star Wars Battlefront and an infinite number of other projects. However, most of these studios scanned stones and trees. Epic games wrote a post on how resources were created for an open-world demo. Employees of the company even wrote a post about the choice of equipment and another that describes the process of eliminating lighting. I highly recommend reading these posts if you have not seen them yet.
Difficulties
When scanning such a large object as a castle, one should not forget about the following difficulties:
- Number of shots: the castle is larger than stone, so even if you need a low-poly model, you’ll have to take more shots. This means that you need a larger SD card. But when you buy a voluminous SD card, you will encounter battery discharge problems, so it would be nice to buy a spare battery. This may seem obvious, but when I started taking more than two thousand shots, it turned out to be a discovery for me. Halfway through this process, my battery started to run out. Fortunately, the castle's guards allowed me to charge the camera in their office. After taking the pictures, you have to find enough storage space on the computer, but hard drives are very cheap these days.
- More time: it is logical that the more you shoot, the more time is required. It took me 8 hours to scan the castle, that is, you will need 8 hours of cloudy / cloudy weather. It will also be nice to take all the necessary photos of one section of the castle, and only then move on to the next. In this case, if the sunlight shifts a little, and the software cannot connect all the photos together, then you can always connect them manually using the control points.
- Computational power: due to the large number of analyzed photos, you will need a lot of computing resources. Computer requirements depend on 3d scanning software, but here's what you need to know:
- RAM A lot of RAM, 64 GB is a great choice. However, some 3d scanning packages use a caching system that allows you to process scans with a small amount of RAM, but I still do not recommend working with less than 32 GB.
- Video processor The faster the better. A lot of video memory is not needed, 4 GB is enough. I would recommend the NVidia GTX card because some of the software does not support AMD.
- CPU. The more cores, the better.
- Difficult shooting angles: when scanning a stone, you can take pictures at any angle, and in a huge castle there are hard-to-reach spots. If possible, use the drone, but I didn’t have it, so I had to solve the problem differently, which I will discuss below.
- Complex construction: unlike stone, the castle has more complex shapes, not to mention the fact that the stones do not have interior spaces. The task becomes even more difficult, you need to make sure that everything you need is removed. How to achieve this? Preliminary planning and on-site verification.
Explore your goal (pre-planning)
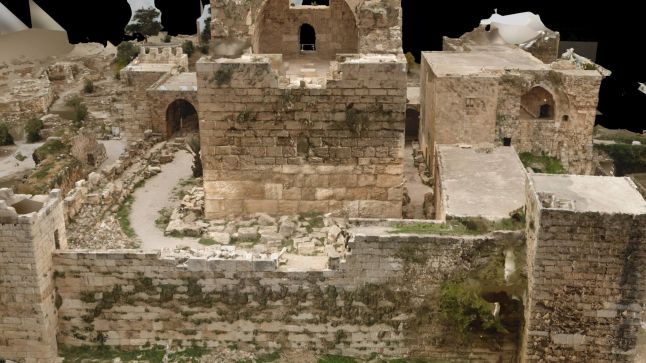
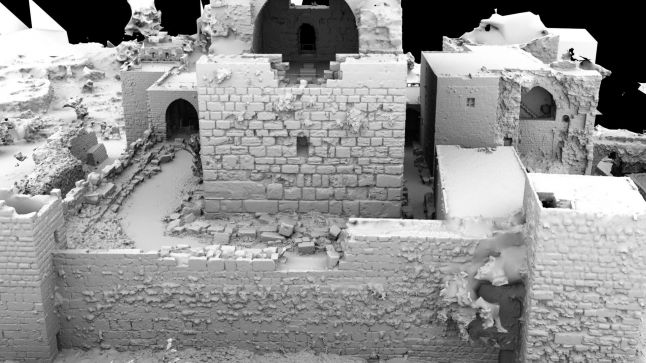
I work in the Byblos historical monument, a city in Lebanon that has been inhabited for more than ten thousand years. However, the castle itself dates from the 12th century. This is a relatively small castle compared to the newer ones built in some European countries, however each wall of this castle is made of highly detailed masonry polished by time itself.
By studying the goal, I mean that you need to sketch top and side views on paper, break them into several elements, select the order in which to shoot and select those areas in which you need to take more pictures.
In addition, errors accumulate during scanning, which leads to the creation of displaced geometry, so you should always do a full set of circular images of the object so that the scans are automatically corrected. Open geometry may not be accurate.
I also took the opportunity and took many pictures of the surrounding area from the castle walls, which allowed me to add landscape to the scan.
Hint: do not take multiple images at different angles from one point (panoramic images). Most often this leads to unwanted errors.
A useful way to scan small tunnels in which, due to limited space, it is difficult to take pictures from all angles: walk in a straight line, and at each step take a picture with the camera directed forward. This technique gives lower resolution, but it may be quite enough.
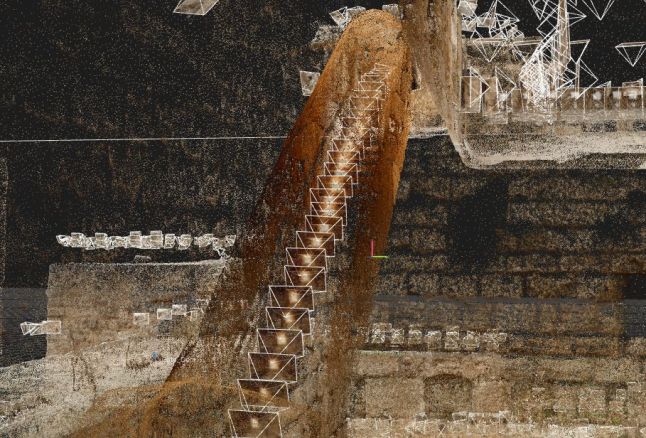
It is very likely that during scanning you will miss several angles and the images will not overlap enough, which will lead to the appearance of low-resolution areas in the scan, so I highly recommend checking the result on the spot. Reality Capture 3D scanning software, for example, can check the overlap of a huge number of images on a laptop in just a few minutes. This is incredibly useful - it will let you know in which areas you need more images.

White dots indicate the locations from which pictures were taken. Blue dots are hand-added survey points that help to relate some elements that the software cannot automatically relate. Note that there are many geodetic points on the roof of the castle, and this is normal, because I did not have a drone and I could not take enough pictures of the roof. Fortunately, I managed to bind them manually, which for large locks may not be possible. In total, the software has linked 4,000 photos.
What do you need?
If you want to save as much as possible, then here is what you need:
- Camera (yeah), necessarily a “DSLR”. In new smartphones, for example, in the Galaxy S7, cameras are pretty good, but if you earn by 3D scanning, then buy a DSLR. I didn’t have a DSLR, so I borrowed it from my aunt. It was a Nikon d3200, and since I was scanning a castle made of stones, I did not need a camera with greater sharpness.
- Lens. The cameras are sold with zoom lenses (18-55 mm), but it is recommended to use a lens with a constant focal length. However, if you use the limit value (18 or 55) for the entire scan, then everything should be in order.
- Tripod. Yes, you will need it, especially if you shoot in low light conditions, for example, inside the castle, and you can’t use the flash, that is, you will take pictures with high shutter speed.
- A monopod is useful, but if your hands do not shake and the desired shutter speed is selected, then you can do without it. On the other hand, it costs only $ 10, so why not?
- SD card. I used a 64 GB SD card. I had a laptop with me, and if the card were full, I could just transfer the pictures to the hard drive.
What i did not use
- Battery. I didn’t have it, but if you are going to take a lot of pictures, I recommend buying a second or even third battery.
- Drone It can greatly facilitate your work, and if there is such an opportunity, then consider purchasing it. I did not have a drone, so I had to climb and take pictures from different dangerous points. Fortunately, it worked, but how much do you want to try your luck, especially in large castles?
- Chrome ball and gray ball. This device is used to obtain perfect color accuracy and the ideal process of eliminating lighting. It is tempting to use every opportunity to create the perfect scan. But first ask yourself, is it worth it? There are other lighting elimination techniques that do not require this device, while still providing decent results. In my case, this device would add another large layer of complexity to the project, which was not worth a possible quality improvement.
- Calibration target Color checker. This is an expensive but useful device for calibrating the camera. I did not use it when scanning.
Software
I tested a bunch of photogrammetric software, and any of the packages listed below cope with small scans, but I needed to process large amounts of data (4000 photos with a resolution of 24 megapixels).
- Agisoft Photoscan. Agisoft is the most popular entertainment software. It has a user-friendly interface and amazing quality of finished scans. The standard version costs $ 180, but if you need the option of creating geodetic points, which can be very useful when creating large scans, you will have to buy a professional version for $ 3,500. At the same time, Agisoft consumes a lot of computing resources, and if you want to process a large amount of data, then you will need an incredibly powerful computer. Not to mention that Agisoft is a bit slower than its competitors from this list.
- Pix4d Due to its specialized toolkit, this software is most common in industry and agriculture. On a powerful computer, it can process large amounts of data, and at the same time a little faster than Agisoft. A subscription to this package costs $ 350 per month. However, I did not really like the quality of the resulting textures.
- Autodesk Recap. This is a cloud software that has a free version and creates good quality scans. Unfortunately, the processed set is limited to 250 photos, and uploading large amounts of data to the cloud takes forever.
- Reality Capture. The newcomer who took the market by storm. This is incredibly fast software, it can process large amounts of data and is able to work on a regular computer with an NVidia video processor. It can be run even on a laptop, but I do not recommend this, unless you have a gaming laptop with good cooling - a strong and long load on the laptop reduces its resource. Reality Capture has great quick snap features that let you link images on your laptop in seconds. This is a convenient tool for checking the data set at the shooting location to make sure that there are enough pictures. Compared to Agisoft, this software has slightly noisier scans. It costs 99 euros for three months, but this version can process no more than 2500 images. If you need more then you have to buy the CLI version for 7500 euros per year. Fortunately for me, when scanning the lock, Reality Capture was in beta and was free for 60 days. This is more than enough to complete the scan.
Expenses
This is the interesting part. I borrowed the camera, the software was free, but I still needed to process the scan, because my laptop could not cope with it. Here Milos Lukacs helped me, he suggested processing the data on his computer, and my gratitude knows no bounds. He helped me in the process of data binding, showed a couple of tricks to fix some of my mistakes typical for beginners. As a result, I only had to spend money on a tripod, a monopod and an SD card, which totaled $ 70 + shipping. That is, yes, I managed to scan the castle from top to bottom for only $ 70! I proved that having a desire, you can find a way. I was lucky, but luck came when I started to chat and make friends.
Can this be repeated?
Six months before the castle began to scan, I did not know anything about 3D scanning. And although I am tempted to say that I did it alone, it will not be true - they helped me, and in many respects this help was received from the community and industry professionals. How did I find them? Pretty simple - in the Facebook 3D Scanning Users Group. First I joined the group, then explained what I want to do, and received great support from the community. One of the members of the group, professional Jeffrey Ian Wilson even wrote me a “PM”, and we had a fruitful chat. He guided me on the right path, realized that I was ready for a complex project and made recommendations. In addition, he advised to treat his recommendations with a certain degree of skepticism. The same applies to my advice: in fact, my experience in 3D scanning is only six months, I made mistakes when scanning the castle, fortunately, they were not too serious and they were able to be fixed. If I managed to scan the lock, this does not mean that I am the best assistant in scanning locks. I just share my experience, study and try everything yourself. I answer the question in the section heading: yes, you can repeat my “feat”, if you have a determination, then nothing is impossible.
Finally
I sincerely hope that our experience can be useful for readers, and if something interesting comes out of this, write to me on Twitter or share in the Facebook group, I will look with pleasure.
Processing a scan of one billion polygons and porting it to a game engine is a completely different story, worthy of another post.
